
How to make a DIY UV Curing Station for Resin 3D Printers
Whilst you can Buy UV Curing Stations, or UV Curing Chambers online they are very expensive. I just don’t have the money to spend what they cost! So instead I built my own and I’ll show you the steps in our How to Make a DIY UV Curing Station for Resin 3D Printers guide.
Ok, so if you follow me on Facebook or Instagram you’ll see from my posts I love my 3D printer. After buying this, however, I was surprised (due to my over-excited lack of actual research) that the parts you print actually need to be fully cured post-print with UV light.
So when my first print came off the plate, I was scrambling around looking for anything which would suffice. Thankfully my wife had a UV Cure station which was made for nail gels. So I used this for the first week until it died.
Still unable to afford one of the retail options, I was looking at how to make a decent cure station. Many people will just stick a print in the sunlight, but living in the UK during the winter, we don’t get much sun. Even when we do it’s probably raining anyway.
There’s a lot to consider when curing resin, if you want to cure it properly without it becoming too brittle or warping you need to regulate temperature and light intensity. You also need to balance it across the surface. When I was making base toppers for my miniatures and using my wife’s nail curing station thy started to curl from being left under the direct light.
Whilst you can’t really regulate temperature with a DIY Curing Chamber, you can easily keep the part rotating to get more even coverage.
How to make a DIY UV Curing Chamber – Parts
If you have a Resin printer, I’ll just assume you have plenty of Isopropanol for rinsing the parts and Nitrile gloves for handling uncured resin. Not that you need them for making this. I just didn’t realise how many gloves or how much Isopropanol I’d need for resin printing. so if you rea reading this before getting a printer, let me just say you need this stuff. Lots of it.
Let’s have a look at what you need to make a cure station
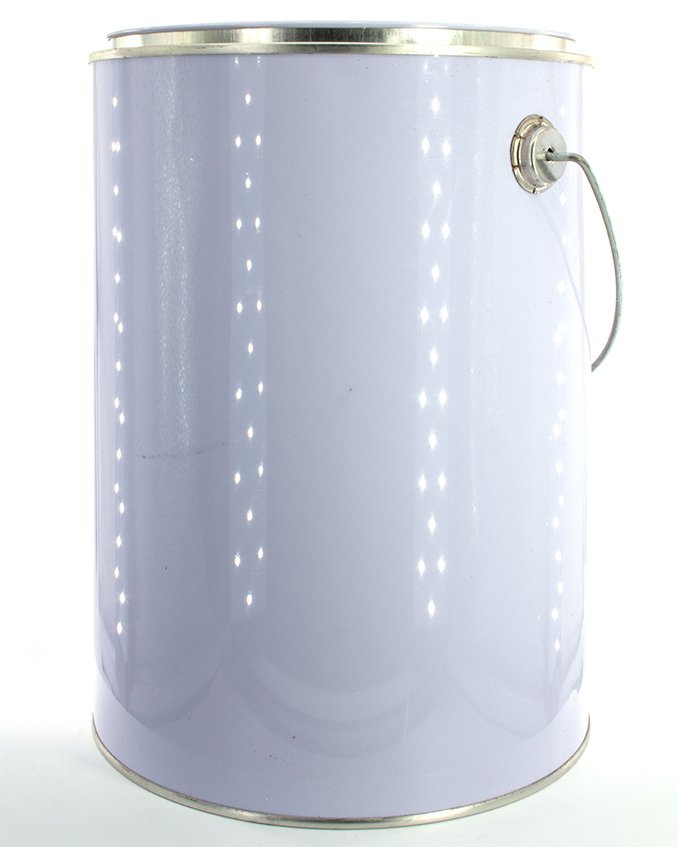
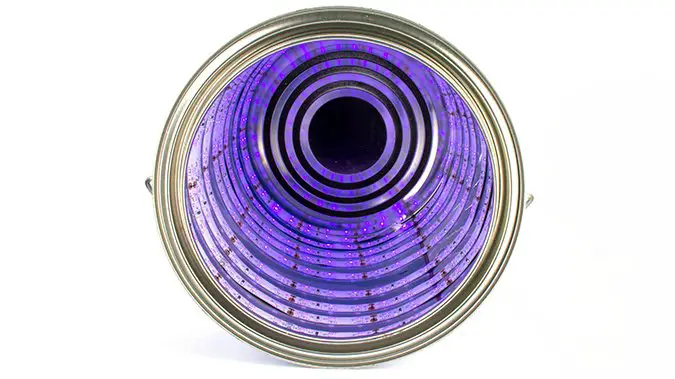
Empty Paint Tin
The reason I’ve picked a paint tin is becasue teh inside is already reflective. You will lose a lot of the UV’s power in reflected light but it’s still better to have some than none. Some people have gone as far as lining the inside with Aluminium tape to increase the reflectivity of the surface. For the amount of UV light that would reflect over the normal lining of a tin, I just couldn’t see it was worth the effort. But go ahead and do that if you want.
Size-wise, you want a 5L paint tin (1 gallon). I did try with a smaller 2.5L tin, but it was too small for the majority of larger printed parts.
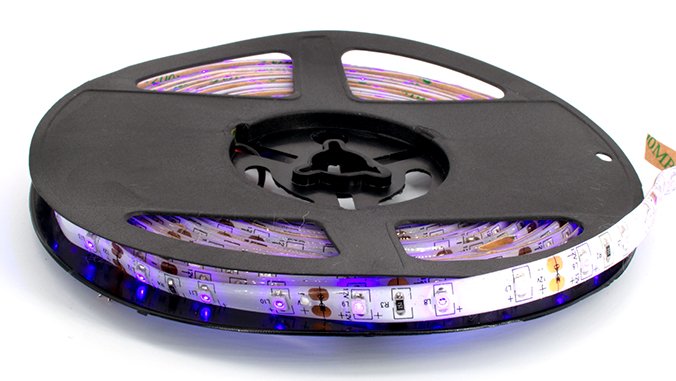
UV LED Light Strip
For this guide, I used a 5M LED Light strip, pretty much the cheapest I could find for 5m. You can get 10M and double up for more intense light. But I’ve found 5M is just fine.
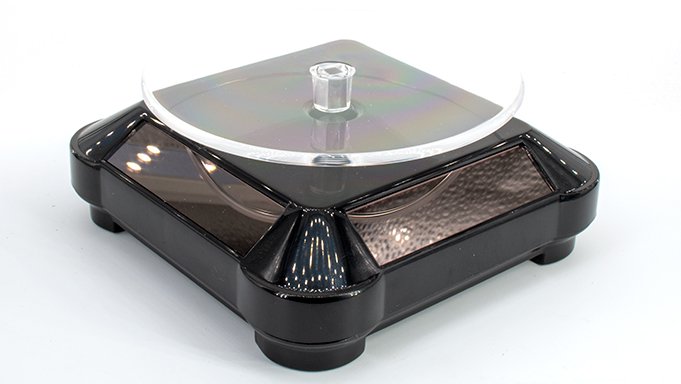
Rotating Display Stand
I like these for displaying models when they are completed. they are really cheap when you hunt around. there are actually 3 variants. One which is powered by light. and one which has the option of adding a battery. The one without the battery option still has the compartment for it, just no connections for the battery to connect to.
If you get the super cheaper one, this probably doesn’t have the battery, probably. this doesn’t mean the more expensive one will let you add a battery. Anyway, I got the cheap one because the UV lights will power it anyway.
UV Protection Safety Glasses
You’re working with UV Lights, protect your eyes.
Drill (optional)
Depending on how you follow the steps ahead you may want to use a drill so that the power lead comes out of the bottom of the tin. You can have it coming out of the top if you want to do it the easy way but you won’t be able to close the lid flush. I drilled a hole for the lead becasue the DIY Cring Chamber looked neater as a finished item.
Your call.
You’ll need to measure the diameter of your power cable. I used a 12mm flat wood drill bit for mine.
How to make a DIY UV Curing Chamber
Step 1 – Assemble Components
Straight forward, just get everything ready, You need your Empty Paint Tin, Drill and UV LED Strip.
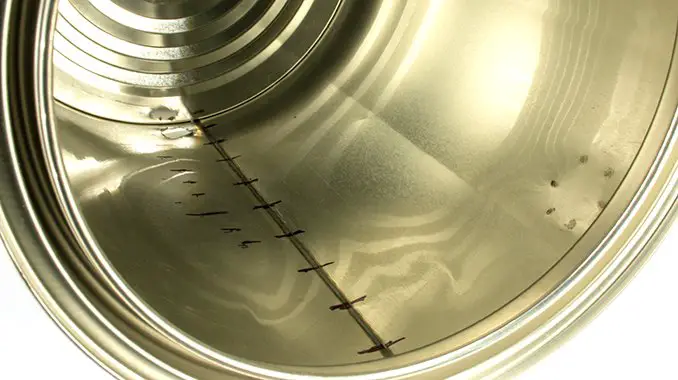
Step 2 – Drill a hole
You can skip this step and just have the power lead coming out of the top. but again the lid won’t sit flush and this just looks neater.

Go careful when doing this, these are really brittle tins and the drill can send shards flying everywhere. Go slow and steady, don’t push, just let the drill score the tin until it punches through.
Step 3 – Test Your LED Strip
I’ve seen a few people online mention how flimsy these Cheap LED strips can be. take a minute to make sure it works before your next step.
Step 4 – Measure the Tin & LED Strip
Depending what size tin you got you may need to get maths involved so you can evenly space the Led strip around the inside. Thankfully for me, I remembered some maths. thankfully for you, if you get the paint Tin size I recommended I’ve done the spacing here for you.
To work out even spacing I needed to know roughly how many times I could wrap a 5m led strip around the circumference of this painted tin.
Well, everyone knows C = πD (right?)
You can always just avoid math and use a tailors tape measure wrapped around the tin.
So I have a tin diameter of 17.5cm. 17.5 x π = 54.98cm (let’s say 55cm)
The length of the UV LED strip is 500cm. So 500/55 is 9.1. so I can wrap this around the inside of the tin 9 times.
The height of the tin is 22.5cm. 22.5/9 is 2.5cm. Pretty much an inch
Hey cool, I have an inch ruler!
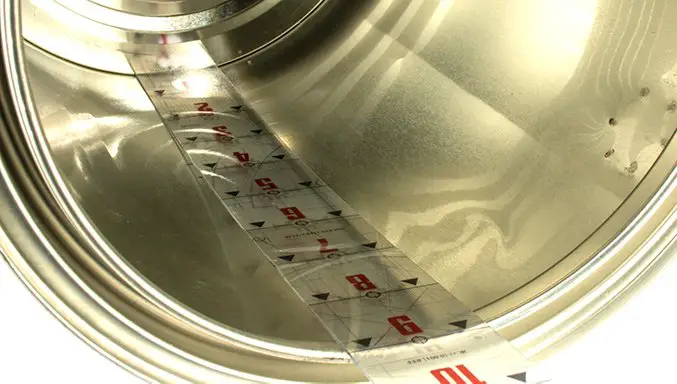
Step 5 – Mark the Tin
Using a marker pen draw the evenly spaced lines up the inside of your tin. This is a guide to follow in the next step
Step 6 – Stick in The LED Strip
Feed your power cable through the hole in the bottom of the tin. Then, starting from the bottom, stick the Led strip around the inside of the can. Try to follow your guidelines as best you can on each full rotation to keep them evenly spaced.
I left a little bit of LED sticking out of my tin near the power hole so I could see from the outside when it was on. It’s just enough so that when I flick the lights off in my office I can see it glowing, reminding me to actually turn it off.
When you are done you shouldn’ have any need to trim the LED strip as it should be a perfect fit. Assuming you measured correctly or got the bits we suggested above. any excess can just be doubled up a bit toward the top.
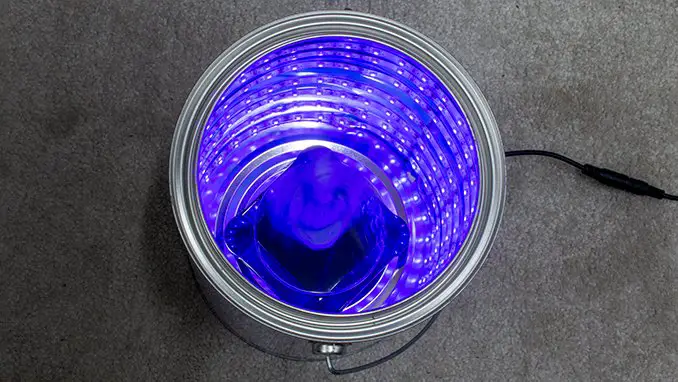
Step 7 – Add the Solar Powered Display Turntable
Stick it in with double-sided pars if you want, but I just placed it in the base of the tin so I can replace it if needed.
Some people like to coat the turntable itself in foil tape or tin-foil. In my experience, you can end up with some resin seepage from your model and it will start to discolour the foil and tear it away.
How to make a DIY UV Curing Box – Complete
And that’s it. Once you have rinsed off your resin Model in Isopropanol and let it evaporate. just place it on top of the turntable and plug it in. The UV lights will power the turntable to keep it spinning.
These LED strips are really low power so I tend to leave my parts in for anything up to an hour, then flip them over and do an hour on the other side. As I’m writing this I’ve just remembered I’ve left a part curing for the last 4 hours becasue I forgot about it!
I just checked it, it’s fine, fully cured and no warping.
What did you think of this Tutorial? please let us know in the comments.
If you like what we’re doing here you could really help encourage more content with a share on any social media platform.
Click the share links at the bottom of this screen (or on the left for computers and tablets)
Want to keep updated with the blog? You can subscribe in the sidebar for RSS or by email below
(Sidebar is below the article on Mobile Devices)
Author


Why you need rotating stand when lights are wound all around symmetrically? Also if one creates platform made of transparent plastic few inches above the bottom turning part over should not be needed either since it will be lit from the bottom as well