
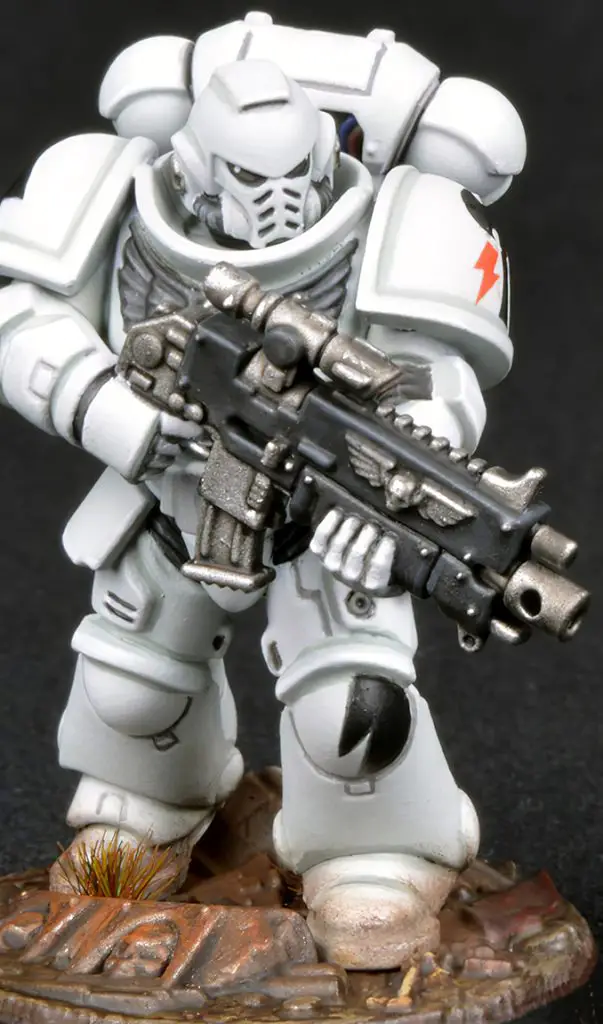
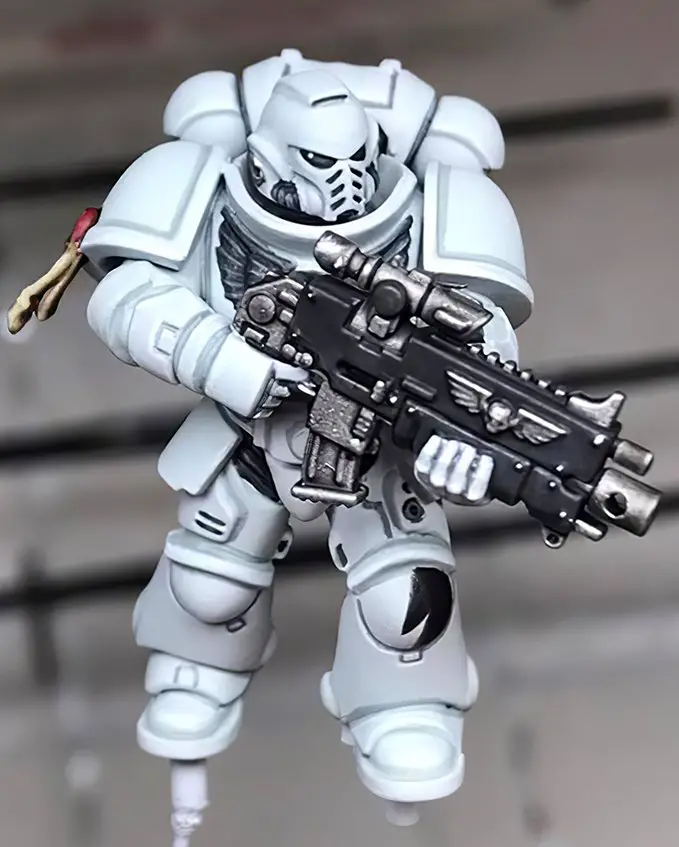
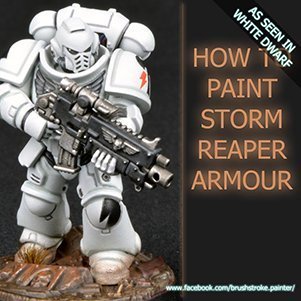
How to paint Storm Reapers Armour Tutorial – 2019
Brushstroke here – Below is my how to paint Storm Reapers Armour tutorial. This is a quick and easy way to paint white Space Marines.
To See my latest Guides, Find me on Facebook & Instagram
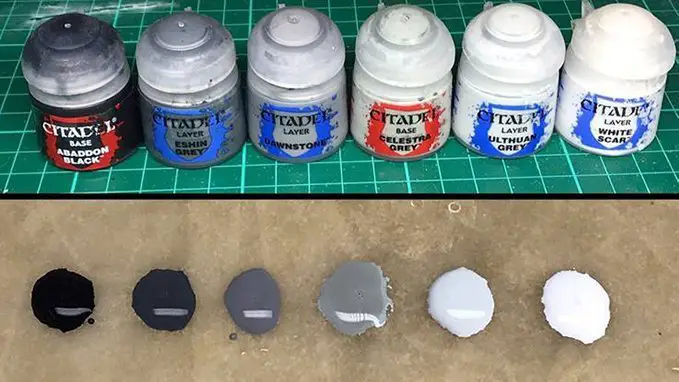
How to paint Storm Reapers – Paints & Tools
Brushes
- Winsor & Newton Series 7 (not the Series 7 ‘Miniature’ Brushes)
Paints
- Ulthuan Grey
- Eshin Grey
- Celestra Grey
- Abaddon Black
- White Scar
- Dawnstone
- Khorne Red
- Ushabti Bone
- Wazdakka Red
How to paint Storm Reapers – Tutorial
Introduction to Glazing
Before jumping into how I painted the white armour, as I think it is important to explain how the paint should be applied.
When painting white, one of the biggest struggles is to achieve a clean, smooth finish.
The best way I’ve found is to layer the paint on as a series of glazes rather than standard paints. All this means really, is thinning the colours right down, until they have the consistency of milk. When you paint them onto the model you are just looking to wet the surface with them, effectively tinting it. Over repeated applications of the glaze, you build up the colour you want.
Unlike washes, where you want them to flow into all the creases etc, with glazes, you need to be more controlled and not let the paint run. Instead, just look to apply very thin layers at a time.
To help with the process I recommend using a wet palette.
Step 1 – Apply Primer
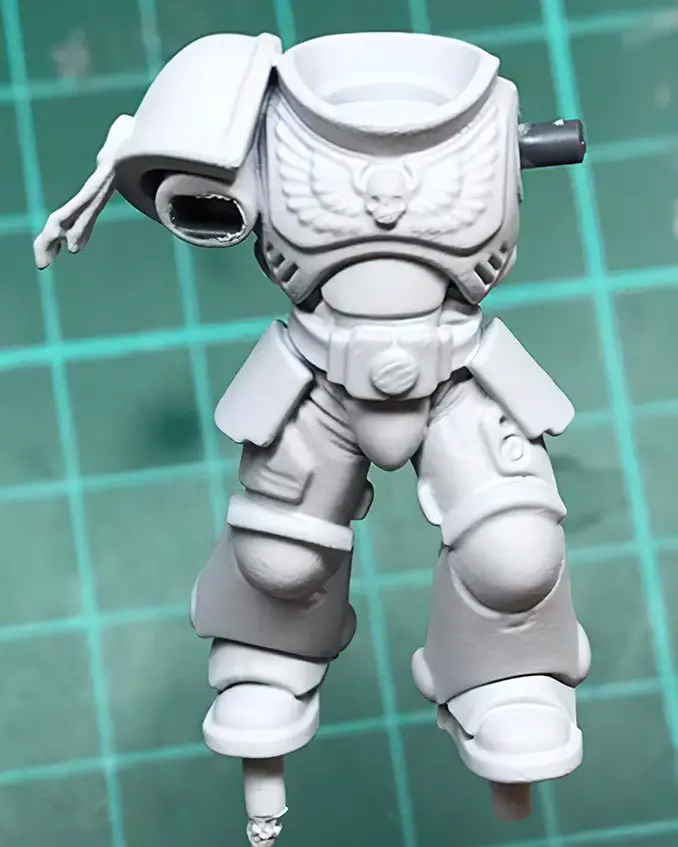
As the paints being used are very thinned down it makes them transparent. Because of this, it makes the choice of primer colour very important, as it can actually be used to our advantage and do a lot of the work for us.
So, in this case, prime the mini white.
Do take your time when priming to get a smooth finish, unlike me… Who (as you can see from the pic), layered it on much too thick in my haste to get started.
Step 2 – Apply Base Colours
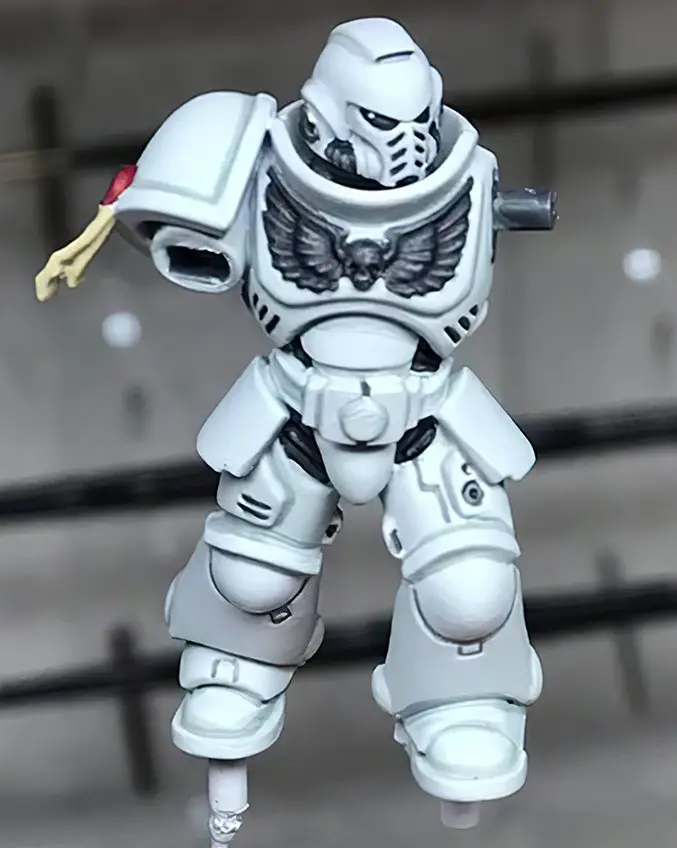
Paint the complete mini in Ulthuan Grey. Remember to apply as a glaze in very thin layers. This will be the final colour of the mini, so it is very important to get this step as smooth and clean as possible.
Paint all the areas that you want to be black in the end with Eshin Grey (leg joints, chest crest, deep vents etc) Again, apply as a glaze so you get a nice shaded effect on all the textured areas. The white primer helps by showing through the semi-transparent glaze.
Apply thinned Celestra Grey, as you would a recess shade, into the grooves and edges of the armour panels. If you make any mistakes, simply neaten up again with Ulthuan Grey.
Step 3 – Apply Shading
Apply NuIn Oil to all Eshin Grey areas.
This is the only time I used a shade for this armour.
This will give a strong definition to the texture and give a nice highlighted black without any effort … WIN!
Take care when applying the shade to keep it off the armour plates etc, especially when running it into the vents.
As before, any mistakes can be corrected with Ulthuan Grey.
Step 4 – Paint the Details
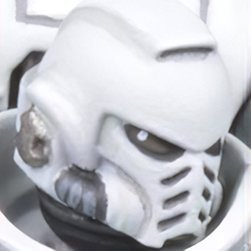
Eye lenses – paint the full lens in Abaddon Black, then leaving an edge of black, paint Eshin Grey inside. Finish with a dot of White Scar.
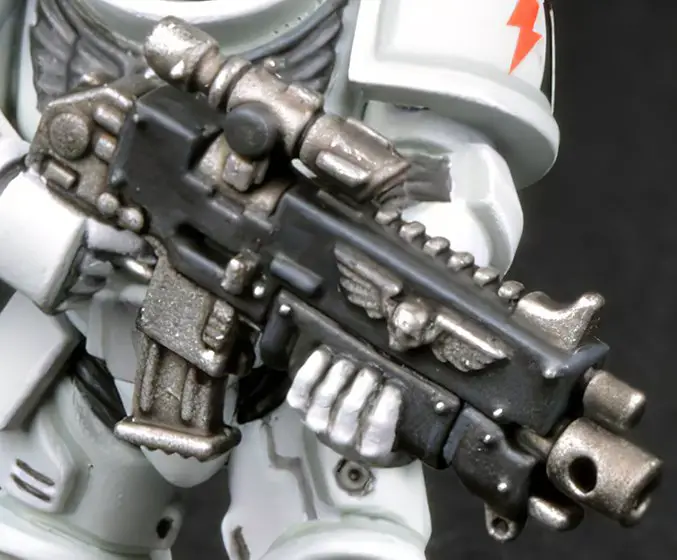
Gun – paint metallics with Ironbreaker and casing with Eshin Grey. Shade the whole gun with NuIn Oil. Highlight metallics with Ironbreaker and casing with Dawnstone.
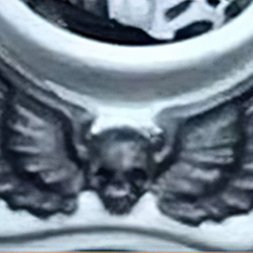
Chest crest – highlight with Dawnstone.
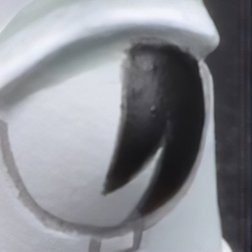
Knee – the knee detail was freehanded in Abaddon Black.
Purity Seal – base with Khorne Red and Ushabti Bone. Shade with Agrax Earthshade. Highlight with Wazdakka Red and Ushabti Bone. Add lines of writing in Eshin Grey.
Step 5 – Paint Highlights
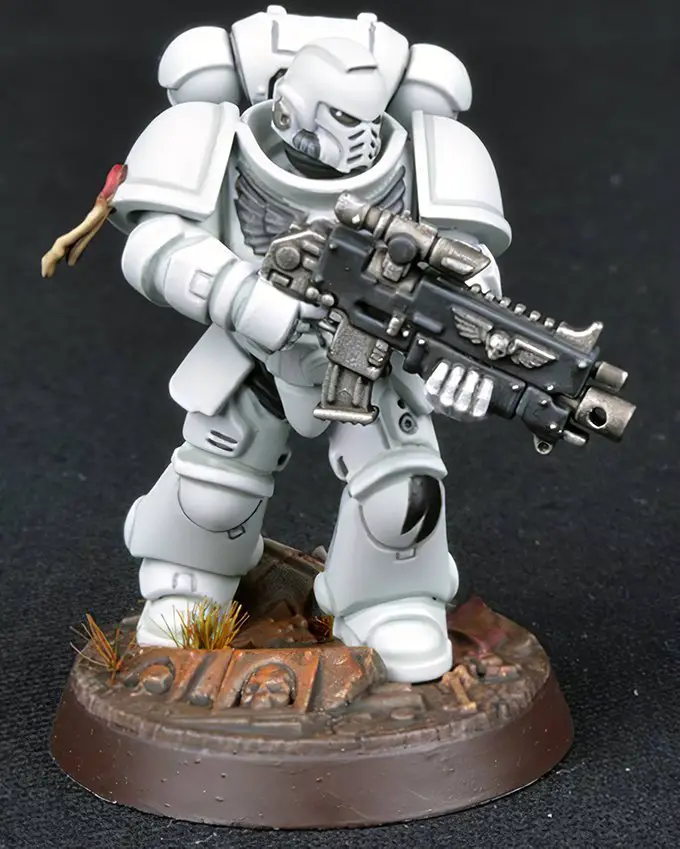
After assembly and basing the last step is to apply a final edge highlight of White Scar to the armour.
I concentrated on sharpest edges and areas of focus… such as the helmet, shoulder pads, hands etc.
The finishing touch of weathering is up to you…
You can decide to keep it clean and perfect or go on to add dirt and battle damage.
I decided to simply add some dirt to the boots and leave it at that.
How to paint Storm Reapers – Complete
Thank You
I hope you find this guide useful.
If you do have any questions or suggestions on how to improve it for others, then please do let me know.
Don’t forget to LIKE and FOLLOW my Instagram & Facebook pages for more tips and guides
More Tutorials From Brushstroke
Got any questions? Want to see more tutorials like this, or what I’m working on next? Follow me on Instagram by clicking any of the images in this post.
I’m now on YouTube, Subscribe to my channel and see my video guides by clicking here.
See this full tutorial and more, directly on my Instagram & Facebook pages. Don’t forget to LIKE and FOLLOW for more tips and guides.
What did you think of this Tutorial? please let us know in the comments.
If you like what we’re doing here you could really help encourage more content with a share on any social media platform.
Click the share links at the bottom of this screen (or on the left for computers and tablets)
Want to keep updated with the blog? You can subscribe in the sidebar for RSS or by email below
(Sidebar is below the article on Mobile Devices)
Author


Yep. That’s how you get a nice, clean white. Awesome job.