
Comment faire une station de séchage UV DIY pour les imprimantes 3D en résine
Whilst you can Buy UV Curing Stations, or UV Curing Chambers online they are very expensive. I just don’t have the money to spend what they cost! So instead I built my own and I’ll show you the steps in our How to Make a DIY UV Curing Station for Resin 3D Printers guide.
Ok, donc si vous me suivez Facebook ou Instagram you’ll see from my posts I love my 3D printer. After buying this, however, I was surprised (due to my over-excited lack of actual research) that the parts you print actually need to be fully cured post-print with UV light.
Alors, quand ma première impression est sortie de l'assiette, je me bousculais à la recherche de tout ce qui pourrait suffire. Heureusement, ma femme avait une station de séchage UV conçue pour les gels pour les ongles. J'ai donc utilisé cela pendant la première semaine jusqu'à sa mort.
Still unable to afford one of the retail options, I was looking at how to make a decent cure station. Many people will just stick a print in the sunlight, but living in the UK during the winter, we don’t get much sun. Even when we do it’s probably raining anyway.
There’s a lot to consider when curing resin, if you want to cure it properly without it becoming too brittle or warping you need to regulate temperature and light intensity. You also need to balance it across the surface. When I was making base toppers for my miniatures and using my wife’s nail curing station thy started to curl from being left under the direct light.
Whilst you can’t really regulate temperature with a DIY Curing Chamber, you can easily keep the part rotating to get more even coverage.
How to make a DIY UV Curing Chamber – Parts
If you have a Resin printer, I’ll just assume you have plenty of Isopropanol for rinsing the parts and Nitrile gloves for handling uncured resin. Not that you need them for making this. I just didn’t realise how many gloves or how much Isopropanol I’d need for resin printing. so if you rea reading this before getting a printer, let me just say you need this stuff. Lots of it.
Let’s have a look at what you need to make a cure station
Boîte de peinture vide
The reason I’ve picked a paint tin is becasue teh inside is already reflective. You will lose a lot of the UV’s power in reflected light but it’s still better to have some than none. Some people have gone as far as lining the inside with Aluminium tape to increase the reflectivity of the surface. For the amount of UV light that would reflect over the normal lining of a tin, I just couldn’t see it was worth the effort. But go ahead and do that if you want.
En termes de taille, vous voulez une boîte de peinture de 5L (1 gallon). J'ai essayé avec une boîte de 2,5 L plus petite, mais elle était trop petite pour la majorité des pièces imprimées plus grandes.
Bande de lumière LED UV
For this guide, I used a 5M LED Light strip, pretty much the cheapest I could find for 5m. You can get 10M and double up for more intense light. But I’ve found 5M is just fine.
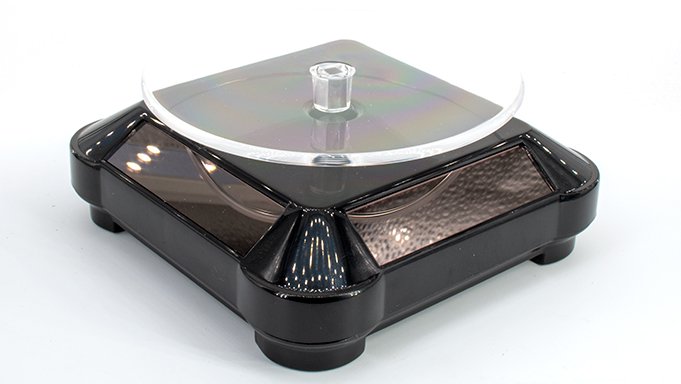
Présentoir rotatif
Je les aime pour afficher les modèles lorsqu'ils sont terminés. ils sont vraiment bon marché quand on chasse. il existe en fait 3 variantes. Celui qui est alimenté par la lumière. et celui qui a la possibilité d'ajouter une batterie. Celui sans l'option batterie a toujours le compartiment pour cela, juste aucune connexion pour la batterie à laquelle se connecter.
If you get the super cheaper one, this probably doesn’t have the battery, probably. this doesn’t mean the more expensive one will let you add a battery. Anyway, I got the cheap one because the UV lights will power it anyway.
UV Protection Sécurité Des lunettes
You’re working with UV Lights, protect your eyes.
Perceuse (facultative)
Depending on how you follow the steps ahead you may want to use a drill so that the power lead comes out of the bottom of the tin. You can have it coming out of the top if you want to do it the easy way but you won’t be able to close the lid flush. I drilled a hole for the lead becasue the DIY Cring Chamber looked neater as a finished item.
Ton appel.
You’ll need to measure the diameter of your power cable. I used a 12mm flat wood drill bit for mine.
Comment faire une chambre de séchage UV DIY
Step 1 – Assemble Components
Tout droit, préparez-vous à tout, vous avez besoin de votre boîte de peinture vide, de votre perceuse et de votre bande LED UV.
Step 2 – Drill a hole
You can skip this step and just have the power lead coming out of the top. but again the lid won’t sit flush and this just looks neater.

Go careful when doing this, these are really brittle tins and the drill can send shards flying everywhere. Go slow and steady, don’t push, just let the drill score the tin until it punches through.
Step 3 – Test Your LED Strip
I’ve seen a few people online mention how flimsy these Cheap LED strips can be. take a minute to make sure it works before your next step.
Step 4 – Measure the Tin & LED Strip
Depending what size tin you got you may need to get maths involved so you can evenly space the Led strip around the inside. Thankfully for me, I remembered some maths. thankfully for you, if you get the paint Tin size I recommended I’ve done the spacing here for you.
Pour calculer un espacement uniforme, je devais savoir à peu près combien de fois je pouvais enrouler une bande de 5 m autour de la circonférence de cette boîte peinte.
Eh bien, tout le monde connaît C = πD (c'est ça?)
Vous pouvez toujours éviter les mathématiques et utiliser un ruban à mesurer sur mesure enroulé autour de l'étain.
J'ai donc un diamètre d'étain de 17,5 cm. 17,5 x π = 54.98cm (let’s say 55cm)
La longueur de la bande LED UV est de 500 cm. Donc 500/55 est 9,1. donc je peux envelopper 9 fois l'intérieur de la boîte.
La hauteur de la boîte est de 22,5 cm. 22,5 / 9 est de 2,5 cm. À peu près un pouce
Hé cool, j'ai une règle en pouces!
Step 5 – Mark the Tin
À l'aide d'un marqueur, dessinez les lignes régulièrement espacées à l'intérieur de votre boîte. Ceci est un guide à suivre à l'étape suivante
Step 6 – Stick in The LED Strip
Faites passer votre câble d'alimentation à travers le trou au bas de la boîte. Ensuite, en partant du bas, collez la bande Led autour de l'intérieur de la boîte. Essayez de suivre vos directives du mieux que vous le pouvez à chaque rotation complète pour les garder régulièrement espacées.
I left a little bit of LED sticking out of my tin near the power hole so I could see from the outside when it was on. It’s just enough so that when I flick the lights off in my office I can see it glowing, reminding me to actually turn it off.
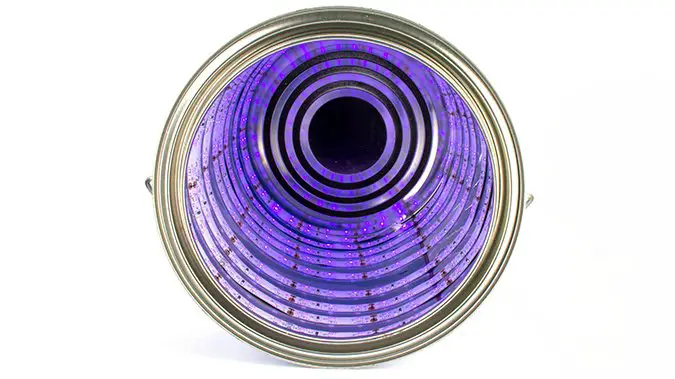
When you are done you shouldn’ have any need to trim the LED strip as it should be a perfect fit. Assuming you measured correctly or got the bits we suggested above. any excess can just be doubled up a bit toward the top.
Step 7 – Add the Solar Powered Display Turntable
Collez-le avec des pièces recto-verso si vous voulez, mais je viens de le placer dans la base de la boîte afin que je puisse le remplacer si nécessaire.
Certaines personnes aiment recouvrir la platine elle-même de ruban ou de papier d'aluminium. D'après mon expérience, vous pouvez vous retrouver avec des infiltrations de résine de votre modèle et cela commencera à décolorer le film et à le déchirer.
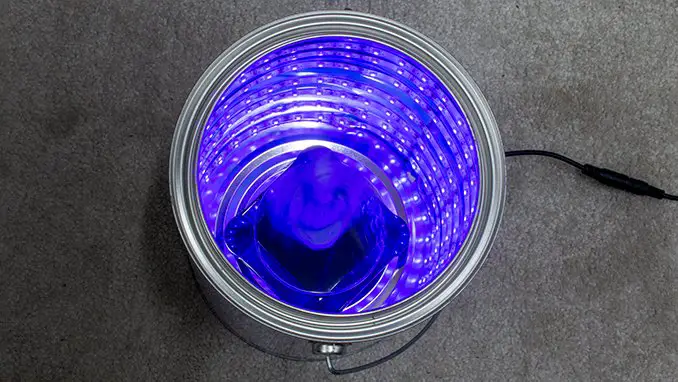
How to make a DIY UV Curing Box – Complete
And that’s it. Once you have rinsed off your resin Model in Isopropanol and let it evaporate. just place it on top of the turntable and plug it in. The UV lights will power the turntable to keep it spinning.
These LED strips are really low power so I tend to leave my parts in for anything up to an hour, then flip them over and do an hour on the other side. As I’m writing this I’ve just remembered I’ve left a part curing for the last 4 hours becasue I forgot about it!
I just checked it, it’s fine, fully cured and no warping.
Qu'as-tu pensé de ça Didacticiel? veuillez nous le faire savoir dans les commentaires.
If you like what we’re doing here you could really help encourage more content with a share on any social media platform.
Cliquez sur les liens de partage en bas de cet écran (ou sur la gauche pour les ordinateurs et les tablettes)
Vous voulez rester à jour avec le blog? Vous pouvez vous abonner dans la barre latérale pour RSS ou par email ci-dessous
(La barre latérale se trouve sous l'article sur les appareils mobiles)
Auteur


Why you need rotating stand when lights are wound all around symmetrically? Also if one creates platform made of transparent plastic few inches above the bottom turning part over should not be needed either since it will be lit from the bottom as well