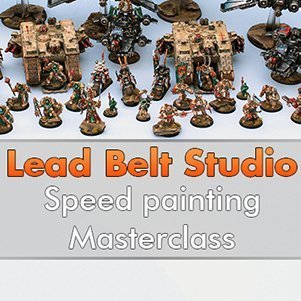
Lead Belt Studio – Speed Painting Masterclass Impressions
Last Updated on April 23, 2021 by FauxHammer
So, last weekend (August 24th & 25th 2019) I attended Lead Belt Studio’s first-ever Speed Painting Masterclass. My head is still spinning with everything we went over on this course. What we learned over these 2 intensive days was a painting approach completely different from anything I had even considered before.
Lead Belt Studio – About the Studio
Lead Belt Studio is located in the Heart of Nottingham. Some miniature hobbyists may know Nottingham is the Location of Games Workshop’s head office and flagship store – Warhammer World (Others know it for Robin Hood). But it’s more than that, there are multiple other miniature brands located here too (such as Warlord Games and Mantic Games. Even Reaper Miniatures have a UK Warehouse here). With all these minis produced in Nottingham, it’s no wonder Nottinghamshire has been referred to as the Lead Belt of the UK.
Ahhhh! I just got it.

Running the studio is James Griffiths, a long-time miniature enthusiast who started painting Hero Quest when he was 9. Taking a bit of a hobby break during University, he came back to the hobby as he started to migrate into the real world. James has also worked for Games Workshop in Nottingham too. But not as a miniature painter. James opened the course by advising that he wasn’t a very good miniature painter. We can tell by just looking at some of his modern miniatures, this is not true.
James advised that his realisation is that the ‘Eavy Metal approach is just not right for him. But since getting an airbrush for Zenital Highlighting. He developed his method into speed painting. By utilising colour and contrast to simulate light, he has developed his way of painting which is quick to do and delivers striking results.
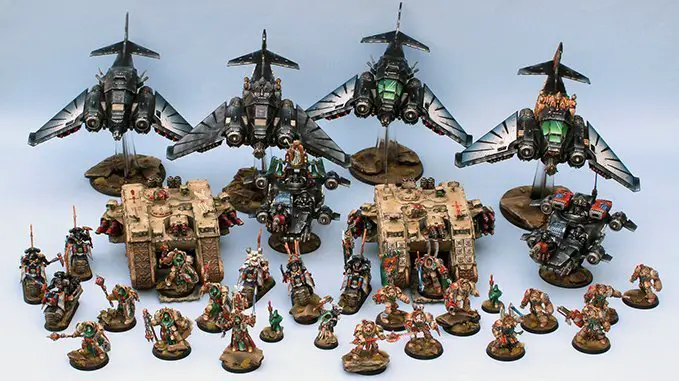
Also, He’s keen on big stuff
Lead Belt Studio – Finding the Course
Finding Miniature painting courses in the UK (or anywhere for that matter) can be quite tricky. The last course I reviewed was really good, but it was over an hour away, I had to get a hotel and I wouldn’t learn anything further by going on that same course again. I’ve been in the market for something new. To have this one in my home town was an instant win.
I stumbled across this course by accident. Like many of you, I follow the Legendary David Soper’s Blog. He had a Troggoh painting course back in June at Element Games and I was gutted I could not go. but when he posted about the course online, I was so excited to see that David mentioned he would be running the same course in Nottingham on 28th and 29th September.
I got in touch with David to get more details and when he was ready to announce, he advised that it was at Lead Belt Studio. I immediately booked my tickets to secure a place. Then, browsing Lead Belt Studio’s Website I also found this Speed Painting course. I have a lot of paint reviews to get through, so this would be a great benefit. I also already knew of James’s work from Instagram and loved what I saw.
FYI, The Studio has different courses upcoming every month and every week, a Wednesday Workshop in the evenings from 6pm-9:30. so if you are in the area, come along.
Lead Belt Studio – Course Approach
I had absolutely no idea what to expect with this course on the way in. On the way out I can safely say that I never could have expected what I got. I foolishly assumed this course would take me through some techniques to speed up my painting. Thinks like, planning beforehand, painting in a specific order, how to avoid missing parts which need to be coloured.
Nah, This wasn’t that at all! And I am so much happier for it.
But, let me just preface the body of this article. The reason I am writing my “impressions” and not a “review”, is becasue my experience on the course was very different from what you should expect.
This was actually James first-ever course he ran. It was at an introductory price and limited to only the first 2 participants who signed up. This was me, and another guy also called Ross. We were the guinea-pigs.
As there was only 3 of us in the room, the course was very relaxed and open. It was more like 3 guys having a good chat about the detailed nuances of miniature painting. Questions were thrown around frequently (and I’m talking favourite movies and TV Shows). Due to this, we often made James deviate from his planned course material and frequently extended beyond a particular module’s allotted time. (Sorry, James.)
This was a double-edged sword however, we delayed ourselves, but we were able to delve deeper into the subjects we covered. We just timed ourselves out of some later material.
The course propper (when you go on it) would be much more controlled and a lot more prep would have been made to accelerate candidates through some modules.
Lead Belt Studio – The Course
The day opened with James giving a background about himself. He then asked us what we want to get out of our painting. This was really great. The other course I went on didn’t do this. So this was a nice little ice breaker that helped Ross and I to get to know each other straight away. It also allowed me to talk about running FauxHammer.com. If you know me, you’ll know I love telling people about FauxHammer.
Even in larger course groups, I hope James continues and starts the course this way no matter how many attendees there are.
After this James presented what we intended to cover over the two days.
Day 1
- Planning and sub-assemblies
- Light and zenithal highlighting
- Airbrush and rattle cans for pre-highlighting and further detail
- Glazes and tone
- Minimal, selective highlighting
Day 2
- Adding gore and battle damage
- Quick masking
- Effective metallics
- Special effects
- Unconventional materials
- And much more!
The early part of day one was a detailed theory on planning and sub-assemblies. All of this was displayed on a presentation which James had created showcasing his own work as cited examples of the topics he covered.
This was very interesting. I have painted with Sub-Assemblies before, my approach has always been to leave off the bits which get in the way of other bits, but there are some very different considerations to make when speed painting. Quite a few ah-ha moments came to me during this segment.
After that, we got into the meat of the course.
Lead Belt Studio – What is Speed Painting?
Ok, so this is something I wish I knew before going in. Well, not just knew, understood.
Speed Painting is not Painting Fast, well, it is, but it isn’t. Clear? Ok, ok, stay with me.
My approach to painting has always been the same way you see on Warhammer TV. Base, Shade, Layer Edge. I’ve tried different techniques such as Zenithal Shading, but most of the time, that was just from following videos online without even realising what I’m doing.
Speed painting is less of the unrealistic ‘Eavy Metal – Base Coating and Edge Highlighting approach and more like painting with light directly. It just so happens that this is also a quick way to paint.
There are numerous techniques and bucketload of colour theory that goes into this (so go on the course to learn it). But generally, the result is more realistic and visually interesting miniatures.
Lead Belt Studio – Painting with Light
This was a lot to take in, but for the rest of that day, my brain was fighting everything I was being taught. I consciously knew that I wanted to get the sort of results that James was getting. But I have been so indoctrinated by the Games Workshop method, that I just could not see the steps ahead of me. This knocked me off balance mentally. And caused every timid step I made, to be uncomfortable one.
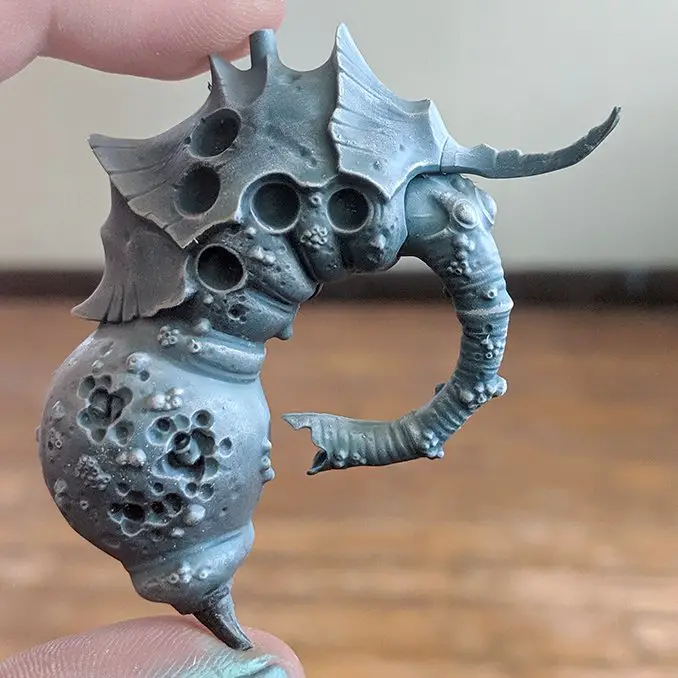
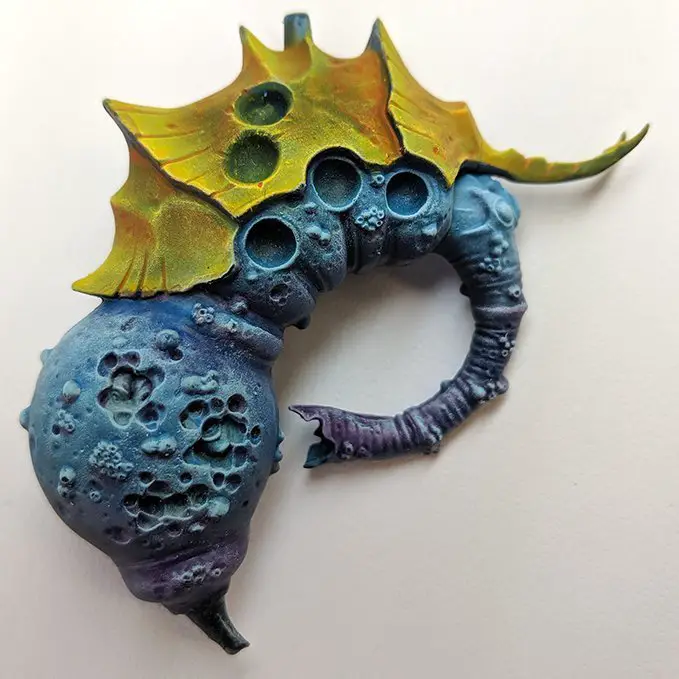
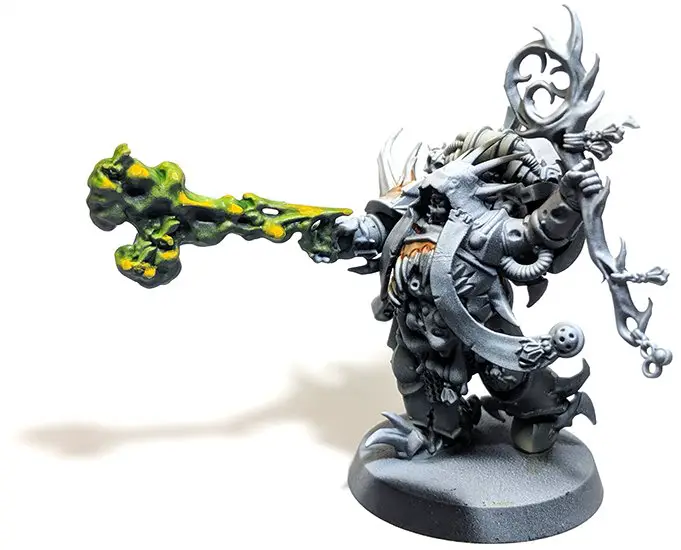
We started airbrushing some Zenithal Highlights, James had a prepared and black primed 3 Plague Flies. One for us and each of us. We all had 2 different colours to Zenithal pre-shade them with. I chose two blue paints
We took some time painting these.
As I forgot my airbrush hose, we only had one airbrush. This took up a lot of time for day one, oops. After the typical Zenithal Shade, James talked to us about specific areas to highlight. We then went over with an even brighter colour (pure white for me).
This marked out the light and acted as a pre-shade.
Lead Belt Studio – Glazing
I have a love/hate relationship with glazing. Even at the best of times, it’s more of a hate relationship. Over the layer above, we applied the base colour by making our own glazes.
This wasn’t glazing as I had previously learned. We took typical Games Workshop Paint and added a couple of mediums to increase the transparency, control the flow and give us some more working time on the model. This final mix had a consistency similar to Citadel Contrast Paints.
In fact, James suggested during the course, we can just use contrast paints if we wish. Another part where my brain started rejecting concepts. This time due to internet indoctrination and a view that Contrast Paint is somehow cheating or does not require any skill (not true). In reflection, I had nothing against the contrast paints, I just wanted to learn how to do this with any paints.
The point I had mentioned above is that we had only so far applied an underlayer. This was not the final colour of the model, this is just a pre-colour. This would react with the colour we apply over it to create differences in the overall tone of the model.
James discussed this with us and opened the floor to us to decide what colours we thought would work well. I had no idea what a good paint to apply over a blue base was. This discussion went on a little long for me and the more I considered it, hazier my brain became.
I think I was trying to understand the result of what I would do before I did it. But I needed a lot more guidance here and just wanted James to hold my hand and tell me what to do. Then explain why, along with other colour options as we did it. I just settled with the idea of adding some purple to the body, but generally I just glazed blue back over the existing blue. Now I understand the intention, I would have gone a different way.
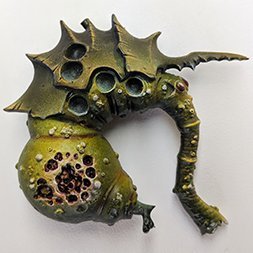
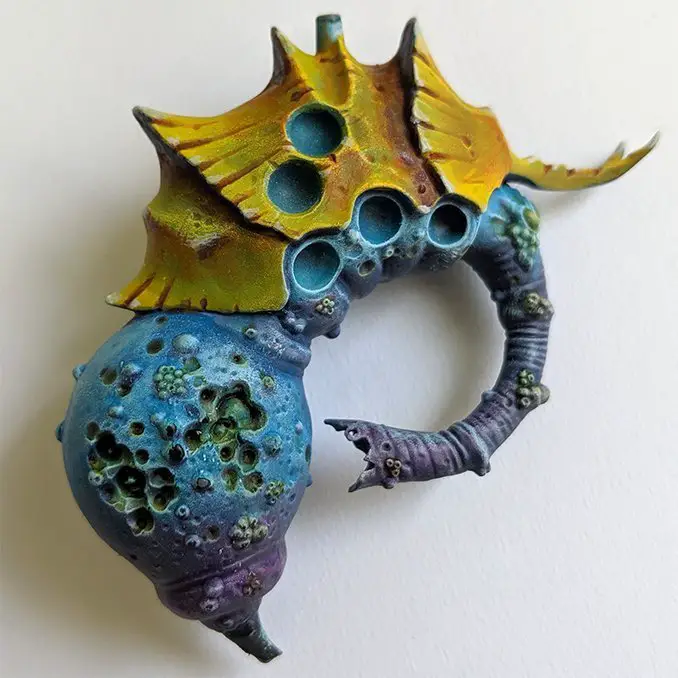
The other Ross chose Yellow, and fully Glazed that over his model which was pre-shaded Bright Green and Deep Purple. This to me seemed like an alien concept, but just look at his result.
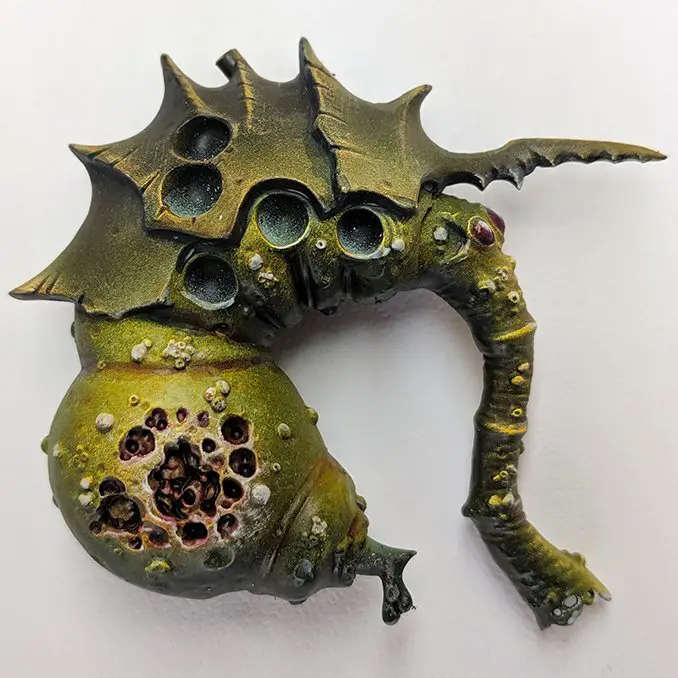
The Yellow has become an appropriately sickly yellow over the green parts and the Purple had cooled and deepened the shadows.
It was only after the day ended and I reflected on it that I understood the lesson. We learned how underpainting can have a great impact on an overall shade.

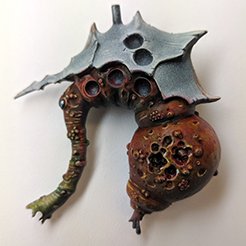
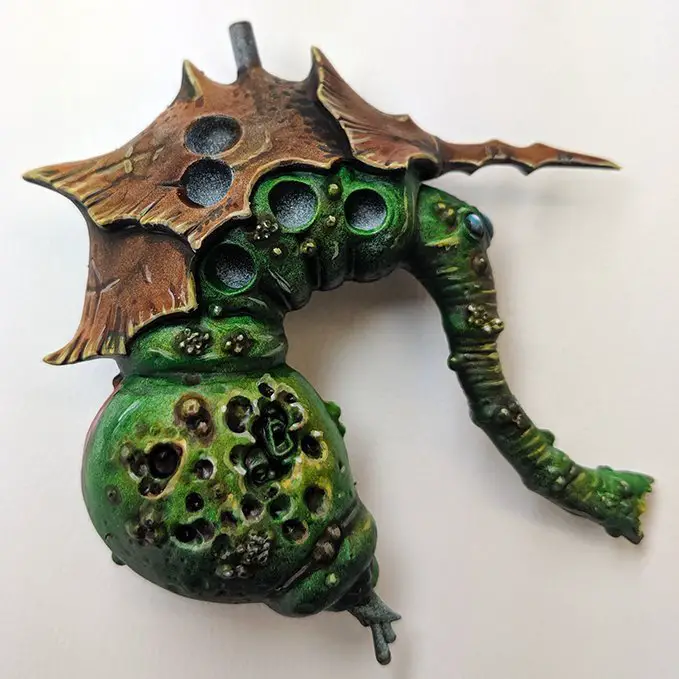
Mine Other Ross James’s B-Side James’s A Side
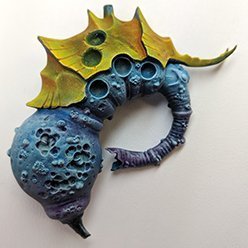
- Blues (mine) are cooling colours and would cool the colour applied above (not that I got that at the time or showcased it)
- Green and Purple pre-shade (Other Ross’s) are quite sickly colours, and will mostly give a sickly look to the base colour.
- And Grey+White (James’s Model) leave a generally neutral tone to the base colour painted on top.
There are many, many other options we learned on the course, these were just the 3 examples we made.
At the end of this day, I was a bit disappointed with my own result. I had shaded a model Blue and then painted it Blue, so it looked Blue. Ross 2 had shaded with Green and Purple to end up with a gorgeously sick-yellow Plague Fly.
I think James is definitely on the right track with the lesson as we covered Zenithal & Spot Highlighting. We also covered glazing in much greater detail than I previously understood Hooray!
But becasue we were all left to our own decisions on what colour to paint over it. For me, without the understanding of what the result will be, I lost a lot of time in making these considerations. I think for the future, James should hand out a selection of pre-defined pre-shade colours, as he did, but then ask everyone to apply the same base colour over the top. Whilst keeping the greyscale (Black+White) pre-shade himself as a control piece.
I feel that this approach would use his model to demonstrate the result people have when applying colours over a model pre-shaded in black with a zenithal in white. Vs the different results attendees have with their variously selected pre-shade colours. This, along with some explanation of what pre-shades generally give which result.
Everyone then will have an interesting result they can continue to work on and immediately have the knowledge to take away and apply on their own models. I think James was very keen to open our minds to the world of possibilities in colour. But for me, I felt overwhelmed and I could experiment with colour in my own time. I ended up with a result which wasn’t painted badly, but I was personally disappointed with. In the time I took to correct it, I fell behind the other guys.
Lead Belt Studio – Day 2
Day 2 started with a rush job from me to catch up to their work on the previous day. But that’s ok, Another quick tip from James, I learned how to drybrush properly. That quick-tip alone is going to change my painting forever.
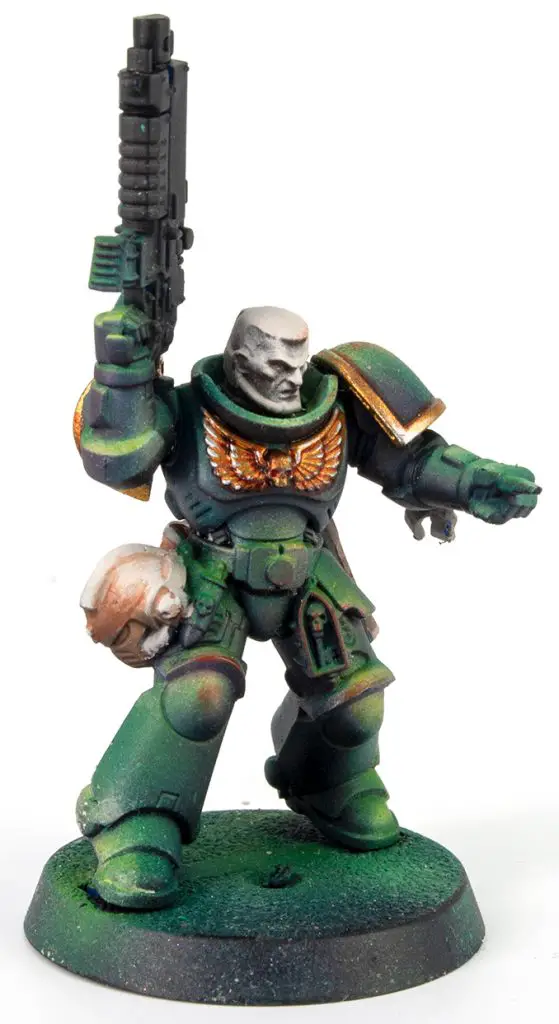
James had immediately taken on-board our feedback from day one and removed colour decision making from us both. He gave us both a Space marine and the same green paints to use. Although the other Ross applied the lighter green as the shade so he ended up with a new green for the highlight. This was a happy little accident as we ended up with different looking models but used the same steps after this initial layer.
Lead Belt Studio – Quick Masking
The second day required a lot of airbrushing in the morning. thankfully I remembered my hose this time so we could work at this together. This approach saw us applying spot highlights on a space marine to specific individual components using quick masking techniques to avoid overspray onto other parts.
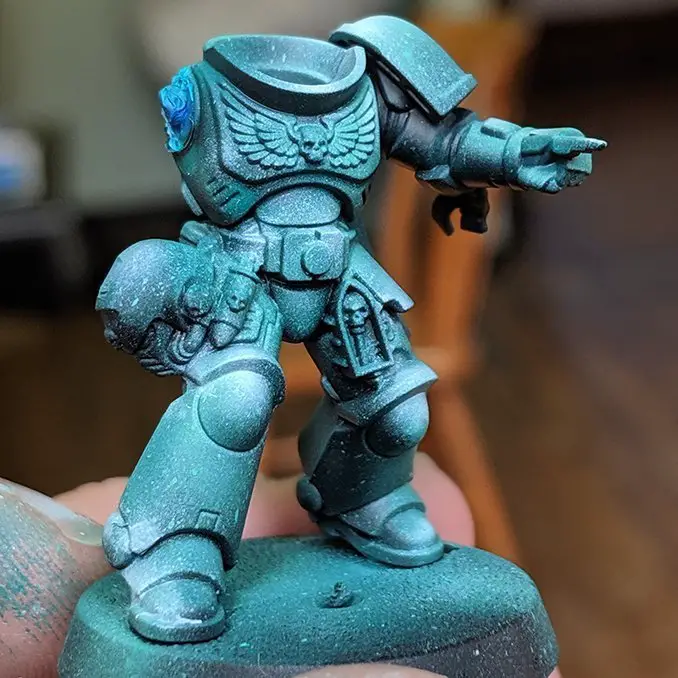
This was really useful, whilst my result here wasn’t the best airbrushing I’d done. I could clearly understand the approach and know how to apply this to my own models in future. We painted these models with colours all the way up to pure white.
It took about 4 hours to fully paint a single marine, but this was my first attempt and it was under steady guided tuition. If I had to do a whole squad now, I’m confident that this course just reduced my painting time from a week down to a couple of days.
Lead Belt Studio – Glazing Continued
Next, we went back to some glazing, but this time through the airbrush. This is where I finally had the Ah-ha moment James tried to show us on the first day.
We had been talking about the importance of contrast (not the paints) in miniatures. I’ve known for a while that contrast is important, as I progress as a painter I am starting to go from brilliant white, through the colours to deep black shadow.

James, however, taught us additional levels of contrast such as warm vs cool colours and where to use contrasting and complementary colours on a colour wheel. These nuances are the things that really make a model pop and stand out from the crowd.
Lead Belt Studio – and much more…
After all the time spent on the Space Marine and general discussion and banter, we had dragged James well over his planned agenda.
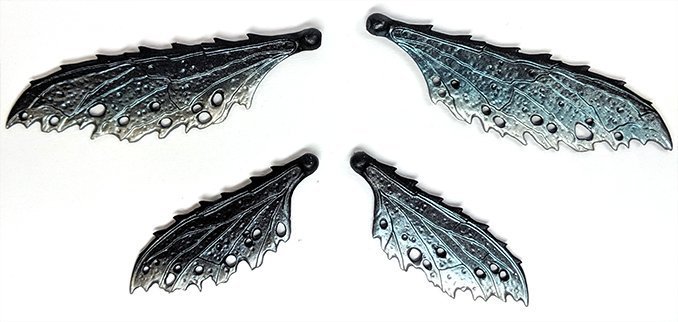
We did spend some time on special effects by painting some cool looking wings for our Plague Flies and painted the rider with some metallic paints. Once again we practised some highlighting using the airbrush for speed.
But we had to rush through the gore application, OSL and weathering by the end of the day to squeeze it in. I really could have done with some more time on this as I was looking forward to it.
We had also kind-of missed out on an end of course summary or open Q&A. But due to the limited volume of people, we kind of took the liberty of this throughout both days. Questions like how do I (or more accurately ” show me how to”) apply these techniques to a Plague Marine, or what do you mean you haven’t watched Sons of Anarchy, took us off on a tangent for quite a while (again, sorry James).
Lead Belt Studio – Speed Painting Masterclass – Final Thoughts
All in all, I learned a heck of a lot in these exhaustive 2 days. Things which have completely changed the way I will paint any model in the future.
James is a great friendly guy with a vibrant and unique approach to miniature painting. This course will guide you through the essentials of his method.
There’s certainly some room for improving the course improvement, but it’s wiggle room at best. We all went in with this expectation due to this being the first-ever course.
The only feedback I would give at this point would be to have more live demonstrations from James before we are set to task. A general approach of a. Explain the Objective, b. Show the Objective then c. Let us try whilst he supports and corrects us. I think he would keep a better flow to the day and keep us to time. But if that’s the only critique I can make, after the first-ever time he’s run a course, I’m obviously clutching at straws to find a problem. The likelihood is that this would be the approach in a larger group anyway.
I’ll certainly be going back to many of his other courses and I will be asking for some regular one-to-one tuition. Maybe one night every couple of weeks for guidance with models to get me through this backlog of reviews. I’m just not sure how to approach him about it. Maybe I’ll just send a link to this article and hope he gets the hint. Although the risk is, if he doesn’t like this article I’ll get sat at the back of the class on the David Soper course.
If You’re In Nottingham or Coming to Nottingham for Warhammer World, maybe check if Lead Belt Studios has any courses on first and really make the most of your Mini adventure weekend. Chances are, I’ll see you there.
What did you think of this Article? please let us know in the comments.
If you like what we’re doing here you could really help encourage more content with a share on any social media platform.
Click the share links at the bottom of this screen (or on the left for computers and tablets)
Want to keep updated with the blog? You can subscribe in the sidebar for RSS or by email below
Author