
How to paint Silver Templars Space Marines for Warhammer 40k
In today’s guide, we’re going to be looking out how to quickly and easily speed-paint your Space Marines as Silver Templars, using only a handful of tools and a few super easy steps.
Please Note: This site uses affiliate links. Our Affiliate Partners are shown below
(Affiliate links will result in compensation to the site on qualifying purchases)
Click this link & buy your hobby stuff from Element Games for the UK & Europe to support FauxHammer.com – Use Code “FAUX2768” at the checkout for double reward points.


Our Affiliates / Hobby Stores
- UK: Element Games, The Outpost, Wayland Games, Mighty Lancer, Goblin Gaming, Forbidden Planet, Model Scenery Supplies, eBay, Amazon
- US/Canada: MTechCave, GameKastle, eBay (US), eBay (CA), Amazon
- Germany: Taschengelddieb
- Europe: eBay (DE), eBay (FR), eBay (ES), eBay (IT), Amazon
- Australia: eBay, Amazon
- Global: RedGrass Games, Warcolours
- 3D Printers: Phrozen 3D, Elegoo, Anycubic
FauxHammer – Latest Video on YouTube
How to paint Silver Templars Space Marines for Warhammer 40k – Paints and Tools
Tools
- An Airbrush. Not necessary, but much faster for base layers, Any airbrush should do here (in the video, FauxHammer uses a Badger Sotar 20/20 for priming, and a Cult of Paint Infinity CR+ for everything else).
If you’re thinking of buying an airbrush and need some inspiration, check out our Best Airbrushes for Miniatures and Models list
- A set of domed drybrushes (in the video, FauxHammer uses Artis Opus Series D drybrushes).
- Any regular paintbrushes with sharp tips for painting base layers. (In the Video Fauxhammer uses an Artis Opus Series S #3 for everything except the finest details where a Series M #0 is used)
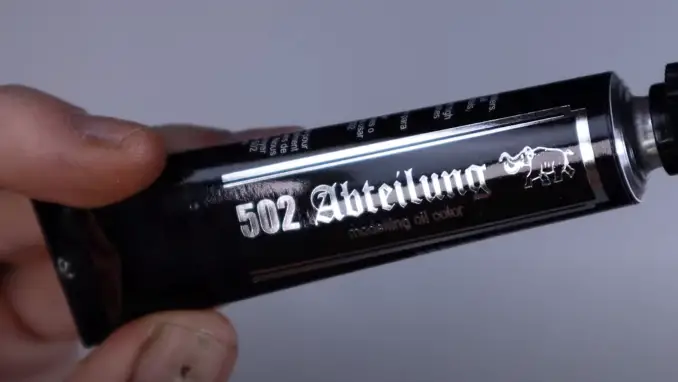
Paints
Flat Colours
- Pro Acryl Yellow Ochre
- Pro Acryl Golden Yellow
- Pro Acryl Olive Flesh
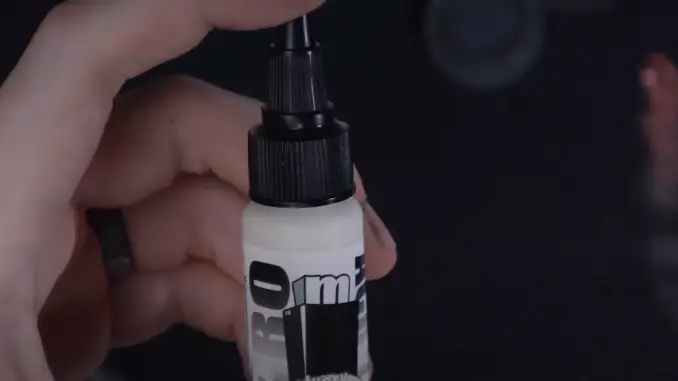
- Pro Acryl Coal Black
- Pro Acryl Mahogany
- Pro Acryl Bright Warm Grey
- Pro Acryl Burnt Red
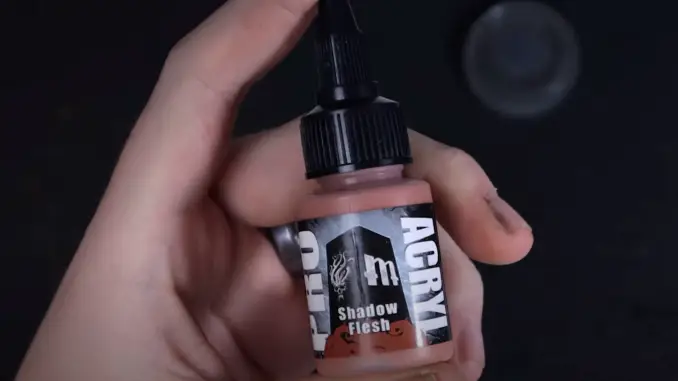
- Pro Acryl Shadow Flesh
- Pro Acryl Ivory
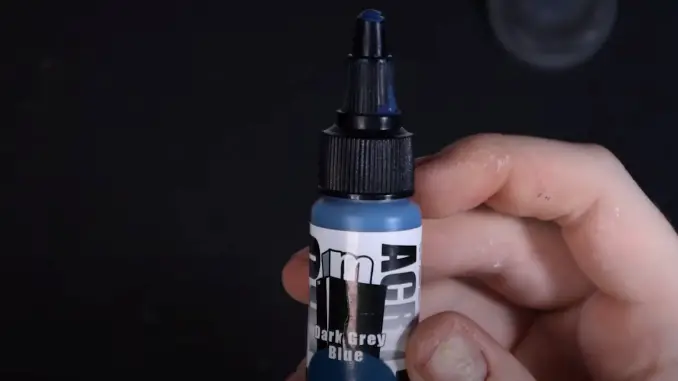
- Pro Acryl Dark Grey Blue
- Pro Acryl Bold Pyrrole Red
- Pro Acryl Orange
Metallics
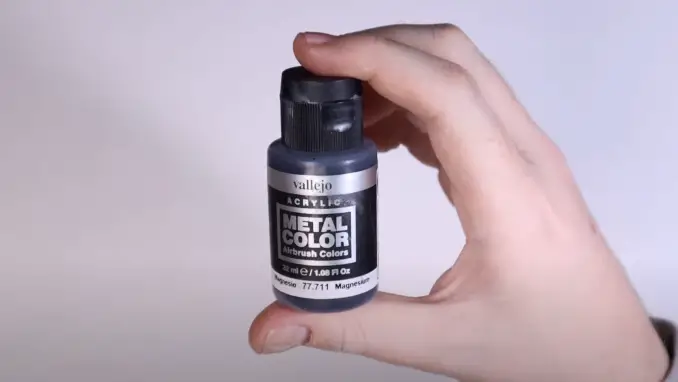
- Vallejo Metal Color Magnesium
- Vallejo Metal Color Dark Aluminium
- Vallejo Metal Color Gold
- Vallejo Metal Color Copper
Washes
Consumables
- AK Interactive Gloss Varnish
- Micro Set
- Micro Sol
- Cotton Buds (Q-tips)
- Mineral Spirit
How to paint Silver Templars Space Marines for Warhammer 40k – Introduction
If you think FauxHammer’s Silver Templars look familiar, that may be because you’ve seen them on WarhammerTV’s Hobby Roundup. Since appearing, we’ve received a high number of requests from people asking how he paints his Silver & Yellow Space Marines.
Surprisingly, they’re all speed painted. Using an array of techniques, cheats and hobby hacks, you too can quickly assemble an army of parade-ready Silver Templars by following our guide below or watching the accompanying video.
How to paint Silver Templars Space Marines for Warhammer 40k – Tutorial
Step 1 – Priming and Basing
Start off as usual: prime your figures. As we’ll be painting these chaps silver, we’re going to start with a black basecoat.
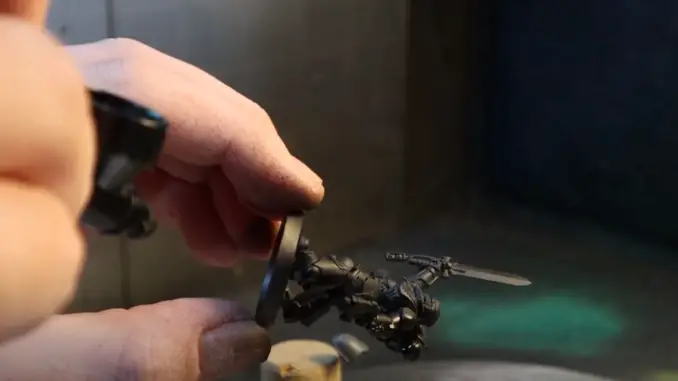
Next, you’ll want to use your base metallic colour. For this guide and the accompanying video, the Magnesium paint from Vallejo Metal Colour range was used.
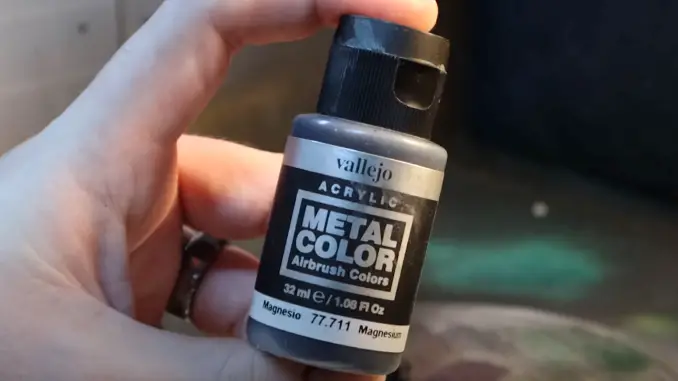
The reason we chose this colour, in particular, was because Vallejo’s Magnesium has a slight blue hint to it, which will contrast with a heavy application of warmer colours we’ll use later on in the guide.
Silver is naturally cool anyway, adding blue to the metallics enhances this futher.
Now that the basic, all-over basecoat is sorted, we can move on to some more selective painting.
Step 2 – Preliminary Highlights
Using Vallejo’s Dark Aluminium, also taken from their Metal Colour Range, carefully airbrush this shade over the knees, toes, and other sticky-out bits of the figure. This will help to start building up a highlight on your figure.

Currently, the difference between the colours isn’t enormous, but it’s there, and it adds some depth which will give some semblance of colour variation on the final model.
With that, we can move on to those distinctive Silver Templars shoulders.
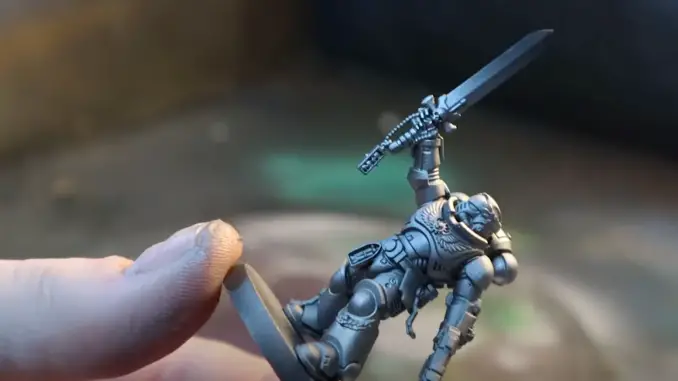
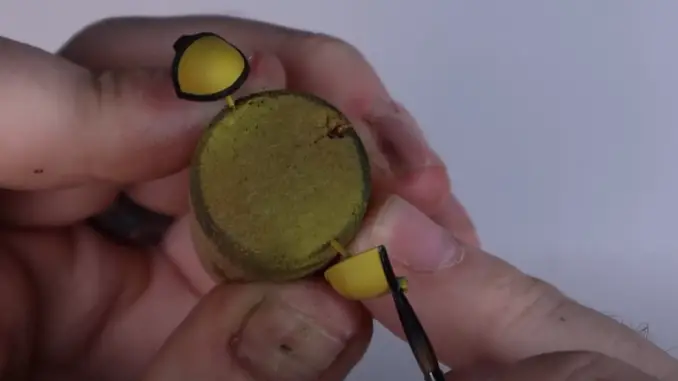
Step 3 – Yellow Shoulders
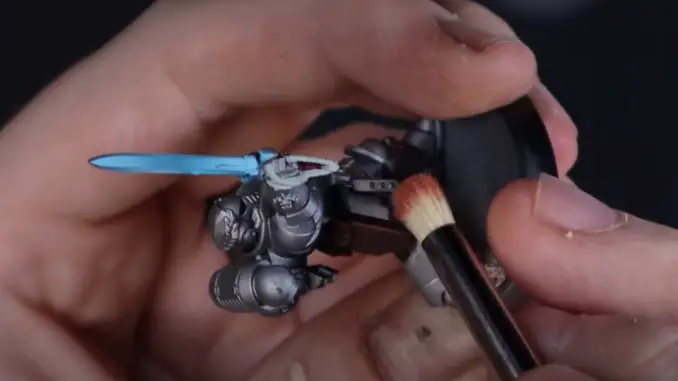
Once you’ve finished with your metallic shades, you will want to paint the shoulder pads of your Space Marine yellow. For this, we used the Pro Acryl Yellow Ochre.
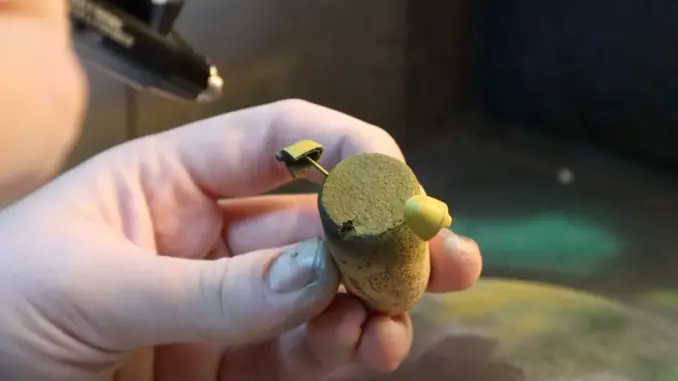
If the shoulder pads on your figure are moulded on, you will want to make sure you cover the rest of your figure with some masking material – I find silly putty works best.
If, however, the shoulder pads on your Space Marines are separate, you can pin them to a handle and airbrush them separately and avoid getting yellow on your metallic colours.
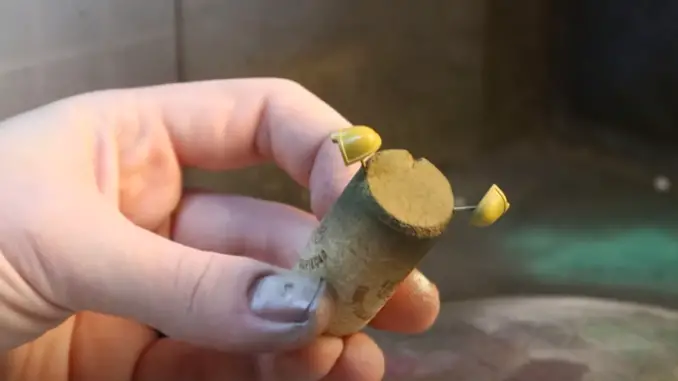
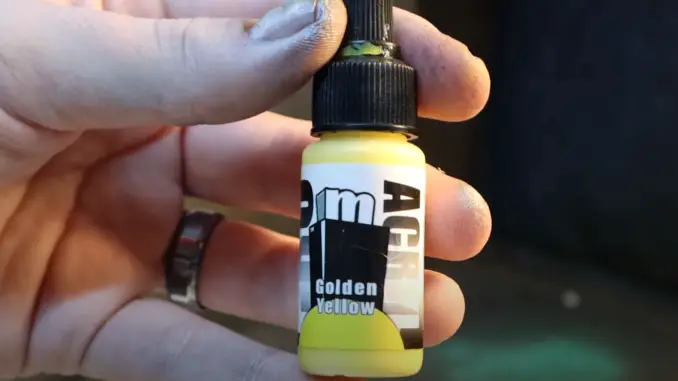
Next, we used Pro Acryl’s Golden Yellow to add some careful highlights to the shoulderpads.
As you can see from the image below, the shoulder pads have been pinned at the same orientation they would be at when attached to the figure, which helps ensure your highlight shade hits the shoulderpads at just the right angle.
Make sure you carefully consider the light source illuminating your model when doing these highlights.
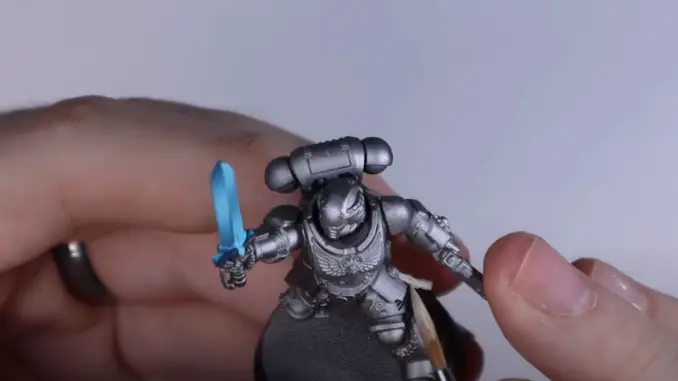
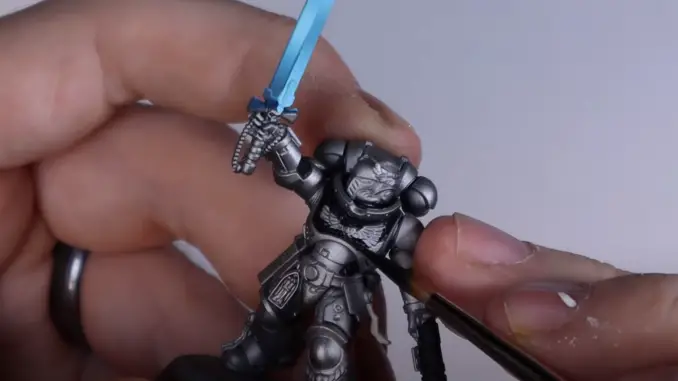
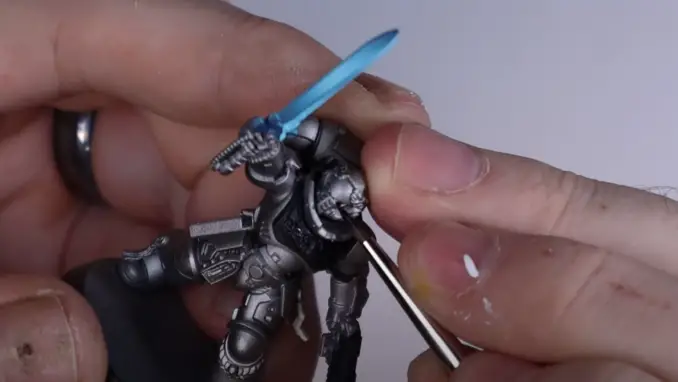
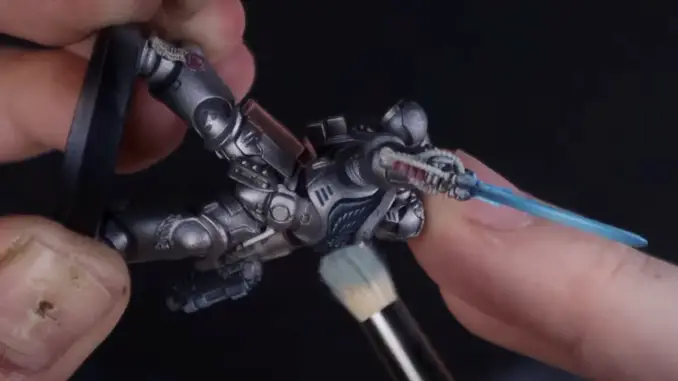
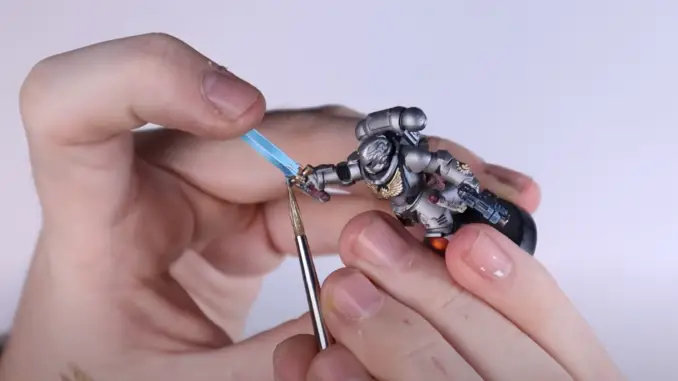
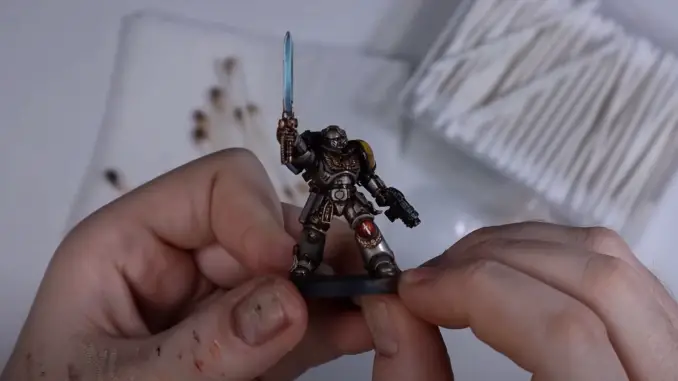
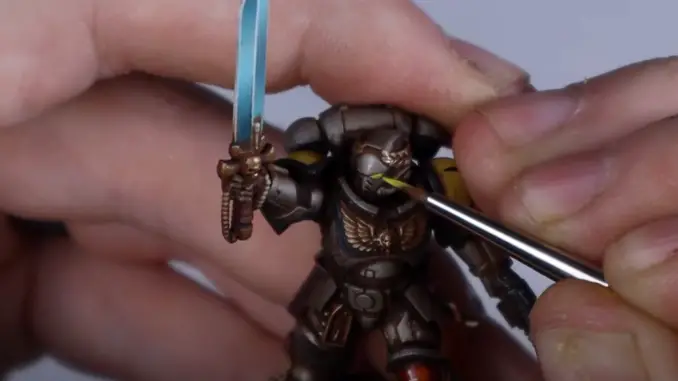
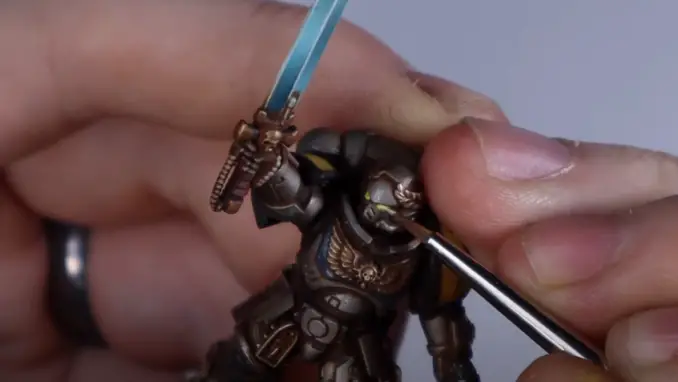
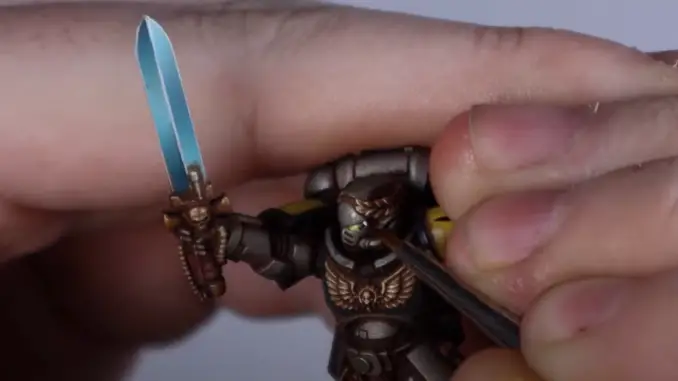
Step 4 – (Optional) The Power Swords
There are quite a few steps involved in painting a Space Marine’s power sword FauxHammer’s way.
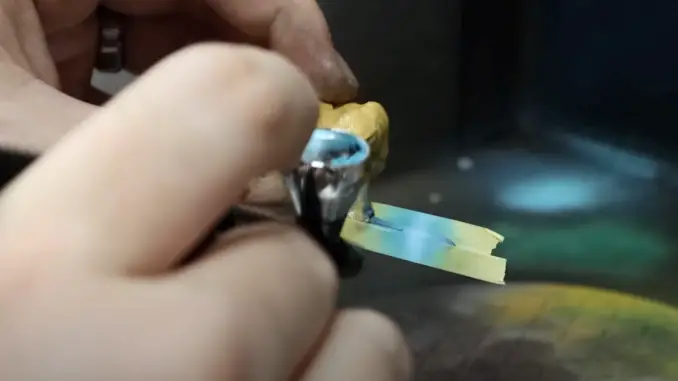
As such, we’ve put together a separate guide and video to coach you through this process. These aren’t relevant to most Silver Templar’s anyway.
Aren’t we nice?
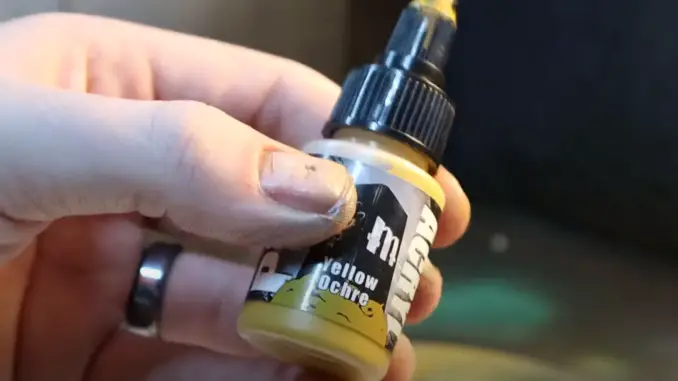
Step 5 – Detail Basing
Setting aside your airbrush for the moment, you’ll have to grab a good parchment colour as we’re going to start working on those purity seals. We used Pro Acryl’s Olive Flesh for this.
We’d usually paint the model from the innermost parts outward (inside out painting) but because we want black text lines on the parchment, and we are using black next, we’ll do this first.
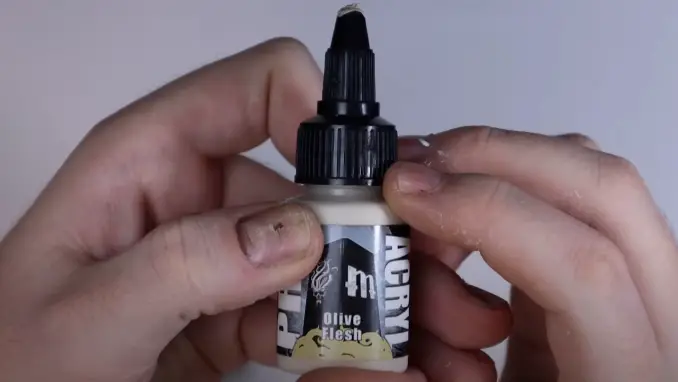
This Pro-Acryl paint makes for a very quick and simple way to paint base coats on models. with the right consistency, you can easily make a smooth layer in just one coat.
Once this is done, grab your black to do some careful lines of text on the seals. For this, we used Pro Acryl’s Coal Black.
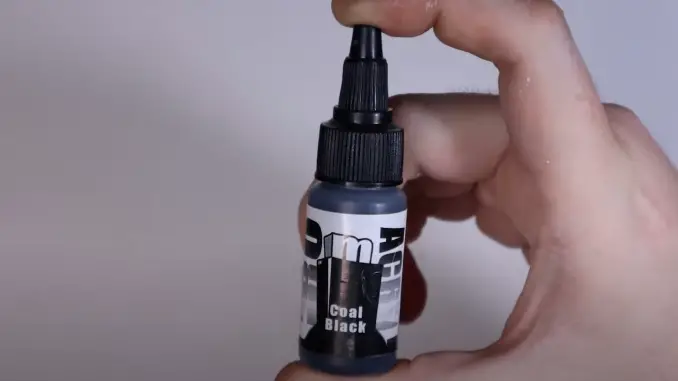
Now is a good time to move on to the black on the rest of your miniature. Use your black to paint up things like the backs of the knees, the insides of the elbows, and the gun casing.
It’s worth remembering that Silver Templars have their iconic black breastplates, so don’t forget to paint this black as well.
Pro Acryl’s Coal Black is a good shade to use, as it isn’t a true black which means it can be shaded down further if you so wish.
You will also want to carefully paint the shoulderpad trims black as well.
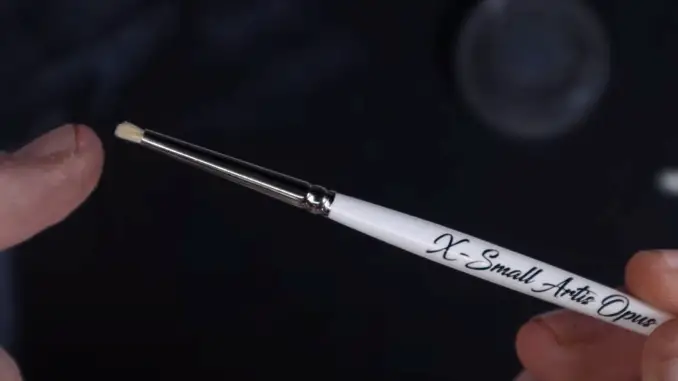
Now is also a good time to start working on the eyes. Carefully, using the very tip of your brush, get a little black onto each eye lens. I used an Artis Opus Series M #0 as the shorter bristles offer so much more control.
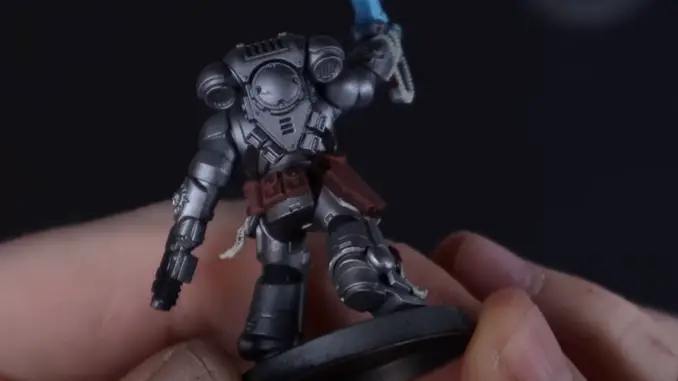
Next, using Pro Acryl’s Mahogany – or any other reddish-brown you may have – paint all the leather details on your miniature, including pouches and holsters.
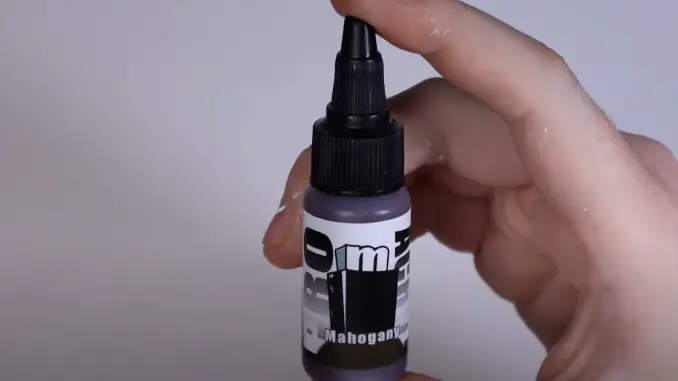
Take care to avoid getting any on the silver parts of the miniature.
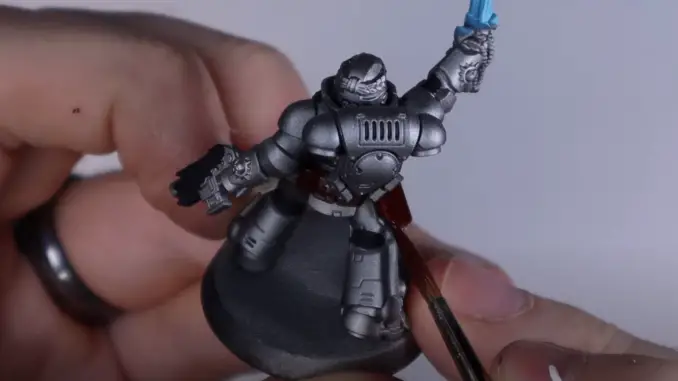
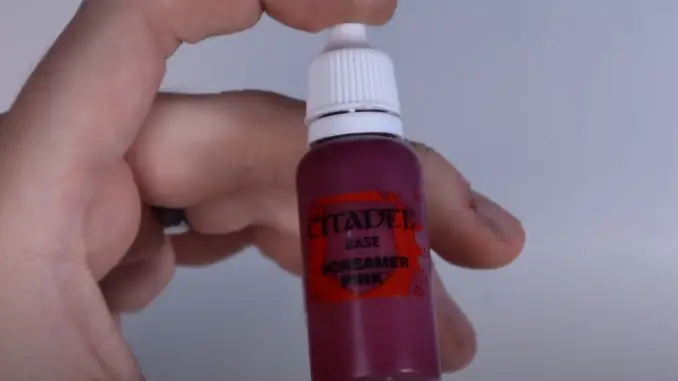
Once your brown is on, take some Screamer Pink and do the wax parts of the purity seals as well as the power sword handle.
I prefer my Pro Actyl colours generally, but they don’t make an equivalent of this colour. You can mix it but for 2 tiny wax seals, it’s not worth the effort and Citadel’s base colours do a close enough job fir painting in one coat.
FauxHammer
Make sure to take your time with this, as you don’t want to get any Screamer Pink on the silver of your Space Marine’s armour.
Screamer Pink is a good colour to use, as it’s still red-ish (warm contrasting the cool armour) a different colour to the reddish-brown leather on the figure, and will be a different colour to the Space Marine’s kneepad which we will be doing in a moment.
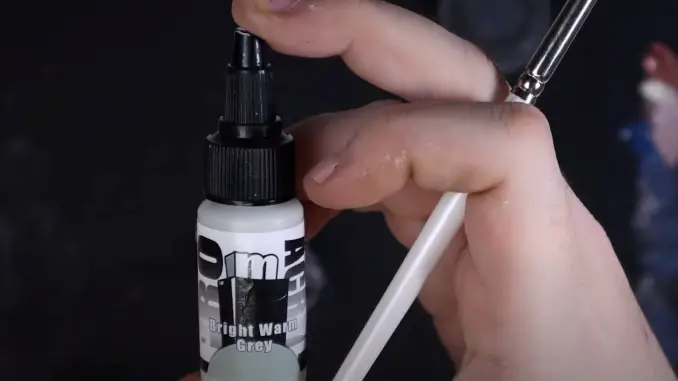
We also used Pro Acryl’s Bright Warm Grey on the rosary beads.

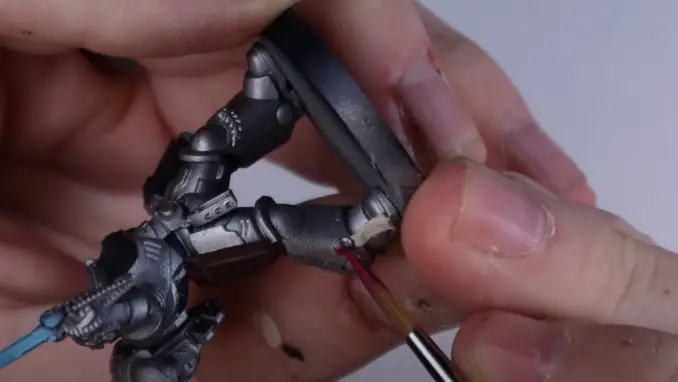
The last basecoat colour we’re going to use is Pro Acryl’s Burnt Red.
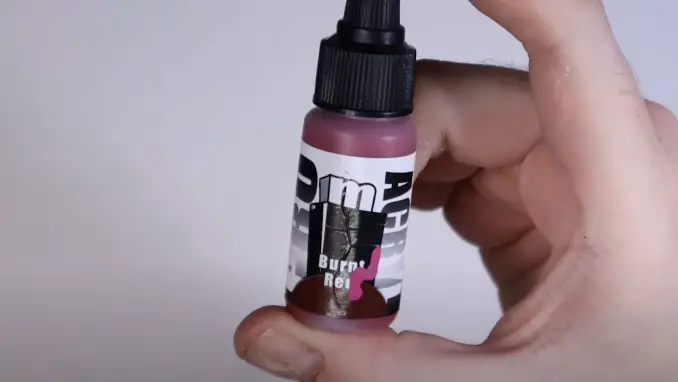
Carefully apply this to the kneepad of the Space Marine.
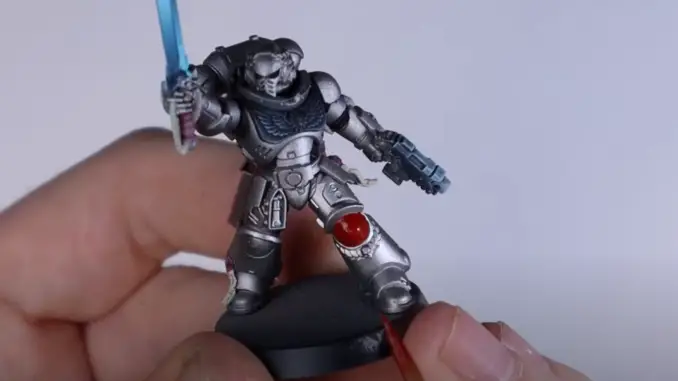
Take care to keep this only on the circle of the kneepad and not get any on the silver of the legplates.
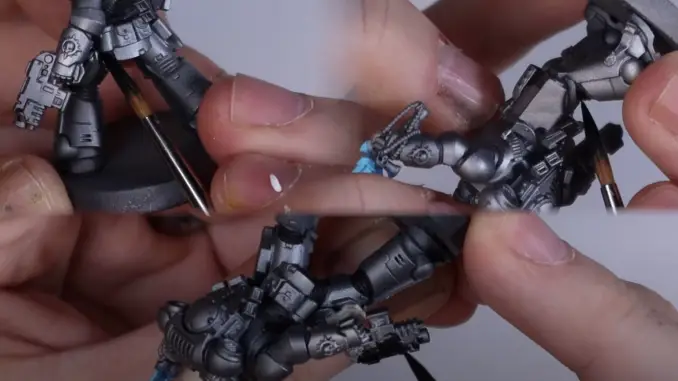
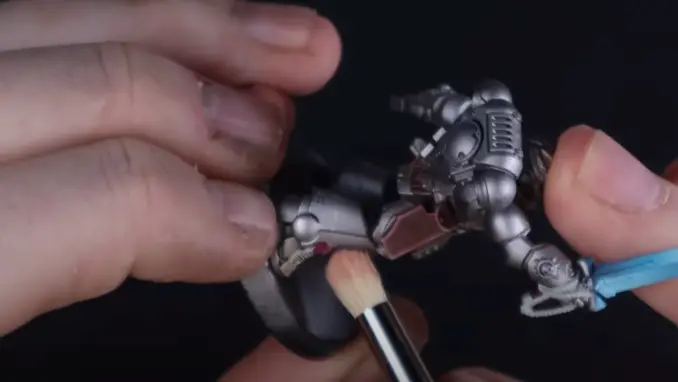
Step 6 – Drybrushing
This is where the speed painting element of this guide really comes into its own, as we will be doing all the edge highlighting on the coloured areas of the miniature using a drybrush. For this part of the guide, we used Artis Opus’ Series D brushes – though any round-headed drybrush you are familiar with will do.
To begin with, we’re going to use Pro Acryl’s Shadow Flesh to highlight all the leather areas on the figure.
Flesh colours are great for painting highlights and distress on leather. couple with the chalkiness of drybrushing
I’ll do a separate video on using and getting the most out of these in the future.
Once you have worked the majority of the paint off the brush, gently go back and forth with the brush over the leather details on your model. This will pick out all the edges and raised areas whilst leaving the surfaces untouched. With these domed drybrushes, you can also twist and swivel the brush for an even spread of paint across edges,
Domed drybrushes are excellent for this, as their shape really helps them pick out those areas for highlight and will give you a very effective result.
The next level of highlighting on the leather areas is done with Pro Acryl’s Ivory.
As you work this into the brush, don’t be afraid to let it mix in slightly with the previous colour order to achieve a smoother transition.
However, in order to ensure this lighter shade does not completely wipe out your previous highlight, make sure you take almost all the paint off your brush – you want only the faintest dusting to be applied to the edges of the leather areas!
As before, gently move the brush back and forth and twist in circles over the leather areas of your miniature.
You can also use this shade to pick out the edges on your purity seals and the handle of the power sword.
Having completed the leather, we can move on to highlighting the black areas. For this, we used Pro Acryl’s Dark Grey Blue. Again to keep the majority of the armour textures cool. For a warmer black you could highlight with a deep brown instead.
As with the leather, carefully move your brush back and forth over the black areas of the miniature, such as the gun case, the edges of the shoulder pads, and, the edges of the black chestplate.
This is a very efficient way of highlighting your miniatures, as the drybrush picks out only the edges. if you watch the video you can see live that all of the black areas were edge highlighted in just 20 seconds!
Next, using Pro Acryl’s Bright Warm Grey and again allowing it to mix in slightly with the Dark Grey Blue, apply another faint drybrush to those black areas.
This time, go a bit heavier on the end of the gun as well as the sides and points of the chest plate (the nippular area), where light would be leaving the model.
This will give you a much more realistic light effect than edge highlighting
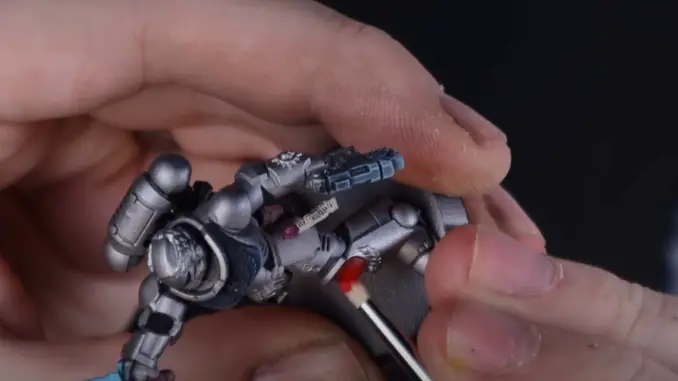
Step 7 – The Knee
For this next step, we are using an x-small Series D drybrush, as we only want to focus on one particular area of the model: the kneepad we painted red earlier.
For the first step of this highlight, we used Pro Acryl’s Bold Pyrrole Red
Very carefully apply a tiny amount of water and small amount of colour to the end of the drybrush. Work it off, then gently dab the red on to the middle of the kneepad.
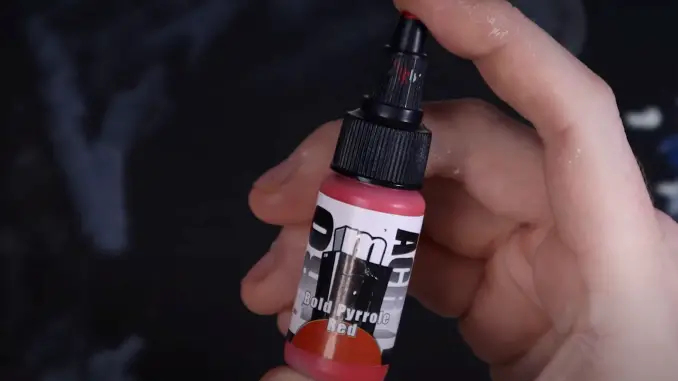
You will need to be very careful here, and make sure you use only light touches with the brush so as not to splurge too much of the colour onto your figure.
You are essentially dabbing it on and with a dabbing and twisting motion blend it out into the darker red colour.
With very little effort, you’ll find yourself building up a nice layer of highlight.
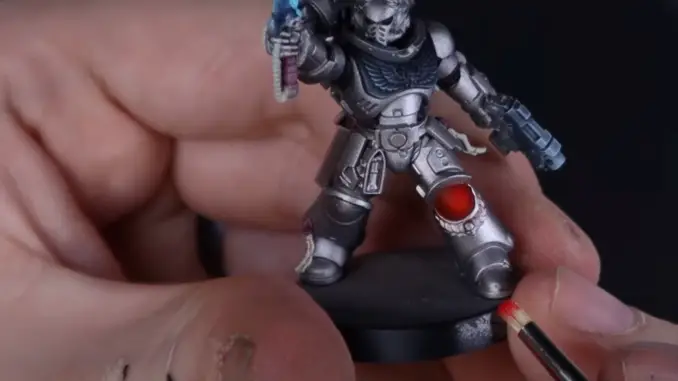
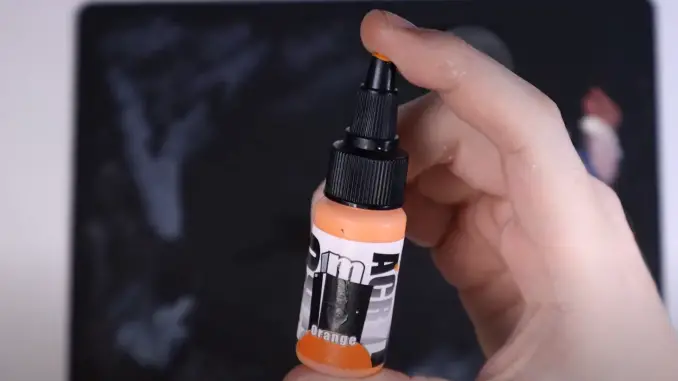
After you’re satisfied with the covering of your red shade, you’ll need an orange for the finer highlight. For this, we use Pro Acryl’s Orange.
Very gently dab on a small amount of paint on the highlighted part of the kneepad.
As the paint starts to dry, you can begin to smoosh the brush a little harder against the kneepad in order to begin building up that all important gradient effect.
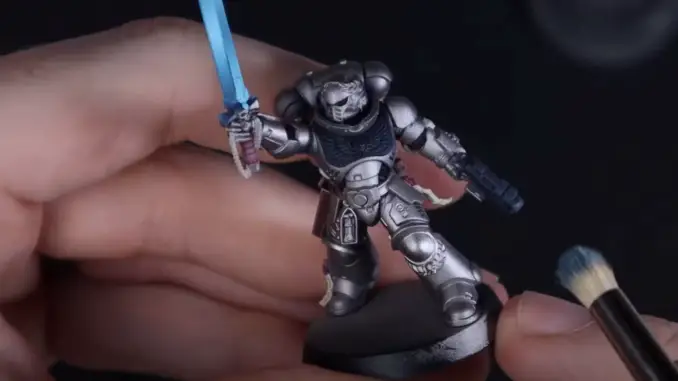
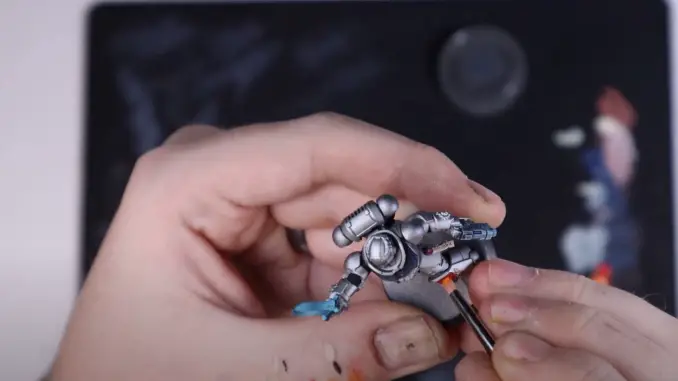
Next, it’s on to metallics. Take a moment to change your water and clean your brushes.
Step 8 – Metallic Paints
Because of the warmth in the armour – that blue tone we mentioned way back in Step 1 of this guide – we’re going to use Vallejo’s Magnesium to change any metal that we want to be different to the armour.
This is the perfect shade to use for things like gun casing and the vents on the power pack.

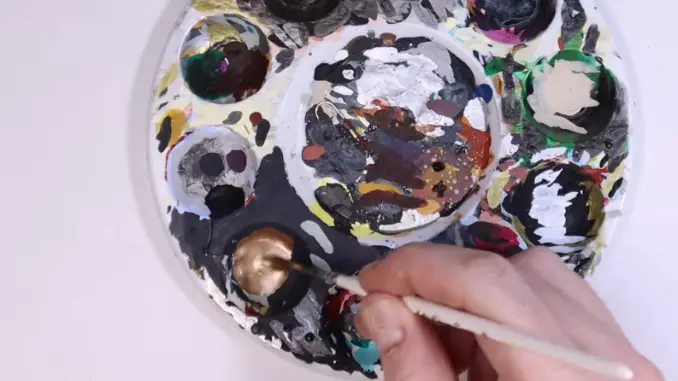
For the gold areas, we mixed Vallejo’s Gold and Copper colours together to make a warmer gold than the original shade. (This range of metals is so easy to apply but these are the only 2 colours in the range which aren’t silvers)
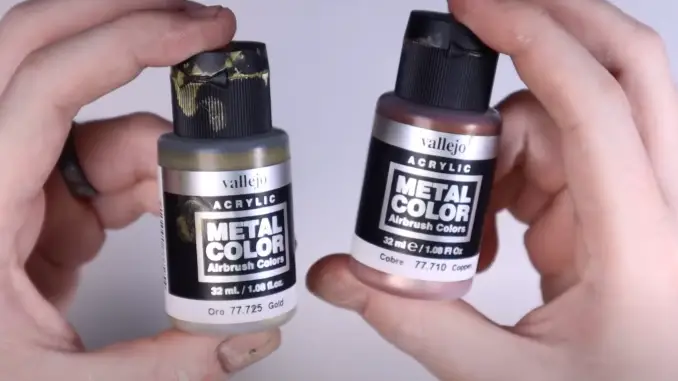
Use 3:2 gold:copper and mix them together on your palette. It’s super easy to measure as these paints come out of the bottles in equal droplets.
Use this warmer gold to paint the aquila and other details on the Space Marine, such as the wreaths on their helmets and leg armour and the hilt of the power sword.
With the metallics out of the way, it’s on to transfers!
Step 9 – Transfers
Next, it’s back to the airbrush desk. We need to apply some gloss varnish to the miniature both to help those colours really stand out, but also to make it easier to apply those all important Silver Templars transfers to the Space Marine’s shoulderpads.
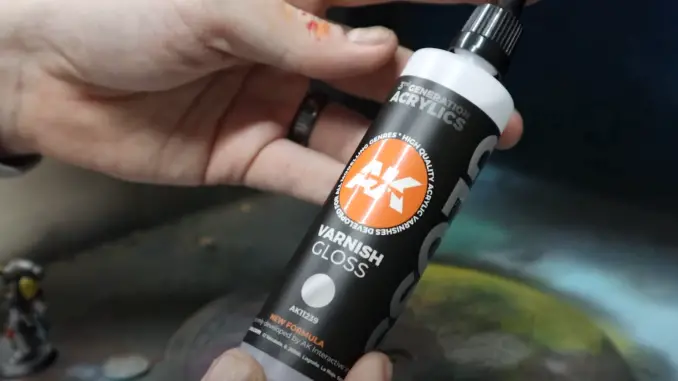
For this, we used AK Interactive’s gloss varnish. Don’t apply this too thickly, or it will crack.
Now, we’re ready for some transfers. If you want to use the official Silver Templars transfer sheets, you may have to do some shopping around – and be prepared to spend quite a lot of money.
Also, be aware that we’ll be using Micro Set and Micro Sol to affix our transfers.

So, having applied some gloss to make your model match the transparent edges of the transfer, apply some Micro Set. Using a paintbrush, carefully remove and apply the transfers of your choosing to the parts of the Space Marine you would like the images to be on.
Once the transfer is in place, use a cotton bud to remove any excess Microset and push the transfer into place. Add pressure and roll (dont pull) over the transfer to expunge any excess trapped beneath it.
Next, apply some Micro Sol over the transfer. This solvent will embed the transfer on the model and ensure it doesn’t come off. Once that’s done and dry, you will want to apply another gloss coat over the transfer.
With the transfers done, it’s on to the penultimate step.
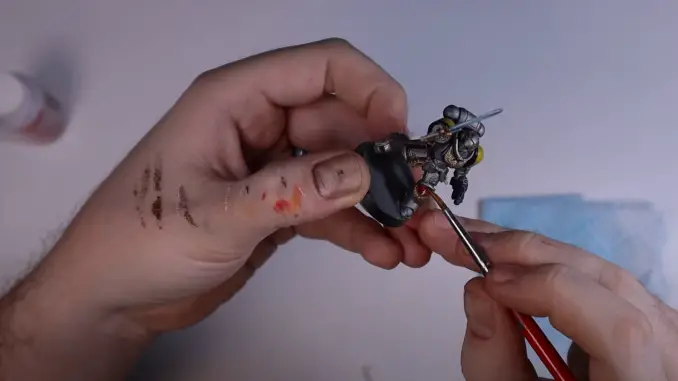
Step 10 – Weathering
For this next step, we used AK Interactive’s Streaking Grime.
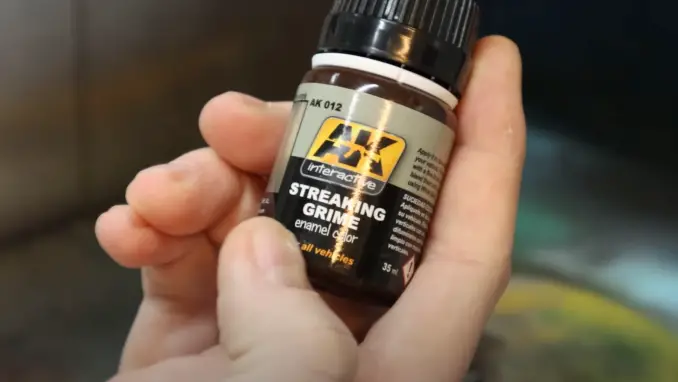
Now – and this may horrify you – you’re going to want to cover the entire model in Streaking Grime.
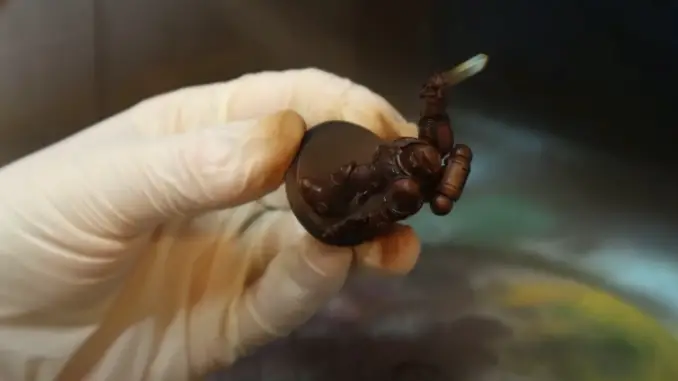
Yes, the whole thing. All your hard work, all those coats, those transfers, those little details. Cover them. Use an airbrush for this bit.
Change your trousers, wipe your tears, sort your makeup, and read on.
Leave the figure to dry. I left it for about an hour, but you can go in 10 minutes later if it’s surface dry. Then come back to it and grab a cotton bud. rub this all over your figure. Even after an hour, this will still drag off the enamel paint on the raised areas leaving grime in the shadows.
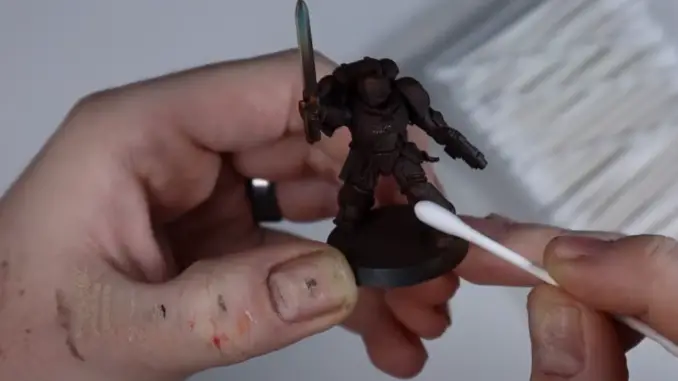
Another way to do this is to dip the cotton bud in some mineral spirit and rub this over the figure.
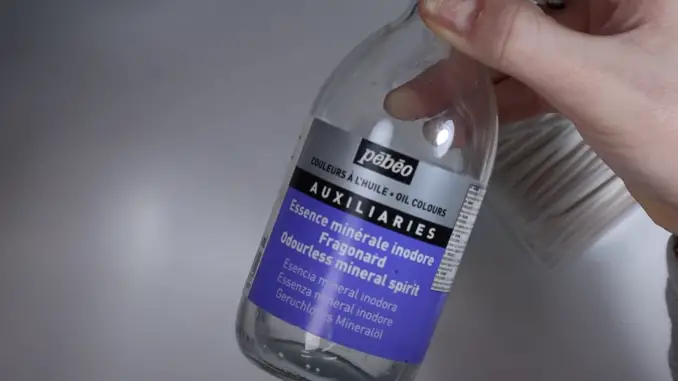
This will strip away the grime easier and reveal your figure underneath. all shaded and weathered, and ready for battle in the grim darkness of the far future. The benefit with this is that it’s faster and will help feather out the edges of the grime. However if you overload with mineral spirit you can wash away the grime from the recesses too, go steady.
Now your heart has stopped pounding and you’ve realised your miniature isn’t, in fact, ruined, we’re almost ready to finish!
Step 11 – Finishing Off
The last thing to do is to paint the eyes of your figure. if you do this earlier, they won’t pop.
Start by using a the Yellow Ochre again in the front 2/3rd of the eye leaving the back corner in black. Then for the front 1/3rd paint this with Golden Gellow
Then, apply a line if Pale Yellow in the centre ,across the Golden yellow.
Next, do a white dot in the back corner of the eye. in the black area. If you have enough control, do 2 dots. A small one at the back and a slightly larger one in front.
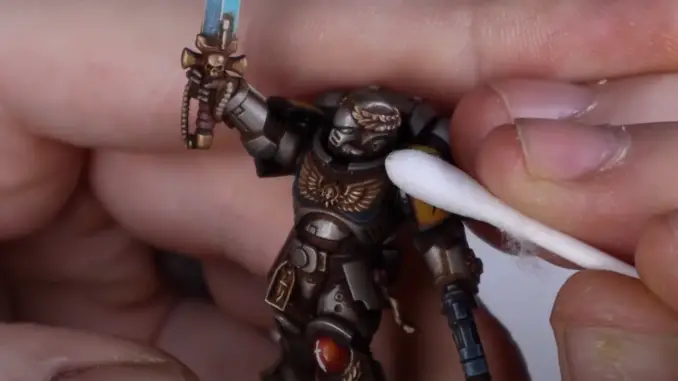
Now, using an oil paint. thin it down to a layer/wash and cover the eye.
Here, we’re using a similar technique as we did with the streaking grime, so don’t panic – your eye will be back soon.

Take off the oil wash with a cotton bud to leave a dark “eyeliner” effect around the eye.
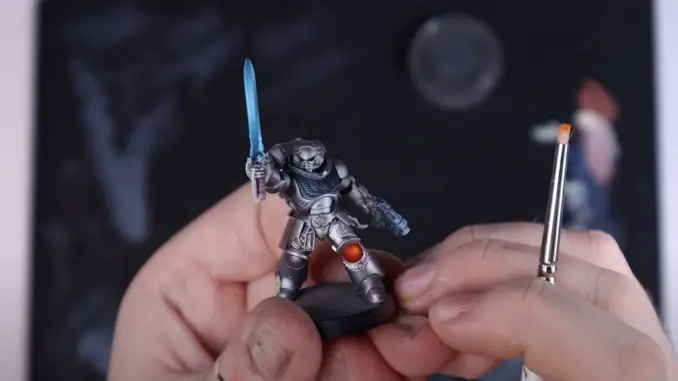
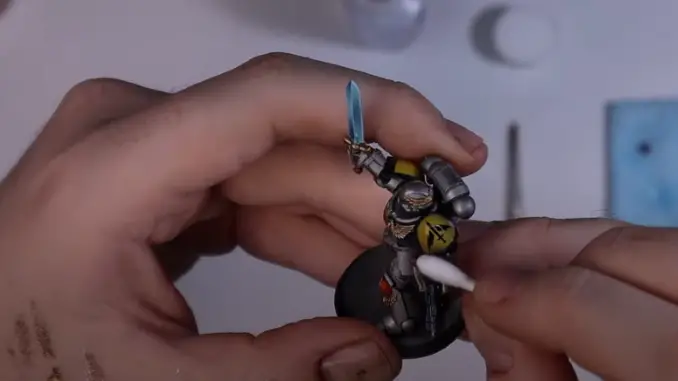
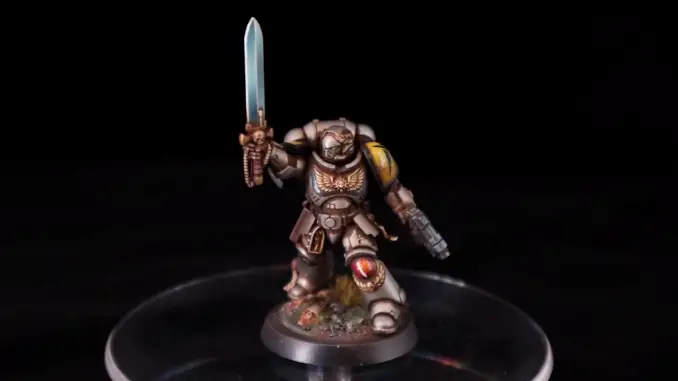
And with that, your model is complete!
How to paint Silver Templars Space Marines for Warhammer 40k – Complete
Having completed every stage in this guide, your finished Silver Templar should look something like this…
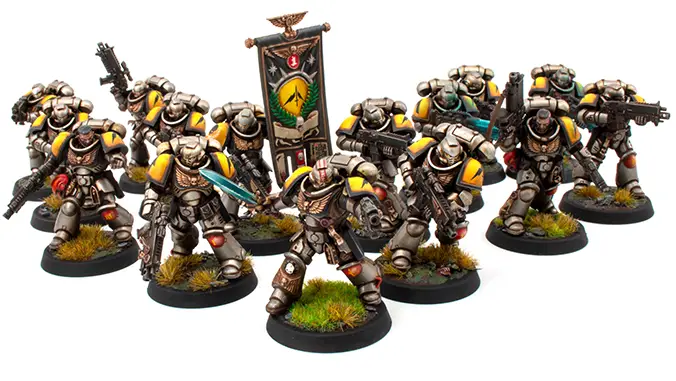
Apply this technique to an entire unit of Space Marines and you’ll soon have a whole army of Silver Templars ready for battle. To see many more examples of these check out the full image gallery on Instagram.
Make sure to check out the accompanying video available on FauxHammer’s YouTube Channel, where you can follow the steps outlined in this guide. Don’t forget to leave and like, comment and subscribe!
Please Note: This site uses affiliate links. Our Affiliate Partners are shown below
(Affiliate links will result in compensation to the site on qualifying purchases)
Click this link & buy your hobby stuff from Element Games for the UK & Europe to support FauxHammer.com – Use Code “FAUX2768” at the checkout for double reward points.
Our Affiliates / Hobby Stores
- UK: Element Games, The Outpost, Wayland Games, Mighty Lancer, Goblin Gaming, Forbidden Planet, Model Scenery Supplies, eBay, Amazon
- US/Canada: MTechCave, GameKastle, eBay (US), eBay (CA), Amazon
- Germany: Taschengelddieb
- Europe: eBay (DE), eBay (FR), eBay (ES), eBay (IT), Amazon
- Australia: eBay, Amazon
- Global: RedGrass Games, Warcolours
- 3D Printers: Phrozen 3D, Elegoo, Anycubic
FauxHammer – Latest Video on YouTube
What did you think of this Tutorial? please let us know in the comments.
If you like what we’re doing here you could really help encourage more content with a share on any social media platform.
Click the share links at the bottom of this screen (or on the left for computers and tablets)
Want to keep updated with the blog? You can subscribe in the sidebar for RSS or by email below
(Sidebar is below the article on Mobile Devices)
Finest breakdown I have ever seen. Thank you so much for the time and the patience that you put into this.
I’m trying to get between the two at least and improve from using the help and guidance you give 👍👍