So, a little distraction from the norm this week. but that’s because my mate bought a 3D printer. and 3D printers are so fucking awesome!
As I work on my next post, this was a lovely little side project intended to “help a bro out”.
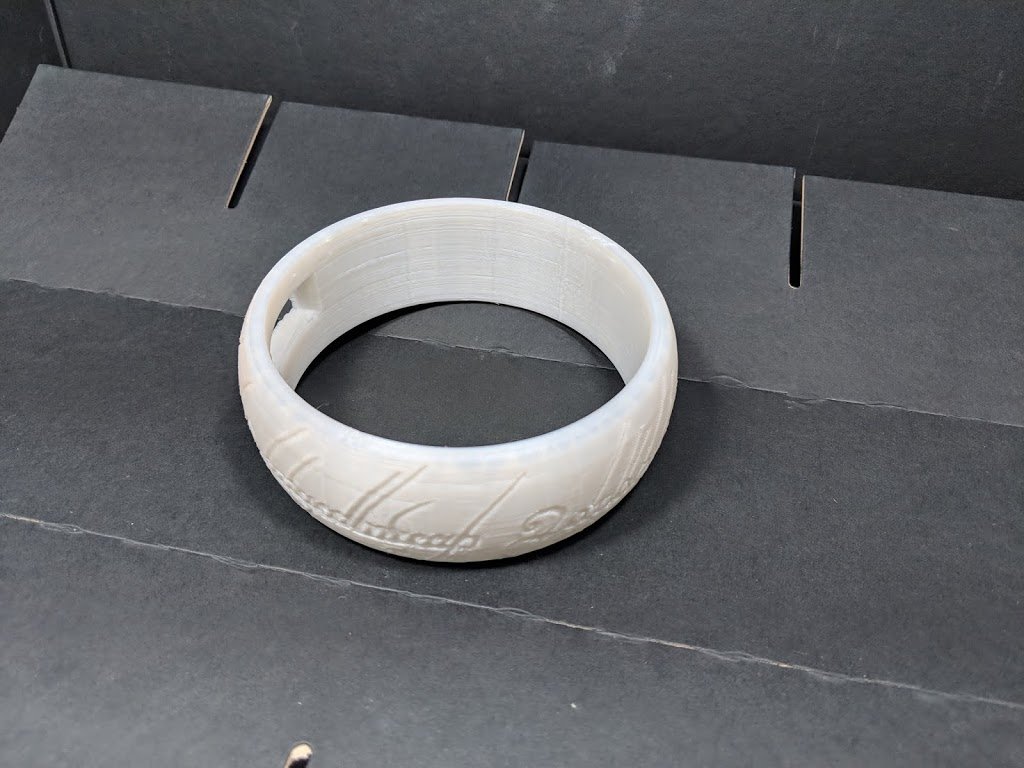
So, the process for this is shown below, apologies for the picture quality, the whole thing was done in a rush.
One Ring to rule them all
I started off by nipping some mail round to my mate’s house and seeing his 3D printer set up in his front window. I watched for a minute (he was out) to see one of these being printed. Next thing I almost shat myself as his wife appeared in the window! I handed her the mail and she showed me a completed one and explained it’s a cover for the Alexa. (Personally, I have Google Home, but my mate has a habit of making bad life choices). Anyway. I begged to take it off her, and she can just tell him she’s lost it.
The above was printed on a Creality CR10s using the stock nozzle and the reel you get in the box. essentially, my mate threw this together and started printing, this was about the 5th thing he printed. so things like the ridges you can see will reduce as he tweaks the settings.
Check out the video below for a review of the Creality CR10 and just what you can accomplish with tweaked settings
One Ring to find them
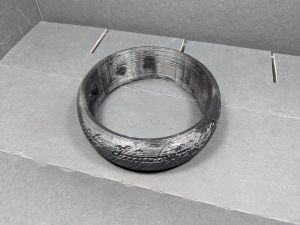
So, I snuck his creation home and swiftly popped out my airbrush to slap down a primer coat of Stynylrez Black Primer. It looks silvery here, but trust me it’s black, that’s just the shine from 2x 2000 lumen daylight bulbs.
One Ring to bring them all
Next, a coat of Retributor Armour, again this was through an Airbrush, I just mixed in some screen-wash to get it to the right consistency, but I was way to heavy with the brush. And I spilled a good amount out of my cup as I was spraying. Again though, this was done in a rush as you’ll see in the next step. It was necessary to do this quick (like, within an hour including equipment set-up as he was coming over and I wanted to surprise him).
And in the darkness……
Next I threw on some matte Reikland Fleshshade, this was done in such a rush the gold hadn’t dried yet and was just mixing in. So I pulled out the hair-dryer before continuing to finish the recesses.
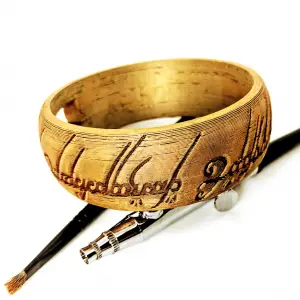
Ooooh, it’s a The One Ring!
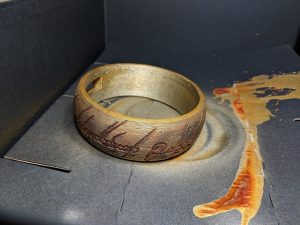
Finally, I tidied up the Retributor Armour by dry-brushing the raised parts (basically the whole ring), then doing the same with Liberator Gold over the raised edges and along the edge of the Elvish text (as you can see this was heavy-handed). But I’m happy with how it came out in such a rush. Whilst there are ridges here due to the 3D printing process, you can hardly see them in the finished article.
I tried sanding it down on the back first but it was cutting into the recessed text and would have taken to long to do. Once ma mate has tweaked the 3D printer settings, I’m sure we’ll get much better results on the next one.
And dude, if you’re reading this, crack on with my R2D2 Google Home Mount. Nobody likes The Lord of The Rings anyway. It’s 9 hours about a bunch of guys returning some jewellery, also there are no lasers in it.
But check the short video below for the final version, in place and in use.
Self-appointed Editor in chief of FauxHammer.com - But I need to thank the team for existing and therefore enabling me to give myself role - without them, I'm just a nerd with a computer and a plastic addiction.
Self-appointed Editor in chief of FauxHammer.com - But I need to thank the team for existing and therefore enabling me to give myself role - without them, I'm just a nerd with a computer and a plastic addiction.