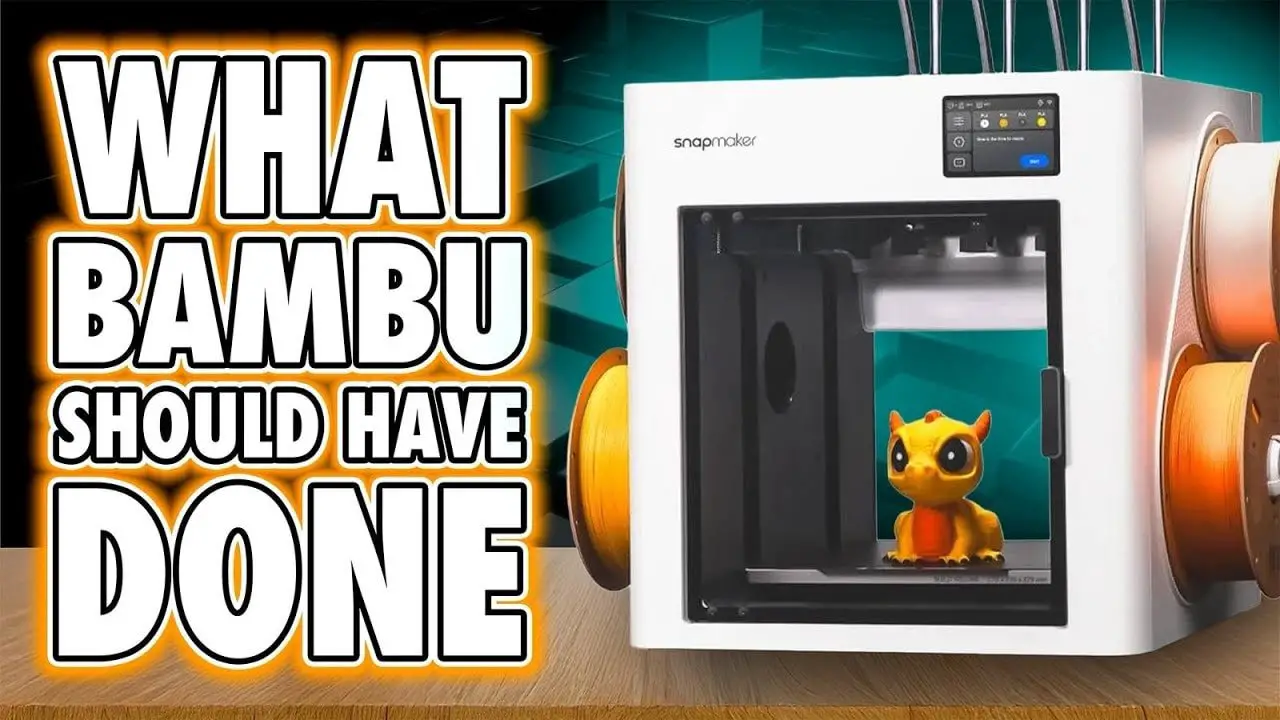
Snapmaker U1 Review – The Multi-Colour Printer That Actually Moves the Market Forward
Last Updated on May 5, 2026 by FauxHammer
It’s not often a 3D printer lands and genuinely feels like it has shifted the conversation. Usually, “game changer” means “this is the new thing and it’s a bit better than the last thing.” The Snapmaker U1 is not that. It is not perfect, it is not fully mature, and it absolutely has weaknesses.
But the Snapmaker U1 does something far more interesting than simply being another competent printer: it attacks one of the biggest frustrations in consumer multi-colour FDM printing and does so in a way that feels practical rather than gimmicky.
That matters.
For years, the promise of easy multi-colour printing has been dragged down by purge waste, long material swaps, awkward feeding systems, and the sort of compromises that make you ask whether painting the thing would have been easier in the first place. The Snapmaker U1 doesn’t solve every problem in desktop printing, but it does solve a very important one. And because of that, it deserves attention.
If you want to check the machine itself, you can find the official product page for the Snapmaker U1 here.
This review covers setup, hardware, software, print quality, TPU testing, weaknesses, and the bigger question: is the Snapmaker U1 just another overhyped launch, or is it actually the printer that forces other brands to respond?
Please Note: This site uses affiliate links. Our Affiliate Partners are shown below
(Affiliate links will result in compensation to the site on qualifying purchases)
Click this link & buy your hobby stuff from Element Games for the UK & Europe to support FauxHammer.com – Use Code “FAUX2768” at the checkout for double reward points.


Our Affiliates / Hobby Stores
- UK: Element Games, The Outpost, Wayland Games, Mighty Lancer, Goblin Gaming, Forbidden Planet, Model Scenery Supplies, eBay, Amazon
- US/Canada: MTechCave, GameKastle, eBay (US), eBay (CA), Amazon
- Germany: Taschengelddieb
- Europe: eBay (DE), eBay (FR), eBay (ES), eBay (IT), Amazon
- Australia: eBay, Amazon
- Global: RedGrass Games, Warcolours
- 3D Printers: Phrozen 3D, Elegoo, Anycubic
FauxHammer – Latest Video on YouTube
Snapmaker U1 – Summary
If you only want the short version, here it is: the Snapmaker U1 is one of the most interesting FDM printer releases in quite a while. Not because it is flawless, but because it delivers four real toolheads in a package that is cleaner, more automated, and more accessible than many people expected.
Its biggest strength is obvious. Instead of relying on a traditional single-nozzle colour-swap system that constantly retracts, reloads, and purges material, the Snapmaker U1 uses four separate heads. That means you avoid the mountain of waste that usually comes with multi-colour printing, and you avoid a lot of the time penalty too.
That alone is enough to make this printer important.
Where it gets even better is that the machine appears to have been designed by people who understand the little annoyances that wear users down: loading filament, wiping nozzles, keeping each tool separate, and guiding setup properly so first prints aren’t a disaster.

That said, let’s not go too far the other way. The Snapmaker U1 is still missing things. At the time of testing, software felt undercooked. There’s no proper enclosure. Material support looked aimed far more at PLA and PETG than engineering-grade filaments. The camera feed was painfully slow. There was only a 0.4mm nozzle available. So this is not the final word in high-end FDM.
But if your main interest is clean, fast, low-waste multi-colour printing for hobby, cosplay, toys, props, functional household prints, or small print-farm output, the Snapmaker U1 makes an extremely strong case for itself.
- Best for: multi-colour FDM printing with minimal waste, PLA/PETG work, hobbyists, makers, and anyone who wants four colours without AMS-style purge pain
- Less ideal for: users needing a mature software ecosystem, fully enclosed high-temp printing, or broader nozzle/material options right now
- Biggest win: four toolheads with very little wasted material
- Biggest risk: whether Snapmaker follows through on software and ecosystem development
Snapmaker U1 – Unboxing and First Setup
The first thing worth praising is that the Snapmaker U1 doesn’t drop you into setup hell. Unboxing is straightforward, and more importantly, it is properly guided. That sounds like faint praise until you remember how many printers still rely on users piecing together half-baked instructions, random QR codes, and a bit of luck.
Snapmaker includes a detailed instruction manual in the box, and that alone puts it ahead of a surprising number of competitors. By the time this machine reaches wider release, a proper setup video would make sense, but the printed guidance already does a good job.
The basic startup process is what you’d expect. Remove all the foam, pull out the transport supports, and take out the screws securing the heatbed during shipping. After that, things become more distinctive because the Snapmaker U1 is not a conventional single-head printer.
You clip in four filament reel holders on the sides, attach the feeder or buffer modules at the back, and connect them according to the numbered labels. This is all sensibly marked, which matters because confusion at this stage would be very easy on a machine with multiple tool paths.
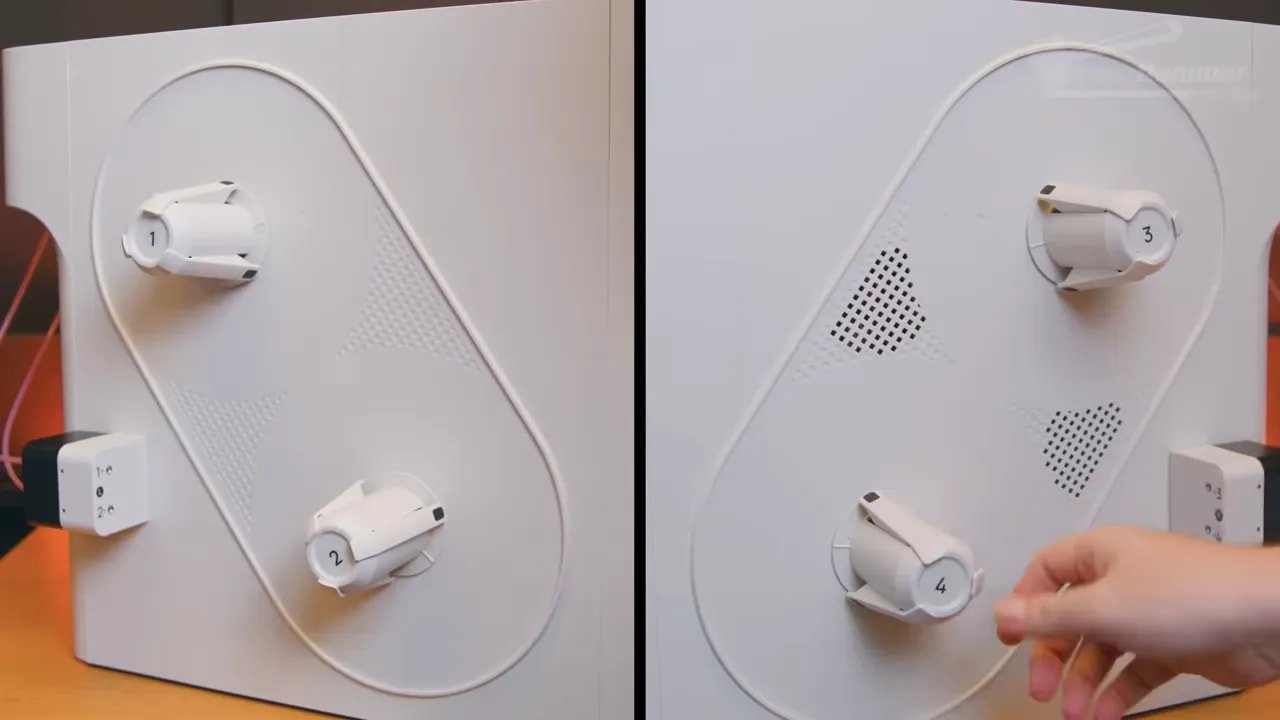
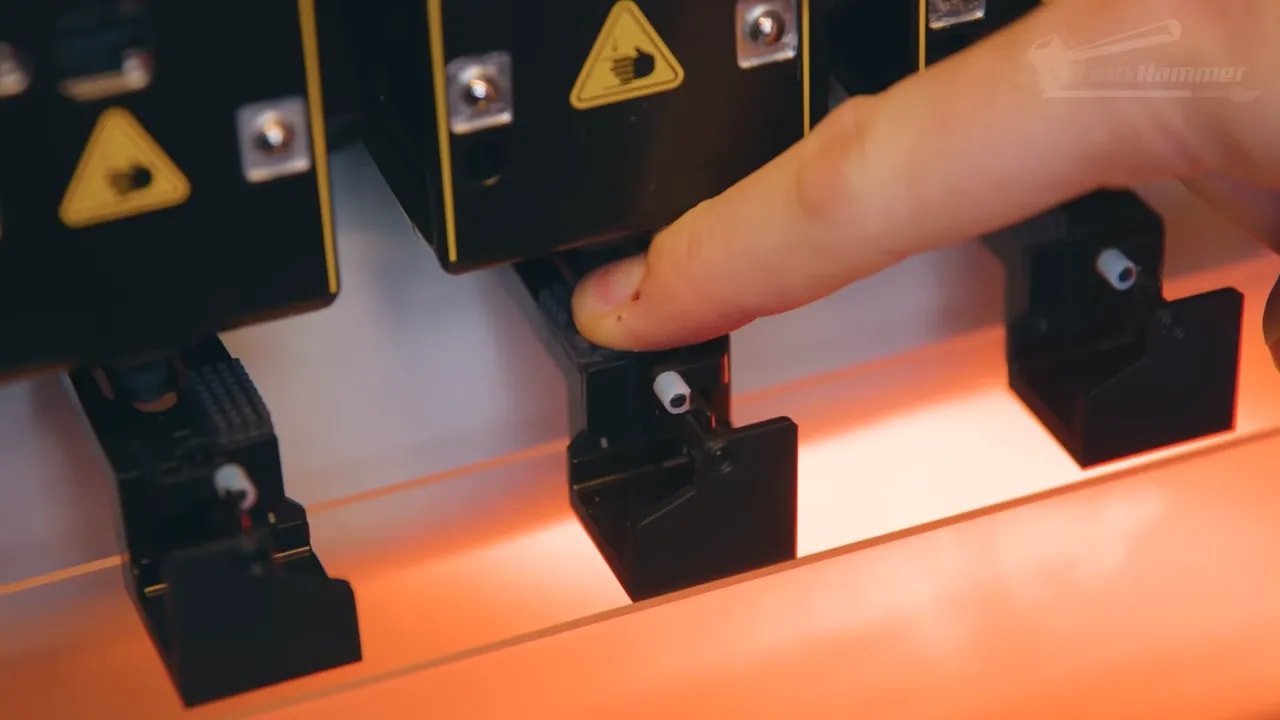
The longest part of setup is fitting the toolheads. It is still straightforward, but you do need to pay attention. The first head mounts differently from the others, and Snapmaker clearly knows that, because it is physically labelled in a way that makes it harder to mess up. That sort of “design around user error” approach is always welcome.
There is one thing to watch out for here: grease on the mounting points. If you smear that onto the pogo pin contacts, you are asking for trouble until it is cleaned properly. It’s not a difficult issue, but it is worth knowing before you start handling everything.
From there, connect the USB-C cables from the body to the heads, route them correctly so they rise over the machine rather than twisting awkwardly to the side, then fit the PTFE tubes from the feeder modules to the rear of the printer, and from the rear into the heads. Interestingly, the upper PTFE tubes are wider than typical. That seems to be a deliberate choice to reduce snags and keep the routing sturdy where those tubes are clipped alongside the USB-C runs.
Overall, setup is longer than a more basic printer, but it never feels needlessly difficult. More importantly, it feels considered.
Snapmaker U1 – Calibration and First Print Experience
Once powered on, the Snapmaker U1 takes over much of the heavy lifting. Calibration is mostly hands-off, and that’s exactly what this sort of machine needs to be. A four-toolhead printer should not require a ritual sacrifice and a weekend of tuning before it can produce something decent.
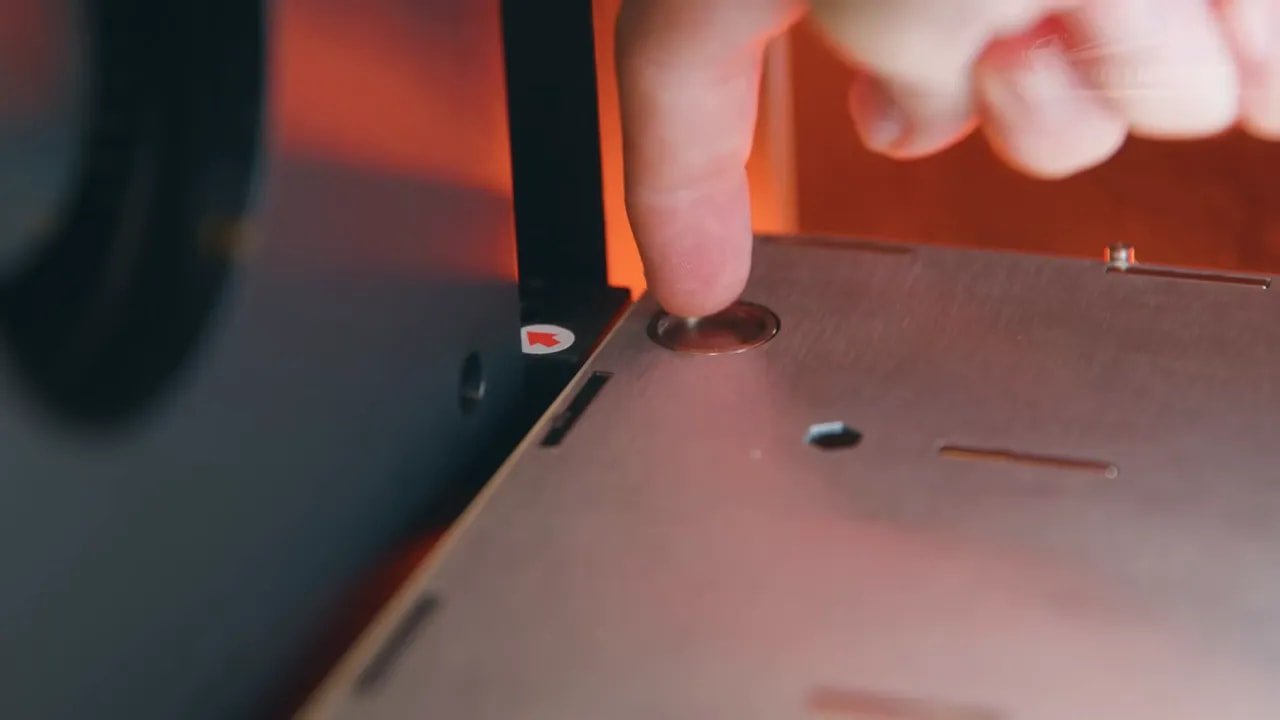
The machine runs through the expected levelling and vibration compensation processes, but the more interesting part is nozzle offset alignment. Here, the printer asks you to remove the build plate so it can use a measuring disc embedded in the heated bed to detect slight height differences between the nozzles. That lets the machine compensate properly when switching tools.
On paper, that sounds like a small thing. In practice, it’s one of those details that separates a promising concept from a usable product.
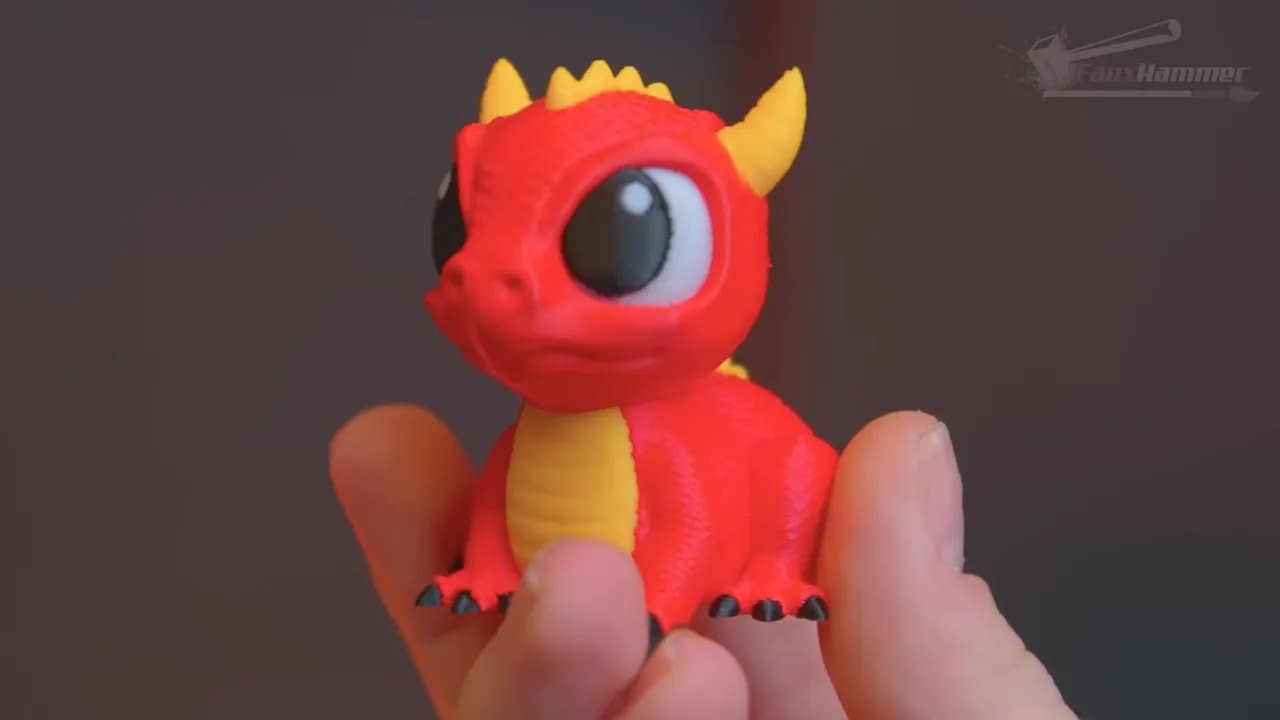
Compared with other multi-tool systems, this setup process comes across as cleaner and less intimidating. Better still, it pays off quickly. Once calibration is complete, the Snapmaker U1 guides you into loading filament and offers an immediate first print: a four-colour dragon. That’s a much stronger first impression than the usual benchmark boat or throwaway calibration cube. It lets the machine show off the very reason it exists.
And crucially, that first print came out impressively well. Not perfect, but impressive. First-layer testing showed some signs of separation, yet nothing dramatic enough to undermine confidence in the printer’s general reliability. For an out-of-the-box result on a machine doing genuine multi-colour work, that’s a strong start.
Snapmaker U1 – Design, Build and Physical Hardware
Externally, the Snapmaker U1 looks clean and professional. It has a fully plastic shell, but this does not make it feel toy-like. It just feels tidy. It isn’t trying too hard to look futuristic, and that is probably for the best. You could put it in a workshop, office, studio, or spare room and it wouldn’t look absurd.
There’s a glass front door, and there’s also a rear viewing window, which is an oddly pleasing touch. It’s not revolutionary, but it does make the machine feel a bit more thought through than average.
That said, there is a gripe here, and it’s a fair one: the front door is not tall enough. When trying to check first-layer adhesion, the upper frame of the door begins almost exactly where you’d want your line of sight. So to properly inspect that critical first layer, you need to look from above or rely on the camera. That is annoying, and with first layers being such a universal point of anxiety in FDM printing, it is not a trivial annoyance either.
Ports are all grouped at the rear right corner. Power and rocker switch are down low, with USB and a four-pin accessory port above. The USB placement is a bit daft, but since many people will mostly use networked workflows anyway, it’s not a deal-breaker. More interesting is what those accessory ports suggest: future expansion.
There are signs all over the machine that Snapmaker intends to build this platform out further. The add-on ports, the space between the central heads, and the strategically placed rubber grommets around the top all point toward future accessories. An enclosure lid, some form of expansion module, perhaps even a more formal external material system later on. Nothing is guaranteed, but the intent seems obvious.
Internally, the Snapmaker U1 uses four magnetically mounted toolheads at the rear, with fan and motion systems in the front body, running on carbon rails. Maximum nozzle temperature is 300°C, and the bed reaches 100°C. Realistically, that means the sweet spot is PLA, PETG, and probably ABS or ASA if enclosure support improves. It is not really a machine to buy for nylon, polycarbonate, or fibre-filled materials in its current state.
That limitation matters because it tells you who the printer is for. The Snapmaker U1 is aimed more at mainstream makers and hobby users than hardcore engineering-material users. That is not a criticism. It is simply where the machine is currently strongest.
Snapmaker U1 – Toolheads, Maintenance and the Real Multi-Colour Difference
The entire point of the Snapmaker U1 is its four-toolhead system, so this is where it either becomes meaningful or falls apart. Thankfully, this is where the machine shines.
Each toolhead contains its own heating, control, and extrusion hardware. Power and data pass through pogo pins, which some people will immediately view as a potential failure point. That concern is valid. Over time, pogo-pin systems wear. The real question is not whether they wear, but whether they wear fast enough to become a practical headache. That can only be answered properly over longer-term use.
For maintenance, each head has a small side window so you can confirm extruder movement. That’s useful when diagnosing clogs, though in testing there were none despite a lot of printing. If you do need to go deeper, the heads are easy to remove for inspection or teardown. Nozzle replacement is not quick-swap, which is a shame, but access is simple enough: remove the rear plastic cover, undo a couple of screws, and you’re in.
One of the best design decisions here is that each nozzle has its own wiper and purge pad. That sounds mundane until you’ve used printers where everything turns into a stringy mess during the first few days. Dedicated wiping and purging per head keeps the machine cleaner, reduces babysitting, and generally makes the entire multi-tool concept feel more mature.
This is also where the Snapmaker U1 pulls ahead of the usual multi-colour systems that depend on a single nozzle and constant colour swaps. Traditional systems can work, and they’ve opened the market up massively, but they usually pay for that flexibility in wasted material and longer print times. The Snapmaker U1 takes a different route: each colour gets its own tool. Fewer full material swaps, less purge waste, less waiting around.
It is such an obvious solution that you end up wondering why more mainstream printers haven’t pushed harder in this direction already.
Snapmaker U1 – Filament Loading, RFID and Waste Handling
Filament management on the Snapmaker U1 is one of the most interesting parts of the machine because it shows both its cleverness and some of its odd compromises.
When you insert filament into the side buffer modules, the printer detects it and feeds it toward the relevant head automatically. That’s a small thing, but it is exactly the kind of small thing that becomes surprisingly annoying on other multi-tool machines when it is missing. Not having to manually poke filament all the way into each head is simply better.
The reel holders use a compression-style mount, which means spool compatibility depends on inner diameter. The practical range is around 52 to 58mm. That won’t suit every spool ever made, but many modern filament brands do now follow similar sizing, so for most users it should be manageable. Even spools that were slightly off still worked, though with some caution.
If you use Snapmaker-branded filament with RFID, the printer automatically recognises the material and applies the right profile. If you use third-party filament, you can manually select material type and colour in the interface, and that data can sync with the slicer. The important detail is that you should define the material before loading into the toolhead, because the printer needs to know what temperatures to use.
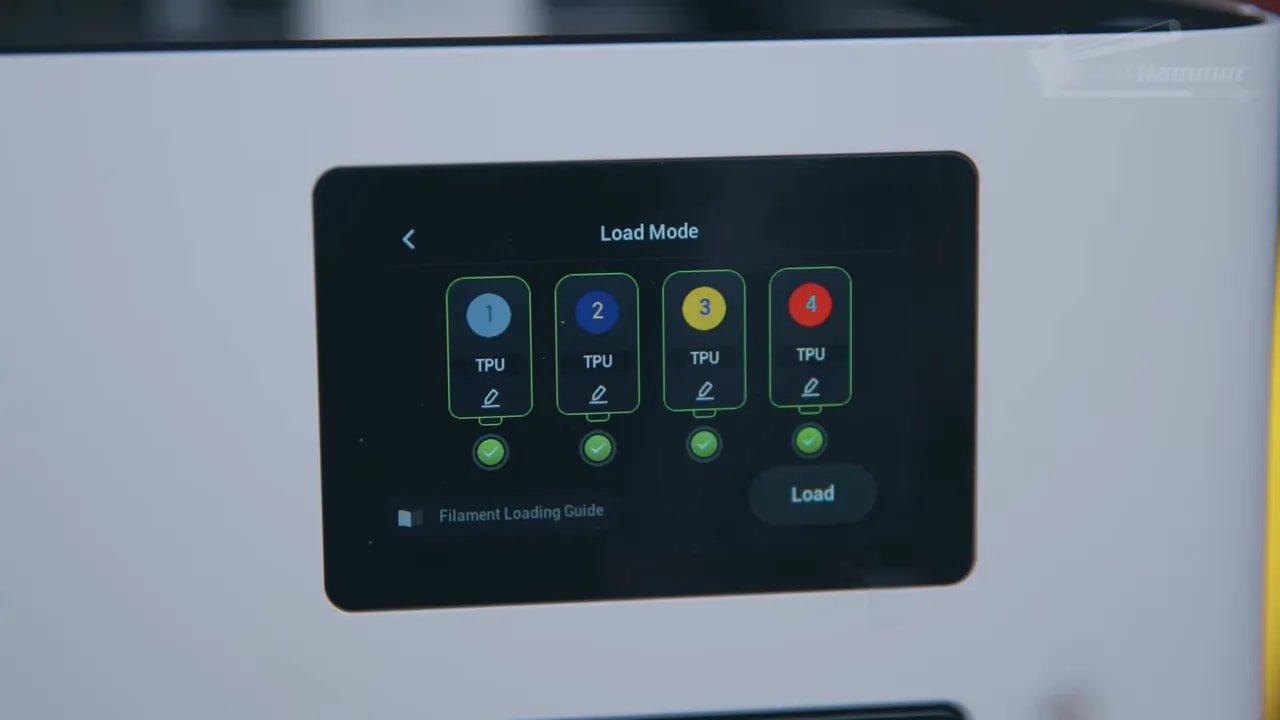
Loading can happen either as part of beginning a print or manually through the filament menu. In both cases, the printer sequentially picks up each head, heats it, feeds material through, purges old material if needed, wipes the nozzle, and moves on to the next tool. It is a satisfying sequence because it feels automated in a way that actually saves effort rather than adding ceremony.
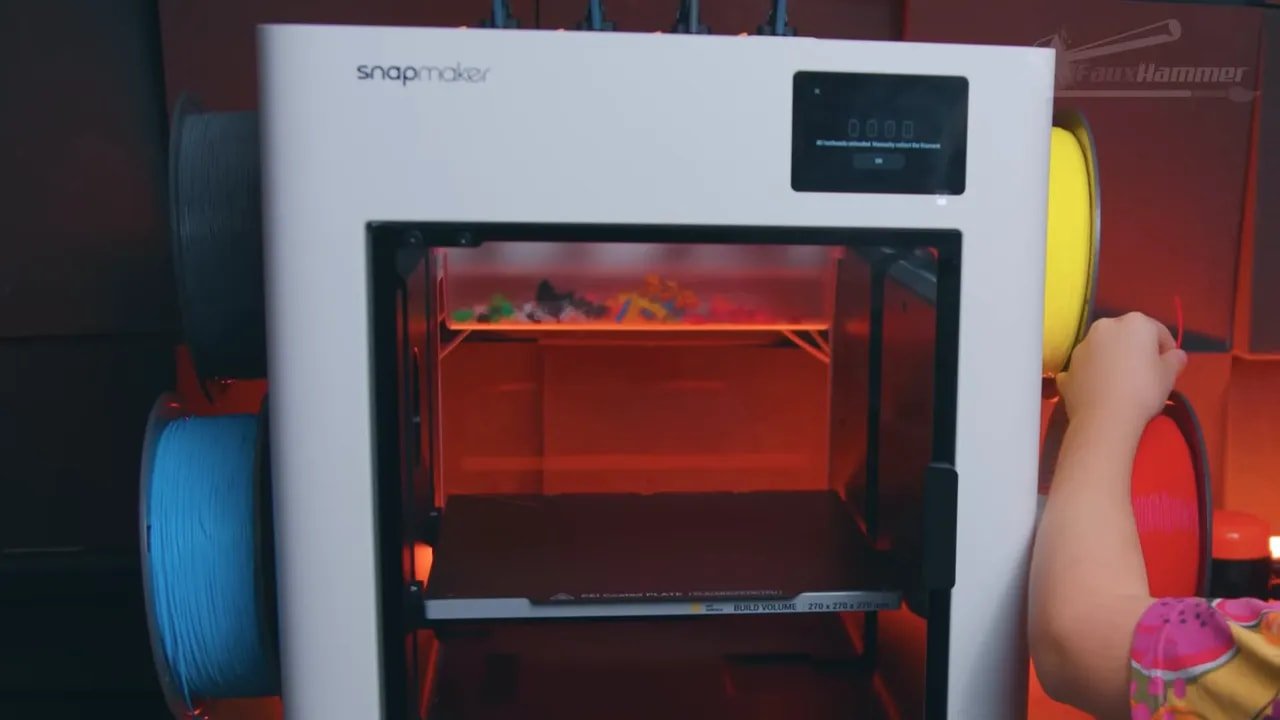
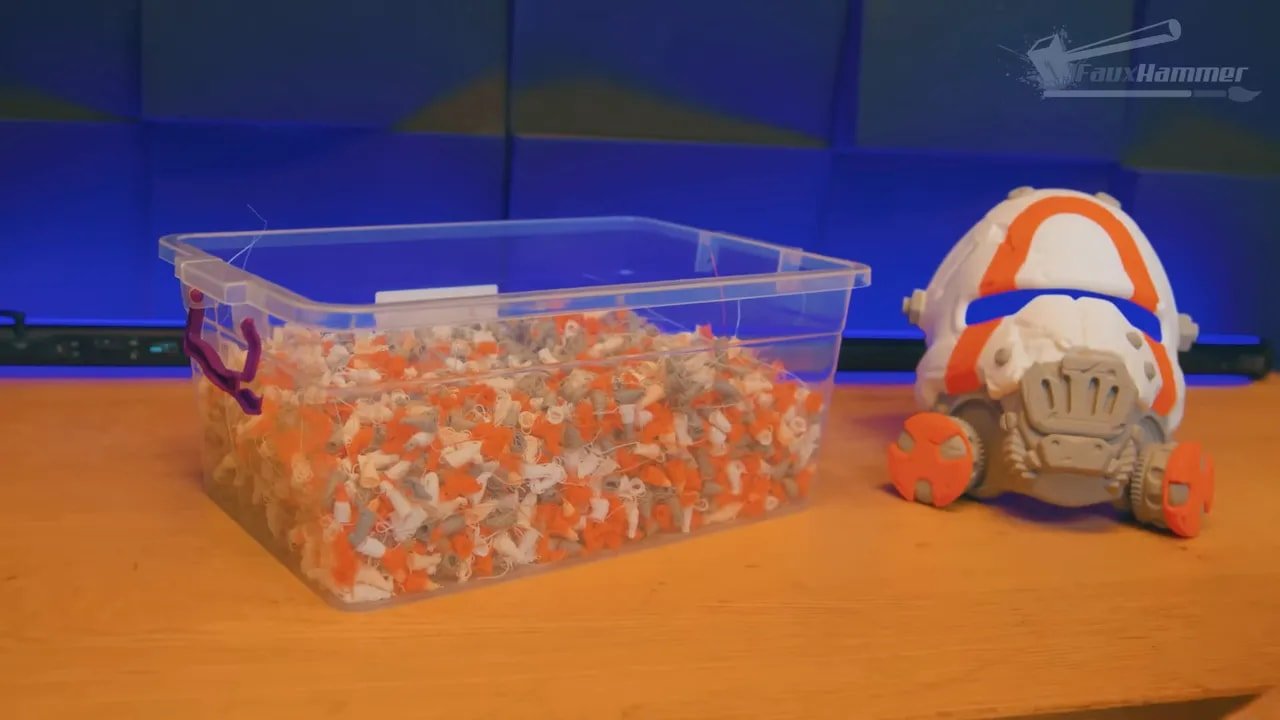
Waste handling is done via a clear purge bucket clipped into the back of the printer. On first glance, that might not seem ideal compared with external waste ejection, and fair enough. But because the Snapmaker U1 only purges when loading new material, rather than on every colour change on every layer, the waste volume is dramatically lower than typical multi-colour systems. In heavy use, the purge bucket still did not need emptying once.
That is the whole point. The printer avoids most of the waste because it avoids the process that creates the waste in the first place.
There is a weakness though. Unloading only retracts filament from the toolhead, not all the way back to the reel. The side reels are not motorised in the way a full AMS-style system is, so they do not rewind material fully on unload. That raises a fair question about why the reel system needed to be quite so elaborate, beyond alignment and RFID functionality.
The other issue is exposure to moisture. Because the reels sit openly on the sides, your filament is left exposed to ambient conditions. There is obvious room here for a future enclosure or filament protection kit, but right now that remains potential, not included reality.
Snapmaker U1 – Build Volume, Bed, Cooling and Core Specs
There are some specs on the Snapmaker U1 that matter far more than a marketing sheet might suggest, and chief among them is the build volume.
You get 270 x 270 x 270mm, which is a very smart size. It is large enough to be noticeably more useful than the now-common 256mm class machines, while still fitting into a similar footprint category. That means the Snapmaker U1 stands out immediately when comparing practical build space without becoming a giant, awkward monster on the bench.
For hobbyists, prop makers, terrain builders, toy printing, and general household use, this size is excellent. Most files available online will fit comfortably, and in many cases you will have room to spare. For a printer focused on multi-colour work, that extra volume makes it more attractive on spec alone.
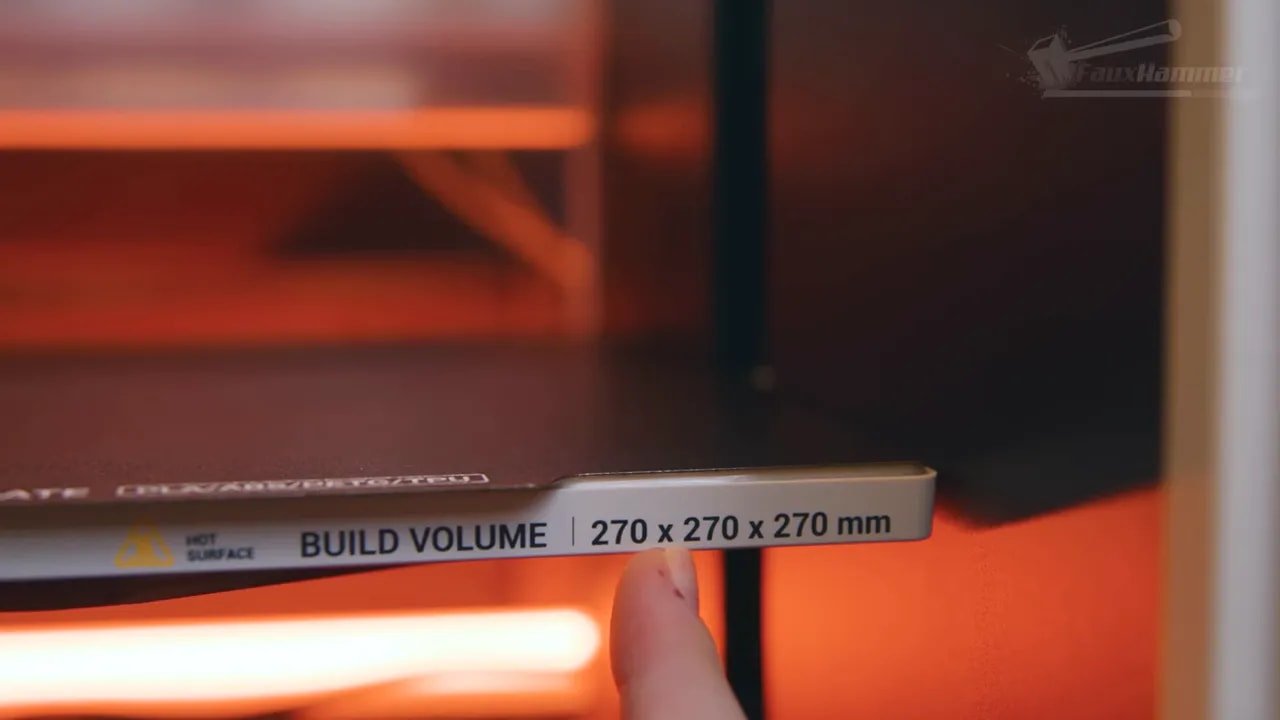
The build plate itself is a highlight. It feels like Snapmaker understood that if you’re going after the same general audience as its closest rivals, simply matching them isn’t enough. Going bigger was the right move.
The rest of the internal hardware appears generally sensible. There is an auxiliary side-mounted part cooling fan on the left. The bed is raised by three lead screws, two on the left and one on the right. That setup works, but maintenance access is not ideal. The side plastics leave limited room for cleaning and relubricating those screws, and there is enough empty-looking space behind the walls that a little more clearance would have been welcome.
Again, not a disaster. Just one of those details that reminds you this is a very good first swing, not the final perfected platform.
Snapmaker U1 – UI, App, Slicer and Software Problems
Hardware gets the Snapmaker U1 into the conversation. Software will determine whether it stays there.
The onboard UI is mounted flat on the front of the machine. A rotating screen would have been more convenient, but the display itself is responsive, easy to read, and sensibly arranged. It doesn’t try to drown you in advanced functions. Instead, it gives you the essentials in a clean, deliberate way.
The phone app follows the same pattern. It handles the basics and little more. That could be fine, but it also reflects the broader truth of this platform at the time of testing: the software ecosystem was not yet fully cooked.
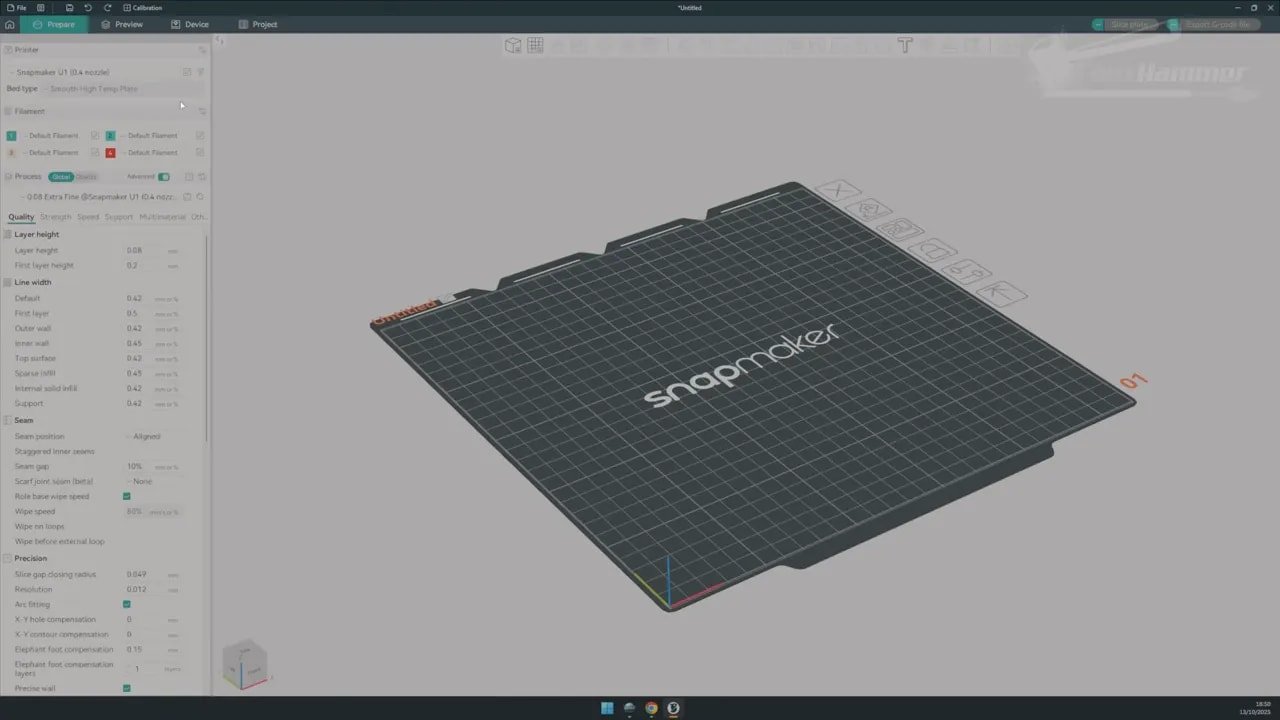
Snapmaker has its own Orca-based slicer, affectionately and quite correctly nicknamed “Snorca.” As a base, that is a good decision. Orca is intuitive, familiar, and strong enough that building from it makes sense. But the Snapmaker flavour of it was, at least during testing, pretty bare bones.
There were also practical issues. Constant logouts from the slicer and app. Sluggish performance. Occasional crashes. That is not acceptable long term, though it is somewhat softened by the fact that nightly builds were already improving some of these issues during the review period.
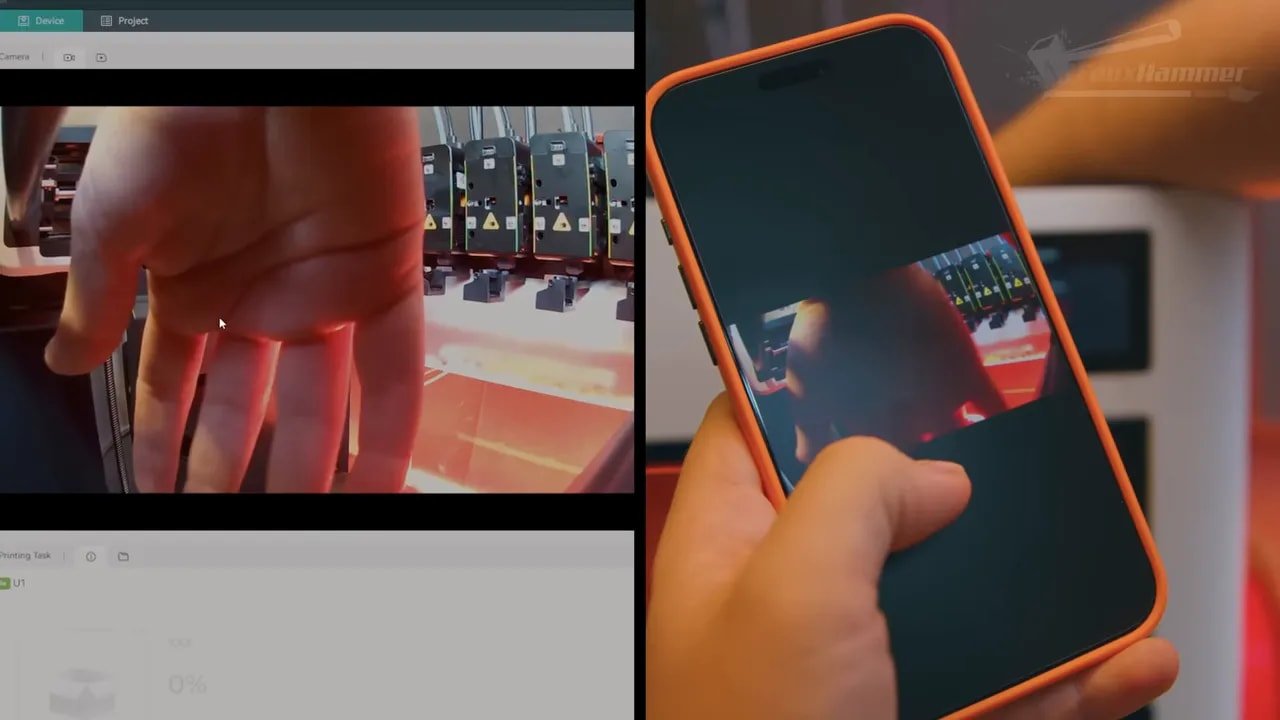
The monitoring camera is another weak point. It is not so much a live feed as a sequence of occasional still images. If you are expecting fluid remote monitoring, lower your expectations immediately. The timelapses, however, were solid, captured at 1080p, and remained visible even in a dark room thanks to the integrated light.
One genuinely positive sign is how Snapmaker appears to be communicating around the product. Historically, good hardware brands earn a lot of goodwill by actively engaging with the community, responding to feedback, and not walling off everything behind a locked-down ecosystem. Snapmaker appears to be making the right noises here. Full Klipper access and profiles already appearing in native Orca, plus stated plans around open sourcing in early 2026, are exactly the sort of moves people want to hear.
Of course, promises are easy. Delivery is what matters. Still, the direction is encouraging.
Snapmaker U1 – Print Quality and Real-World Results
All of this would mean very little if the Snapmaker U1 printed like rubbish. Thankfully, it doesn’t.
In actual use, the machine was somewhere between easy and genuinely delightful. That first four-colour dragon came out looking fantastic and instantly justified the machine’s existence better than any calibration cube ever could.
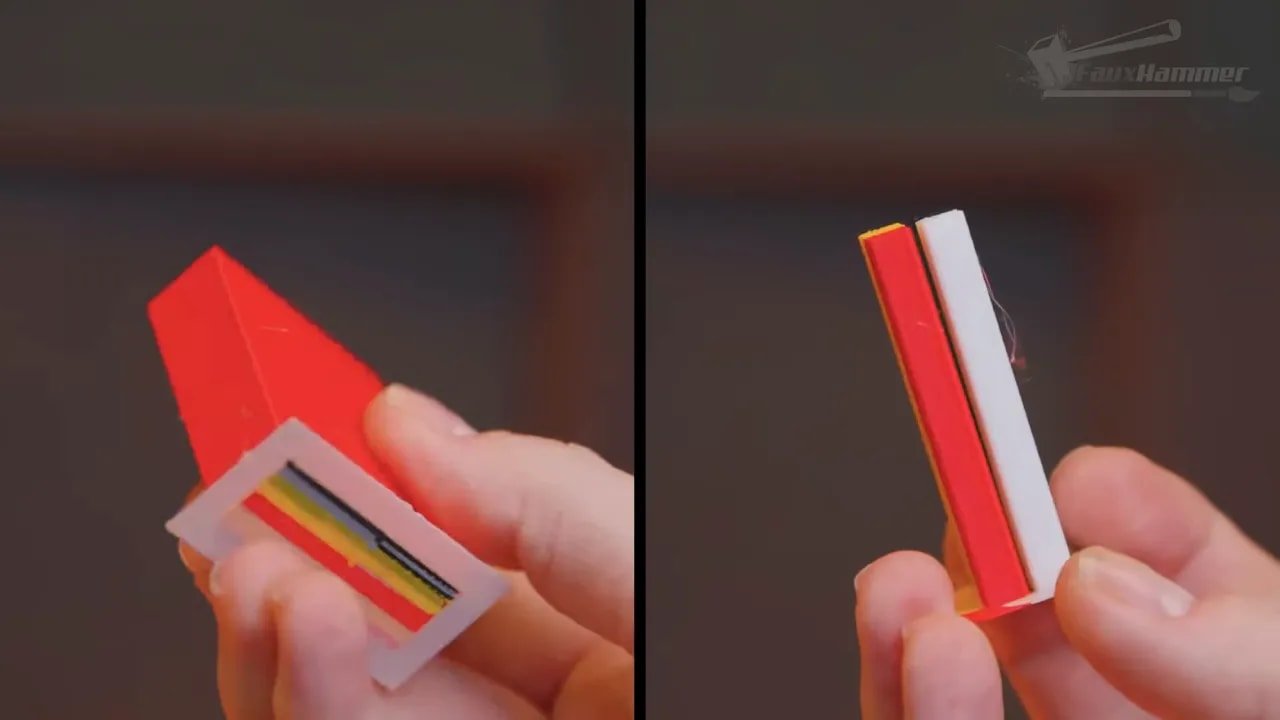
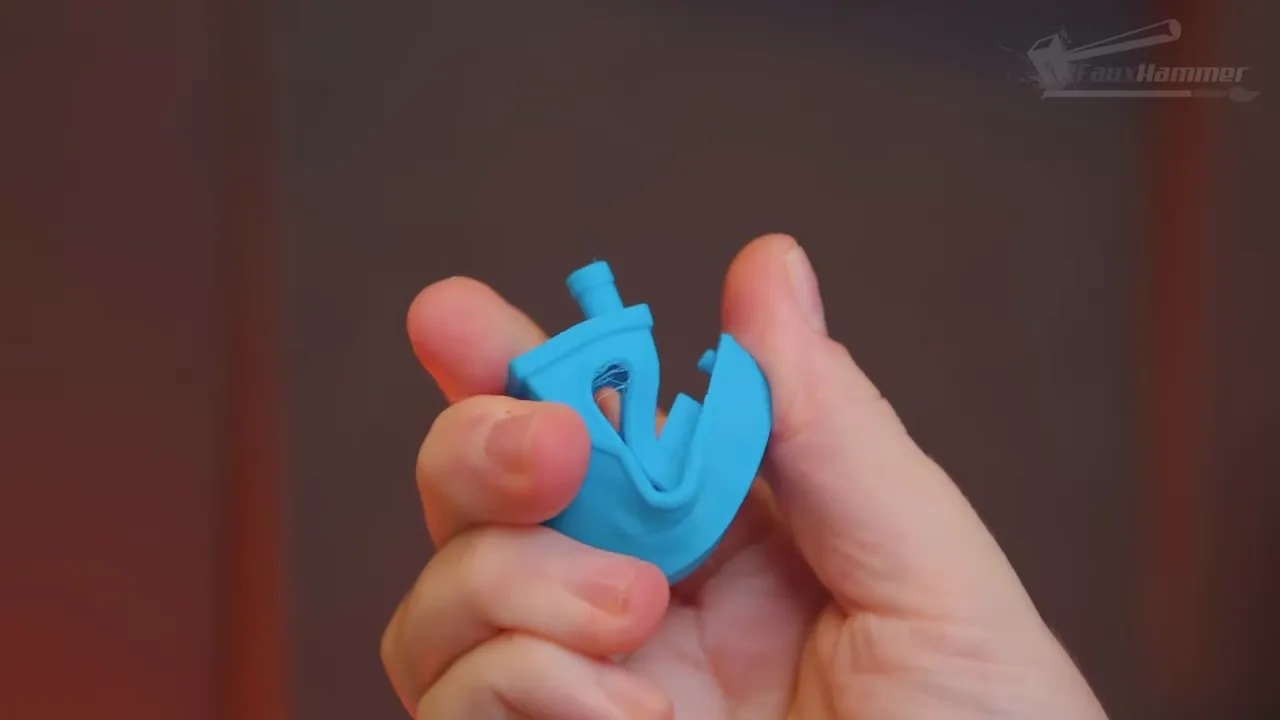
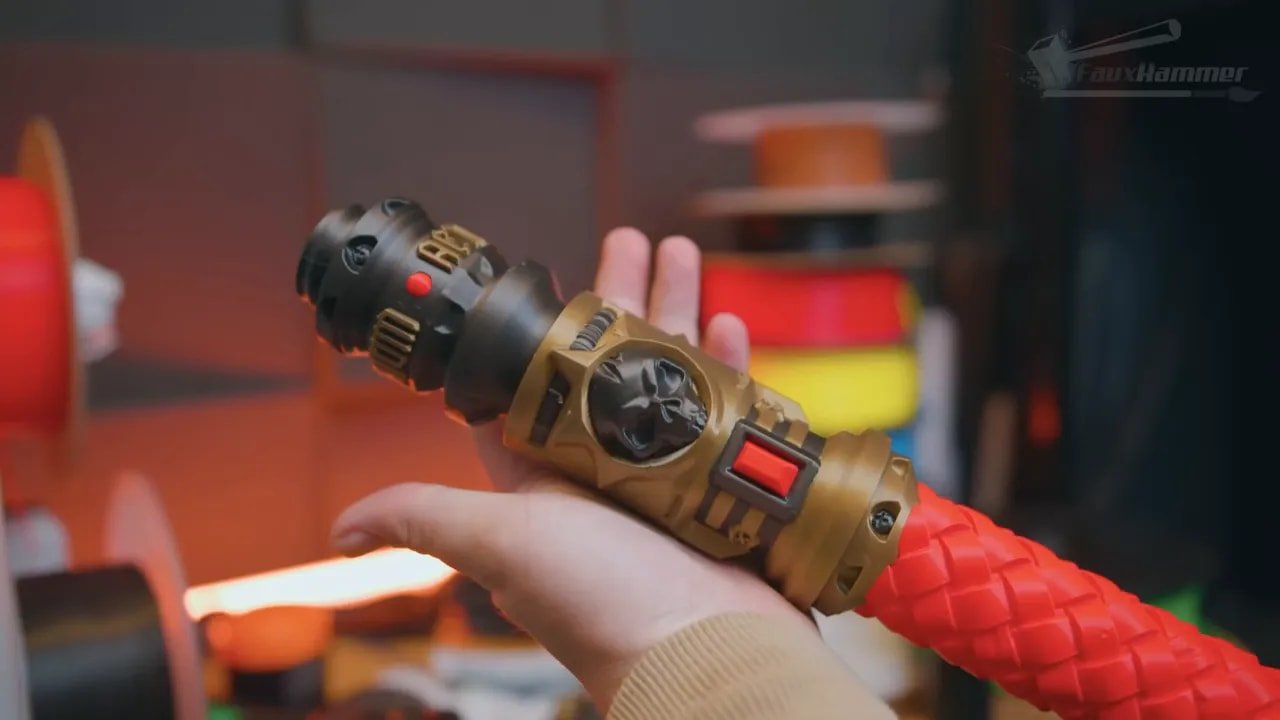
From there, the printer handled a broad mix of projects: toys, keyrings, torture tests, seasonal prints, and larger decorative or practical pieces. A bin-like torture test printed flawlessly. Four tall coloured pillars designed specifically to force every tool to work on every layer also came out flawless. A plate of larger decorative parts, including a full-colour axe model, printed with room to spare on the bed and completed in a timeframe that was not massively longer than if it had been a single-colour job.
That last point is crucial. Multi-colour printing usually brings a serious time penalty. The Snapmaker U1 cuts that penalty down to something between acceptable and negligible for many prints.
This is the first time in a while that a multi-colour FDM machine makes the process feel attractive rather than merely possible. The results looked good, the waste was minimal, and the workflow stayed clean enough that you actually want to use the feature again.
For a lot of people, that is going to be the entire purchasing argument right there.
One of the showcased prints used a model from The Eternal Forge: Epic Battle Arsenal, which is a fitting example of the sort of larger, colourful prop-style output the machine seems very comfortable with.
Snapmaker U1 – TPU Testing and Flexible Filament Performance
Now here’s the bit that pushes the Snapmaker U1 from “interesting” to “properly impressive.” TPU.
Flexible filaments are one of the areas where many colour systems stumble badly. Soft filament does not like being shoved through long PTFE paths and complicated feed systems. So naturally, TPU was worth testing.
First up was 85A TPU, printed using the only available flexible profile at the time, which was for 90A. It did need a bit of manual help during loading, specifically feeding into the toolhead by hand, but once that was done the printer produced a respectable squishy Benchy. There was some stringing, but the result was already promising.
Then came 95A TPU loaded across all four heads to see whether multi-colour flexible printing was genuinely possible. This loaded automatically without intervention, which was a strong sign right away. A GoPro case followed, using all available colours. The first attempt had an awful quality result, but that was not the end of the story.
After reducing nozzle temperature and increasing retraction on tool change, the TPU prints improved dramatically. The final outcome was excellent. Not just “works for TPU,” but genuinely impressive for a machine doing this kind of multi-head colour work.
That opens interesting possibilities. Cases, grips, bumpers, flexible labels, wearable bits, cosplay accents, and all sorts of practical colour-coded soft parts suddenly become viable without the usual level of pain.
For many people, the Snapmaker U1 being good with TPU will matter just as much as its core PLA/PETG multicolour story.
Snapmaker U1 – What It Gets Wrong
No review worth reading should pretend the Snapmaker U1 is perfect. It isn’t.
Some of the problems are small, but still irritating:
- The front door limits first-layer visibility
- The USB port placement is awkward
- The camera feed is painfully slow
- Lead screw maintenance access is tighter than it should be
- The side-mounted filament remains exposed to moisture
Others are more important:
- Software is not fully mature yet
- Only a 0.4mm nozzle was available at the time of testing
- There is no proper enclosure included
- Material support appears centred on PLA and PETG more than engineering filaments
- Long-term durability of pogo-pin tool connections remains an open question
And then there’s the bigger strategic risk: focus. The Snapmaker U1 has a lot of potential, but potential can be squandered very easily if the brand takes its eye off the ball. This machine needs software refinement, ecosystem support, sensible accessories, and ongoing development. If Snapmaker does that, the platform could become a real mainstay. If it doesn’t, the machine risks becoming remembered as a brilliant first impression that didn’t fully capitalise on itself.
Snapmaker U1 – Comparison Thinking and Why It Matters
The reason the Snapmaker U1 feels important is not that it came out of nowhere with impossible technology. It didn’t. It is clearly walking a road that other brands helped pave.
But that doesn’t make it less significant. In fact, it makes its achievement more practical.
One major brand pushed consumer FDM toward faster, more polished, more mainstream-friendly machines. Another proved that multiple toolheads could exist in a desktop ecosystem people actually wanted. What the Snapmaker U1 does is combine lessons from both and focus them on the bit many users actually care about: getting colourful prints with less waste and less waiting.
That is why the machine feels like something the market needed. Not because it reinvented 3D printing from scratch, but because it solved a user problem in an obvious, useful way.
And in doing so, it creates pressure. Suddenly, colour printing doesn’t have to mean huge purge towers and endless filament shuffling. Suddenly, a four-colour limit can be acceptable because the quality-of-life improvements are so large. Suddenly, the consumer FDM race has another serious lead horse rather than a field of copycats following one dominant pattern.
That competition is good for everyone.
Snapmaker U1 – Who Should Buy It?
The Snapmaker U1 is not for every kind of 3D printing user, and that’s perfectly fine. The key is understanding what it is trying to be.
You should seriously consider the Snapmaker U1 if you want:
- Multi-colour FDM prints without huge purge waste
- A cleaner and faster alternative to single-nozzle colour systems
- Strong PLA and PETG output with a generous build volume
- Useful TPU potential, including multi-colour flexible printing
- A more user-friendly route into multi-tool printing
- A machine that already feels compelling, even before future accessories arrive
You may want to wait or look elsewhere if you need:
- A fully mature software stack right now
- Broad nozzle options from day one
- More than 4 colours in one print
- A complete enclosure for hotter chamber conditions (though a lid is coming)
- Regular use of more demanding engineering materials
- Proof of long-term toolhead contact durability before buying in
For hobby users especially, this machine is easy to recommend with caveats. If you print props, toys, organisers, cosplay pieces, household parts, or fun display models, the Snapmaker U1 is extremely compelling. If your priority is colourful output without the usual mountain of wasted filament, it may well be the most attractive option currently available for normal users.
And if your broader hobby leans into miniatures and model making, it’s also worth browsing FauxHammer’s wider guide to the best 3D printers for miniatures for context on where this kind of machine sits among other printing options.
Snapmaker U1 – Final Thoughts
The Snapmaker U1 changed the game, but not in the lazy, overused sense of “this is now the best printer and nothing else matters.” It changed the game because it moved the goalposts.

It took a problem that has been hanging over consumer multi-colour FDM printing for years and addressed it in a way that feels practical, achievable, and immediately valuable. It made multicolour printing feel fun rather than wasteful. It made four colours feel like enough. It made tool changing feel accessible. And it did all of that while offering a larger build volume and a generally polished physical experience.
That doesn’t mean you should ignore the flaws. The software still needs work. The enclosure story is unfinished. The ecosystem is still emerging. Long-term reliability questions remain. But even with all of that, the Snapmaker U1 leaves a strong impression very quickly: this is a machine with real momentum behind it.
If Snapmaker makes the right decisions from here, this could become one of the most important FDM platforms in its category. If they stumble, it will still be remembered as the printer that forced the market to think harder about what multi-colour printing should actually be.

Either way, the Snapmaker U1 matters. And in a market full of machines that mostly iterate sideways, that is a big deal.
Snapmaker U1 – FAQ
Is the Snapmaker U1 better than a typical AMS-style multicolour system?
For many people, yes. The biggest advantage of the Snapmaker U1 is that it uses four separate toolheads, so it avoids much of the waste and time penalty associated with single-nozzle colour-swapping systems. The trade-off is that it is currently limited to four tools and its software ecosystem is still maturing.
How much build volume does the Snapmaker U1 have?
The Snapmaker U1 offers a 270 x 270 x 270mm build volume, which is one of its smartest advantages. It is larger than many similarly sized consumer machines and gives it broader appeal for props, household items, hobby prints, and larger decorative models.
What materials is the Snapmaker U1 best suited for?
Right now, the Snapmaker U1 looks best suited to PLA and PETG, with some potential for ABS and ASA depending on future enclosure support. It is less convincing as a machine for high-temperature engineering materials like nylon or polycarbonate in its current form.
Can the Snapmaker U1 print TPU?
Yes, and surprisingly well. Testing showed that the Snapmaker U1 could handle TPU, including multi-colour TPU, although some tuning was needed to get the best results. That is one of the more impressive parts of the machine’s performance.
Does the Snapmaker U1 waste a lot of filament when printing in multiple colours?
No, and that is one of the main reasons the printer stands out. Because each colour has its own toolhead, the Snapmaker U1 only needs to purge during material loading rather than on every colour change. That dramatically reduces waste compared with most traditional multicolour systems.
Is the Snapmaker U1 beginner friendly?
In hardware terms, yes. Setup, calibration, and filament handling are well guided. The main thing that may frustrate newer users is that the software side still needs refinement. So the Snapmaker U1 is friendly in use, but not yet completely polished as a total ecosystem.
Snapmaker U1 – Additional Resources
If you want more 3D printing content and broader hobby coverage, you can explore the main FauxHammer website for reviews, tutorials, and buying guides.
Please Note: This site uses affiliate links. Our Affiliate Partners are shown below
(Affiliate links will result in compensation to the site on qualifying purchases)
Click this link & buy your hobby stuff from Element Games for the UK & Europe to support FauxHammer.com – Use Code “FAUX2768” at the checkout for double reward points.
Our Affiliates / Hobby Stores
- UK: Element Games, The Outpost, Wayland Games, Mighty Lancer, Goblin Gaming, Forbidden Planet, Model Scenery Supplies, eBay, Amazon
- US/Canada: MTechCave, GameKastle, eBay (US), eBay (CA), Amazon
- Germany: Taschengelddieb
- Europe: eBay (DE), eBay (FR), eBay (ES), eBay (IT), Amazon
- Australia: eBay, Amazon
- Global: RedGrass Games, Warcolours
- 3D Printers: Phrozen 3D, Elegoo, Anycubic