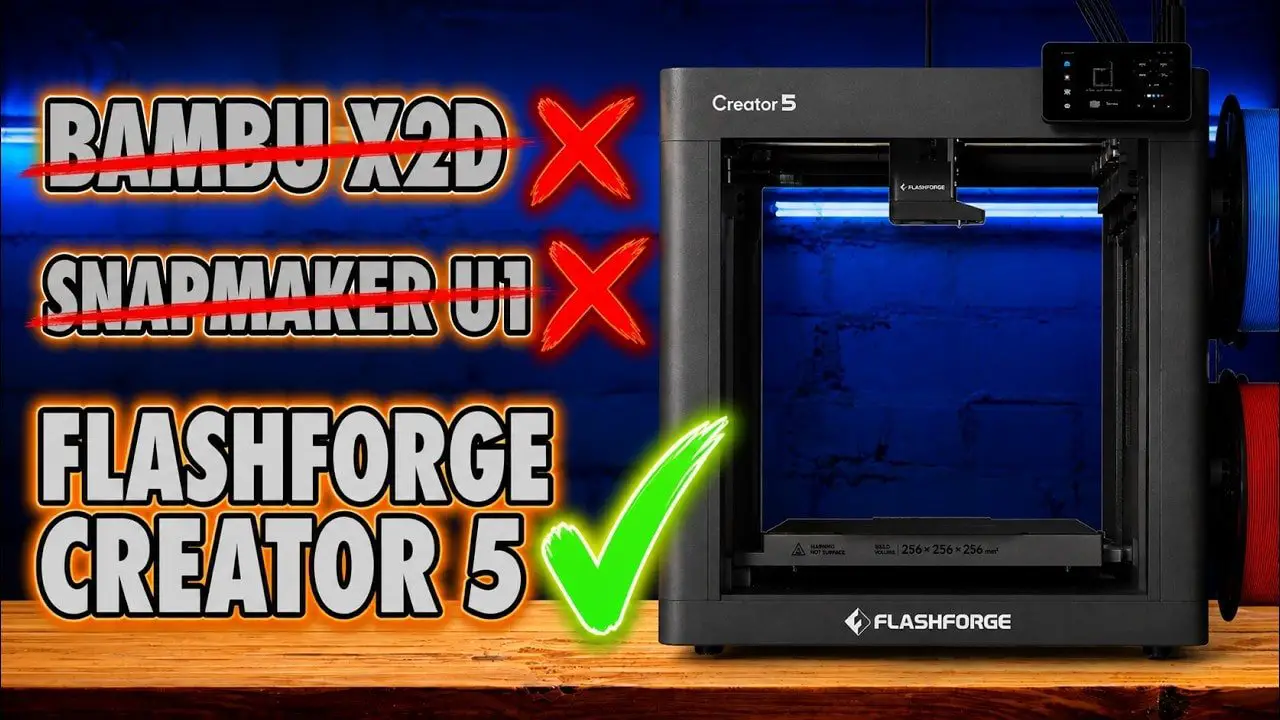
FlashForge Creator 5 Review – Features vs Ecosystem, and Why That Actually Matters
For a long time now, I’ve held the view that the most important part of a 3D printer isn’t just the printer. It’s the ecosystem around it: the slicer, the app, the interface, the workflow, the updates, the way the whole thing fits into your life once the novelty of the hardware wears off. And every time that gets said, people kick off as though software somehow stops mattering the moment a machine can melt plastic.
So the FlashForge Creator 5 is a genuinely interesting machine, because it forces the argument into the open.
Here is a printer that, in raw functional terms, does an awful lot right. It’s a proper four-tool toolchanger. It can print multiple materials in a way that single-nozzle systems simply cannot. It avoids several of the compromises that have become strangely accepted in modern multicolour FDM. It looks to be aggressively priced for what it offers. In a few practical respects, it even beats some of the machines people usually hold up as the gold standard.
And yet, there’s still a gap.
That gap is ecosystem maturity.
So this review isn’t just about whether the FlashForge Creator 5 is good. It is. The more interesting question is whether raw features are enough to make it the best buy, or whether more polish, workflow and platform still decide the winner in the end.
If you want to check current pricing or availability, you can find the machine here: FlashForge Creator 5.
Please Note: This site uses affiliate links. Our Affiliate Partners are shown below
(Affiliate links will result in compensation to the site on qualifying purchases)
Click this link & buy your hobby stuff from Element Games for the UK & Europe to support FauxHammer.com – Use Code “FAUX2768” at the checkout for double reward points.


Our Affiliates / Hobby Stores
- UK: Element Games, The Outpost, Wayland Games, Mighty Lancer, Goblin Gaming, Forbidden Planet, Model Scenery Supplies, eBay, Amazon
- US/Canada: MTechCave, GameKastle, eBay (US), eBay (CA), Amazon
- Germany: Taschengelddieb
- Europe: eBay (DE), eBay (FR), eBay (ES), eBay (IT), Amazon
- Australia: eBay, Amazon
- Global: RedGrass Games, Warcolours
- 3D Printers: Phrozen 3D, Elegoo, Anycubic
FauxHammer – Latest Video on YouTube
FlashForge Creator 5 – Summary
The short version is this: the FlashForge Creator 5 is one of the most compelling value propositions in multicolour FDM right now, especially if what you care about most is capability.
It gives you four independent tools, direct-drive printing on every tool, support for true multi-material use, full-bed access from every nozzle, and fast tool swaps that massively reduce the time penalties usually associated with multi-material printing. It also avoids the huge purge waste of single-nozzle material switchers.
But it is not a polished “lifestyle” printer. It lacks some of the convenience features people now expect. Material loading is manual. There’s no RFID. There’s no external material switcher. Nozzles are not quick-swap. The interface is fine rather than impressive. The software works, but mostly because it leans on Orca-style familiarity rather than doing anything especially smart itself.
So if your priority is functionality, the FlashForge Creator 5 is very difficult to ignore. If your priority is a refined platform with a stronger software ecosystem(bascillay if your priority is Bambu), the decision becomes less straightforward.
That doesn’t make this machine a miss. Quite the opposite. It makes it one of the most important FDM releases in this category, because i think it proves that proper toolchanging at a realistic price can be far more than a niche curiosity.
FlashForge Creator 5 – Why This Printer Matters
There are some printers you review because they’re good. There are others you review because they shift the conversation. The FlashForge Creator 5 falls into the second category.
The reason is simple. For years, multicolour printing in the consumer and prosumer space has been dominated by compromises dressed up as solutions. Single-nozzle material switchers can be clever, but they are still single-nozzle material switchers. Every colour change means purging, waiting, and accepting a workflow that is fundamentally wasteful. Dual-nozzle designs help in some areas, but they often come with awkward restrictions. Toolchangers, by contrast, offer a cleaner answer: the right tool for the right material, at the right time.
That matters if you want to print PLA with a dedicated support interface. It matters if you want to combine rigid and flexible materials. It matters if you care about reducing waste and cutting multicolour print times in half compared with other approaches.
And this is where the FlashForge Creator 5 starts landing punches. It is not trying to be a pretty gadget first and a printer second. It is trying to be a functional machine. In that respect, it makes a very strong case for itself.
It also highlights a divide in the market. Some people want the most capable hardware for the money. Others want the cleanest, easiest, most integrated ownership experience (ok actually we want both but right now can’t have it). The FlashForge Creator 5 sits right on that fault line.
FlashForge Creator 5 – Unboxing and Setup
Setup on the FlashForge Creator 5 is one of the first places where the machine makes an excellent impression.
It ships in the now-familiar foam-packed box style, with the printer bagged and easy to lift out. Accessories are layered neatly in foam, and the initial guide gets you through the basics without fuss. More importantly, the physical setup itself is refreshingly simple.
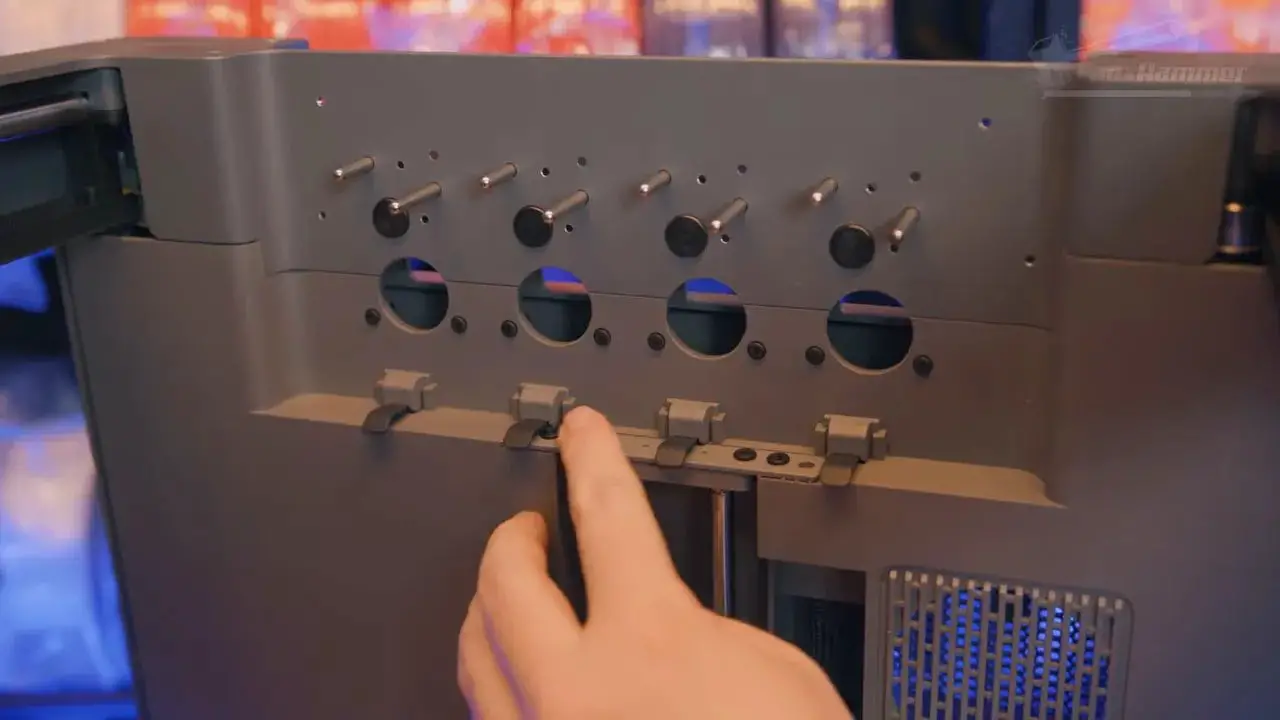
The screen attaches directly and screws into place without ribbon-cable nonsense. The multi-tool arrangement is also straightforward: slide the nozzle feed cassette in, secure it with 2 screws, connect the four nozzle blockers that prevent oozing while tools are idle, and then plug the tool heads onto the internal pins.
After that it’s just a case of removing the shipping locks from the bed, fitting the filament holders, plugging it in and powering it on.
That all sounds routine, but in practice it matters. Multi-tool systems can be intimidating. Toolchangers can feel like a faff before you’ve even started. Here, the assembly process is surprisingly painless. In fact, for a machine with this level of complexity, the initial experience is better than you might expect.
That strong first impression is worth noting, because this is not a printer that wins on sleek aesthetics. It wins by immediately feeling thought through where the actual setup process is concerned.
FlashForge Creator 5 – Design and External Hardware
Let’s get the obvious bit out of the way: the FlashForge Creator 5 is not especially pretty.
The chassis is a dull grey. The front and rear are open. PTFE tubes and cables emerge from the top in a way that looks more functional than elegant. It is not ugly enough to be offensive, but it certainly isn’t trying to be showroom furniture either.
That said, it doesn’t feel cheap. Some exterior panels are plastic, yes, but they come across as decent quality rather than toy-like. The upper frame is metal, and overall it gives the impression of being built for use, not display.
Port placement is mostly on the right-hand side, with the USB port oddly placed on the left near the front. That is not ideal, though in fairness many people will primarily use Wi-Fi anyway. The power socket is also on the right side near the back, where a rear-facing location would have been tidier.
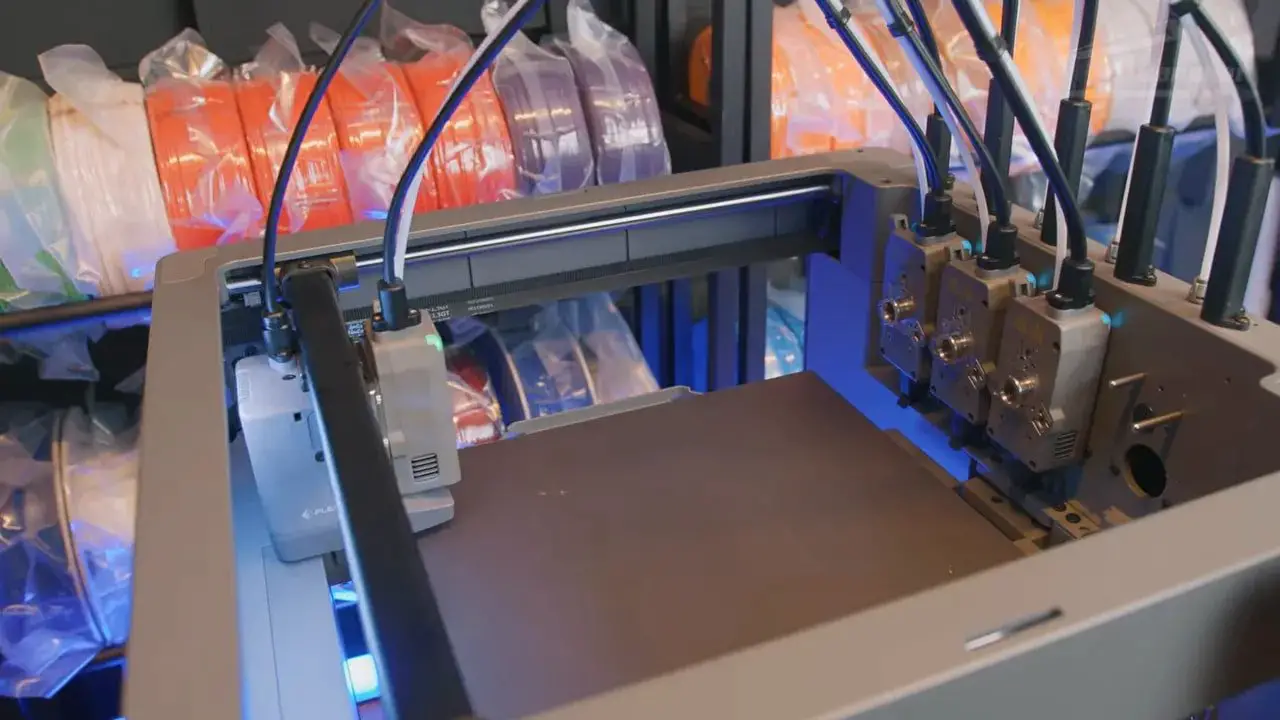
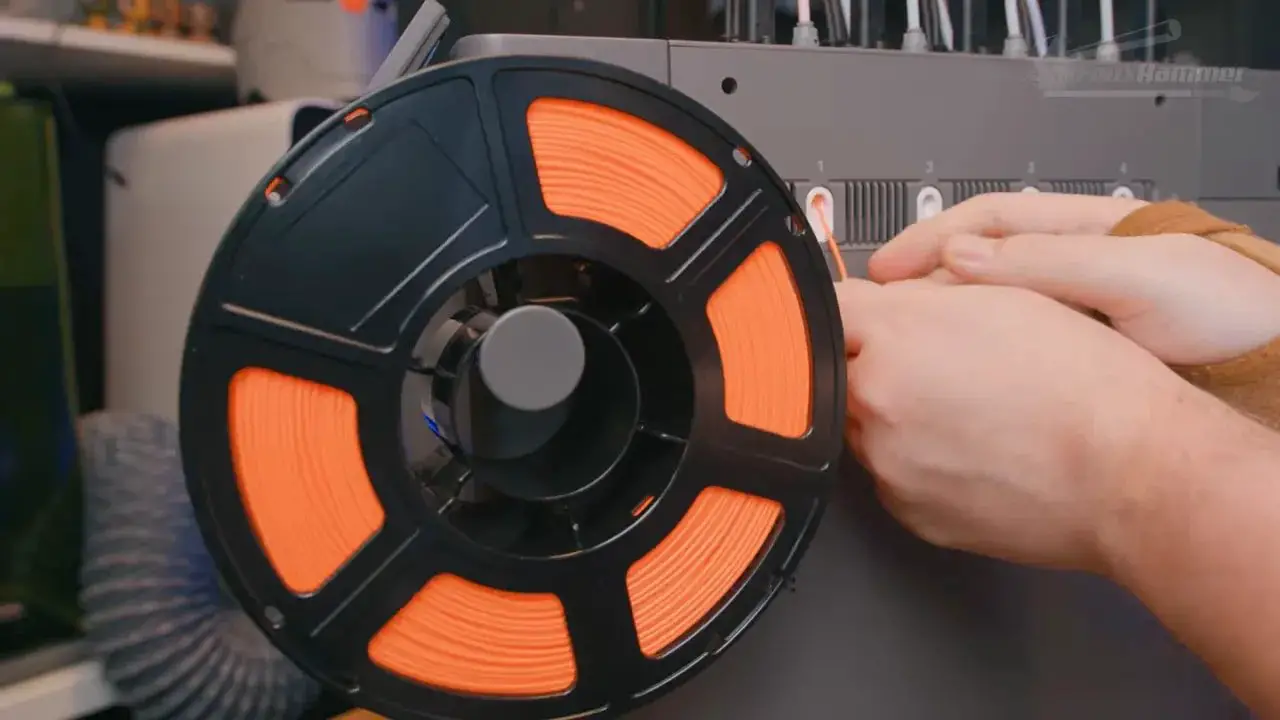
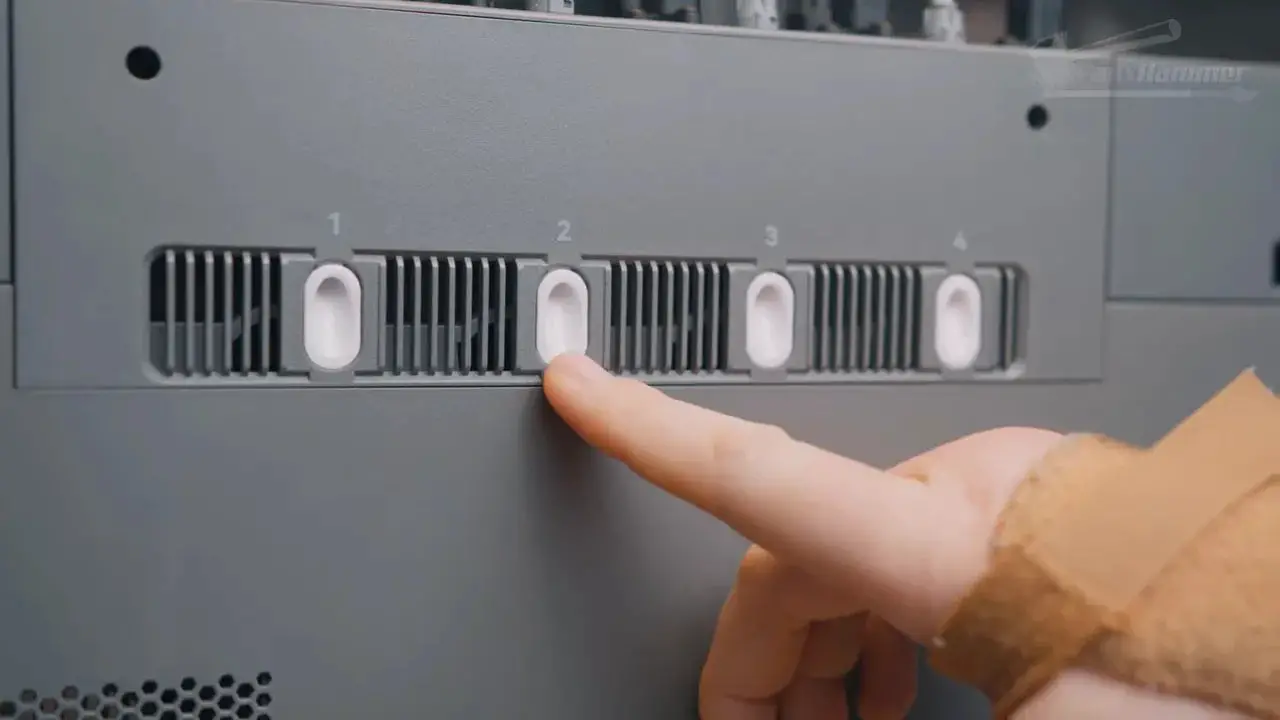
At the top of the right side are the four filament inlets, with reel holders mounted on the same side. One thing to bear in mind here is footprint. The real usable depth of this machine is around 60cm once you account for the reels sitting forward and behind the chassis, and you’ll want side clearance as well to access the rear spools.
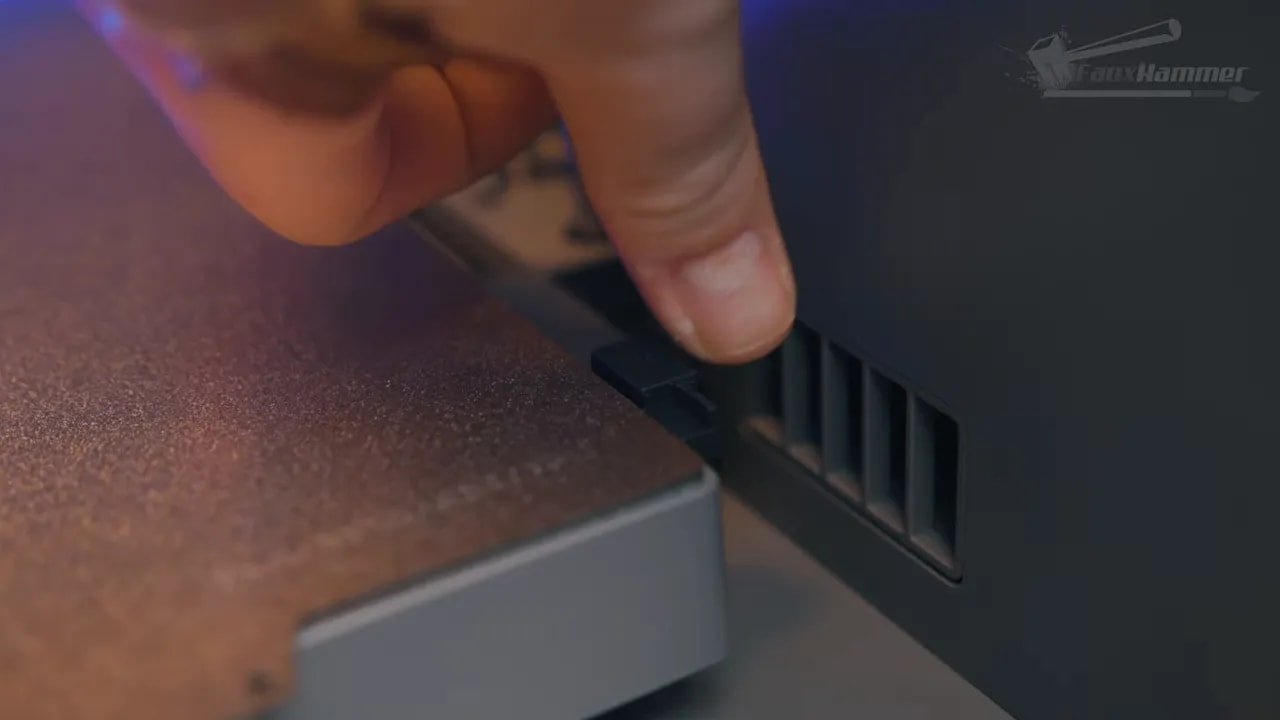
There is also an external four-pin connector on the side. Initial hope might have been that it was some sort of AMS-style expansion, but it is actually for FlashForge’s VDS box, an external four-reel dual-chamber dryer. That gives you controlled drying across two separate chambers at different temperatures, which is useful, though it is not a mechanised material switching system.
One oddity is the sheer number of vent holes around the body. On the standard Creator 5 these are largely redundant, because it doesn’t have the active chamber thermal management of the Pro model. They exist because the chassis shares parts with the Creator 5 Pro, which is a sensible production decision, even if it means some design elements look more purposeful than they actually are.
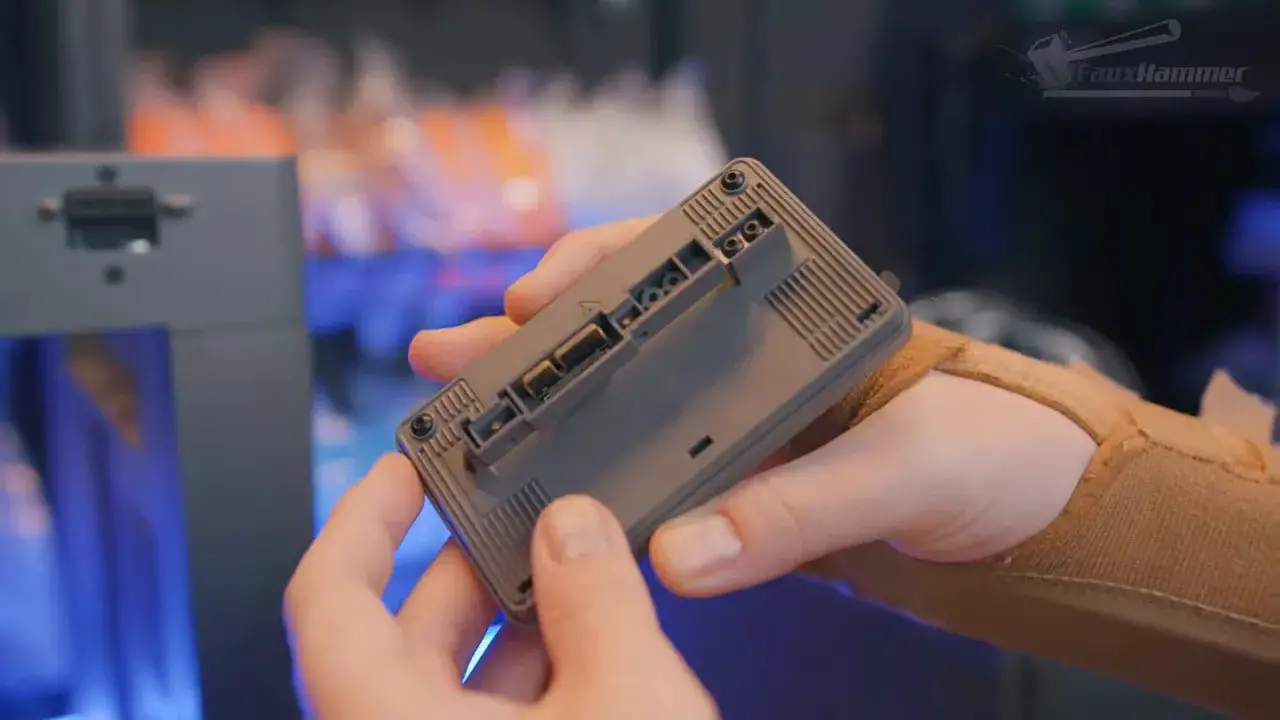
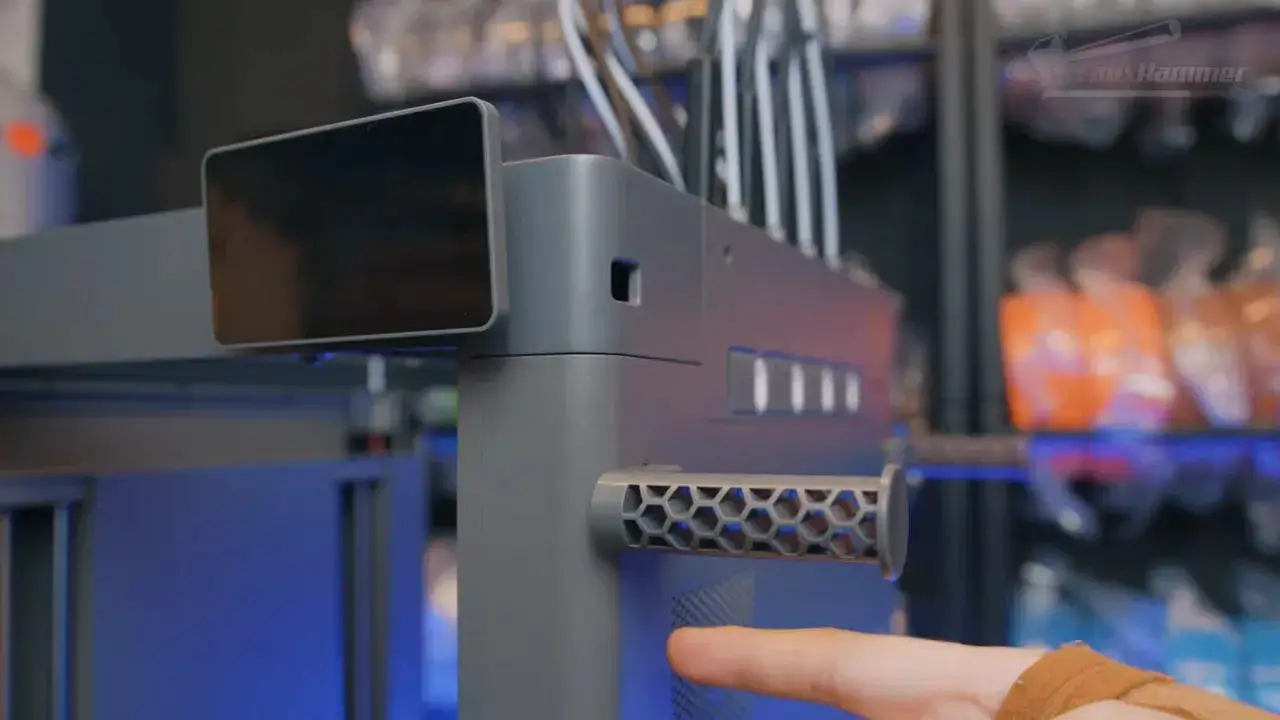
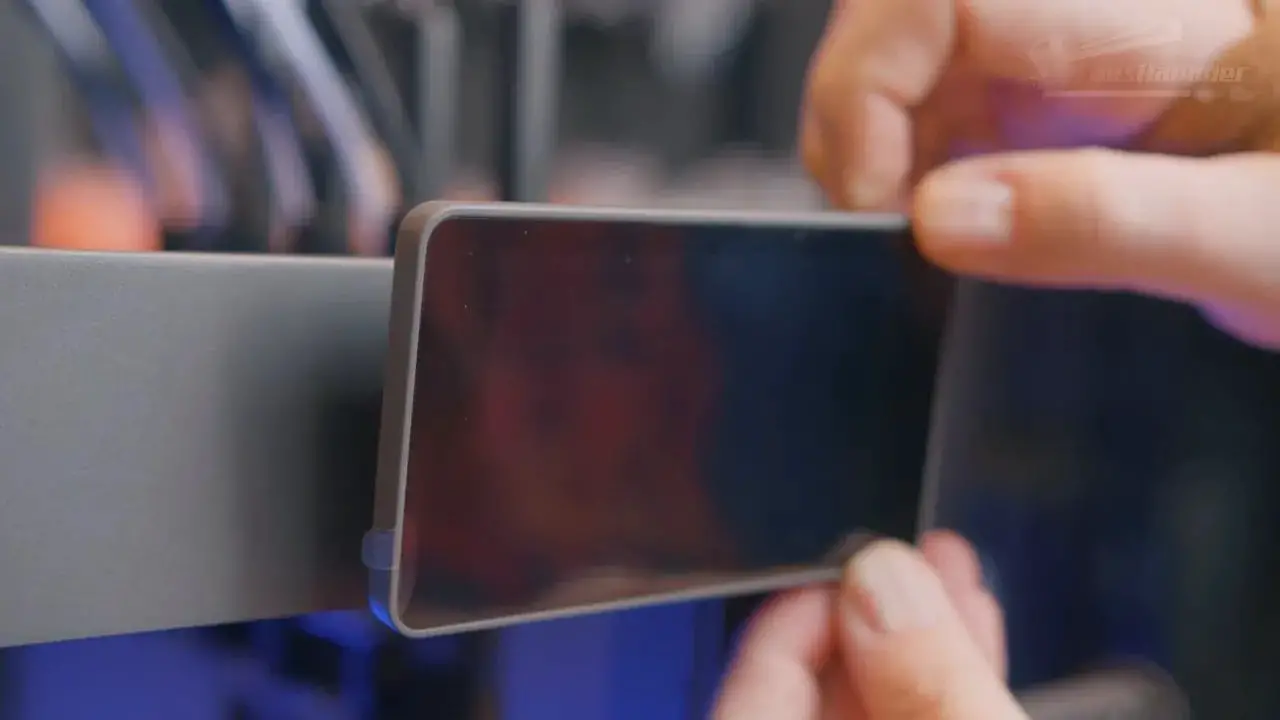
FlashForge Creator 5 – Screen, UI and Physical Usability
FlashForge has finally moved to a more capacitive touchscreen, and that alone is a welcome change. Older FlashForge screens had a reputation for the occasional missed input, and that kind of irritation gets old quickly.
On the FlashForge Creator 5, the screen is also physically adjustable, tilting both upward and downward rather than being locked into a single awkward angle. That may sound minor, but accessibility matters, particularly in workshop and farm environments where machines are often stacked on shelves.
The interface itself is usable rather than exceptional. It does the basics well enough. Starting prints, moving axes, updating firmware and managing common tasks are all easy enough to find. Most operations are a couple of taps away.

The settings menu feels a little limited, though not in a catastrophic way. It is more that the machine doesn’t expose much depth. There are fewer rich details, fewer enthusiast-facing controls, and less of that sense that the interface has been designed to delight either the beginner or the tinkerer.
It is passable. Functional. Adequate. Those words are not glamorous, but they are not insults either. This is not a machine ruined by its interface. It is simply a machine whose interface does not elevate it.
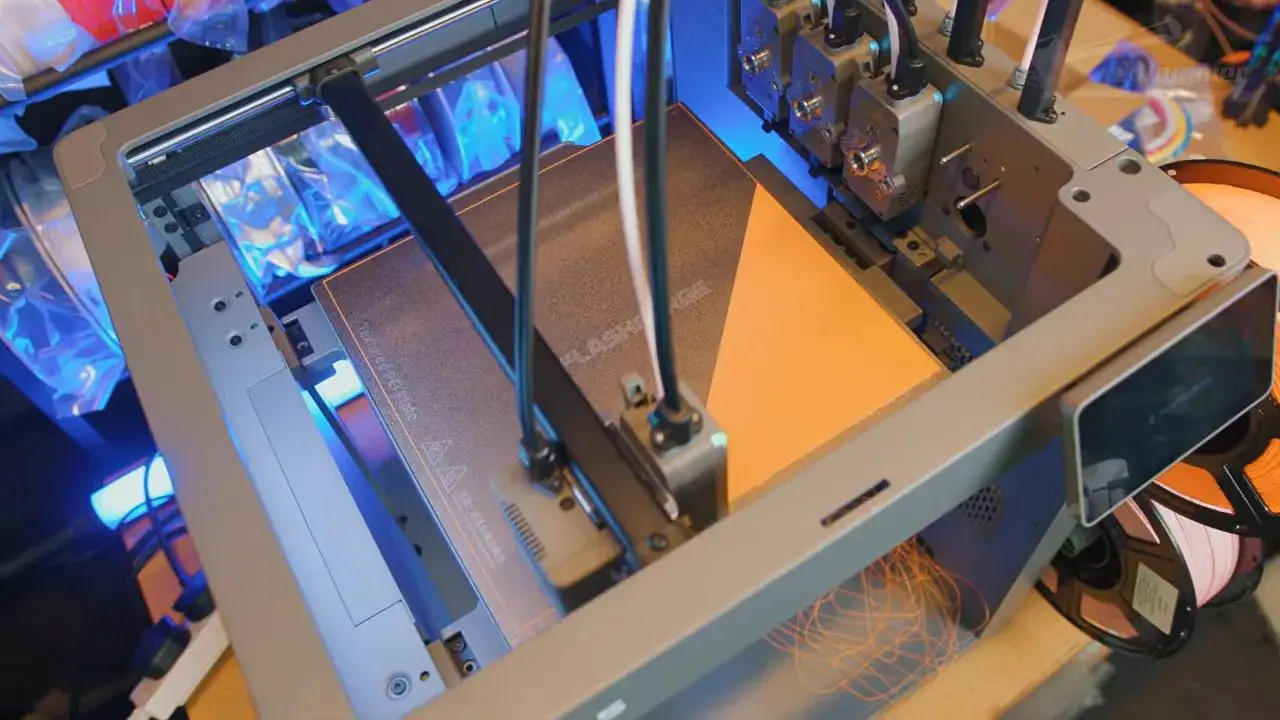
FlashForge Creator 5 – Toolchanger System and Why It’s Better Than You Think
This is the heart of the machine.
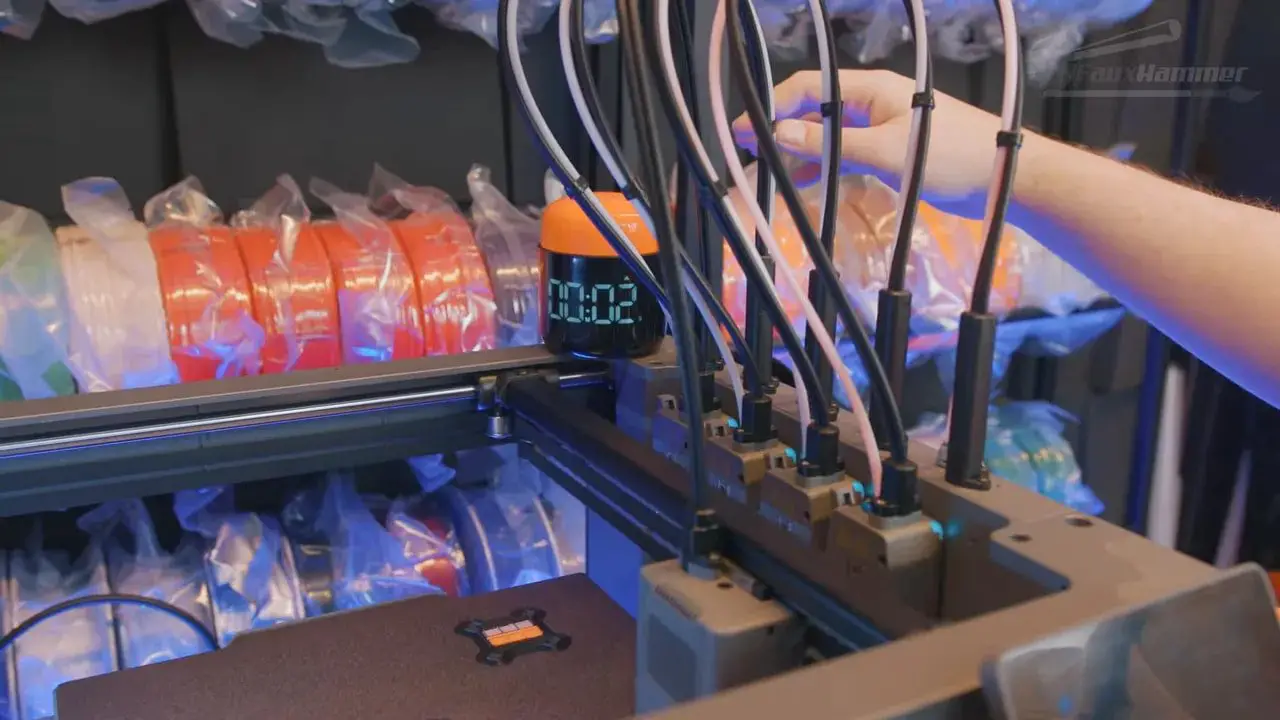
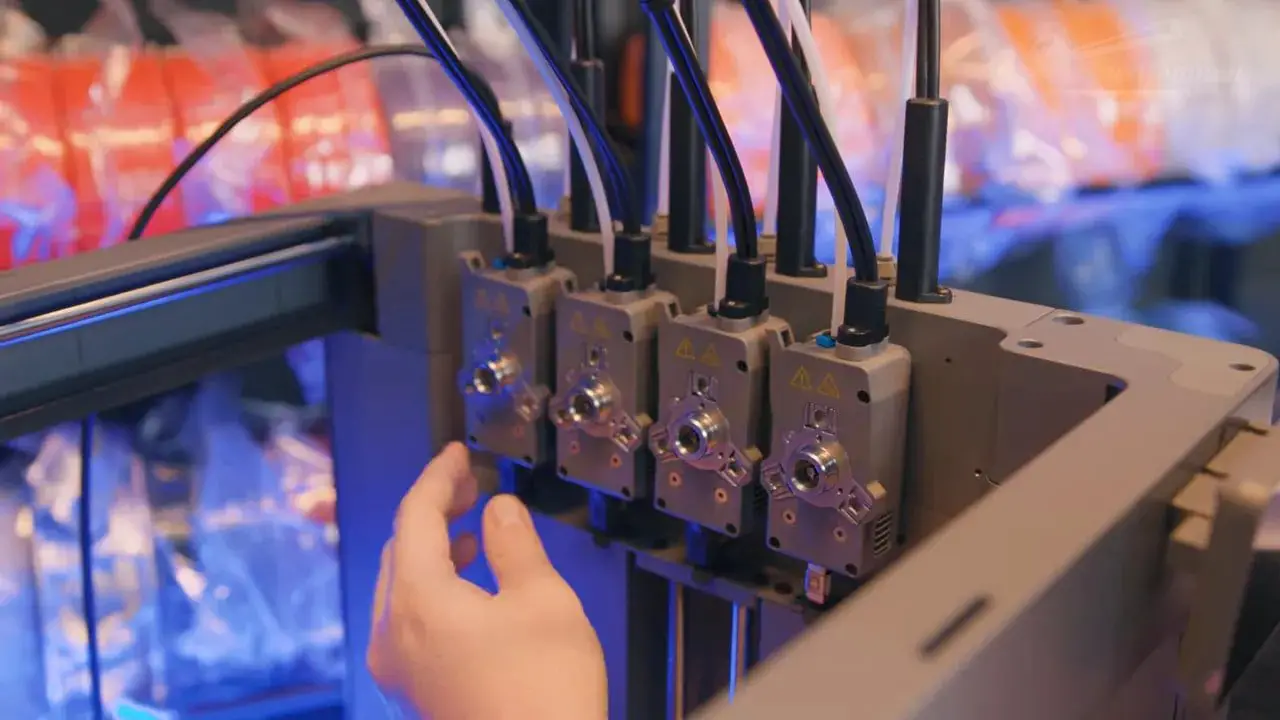
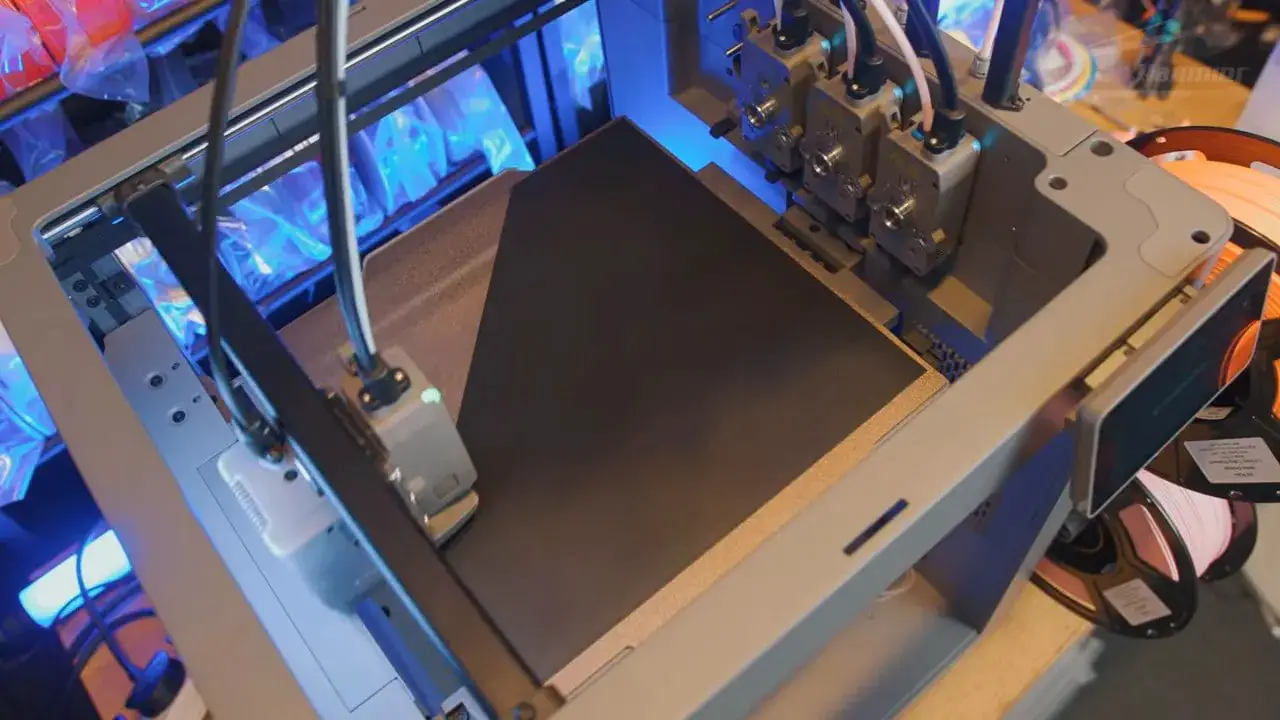
The FlashForge Creator 5 uses a proper four-tool toolchanger, and that immediately puts it in a different category from printers that simulate multicolour through material swapping on a single hotend.
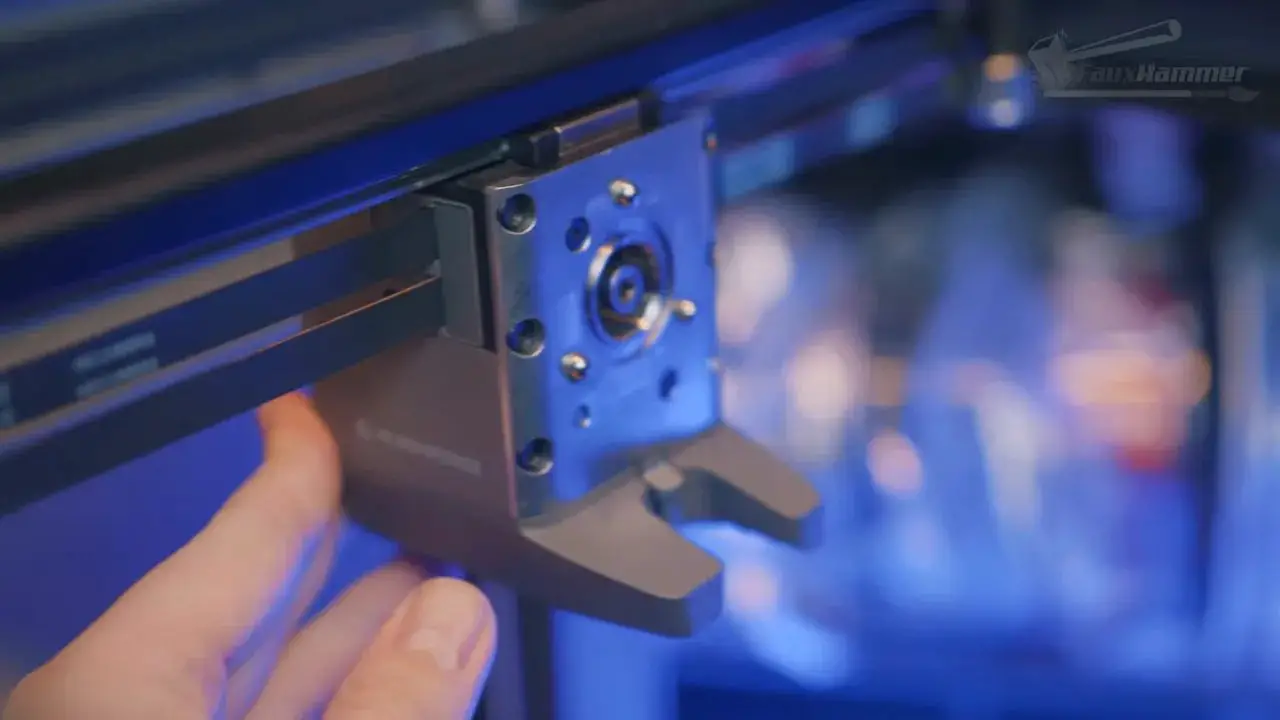
There are a few reasons this matters. First, each tool is direct drive. There are no Bowden compromises. Second, all tools can use the full build area. Third, each tool is independently available for a different material, which opens the door to genuinely useful combinations rather than just decorative colour work.
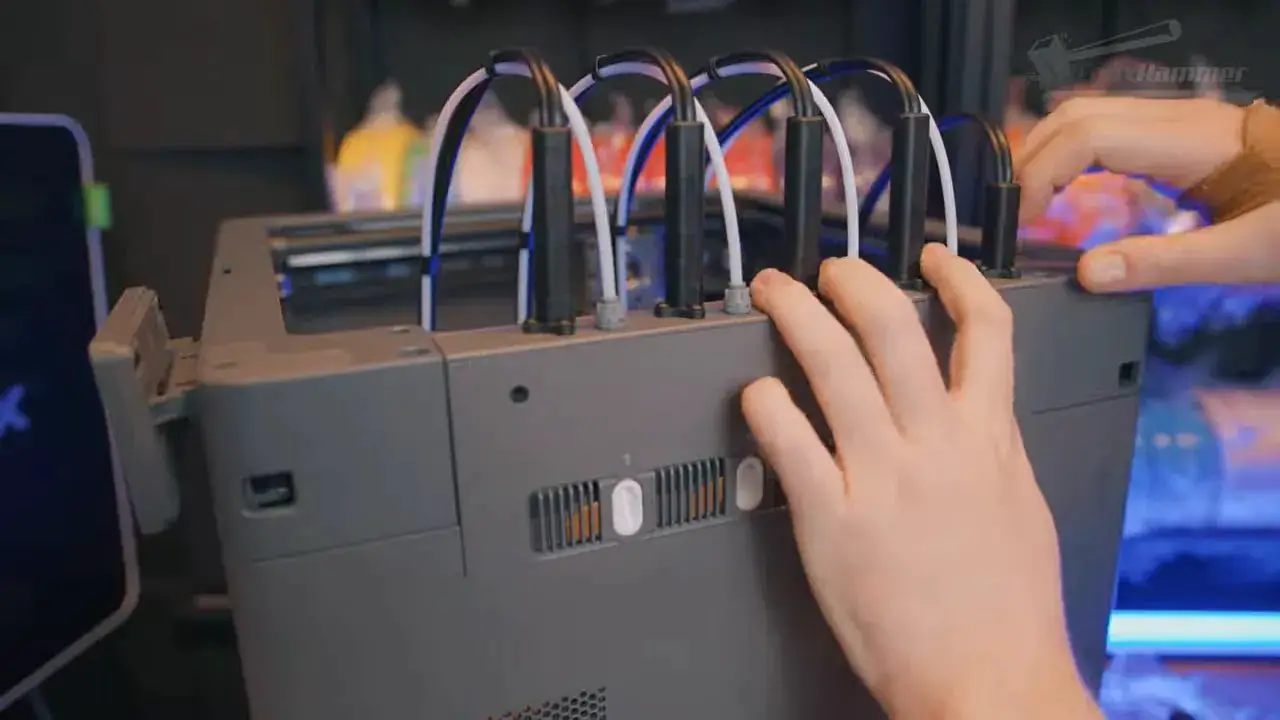
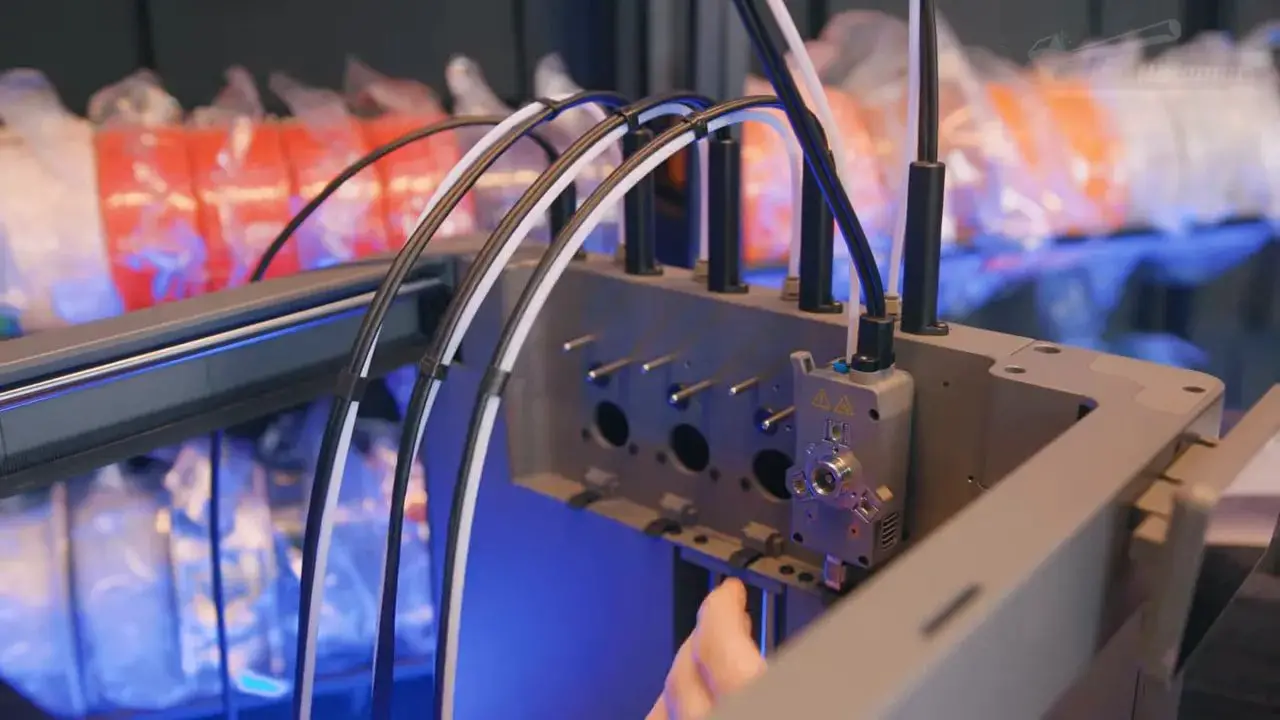
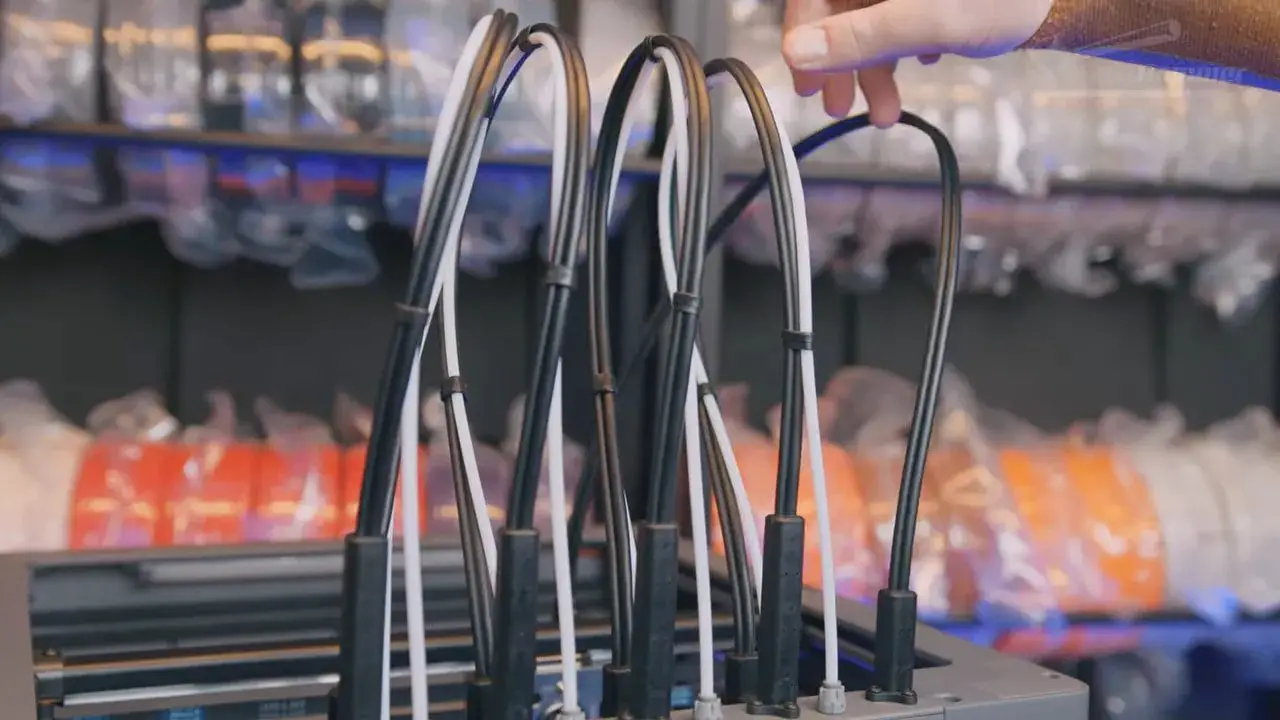
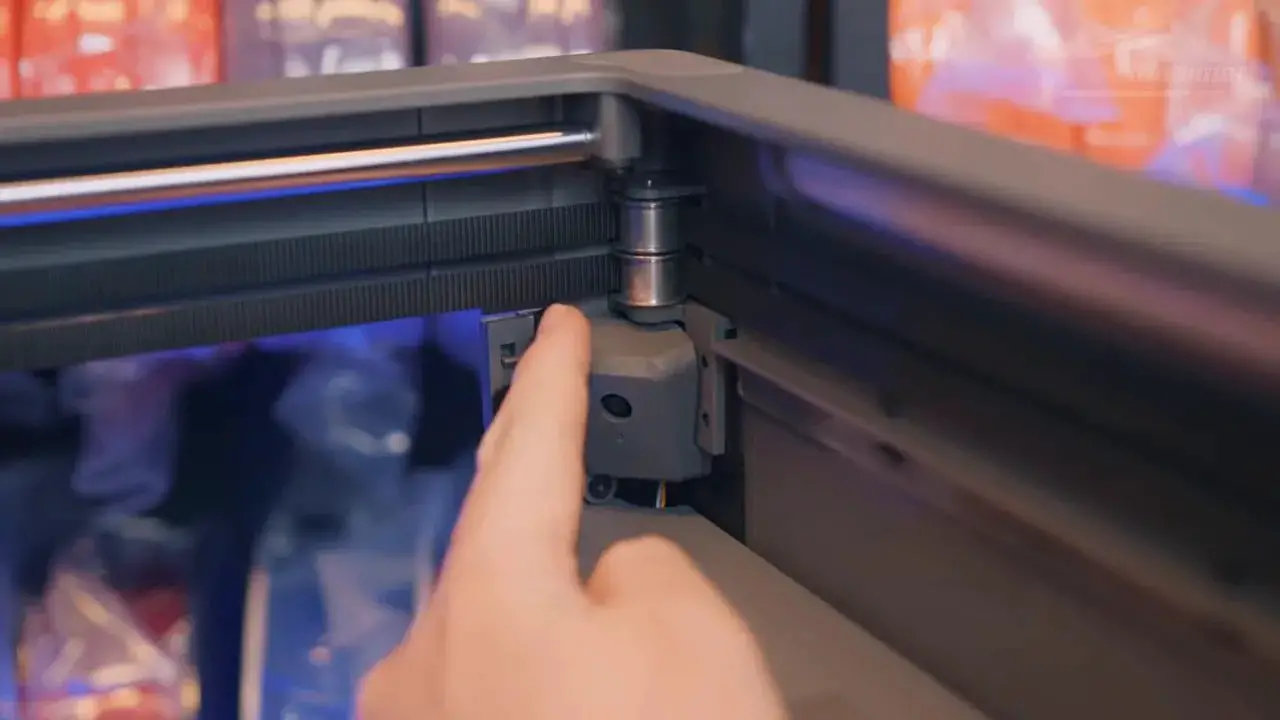
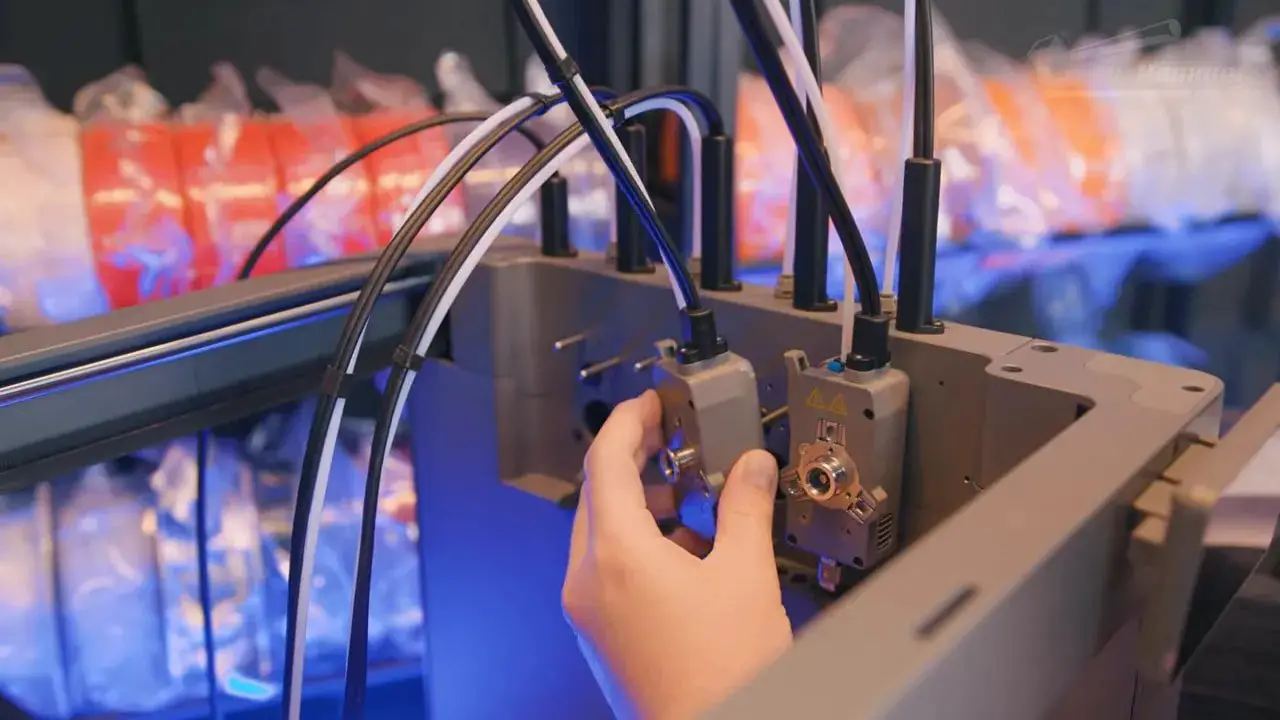
There is another important implementation detail here too. Instead of relying on pogo pins for power and data transfer, FlashForge has cabled both the toolhead and the individual tools separately. That matters because pogo pins have long been identified as a wear point in some toolchanging systems. By avoiding them, FlashForge has addressed a known concern in a practical way.
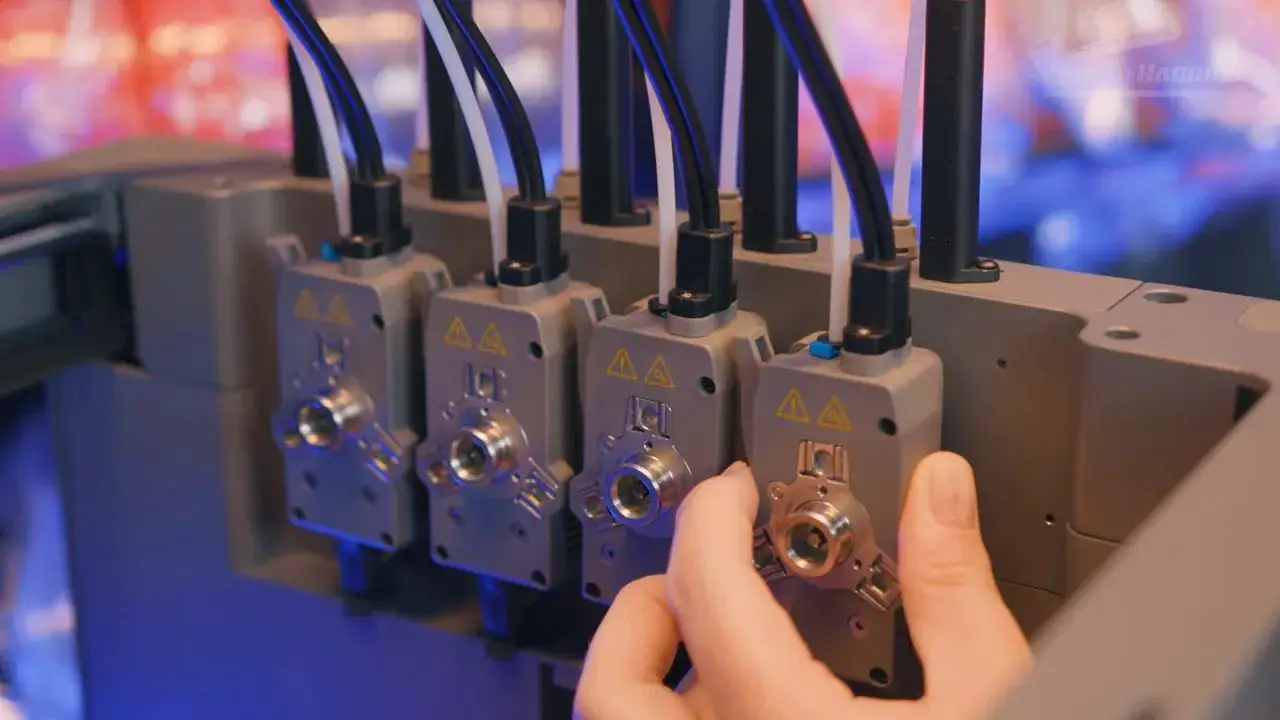
The toolheads themselves are also compact. Motion mechanics, extruder motors and cooling are housed in the toolhead assembly, while the tools focus on extrusion gears and nozzle heating. It’s a sensible arrangement and helps keep the active components relatively tidy.
Would five or six tools be even better? Obviously. A CMYKW setup plus support material would be fantastic. But that’s more about where this category should go than a criticism of what exists here. Right now, four tools is already a meaningful step up for most users, and in this market it puts the FlashForge Creator 5 in rare company.
FlashForge Creator 5 – Nozzle System, Temperatures and Practical Limitations
Not everything about the hardware is a win.
The biggest weak point in the physical tool system is nozzle swapping. On the FlashForge Creator 5, changing nozzles is still a manual process involving screws, disassembly and cable management. That’s not catastrophic, but it is absolutely behind where the market should be. Nozzle swaps in 2026 should really be tool-less or at least far quicker and more consumer-friendly than this.
For people who rarely change nozzles, that may not matter much. For casual owners who expect easy maintenance, it could be a blocker.

The upside is a maximum nozzle temperature of 320°C, which is higher than some competing machines. On the standard open Creator 5, that spec is a bit underutilised because truly demanding engineering materials generally want an enclosed and ideally heated chamber. That is where the Creator 5 Pro makes far more sense. FlashForge has already stated there is no straightforward upgrade path from the standard model to the Pro because too many structural parts differ, though a door or panel kit for enclosure convenience would certainly have been welcome.
So yes, the temperature ceiling is strong. But on this specific open-frame machine, its real-world usefulness is limited compared with the Pro variant.
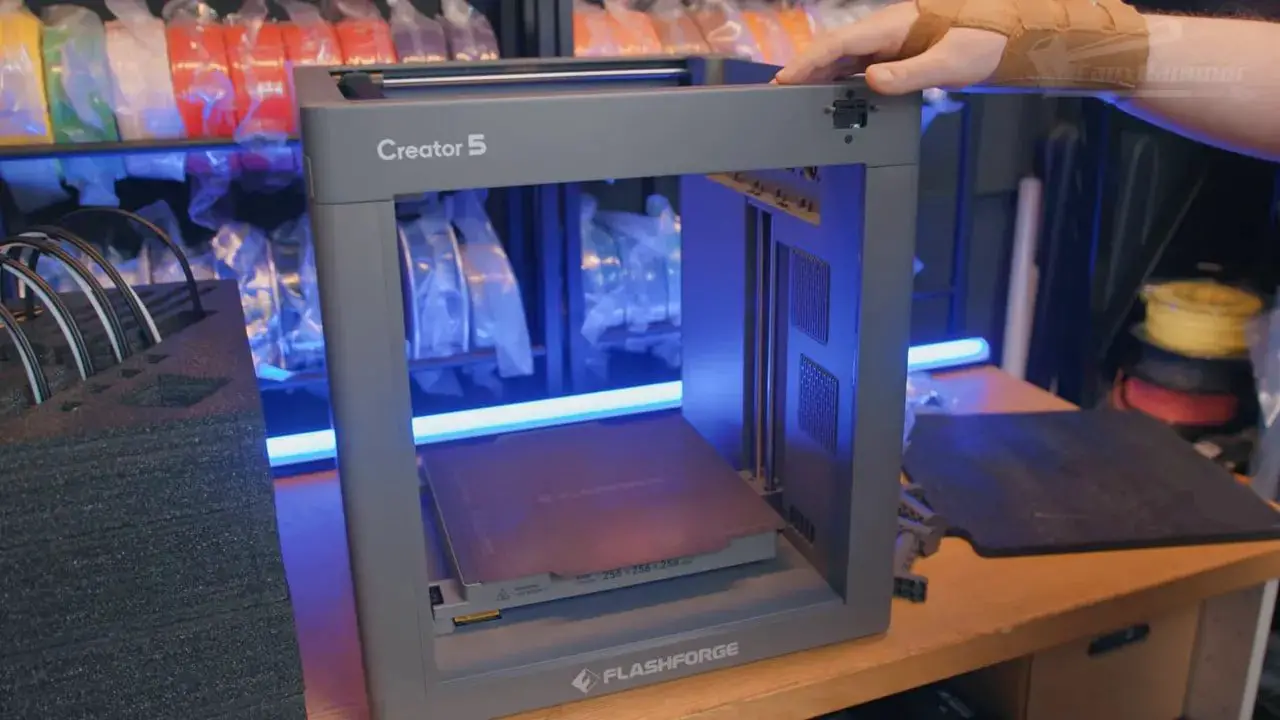
FlashForge Creator 5 – Build Volume, Bed and Calibration
The build area on the FlashForge Creator 5 is 256 x 256 x 256mm. That is smaller than the Snapmaker U1, but tahnbks to Bambu has become something of a modern standard, and the majority of community-model-designs are built with this exact volume in mind.
Would bigger be nicer? Of course. But 256mm in all directions is still very usable, especially on a machine designed around fast multi-material work rather than giant cosplay sections.
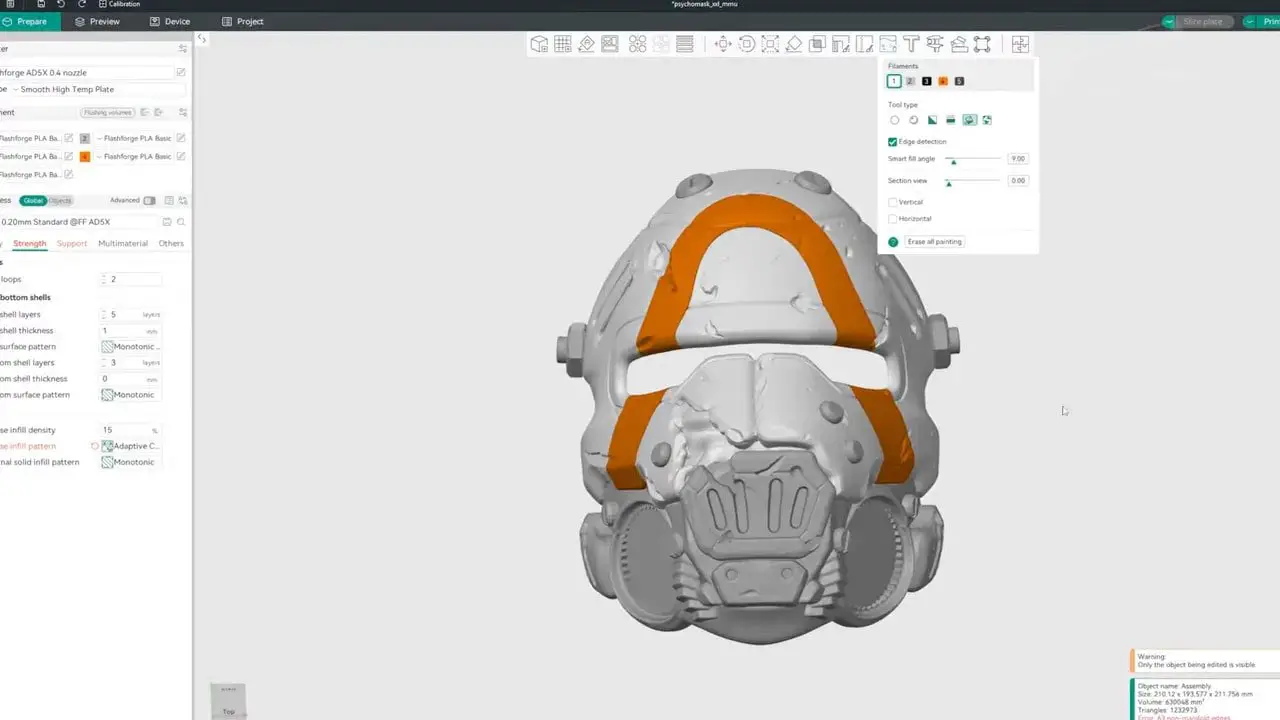
The print surface is a dual-sided spring steel PEI plate, though only one side is branded. Remove the plate and you’ll notice a small calibration disc on the bed. This is used during the lengthy first-boot calibration routine to measure nozzle height and positional differences across the various tools.
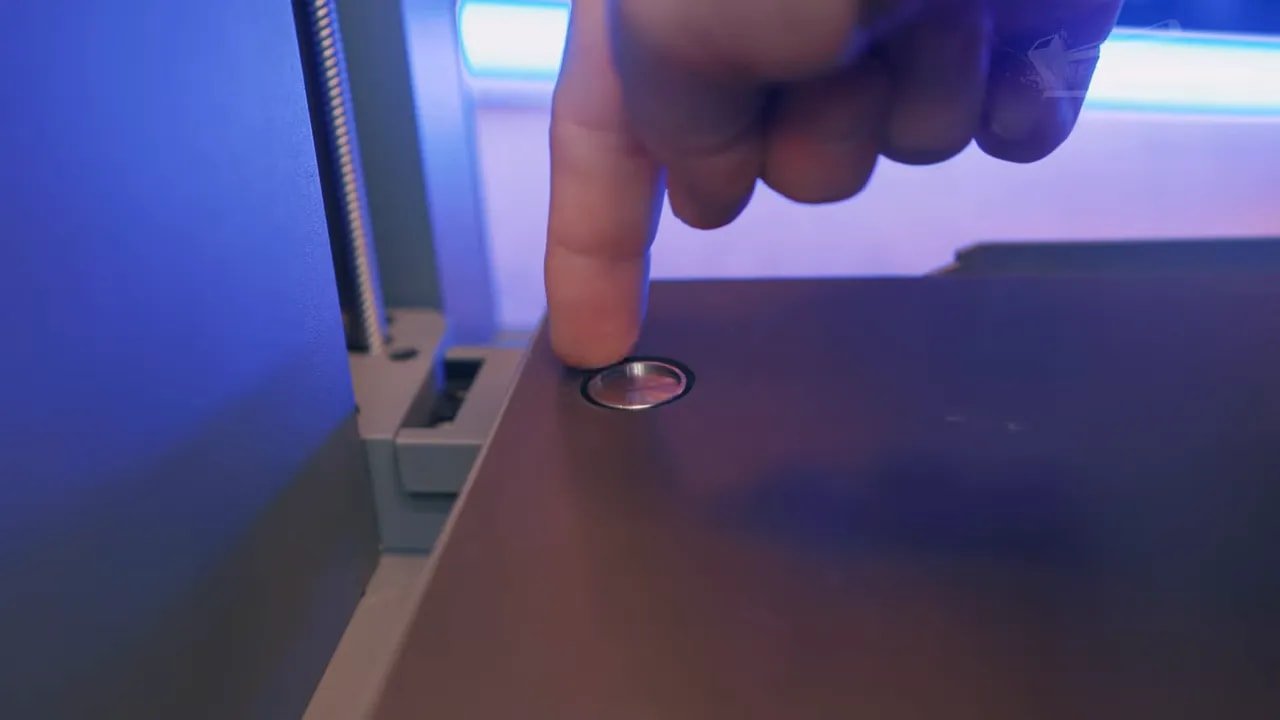
The initial calibration sequence takes around 40 minutes. That sounds long, and it is, but with a multi-tool system this sort of calibration is not fluff. The machine is compensating for differences between four tools, and if it gets that wrong, the whole value proposition collapses. So while it’s a wait, it’s a justifiable one.
The machine also includes a built-in 1080p 30fps camera and an integrated light for remote monitoring and automatic timelapse creation. In practice, exported timelapses come out at 640 x 480, which is one of those classic “spec sheet versus reality” discrepancies that brands really should stop doing.
FlashForge Creator 5 – Waste Management and Material Handling
If there is one glaring convenience omission on the FlashForge Creator 5, it is the lack of a waste chute.
During nozzle loading, and currently before prints as well, the machine dumps filament off the bed into the front-right interior of the chassis. There is a nozzle wiper at the side of the plate, but no clean external route for waste to exit the machine into a bucket or bin.
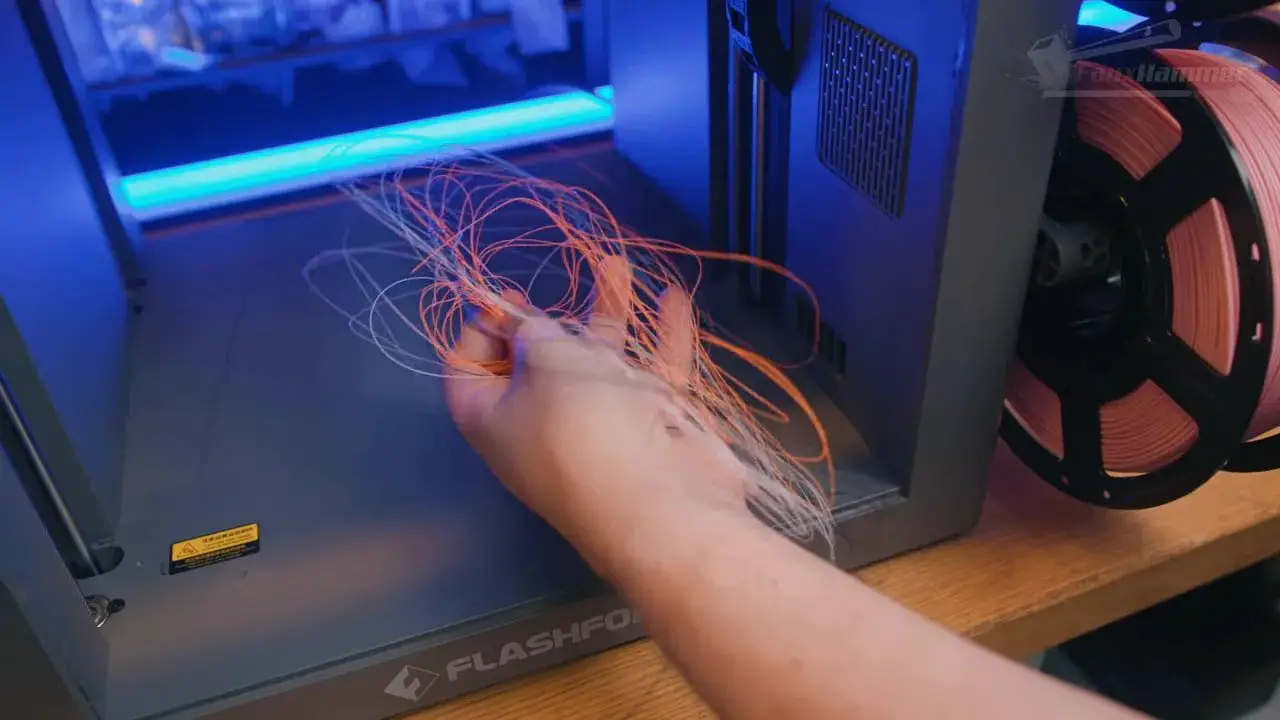
That means cleanup is more fiddly than it needs to be. Rather than emptying a container every few weeks, you’re pulling waste out of the machine more often and dealing with internal scraps.
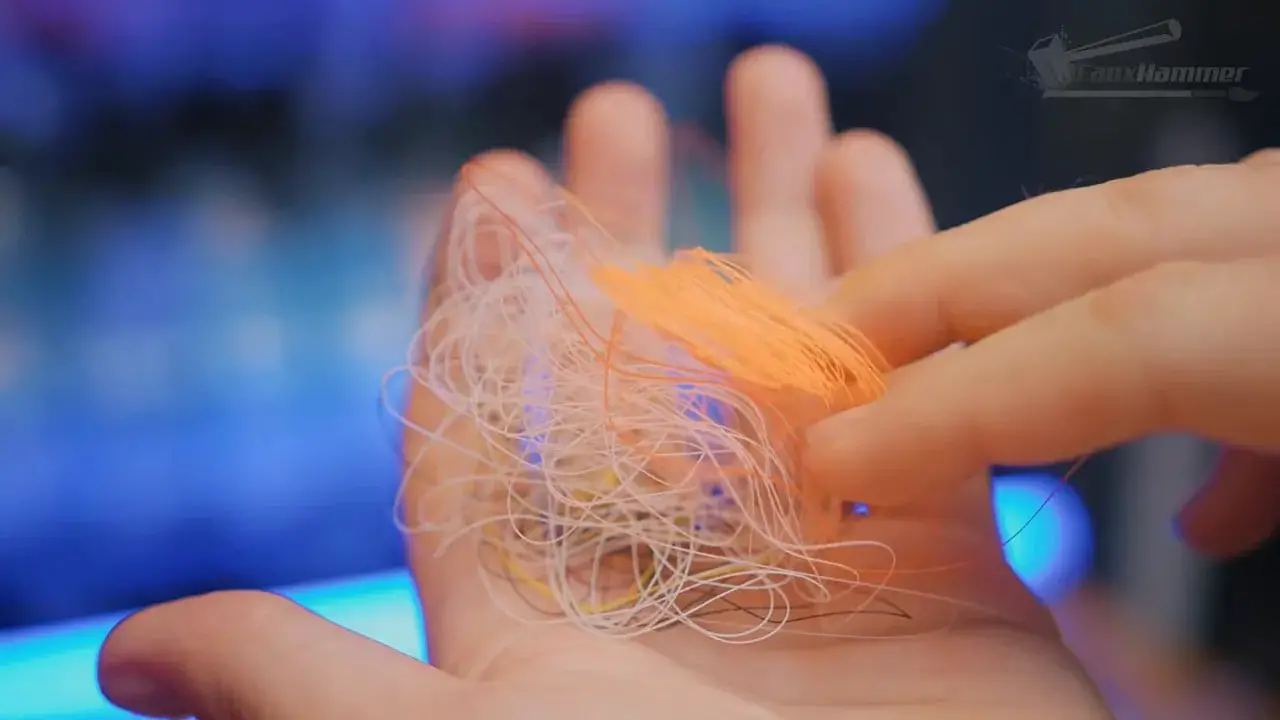
There is also room for software optimisation here. The machine appears to extrude more than necessary during some loading operations, and unless you are actively running calibration procedures, it should not need to waste filament before every print in the way it currently does.
Material loading itself is manual too. The side cassette is not an auto-loader. You physically feed filament into each path yourself. There is no RFID detection, so filament type and colour must also be manually assigned in the UI. Loading material into each nozzle is currently a one-tool-at-a-time process, and unloading is almost comically manual, essentially boiling down to “cut the filament, then pull it out yourself.”
Again, it works. But this is exactly the sort of area where a refined ecosystem would smooth over the rough edges.
FlashForge Creator 5 – Software, Slicer and Ecosystem
This is the section that defines the whole review.
The FlashForge Creator 5 software experience is not bad. It is simply not special. The slicer is effectively an Orca-style environment, which means the heavy lifting is being done by a familiar and capable foundation. That is good news in practical terms because it makes the machine easier to approach and immediately more usable than brands that insist on terrible custom slicers like Creality print.
Send a print remotely, colour the model if needed, assign installed materials, and off it goes. That workflow is perfectly functional.
But the ecosystem falls short in all the ways people tend to dismiss until they actually live with a machine for months. Material information should sync between printer and slicer – it currently doesn;t until you click print and manually select each material. More of the assignment process should be automated. The printer-side information display is extremely basic. Firmware is proprietary and locked down, so tinkerers do not get the openness they might want. At the same time, average users do not get a class-leading, hand-holding, beautifully integrated experience either.
That is the point.
If a machine is closed, then it needs to justify that with polish. If it is not polished, then where’s the value? The trade of is usally a little more openness. The FlashForge Creator 5 sits awkwardly in the middle. It is restricted, but not luxurious enough to make you grateful for that restriction.
And yet, because the underlying workflow is solid enough thanks to it being Orca, it still works fine. Just don’t mistake “works” for “best in class.” It isn’t.
FlashForge Creator 5 – Brand Reputation and Long-Term Confidence
Brand matters more than people like to admit.
You can never really promise long-term product reliability from a short review period, and anyone pretending otherwise is guessing. The best we can do is look at a company’s history and ask whether they generally put out solid hardware, whether they maintain machines properly after launch, and whether they seem capable of building on momentum.
FlashForge’s quality reputation has been mostly decent. Not perfect, not immune from criticism, but generally more respectable than most. The bigger criticism historically has been software and the level of post-launch investment in specific machine profiles and refinement.
That matters here more than ever, because the FlashForge Creator 5 feels like the sort of machine a platform could be built on. It has enough raw capability to attract attention. It has enough value to become popular. And if it becomes popular, FlashForge finally has the incentive to do the thing it hasn’t always done well enough before: support the machine properly after release.
If they do, this printer could become a category staple. If they don’t, it risks being remembered as a brilliant one-hit wonder that proved a point but failed to build a lasting userbase around itself.
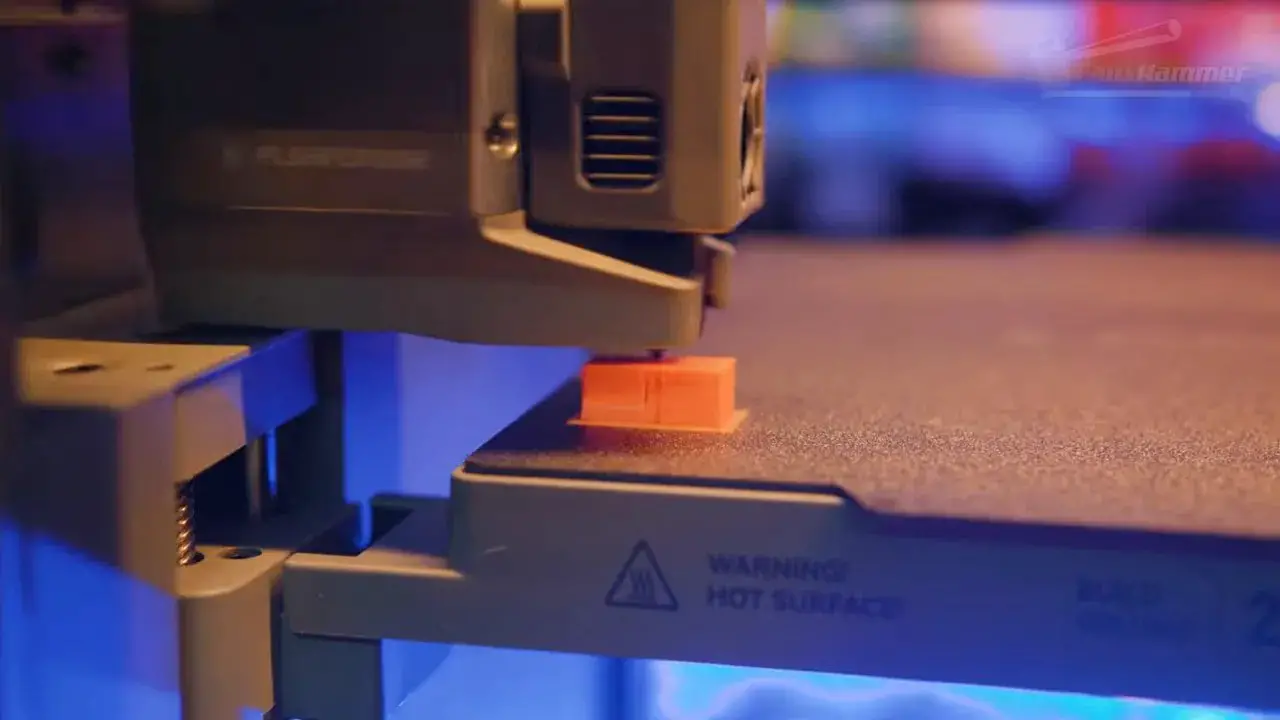
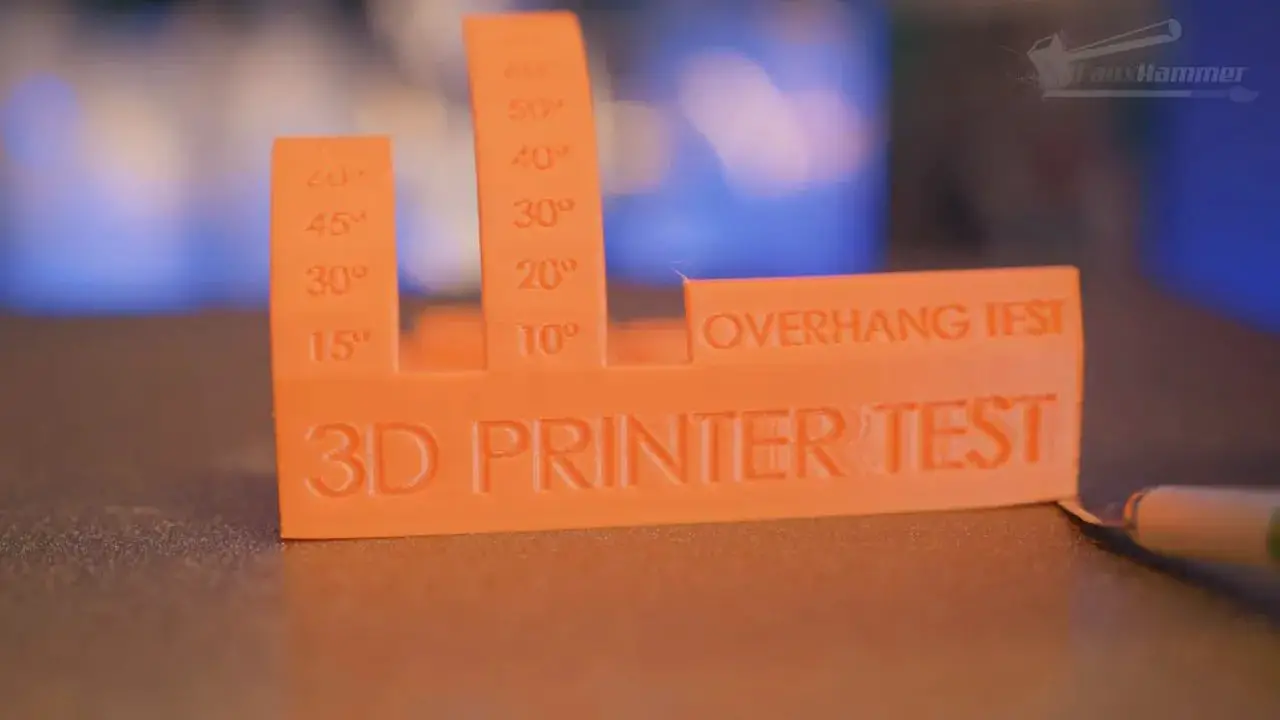
FlashForge Creator 5 – Print Quality and Real Print Results
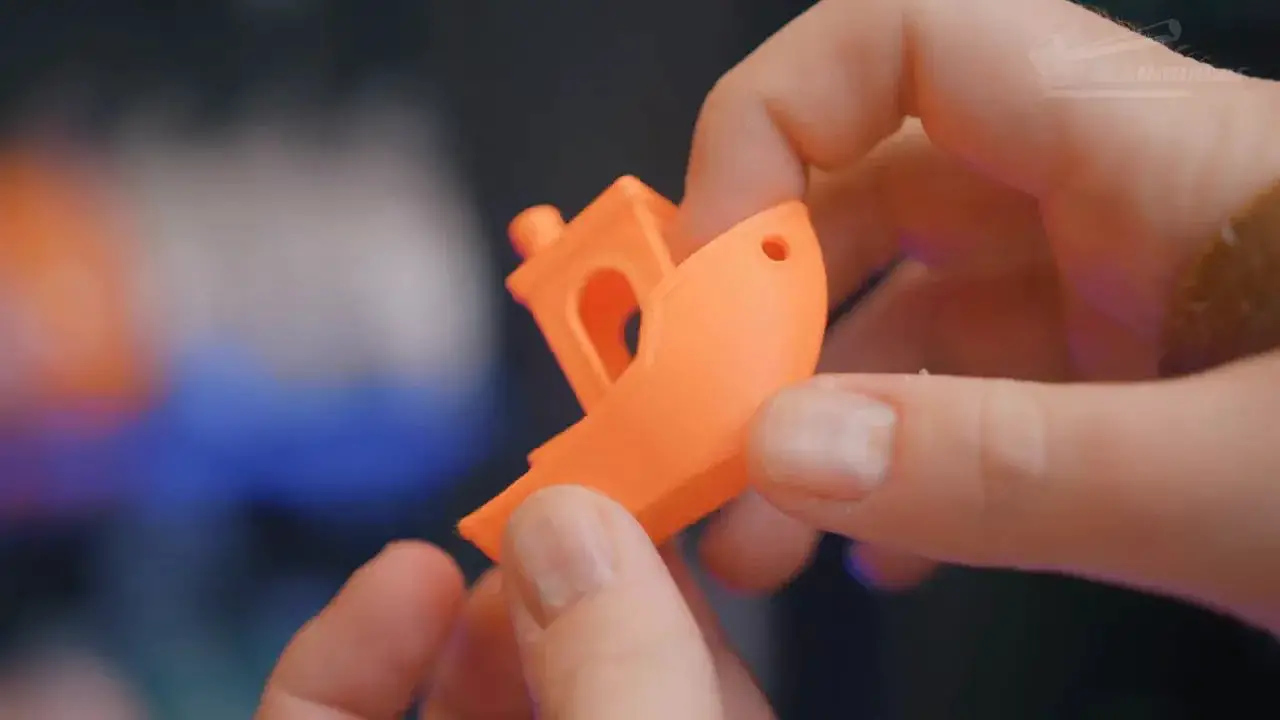
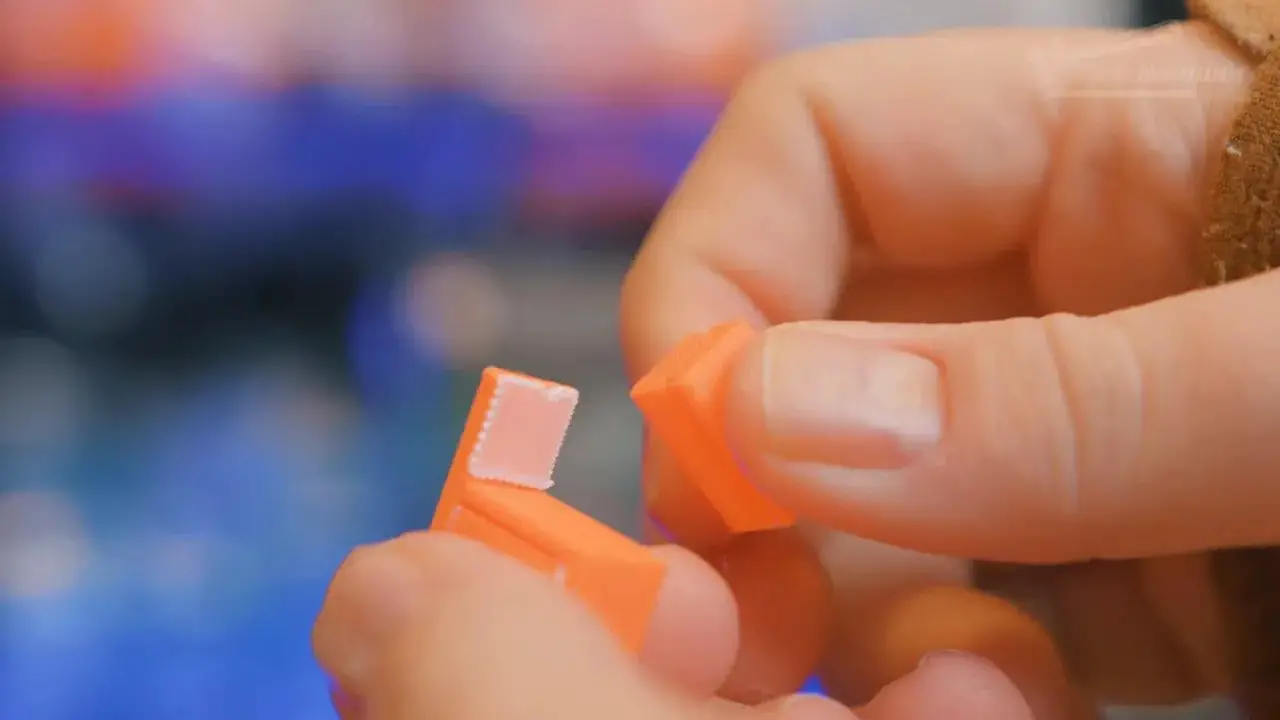
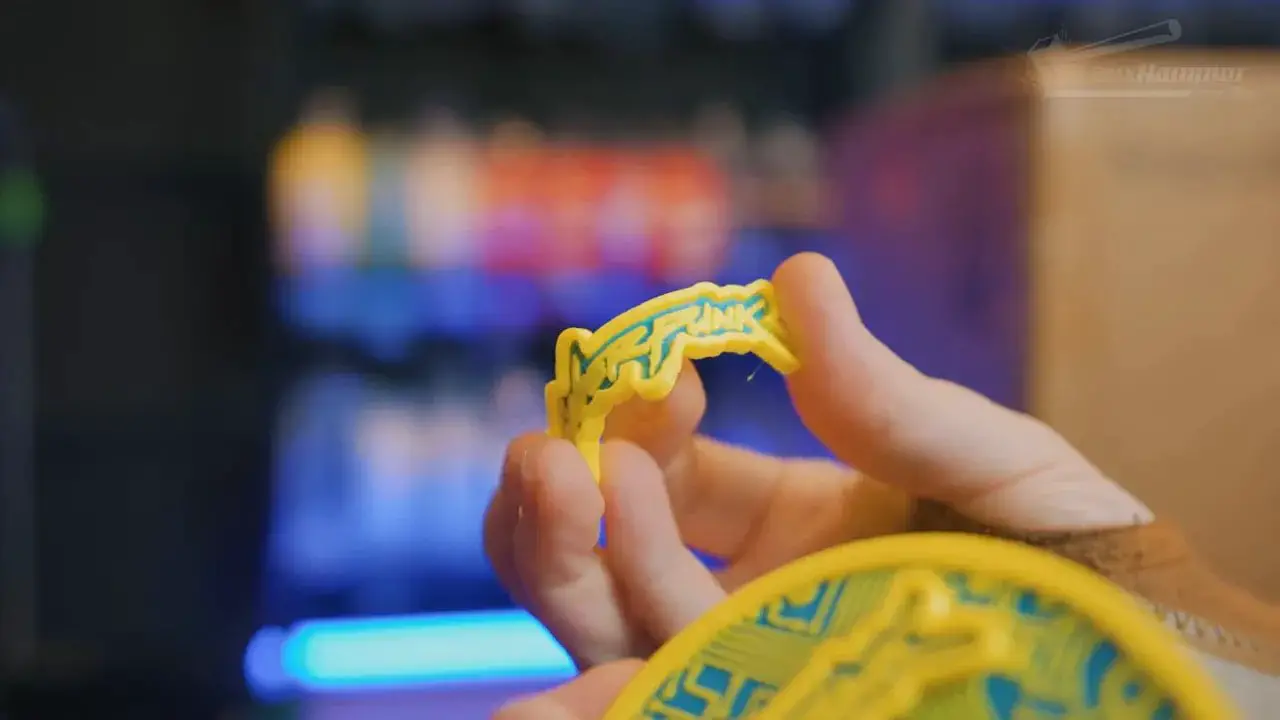
Print quality on the FlashForge Creator 5 is excellent overall.
The first Benchy came out cleanly and immediately looked competitive with the better machines in this space. First-layer testing across all four tool heads showed slight variation, with orange and pink appearing to want a touch more flow or offset tuning, while black and white were generally stronger. It wasn’t a perfect first layer across the board, but it was comfortably good enough to inspire confidence in real print adhesion.
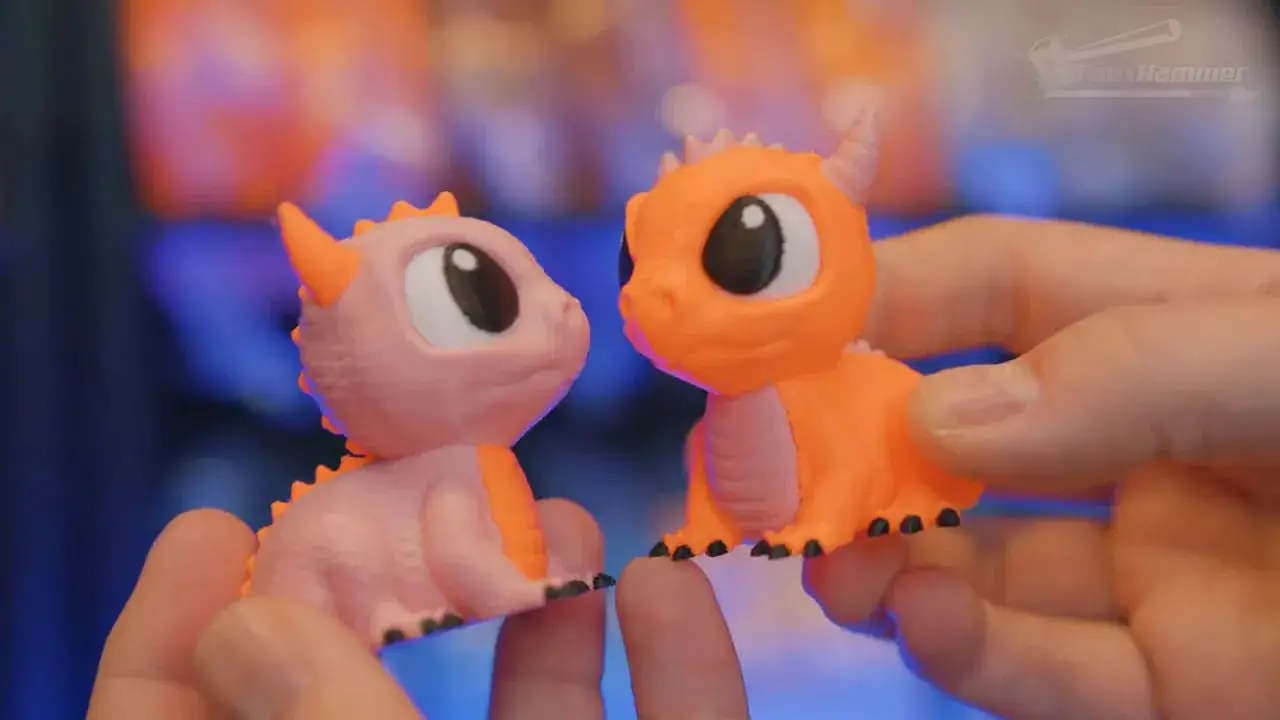
More interesting were the practical tests. A dual-colour dual-dragon print, used as a regular benchmark for multicolour systems, completed in just over 5 hours. A dual-nozzle printer with a material switcher would take over 9 hours for the same kind of job, and a single-nozzle machine could take roughly 16. That is where proper toolchanging stops being theoretical and starts being obviously better.
Also, please be aware when comparing this to tests other people have done on othjer machines, When I print these dragons, I always print 2 of them at the same time, so this is not the same as a single-dragon print from other creators.
Why do I do this? I think it looks cute and it lets me mix the colours…
Tool swaps take roughly four to six seconds from one extrusion stopping to the next beginning its prime tower. That is fast enough to keep the flow of a multicolour print feeling efficient rather than interrupted.
The machine does still use a prime tower, because pressure needs balancing before fresh material is applied to the model. So this is not zero-waste in an absolute sense. But compared with purge-heavy single-nozzle systems, the reduction in waste is significant.
FlashForge Creator 5 – Multi-Material Printing, TPU and Support Interfaces
This is where the FlashForge Creator 5 really starts to embarrass less flexible competitors. (pun intended)
Because the machine uses separate tools rather than a shared nozzle, you can do things that are awkward, restricted or effectively impossible on many other multicolour systems. Dedicated PLA support material is one example. With a proper support interface material, the underside of prints comes out dramatically cleaner than with normal supports or pure bridging.
That is not a niche gimmick. For practical printing, especially on complex models or visible surfaces, dedicated support interfaces are one of the most useful arguments for true multi-material capability.
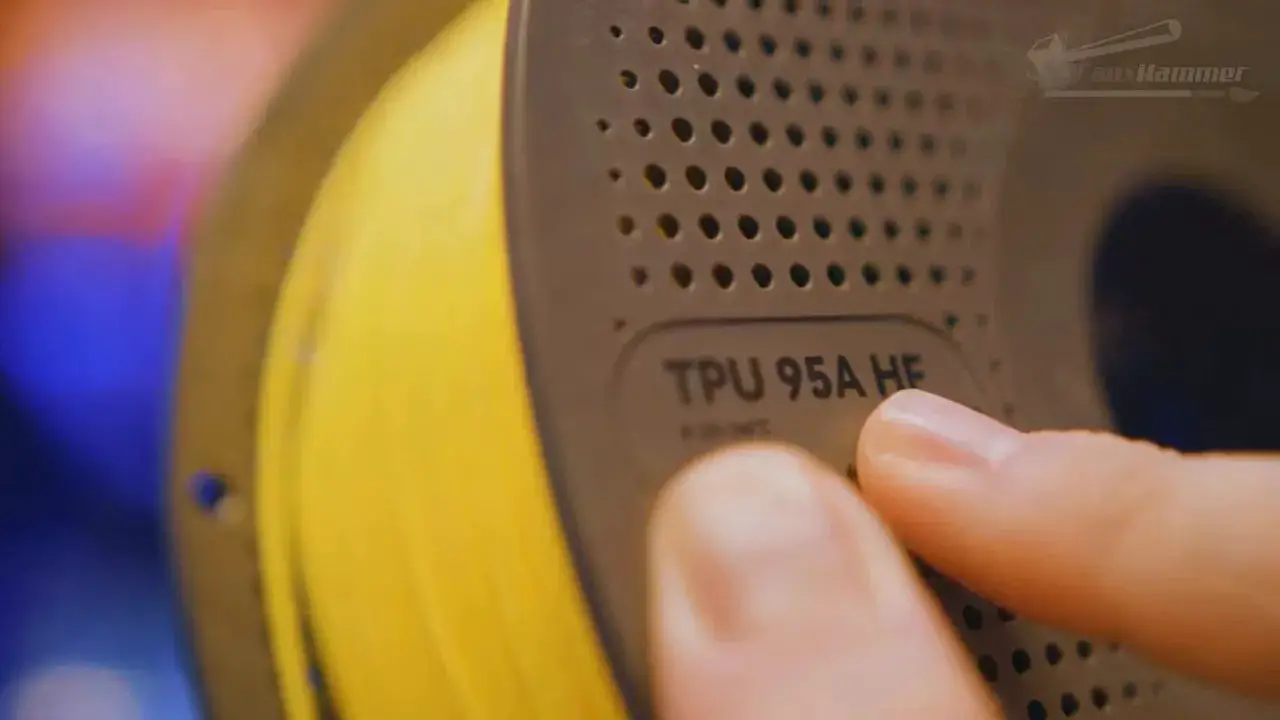
Then there is TPU. The FlashForge Creator 5 can print multicolour TPU because all tools are direct drive and independently managed. Again, this sounds obvious once you see it, but several directly competing machines simply do not offer the same freedom.
TLDR, the Bambu X2D with it’s dual mnozzles is limited as the second nozzle cannot reach the left side of the bed. So when using a support material, you have to work around that limitation. (that;s before coming onto the extrusion inconsistency and slower speed of it’s external bowden extruder)
The Creator 5 has no such restrictions, all 4 nozzles have full access to the whole build volume and all nozzles use direct drive extruers.
This is exactly why the hardware argument for toolchanging is so strong. It is not just about making pretty colour swaps faster. It is about expanding what materials can coexist in one print job and doing so without weird caveats.
FlashForge Creator 5 – Engineering Materials and the Creator 5 Pro Question
The standard FlashForge Creator 5 is open-frame, and that inevitably limits how far you should push engineering plastics.
An ABS test print showed some warping at the front corners. A brim probably would have helped, but the larger point remains the same: if you want consistent engineering material performance, enclosure matters. Heated chamber performance matters even more. Layer bonding on tougher materials simply won’t be as good in an open machine as it will be in an enclosed and actively managed one.
That is where the Creator 5 Pro becomes the logical sibling. It takes the same broader concept and applies the chamber heating management needed for stronger materials. If your use case includes regular ABS or more engineering-oriented filaments, the Pro is likely the more sensible choice. You can find it here: FlashForge Creator 5 Pro.
What is good here is that this lineup at least gives a clear and sensible choice: standard model for affordability and broad multicolour utility, Pro model for more serious material demands.
Rather than the leading brand who offers the choice of a Single-Nozzle Printer or Dual-Nozzle with weird caveats and limits
FlashForge Creator 5 – Comparisons, Value and the Ecosystem Debate
This is where things get spicy.
Functionally, the FlashForge Creator 5 is more capable than several highly visible machines if your goal is fast, flexible colour and multi-material printing. It can use dedicated support material. It can run multicolour TPU. Every nozzle can access the full bed. All tools are direct drive. It avoids pogo-pin wear concerns. Tool swaps are quick. Waste is reduced versus single-nozzle switching systems.
That is a serious list.
So what doesn’t it have? It lacks some of the nice-life features. No AMS-style automated material changer. No quick-swap nozzles. No polished, industry-leading software layer. No remarkable UI. No giant integrated model marketplace with generative tools and all the rest of the modern ecosystem fluff that, annoyingly, is not actually fluff once you live with a machine every week.
And that is the whole argument.
If ecosystem truly doesn’t matter, then the FlashForge Creator 5 becomes absurdly compelling. If ecosystem does matter, then suddenly the conversation becomes more nuanced, because the less glamorous bits around the machine start influencing whether ownership feels premium or merely capable.
Personally, I think this printer proves both sides of the point at once. Hardware capability absolutely matters. Toolchanging is clearly more versatile than the alternatives in many scenarios. But a mature ecosystem still has real value, and pretending otherwise is nonsense.
The result is that the FlashForge Creator 5 may well be the best value machine in its category right now, while still not being the universal best choice for every buyer.
FlashForge Creator 5 – Who Should Buy It?
The FlashForge Creator 5 makes the most sense for a fairly specific kind of user.
Buy it if you care most about functionality: If your priority is a printer that can genuinely exploit multiple tools, use dedicated support material, swap colours, have multi material prints or print multi colour TPU, this machine makes a lot of sense.
Buy it if you want faster multicolour work: Proper toolchanging cuts print times dramatically compared with many single-nozzle alternatives.
Buy it if you want real multi-material capability: Support interfaces, TPU plus rigid materials, and material-specific tool use are where this machine starts earning its keep.
Buy it if you are willing to tolerate a less refined workflow: It works, but it won’t pamper you.
On the other hand:
Skip it if ecosystem polish matters most to you: If you want the strongest software layer, slickest ownership experience and most refined consumer platform, the FlashForge Creator 5 does not yet lead there. They could, the jury is out on “will they?”
Skip it if you want convenience over capability: Manual loading, manual filament assignment and old-school nozzle changes are real trade-offs.
Skip the standard version if you mainly print engineering materials: In that case, the enclosed Creator 5 Pro variant is the better fit.
FlashForge Creator 5 – Pros and Cons
No review is complete without a blunt list.
Pros
Four proper independent tools
Fast tool swaps
Excellent print quality
Full-bed access for every tool
Direct-drive on all tools
Supports genuine multi-material printing
Can print multicolour TPU
Reduced waste versus single-nozzle material switchers
Strong value proposition
Simple physical setup
Cons
Manual filament loading and assignment (No RFID)
No waste chuteNo quick-swap nozzles
Locked-down firmware without premium polish to justify it
FlashForge Creator 5 – Final Thoughts
The FlashForge Creator 5 is one of those rare printers that feels more important than its spec sheet.
Yes, the specs are strong. Yes, the value appears excellent. Yes, the toolchanging system is genuinely more versatile than the compromises many people have become used to. But the bigger reason this machine matters is that it drags the conversation back to first principles.
What do you actually want from a 3D printer?
If the answer is raw functionality, flexibility and fewer hardware compromises, then the FlashForge Creator 5 is one of the strongest options on the market right now. In that sense, it absolutely makes the case that toolchanging is the more versatile direction for FDM to move in.
If the answer is platform, polish and a fully matured ecosystem, then the machine is not yet the complete package. It proves the hardware point brilliantly, while also proving that ecosystem still has weight.
So no, there isn’t a universal winner here. But there is a very clear conclusion.
The FlashForge Creator 5 is, at the very least, one of the best-value multi-tool printers available right now. And if FlashForge can improve the surrounding experience with better refinement, smarter material handling and stronger post-launch support, this could go from “hugely compelling” to “category-defining.”
FlashForge Creator 5 – FAQ
Is the FlashForge Creator 5 a true multi-material printer?
Yes. The FlashForge Creator 5 uses four independent tools rather than one nozzle swapping between filaments, so it is a true multi-material and multicolour system.
Can the FlashForge Creator 5 print TPU?
Yes, and one of the standout points here is that the FlashForge Creator 5 can print multicolour TPU thanks to its direct-drive tool setup.
Does the FlashForge Creator 5 have an AMS or automatic material changer?
No. Material loading on the FlashForge Creator 5 is manual, and there is no AMS-style automated material switching system at the time covered here.
Is the FlashForge Creator 5 good for engineering materials?
The standard FlashForge Creator 5 can reach 320°C nozzle temperature, but because it is an open machine it is not the ideal choice for demanding engineering materials. The Creator 5 Pro is the better fit for that use case.
Does the FlashForge Creator 5 have quick-change nozzles?
No. Nozzle changes are still manual and involve screws and disassembly, which is one of the machine’s weaker points.
How big is the build volume on the FlashForge Creator 5?
The build volume is 256 x 256 x 256mm.
Is the FlashForge Creator 5 better than a single-nozzle multicolour printer?
In functional terms, often yes. The FlashForge Creator 5 offers faster colour changes, less waste, better multi-material flexibility and support for combinations like dedicated support interfaces and multicolour TPU that single-nozzle systems handle less elegantly.
FlashForge Creator 5 – Additional Resources
If you want to keep up with more hobby and printer coverage, there’s more over at FauxHammer.
Please Note: This site uses affiliate links. Our Affiliate Partners are shown below
(Affiliate links will result in compensation to the site on qualifying purchases)
Click this link & buy your hobby stuff from Element Games for the UK & Europe to support FauxHammer.com – Use Code “FAUX2768” at the checkout for double reward points.
Our Affiliates / Hobby Stores
- UK: Element Games, The Outpost, Wayland Games, Mighty Lancer, Goblin Gaming, Forbidden Planet, Model Scenery Supplies, eBay, Amazon
- US/Canada: MTechCave, GameKastle, eBay (US), eBay (CA), Amazon
- Germany: Taschengelddieb
- Europe: eBay (DE), eBay (FR), eBay (ES), eBay (IT), Amazon
- Australia: eBay, Amazon
- Global: RedGrass Games, Warcolours
- 3D Printers: Phrozen 3D, Elegoo, Anycubic
FauxHammer – Latest Video on YouTube
Please Note: This site uses affiliate links. Our Affiliate Partners are shown below
(Affiliate links will result in compensation to the site on qualifying purchases)
Click this link & buy your hobby stuff from Element Games for the UK & Europe to support FauxHammer.com – Use Code “FAUX2768” at the checkout for double reward points.
Our Affiliates / Hobby Stores
- UK: Element Games, The Outpost, Wayland Games, Mighty Lancer, Goblin Gaming, Forbidden Planet, Model Scenery Supplies, eBay, Amazon
- US/Canada: MTechCave, GameKastle, eBay (US), eBay (CA), Amazon
- Germany: Taschengelddieb
- Europe: eBay (DE), eBay (FR), eBay (ES), eBay (IT), Amazon
- Australia: eBay, Amazon
- Global: RedGrass Games, Warcolours
- 3D Printers: Phrozen 3D, Elegoo, Anycubic