He is Groot (Painting a 3D Printed Groot step-by step)
Last Updated on December 29, 2018 by FauxHammer
Painting this 3D Printed Groot was my new favourite activity! Check out the step-by-step below.
I’ve been looking forward to getting my mini’s back out and whilst I’m now surrounded by unpainted models. My time has been fixed on something new, 3D printed models!
I’m loving 3D printing and whilst for miniatures, the print grain texture is frustratingly invasive. For larger models, and especially in the case of Groot (who has a grainy texture anyway), 3D printing is just awesome!
So, after painting his precious ring (oh, haha) my friend (greatest dude ever) showed me some of his other wares. I got eager to try out my airbrush, along with my fathers day gift of a portable airbrush extractor fan (love you kiddies, my lungs love you more too now). So, I took his 3D Printed Groot Plant Pot for a spin, and spray.
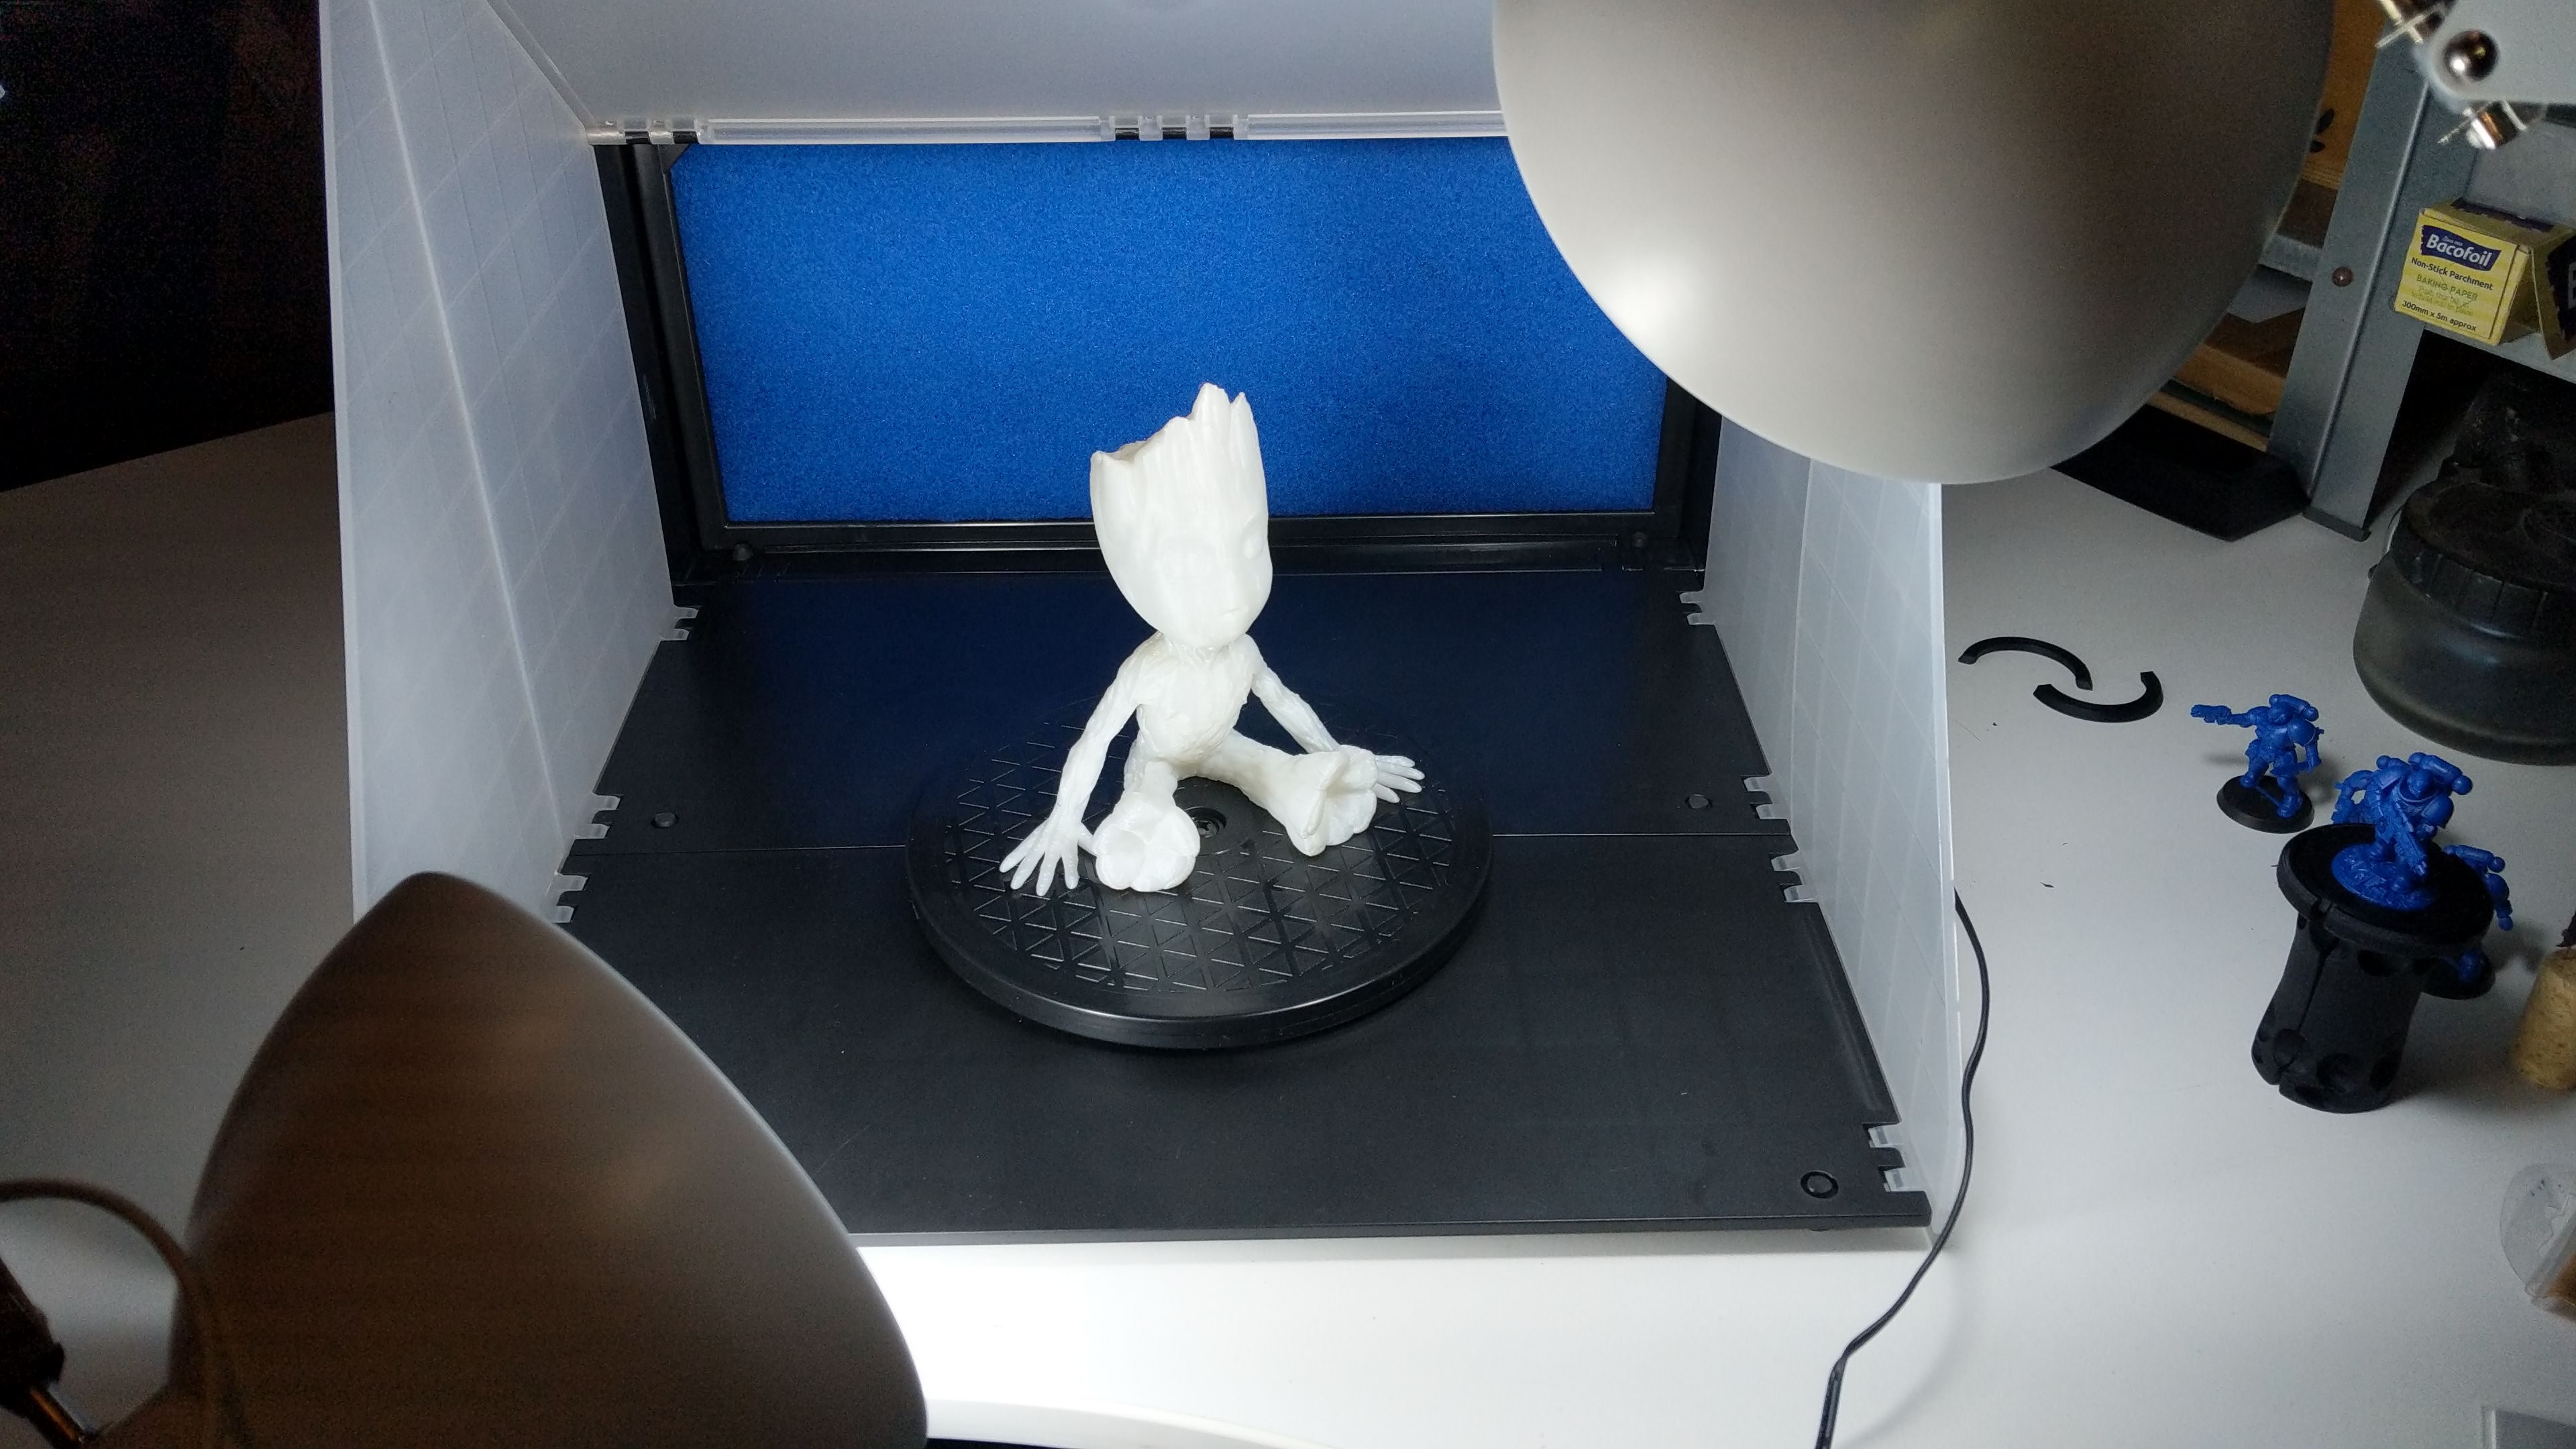
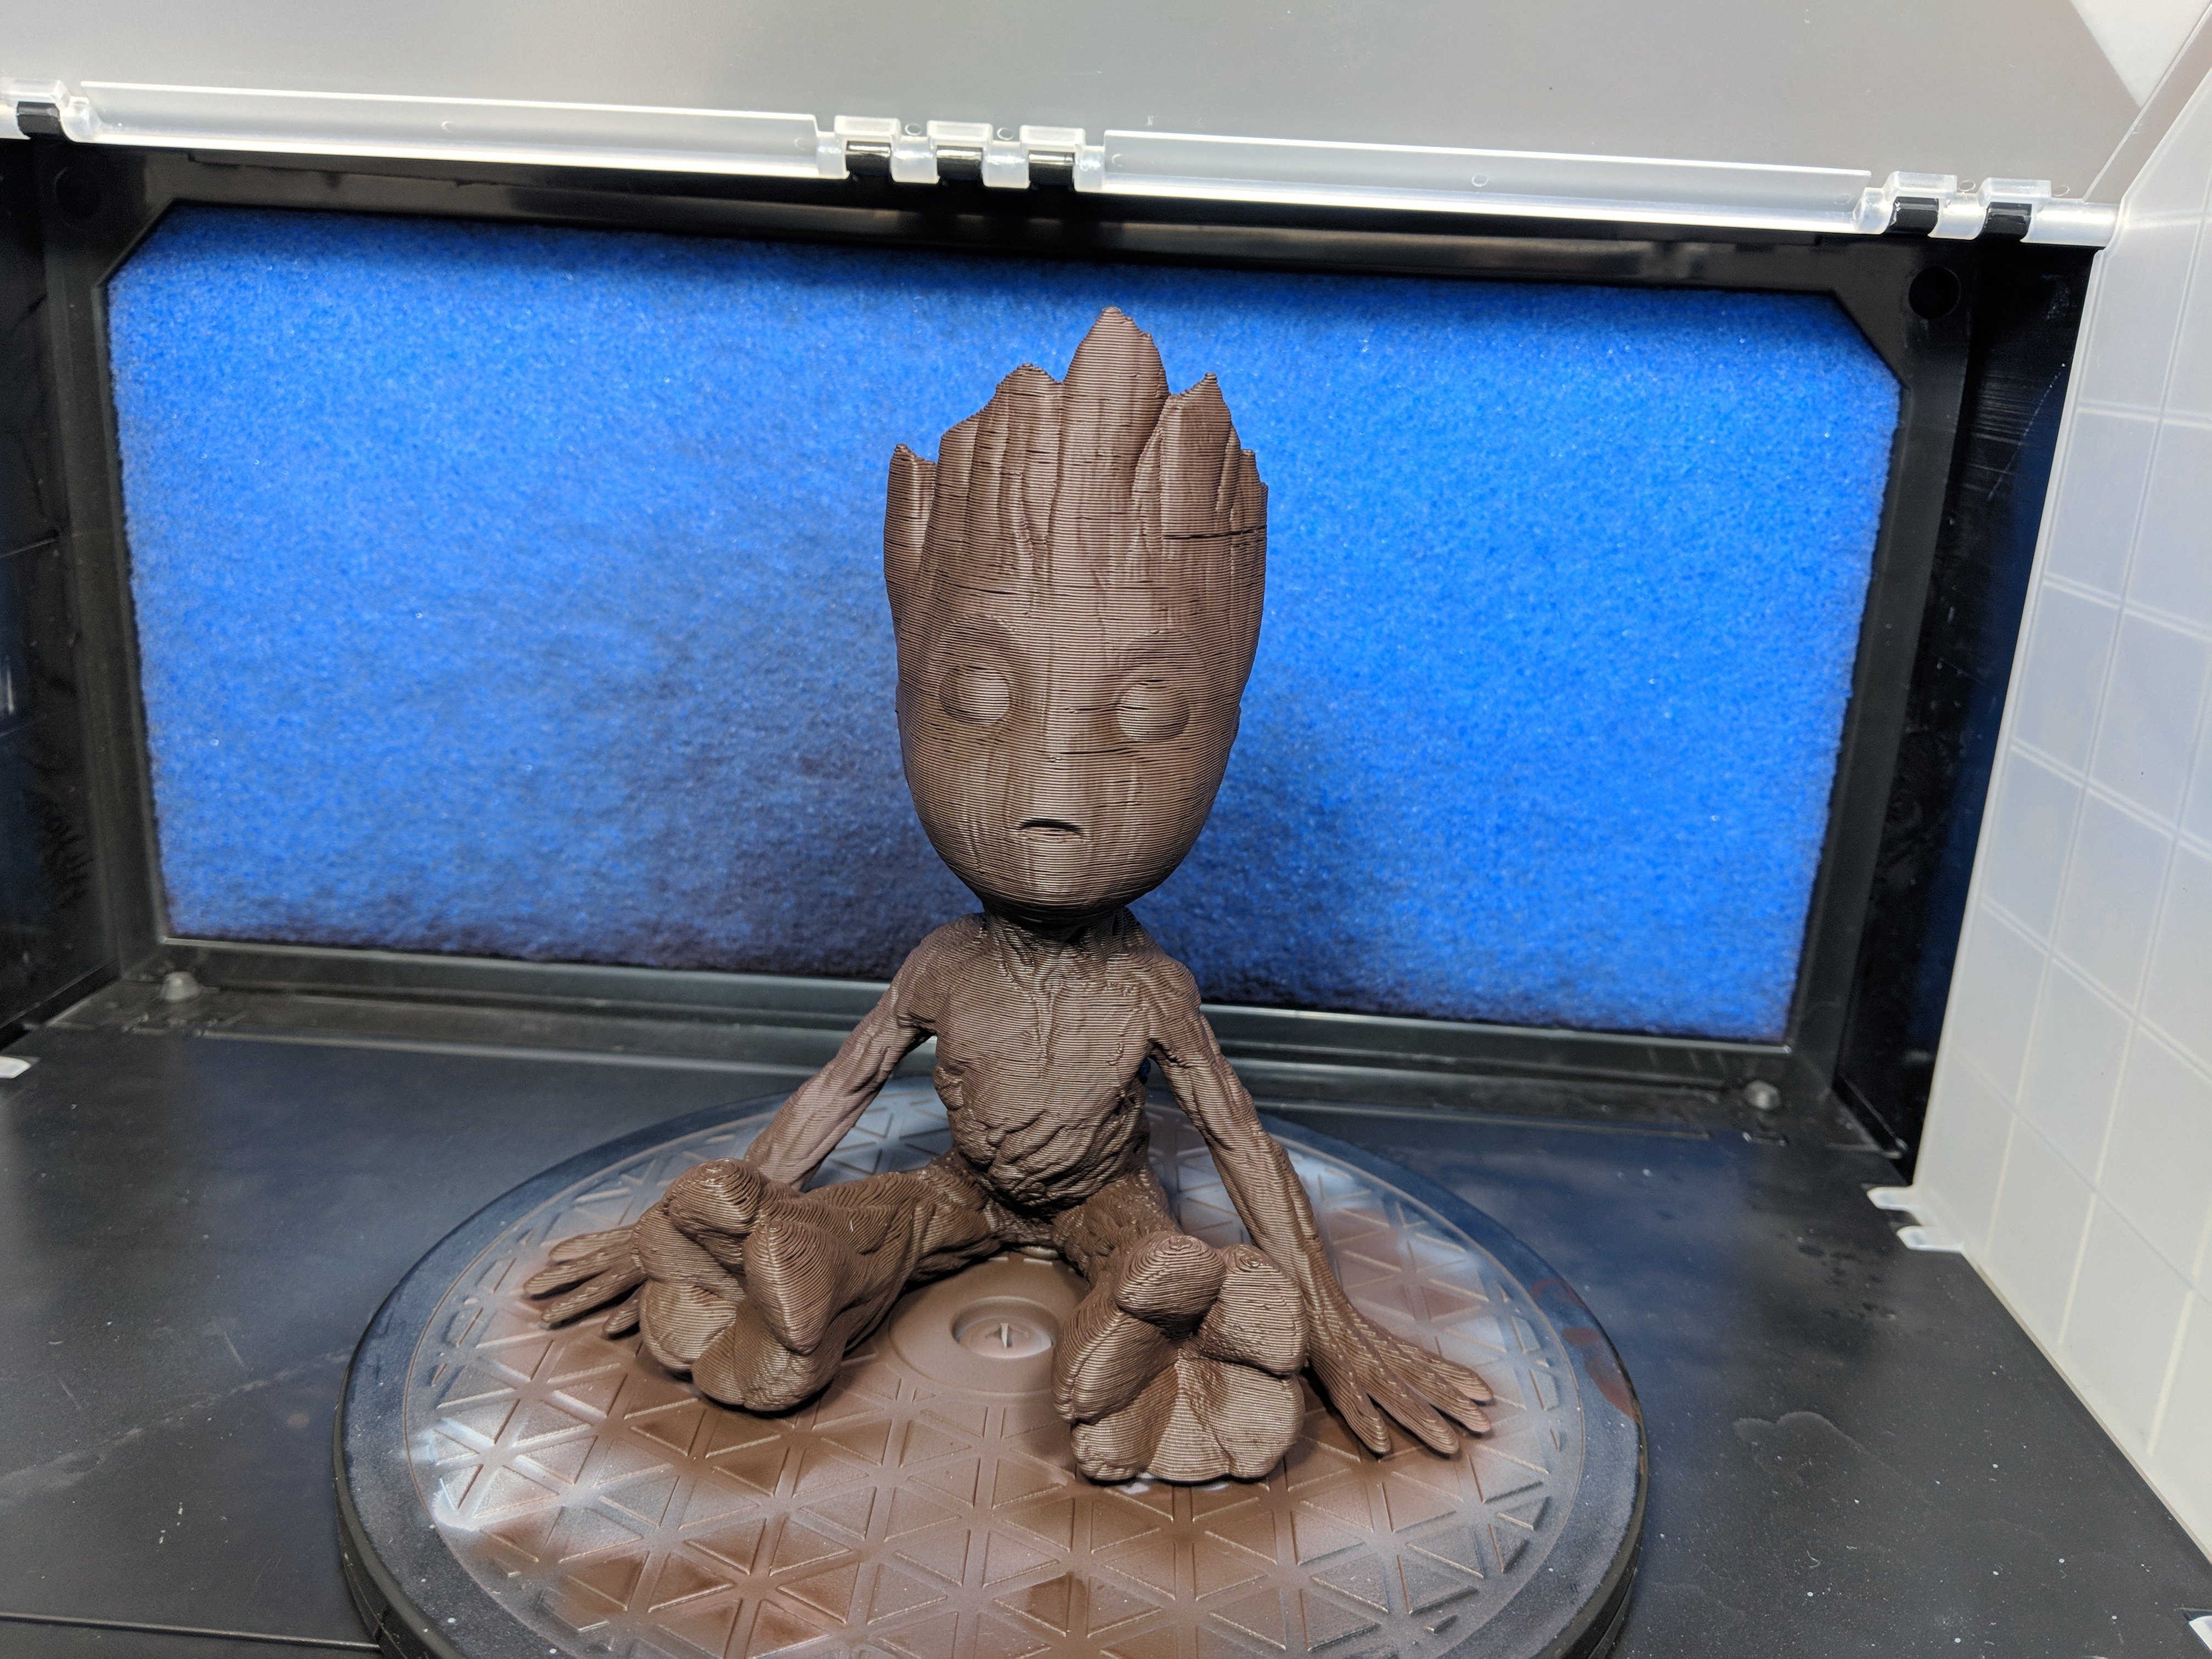
I started with his 3D Printed Groot model printed on his Creality CR10 300x300x400. Which, if you look online is hands down the best 3D printer a beginner can buy, by a good margin. The quality scale you can print to is incredible for the price. It has one of the largest print areas available in an entry-level model. Don’t take my word for it, do your own reading. But you’re likely to find the same result he did. Which is why he bought it. My favourite part of this printer is you can actually 3D print parts for it, using it!
If you are at all interested in 3D printing, have a look at the Creality CR10 on eBay
For anyone who wants to see the model and print one of these, check this link to the item on Thingiverse.
3D Printed Groot model step-by-step
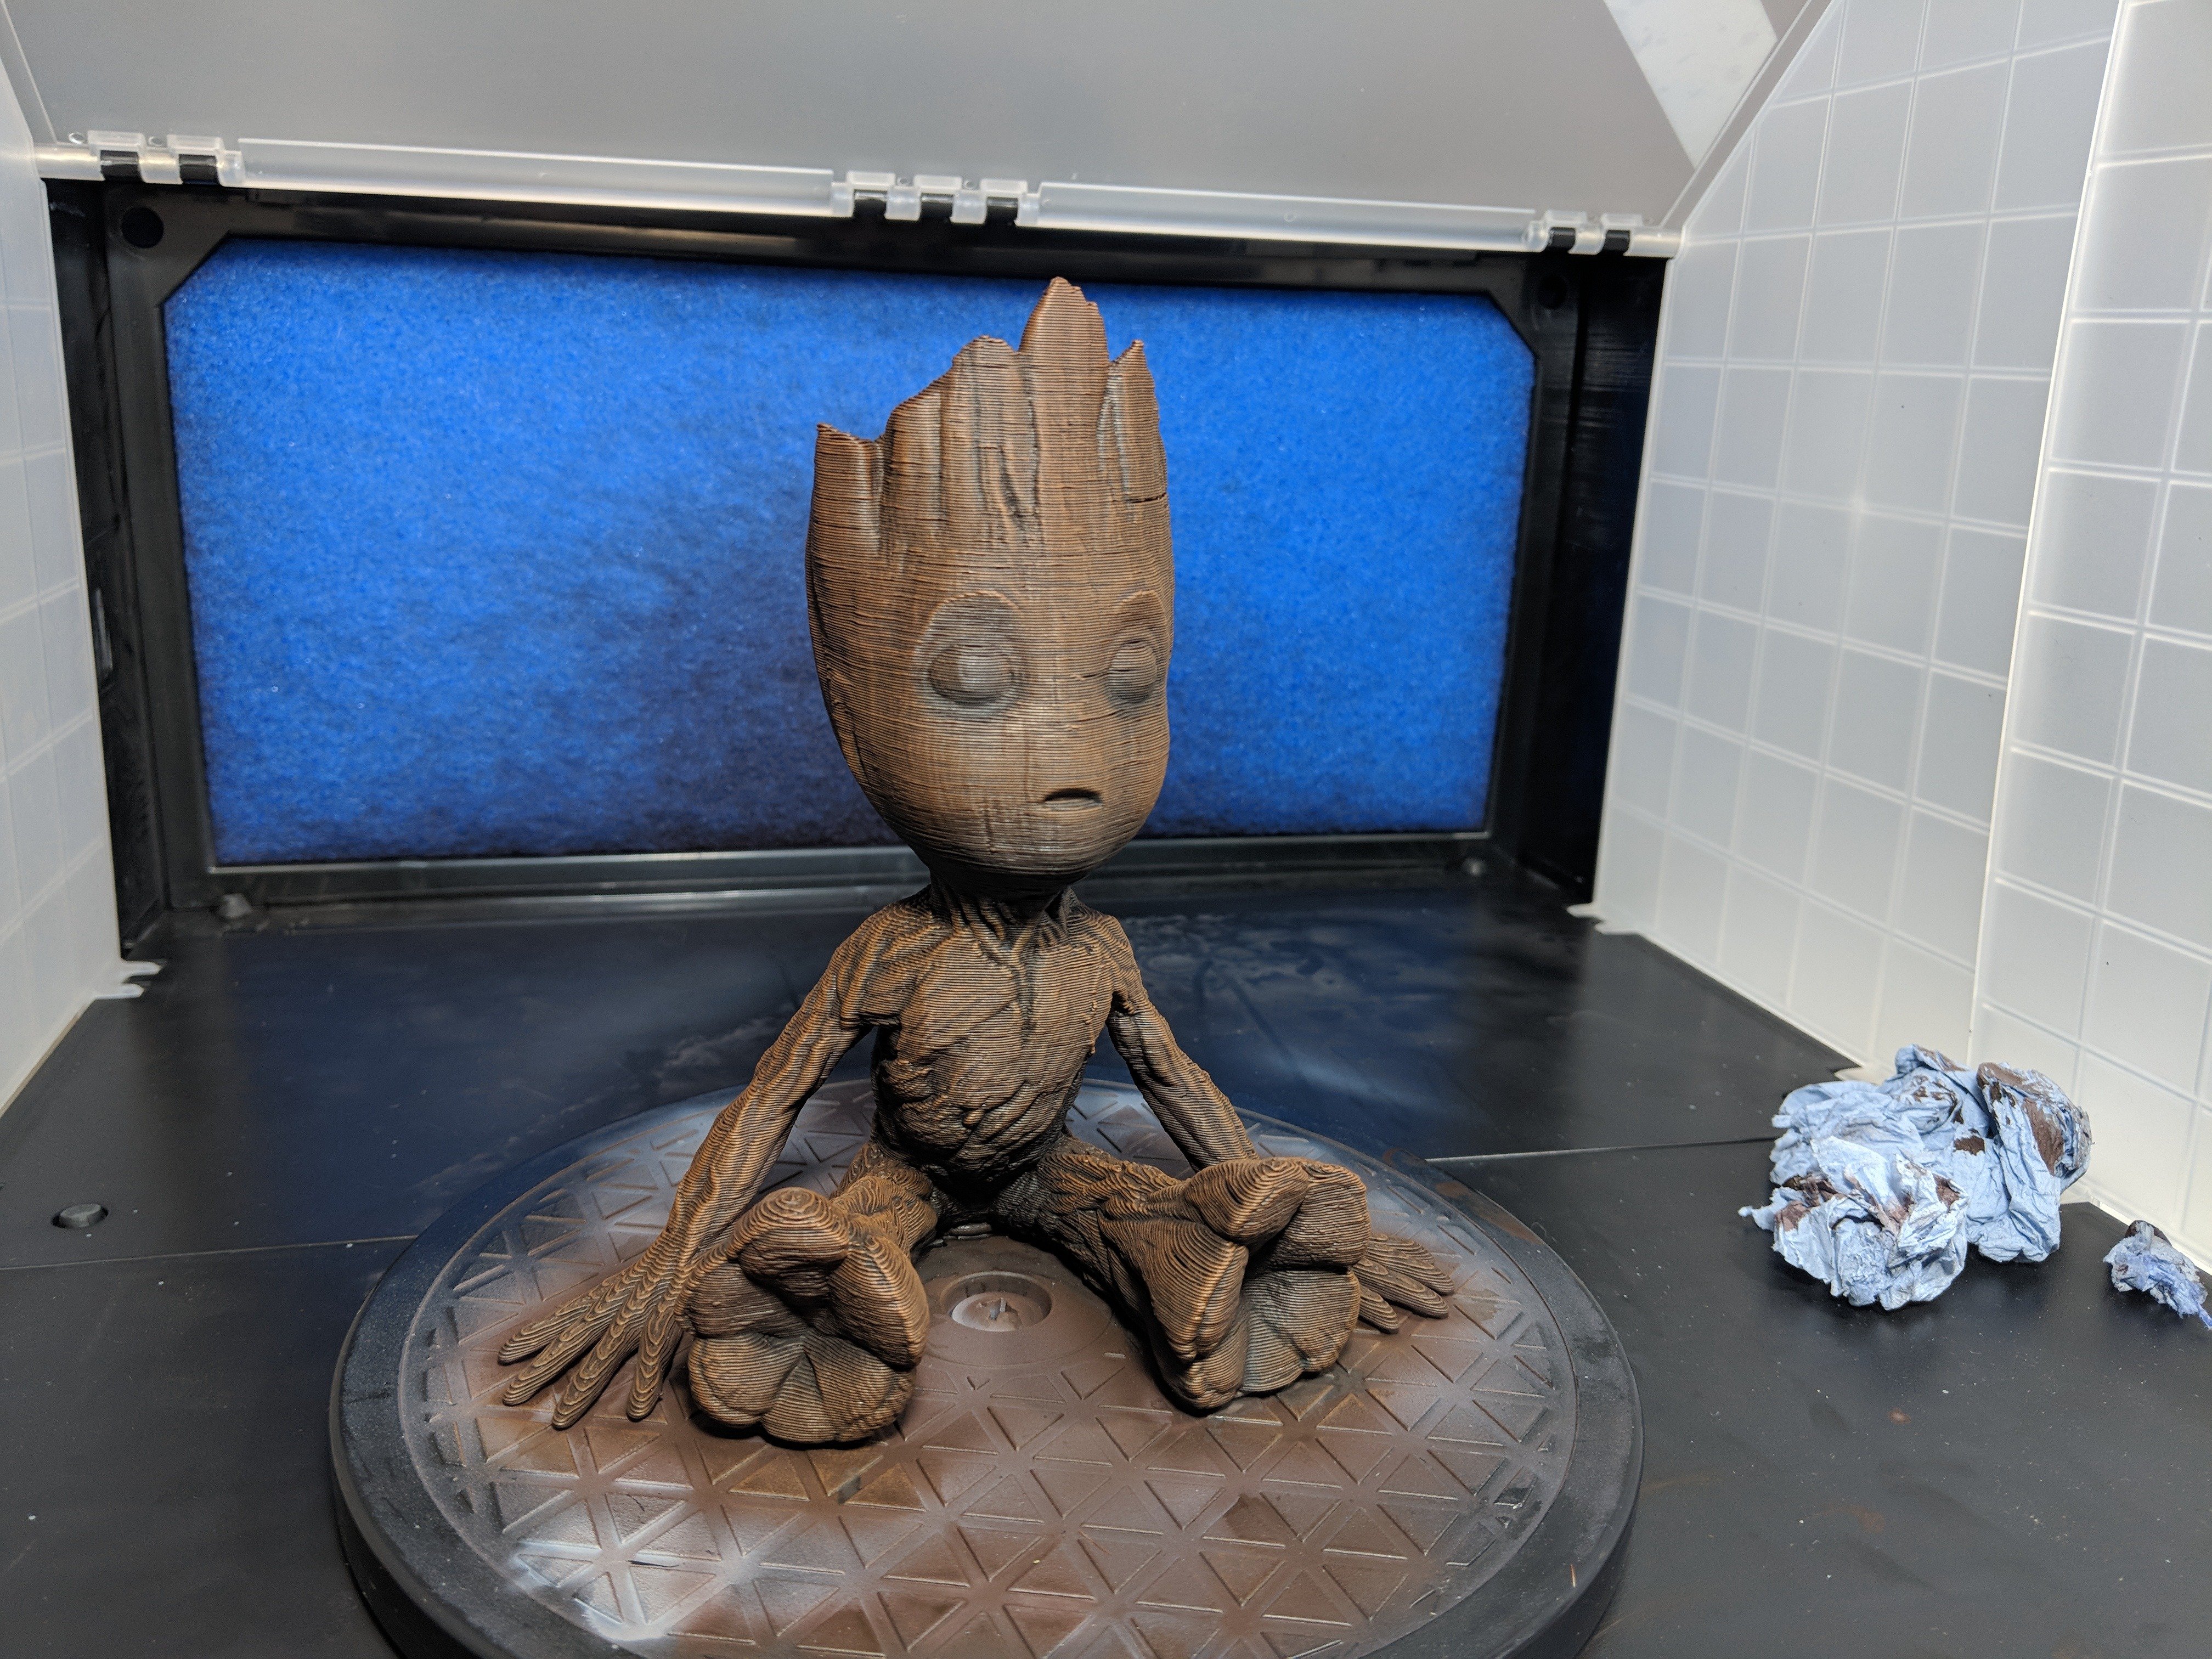
The model was primed with some Badger Stynylrez Grey Primer, again cheap, but bloody awesome stuff!
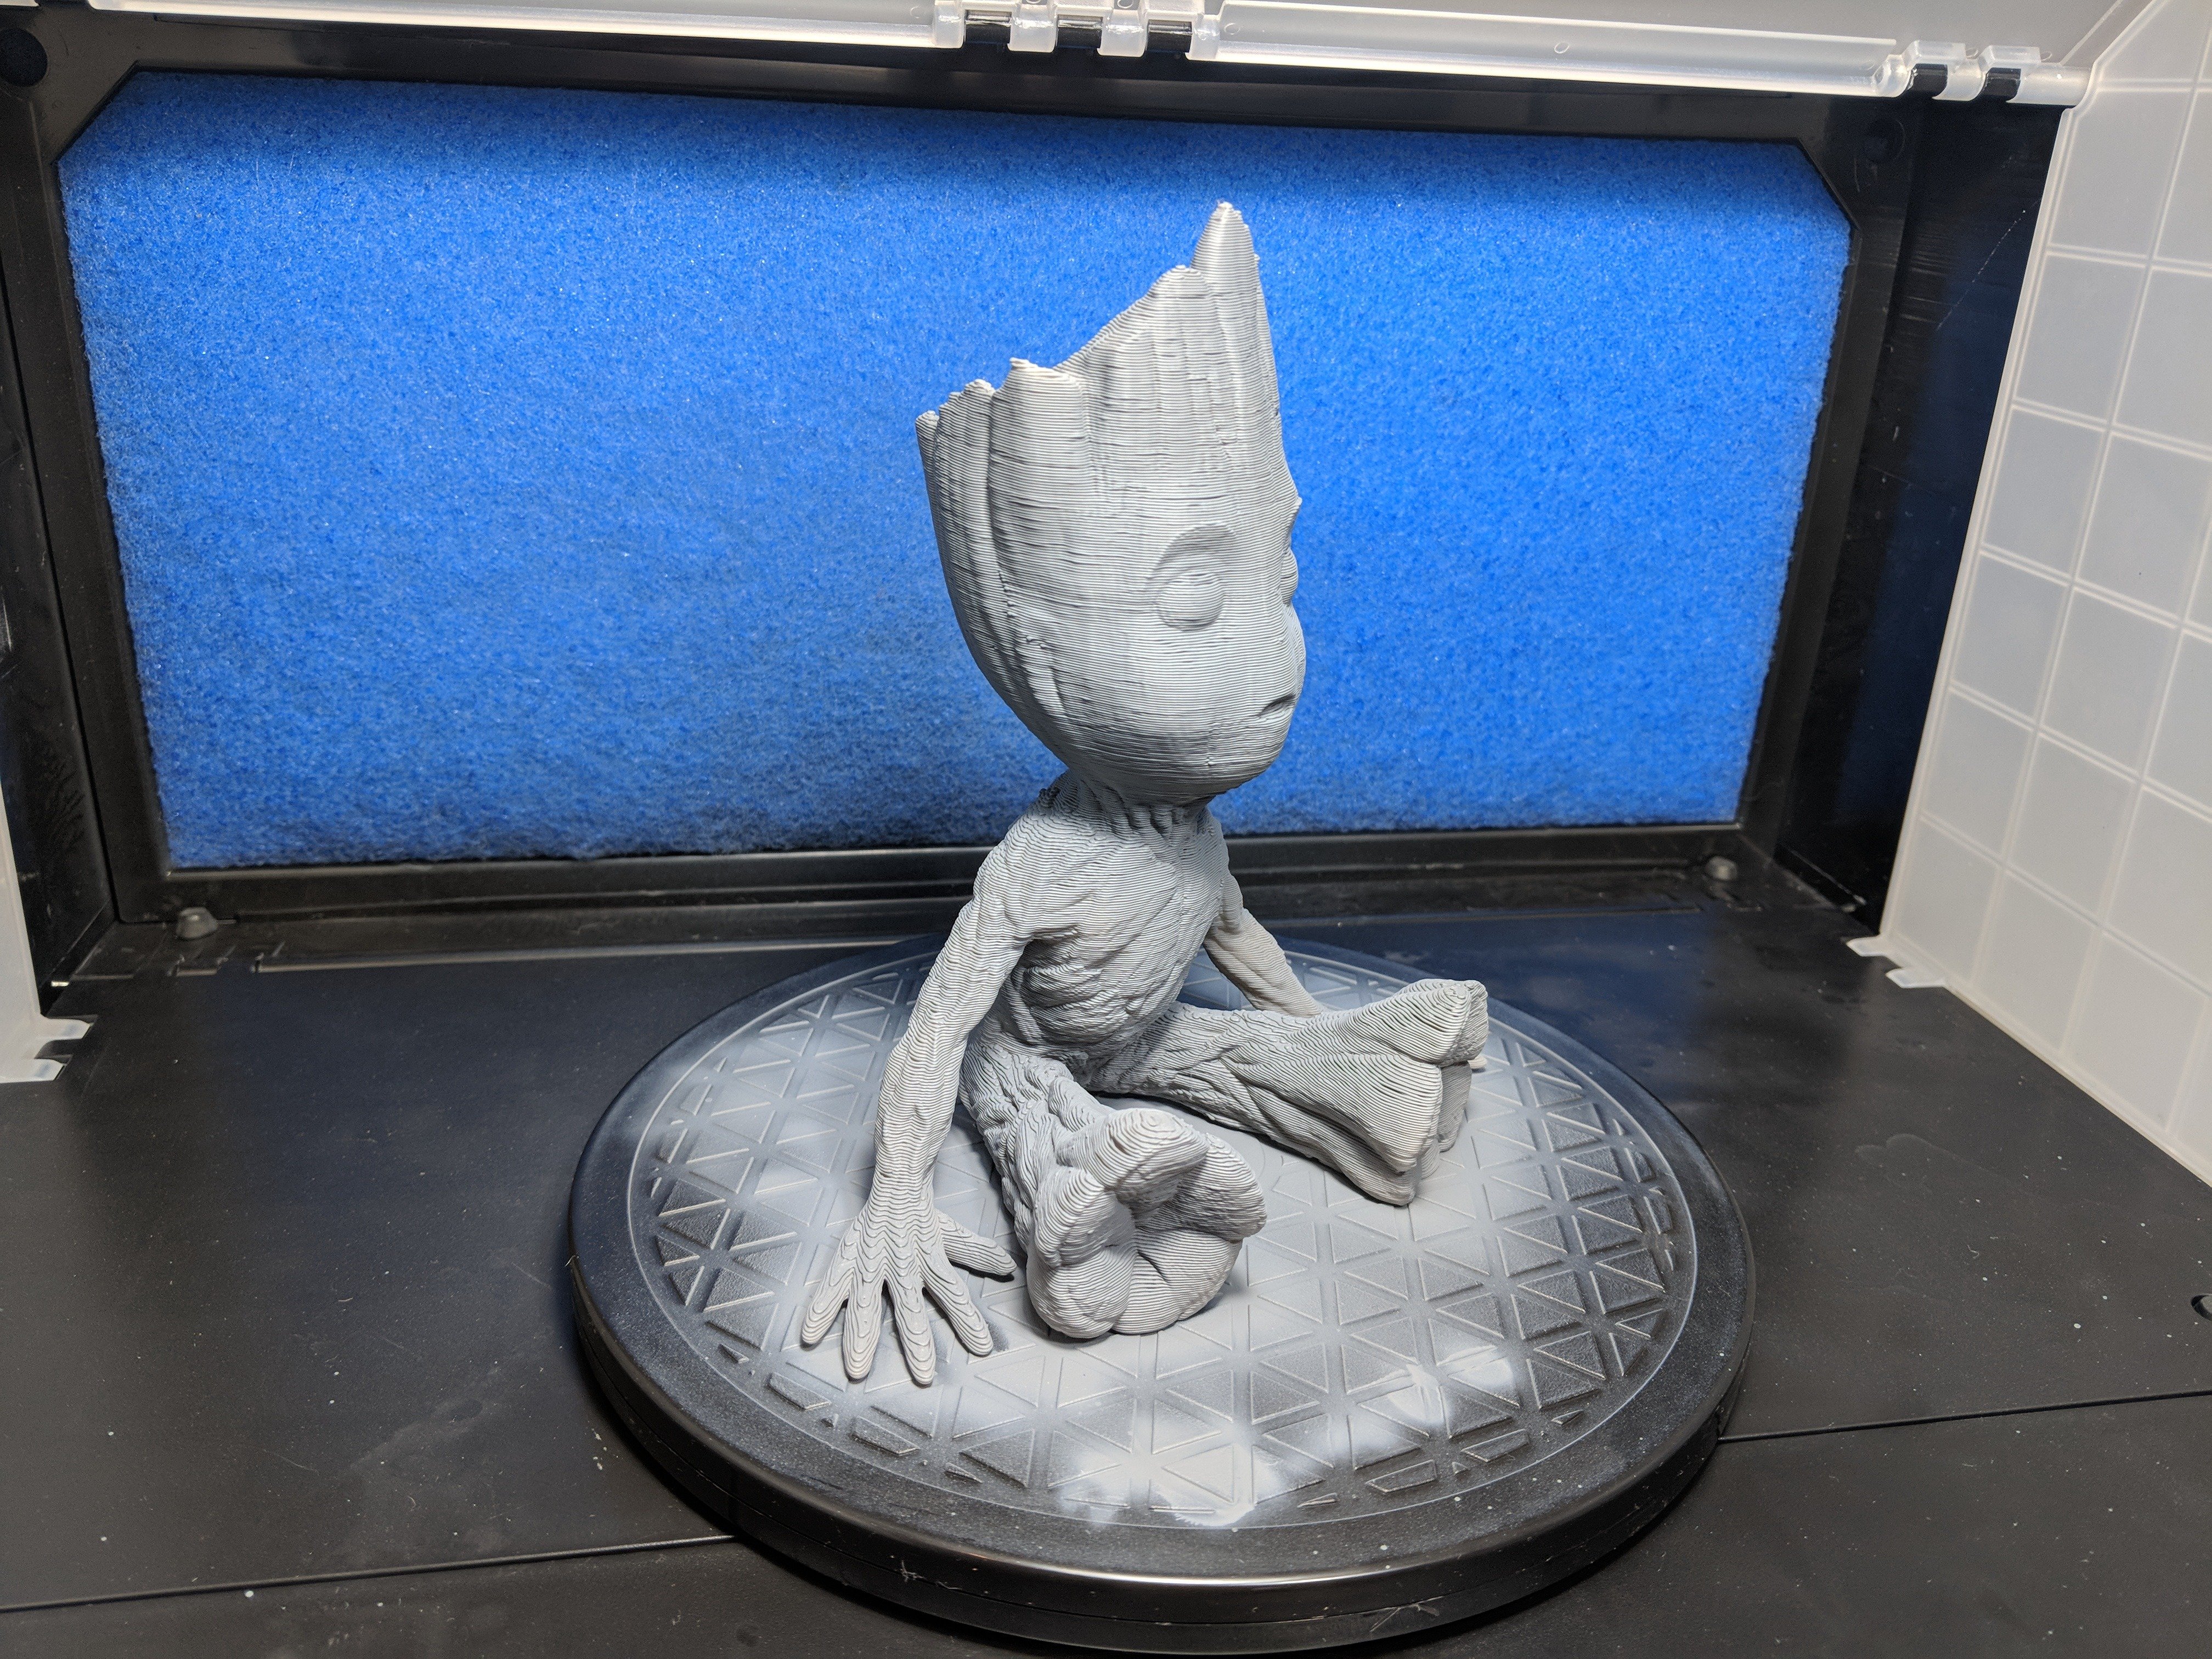
Next, the 3D Printed Groot got a coat of Rhinox Hide mixed with about 30% car screen-wash to get it flowing through the airbrush.
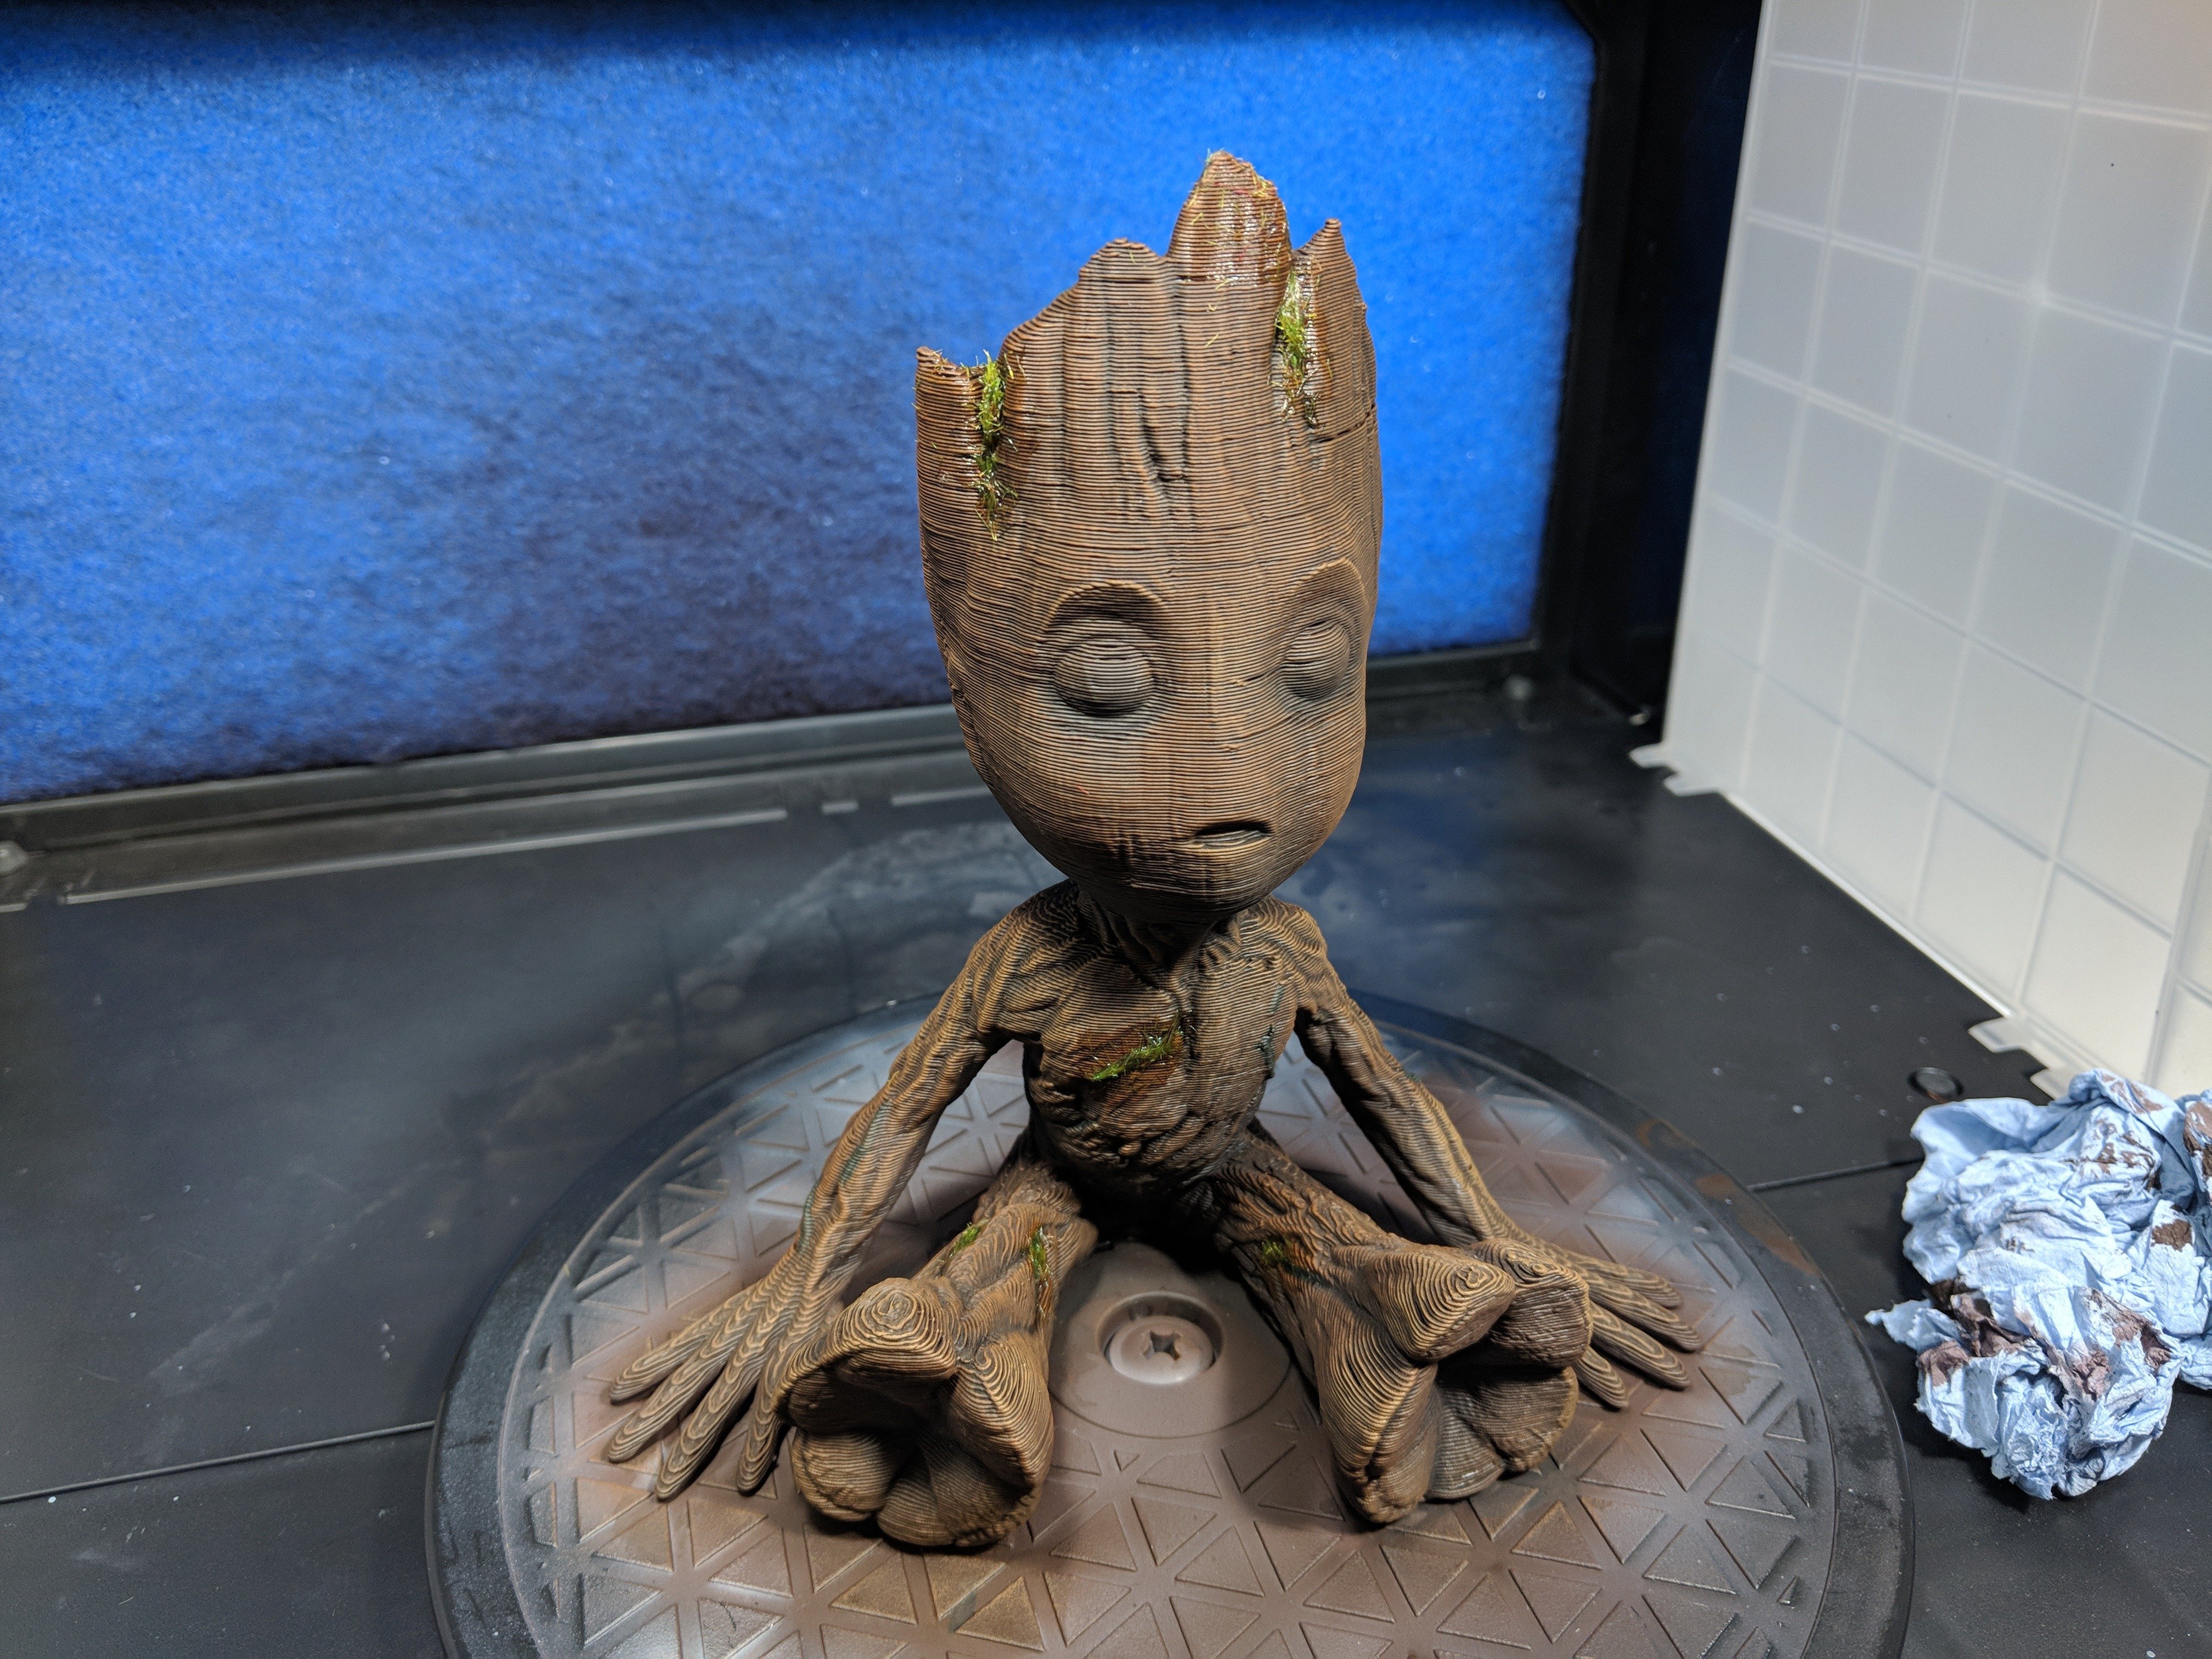
After that, I forgot to take photos for a bit, but I threw in a liberal coat of Agrax Earthshade, but making sure it didn’t pool where it wasn’t meant to. I went over the deeper recesses with a couple more coats to really darken them. This is a much larger model than I’m used to, so the additional shade was needed for larger contrast.
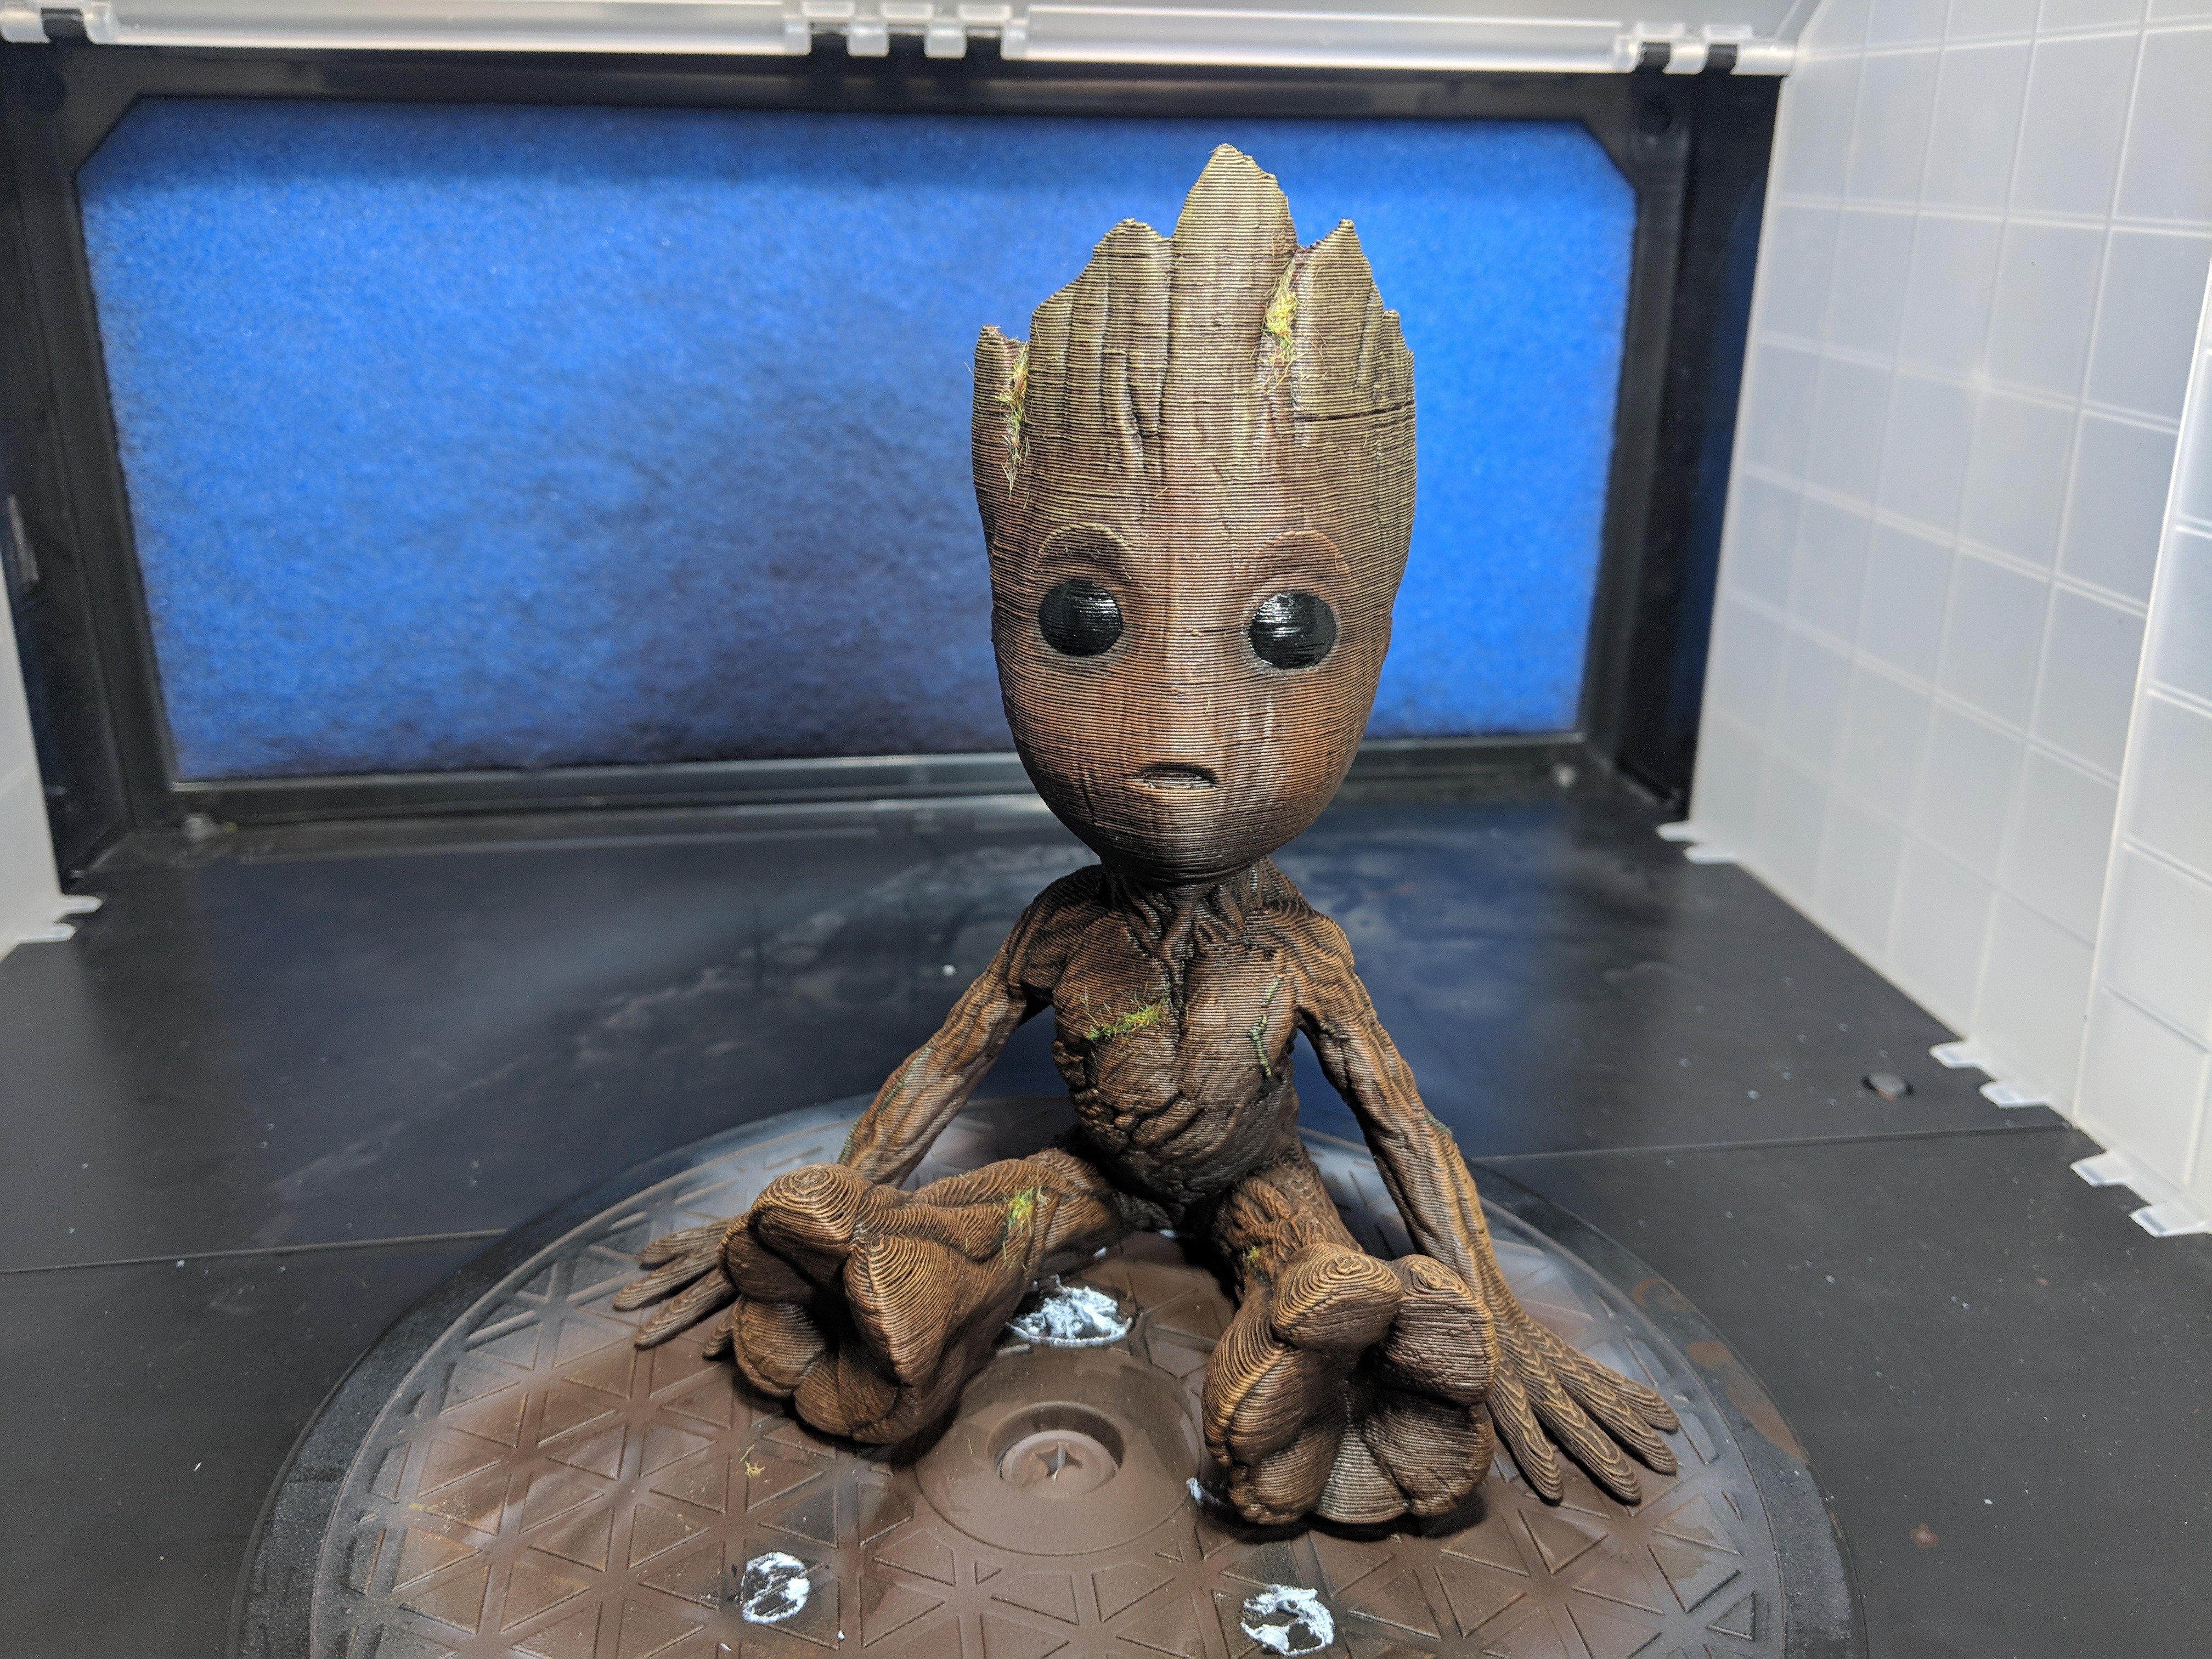
After this, I performed a heavy dry-brush of Rhinox Hide to bring back the surface colour. As you can see below the chin, groin and rib area where I left this darker.
I performed a lighter drybrush of Mournfang Brown along most of the raised surfaces and finally a drybrush of XV-88 on the edges.
Next, I painted a couple of coats of Nocturne Green over some of the thinner vines.
Note: Nocturne Green is an awesome Forge World Airbrush paint that I use to paint my Dark Angels. But I can’t find it anymore on the Forge World website. I found some on this site and god damn I hope Forge World haven’t stopped making it. (I’ve emailed them to ask) It’s the perfect colour for my Dark Angels, it’s Darker than Caliban Green and looks more like the older Dark Angels Green.
Update 19/06/18: Forgeworld has stopped doing their whole paint range! OMFG! Where can I get me some original Dark Angels Green!
Anyway, after that, I mixed some old Static Grass with Lahmian Medium and pasted it in a few crevices.
Half Way there
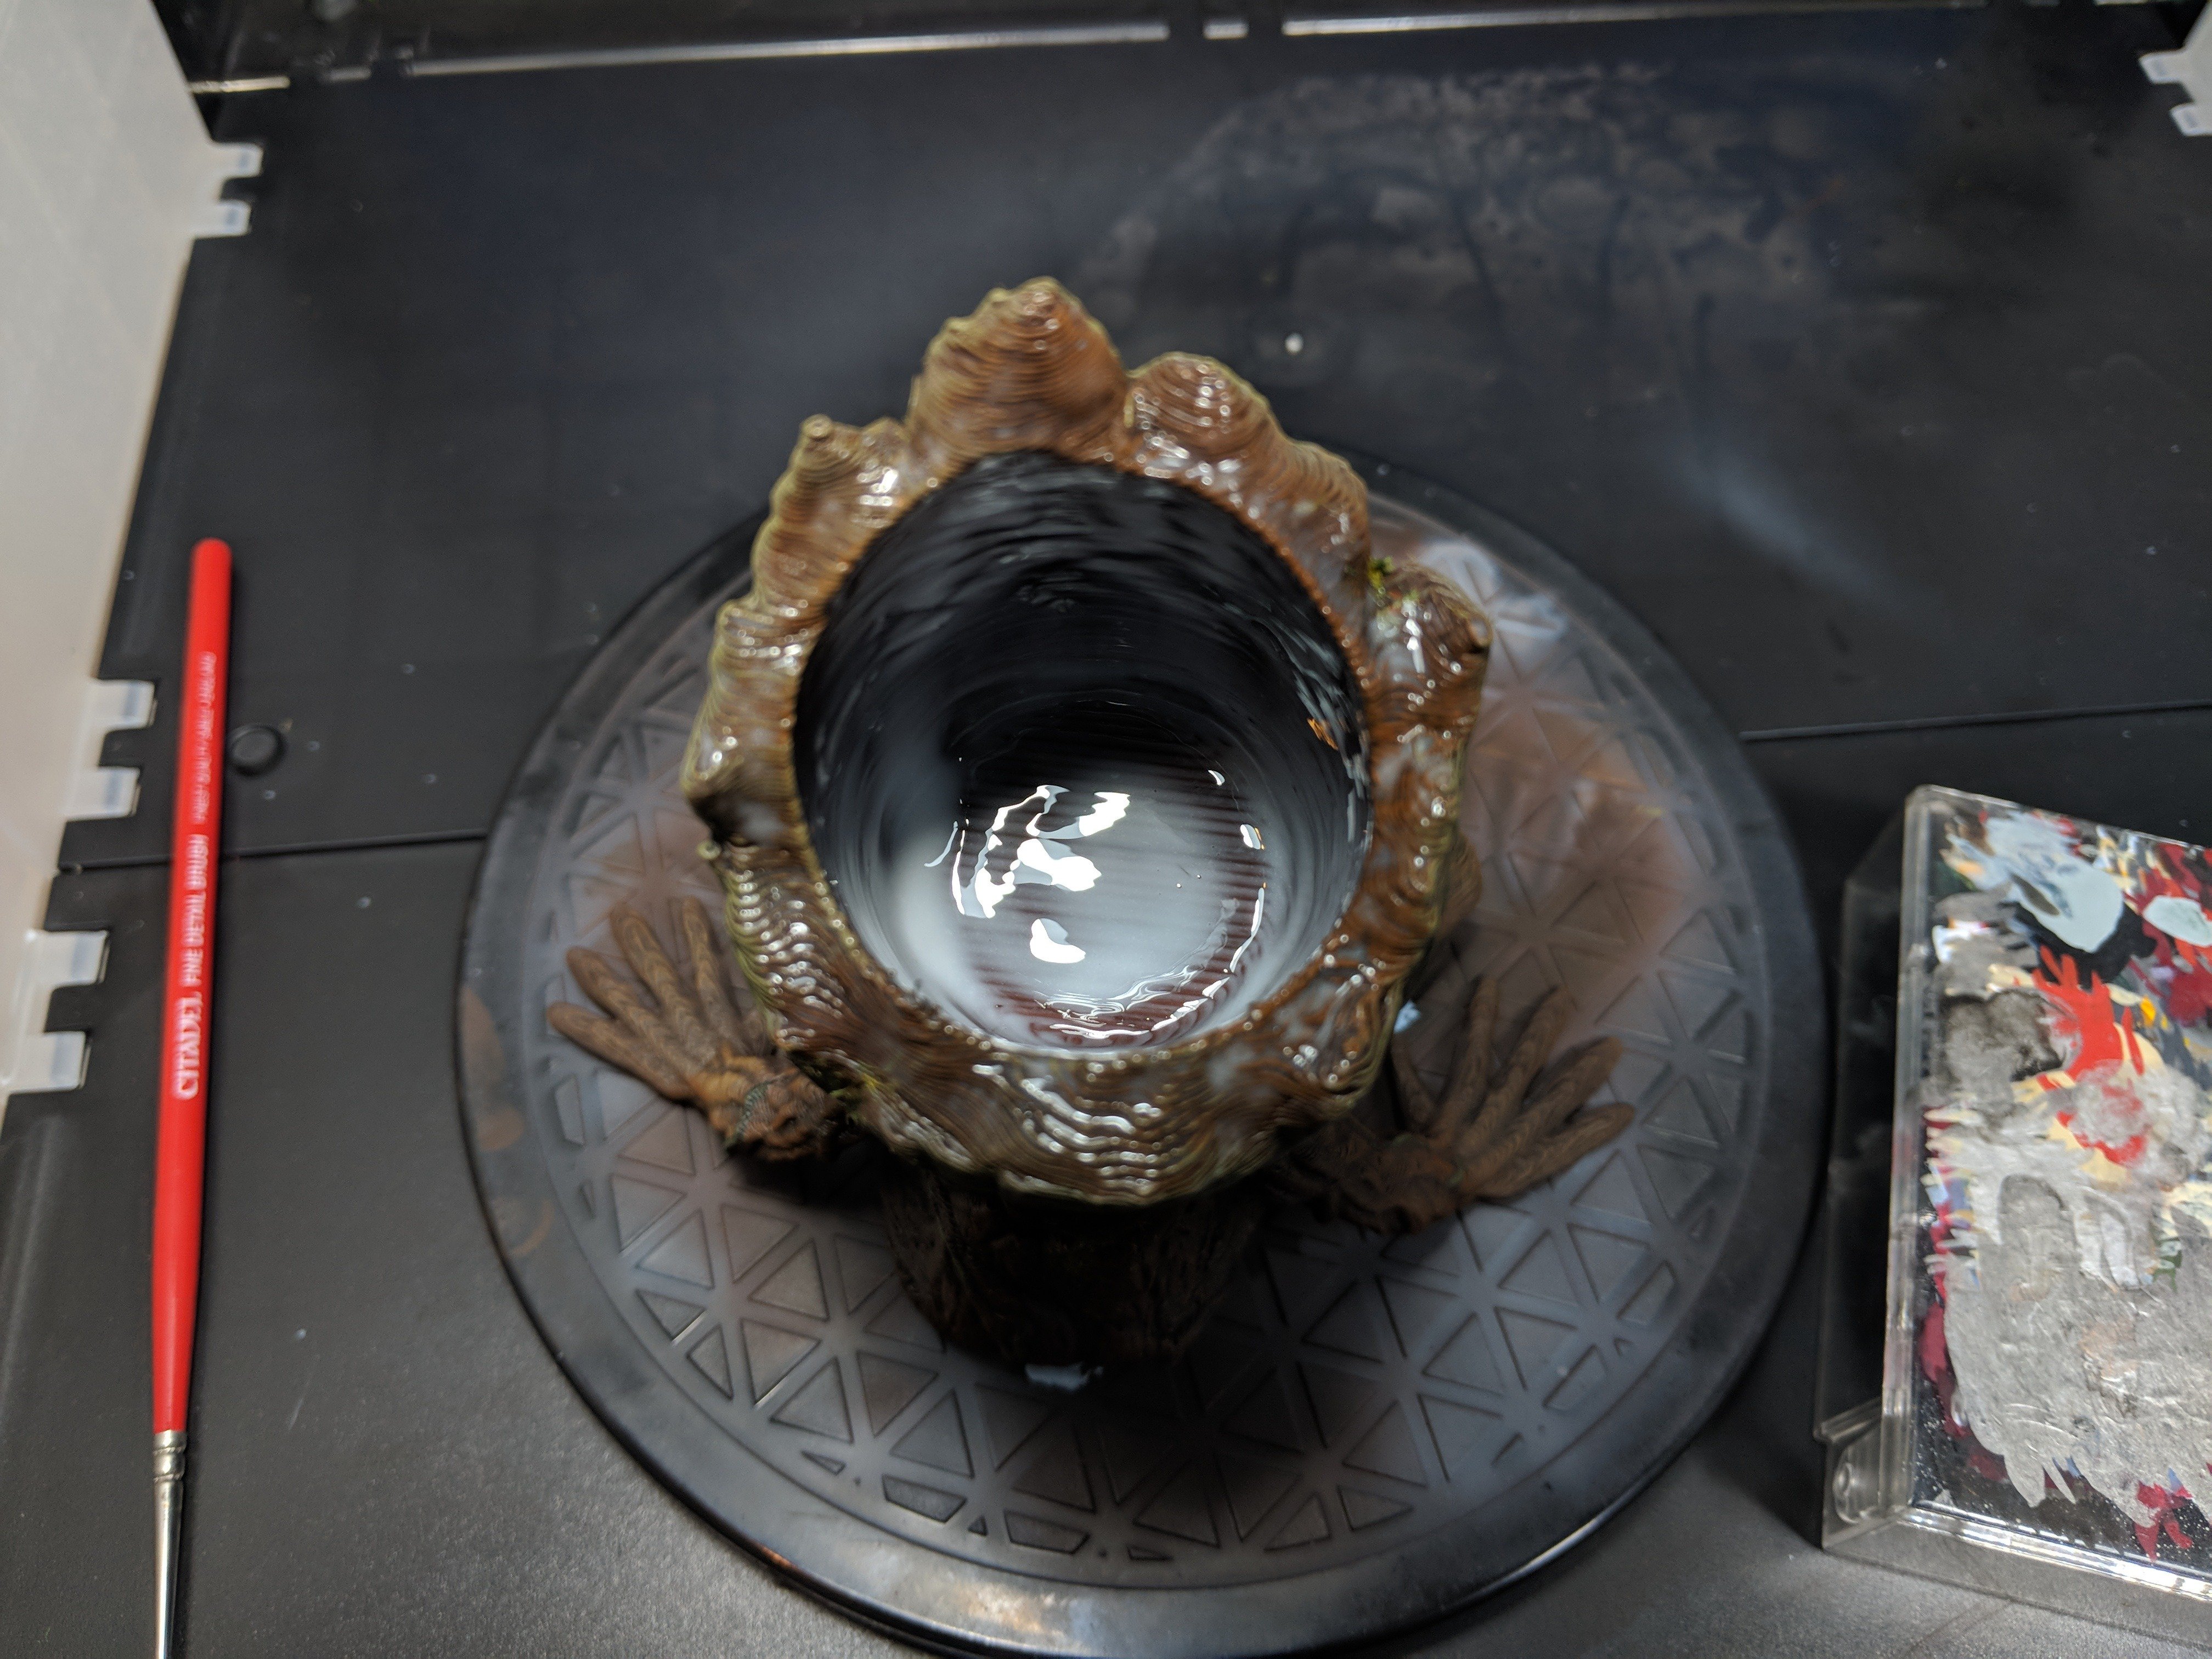
Next, I dry-brushed on some Deathworld Forest on the upper edges of the head to give the impression of moss growth and also as a highlight on the vines. I then got the airbrush back out to seal it and put a consistent texture across the surface with some Vallejo Matt Varnish. I used a plastic dropper to squeeze some PVA Glue into the eyes. This was to give them a gloss texture and remove some of the ridges from the texture of the 3D print and to make them stand out from the rest of the 3D Printed Groot model.
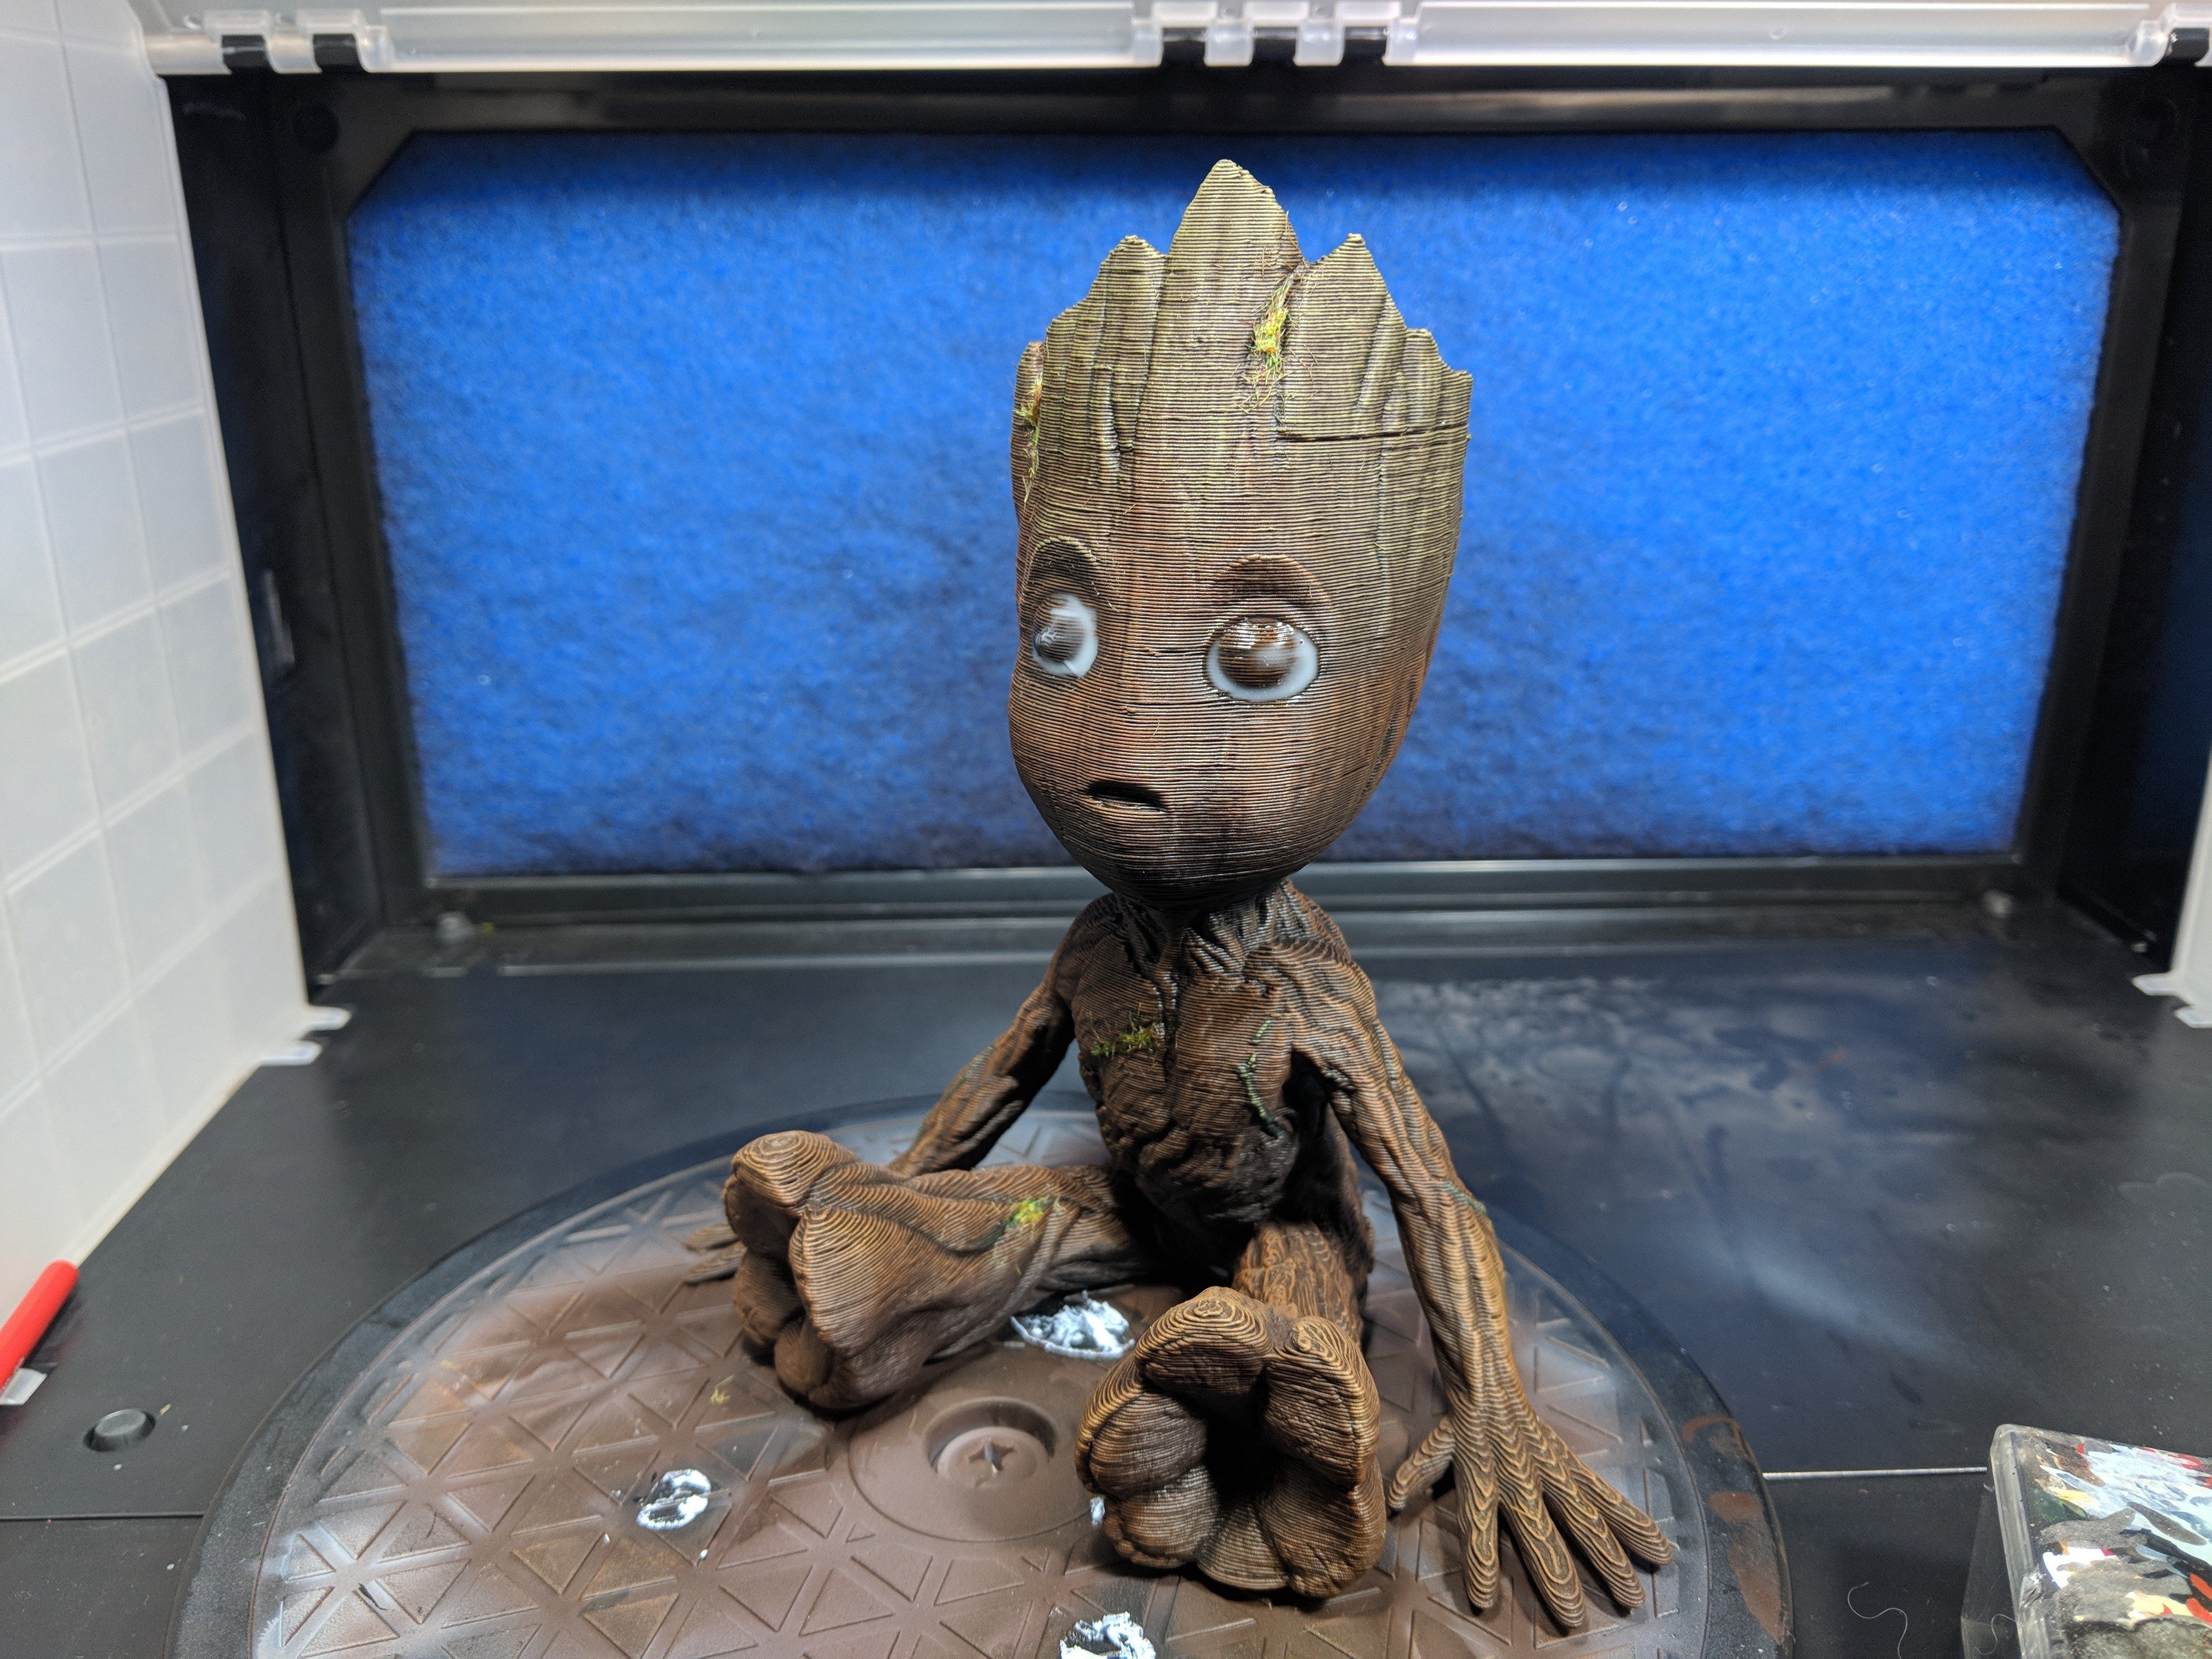
Finally, I put some Abaddon Black into the eyes. I think the PVA really helped here but I’m going to add a layer or 2 of ‘Ardcoat to really make them pop.
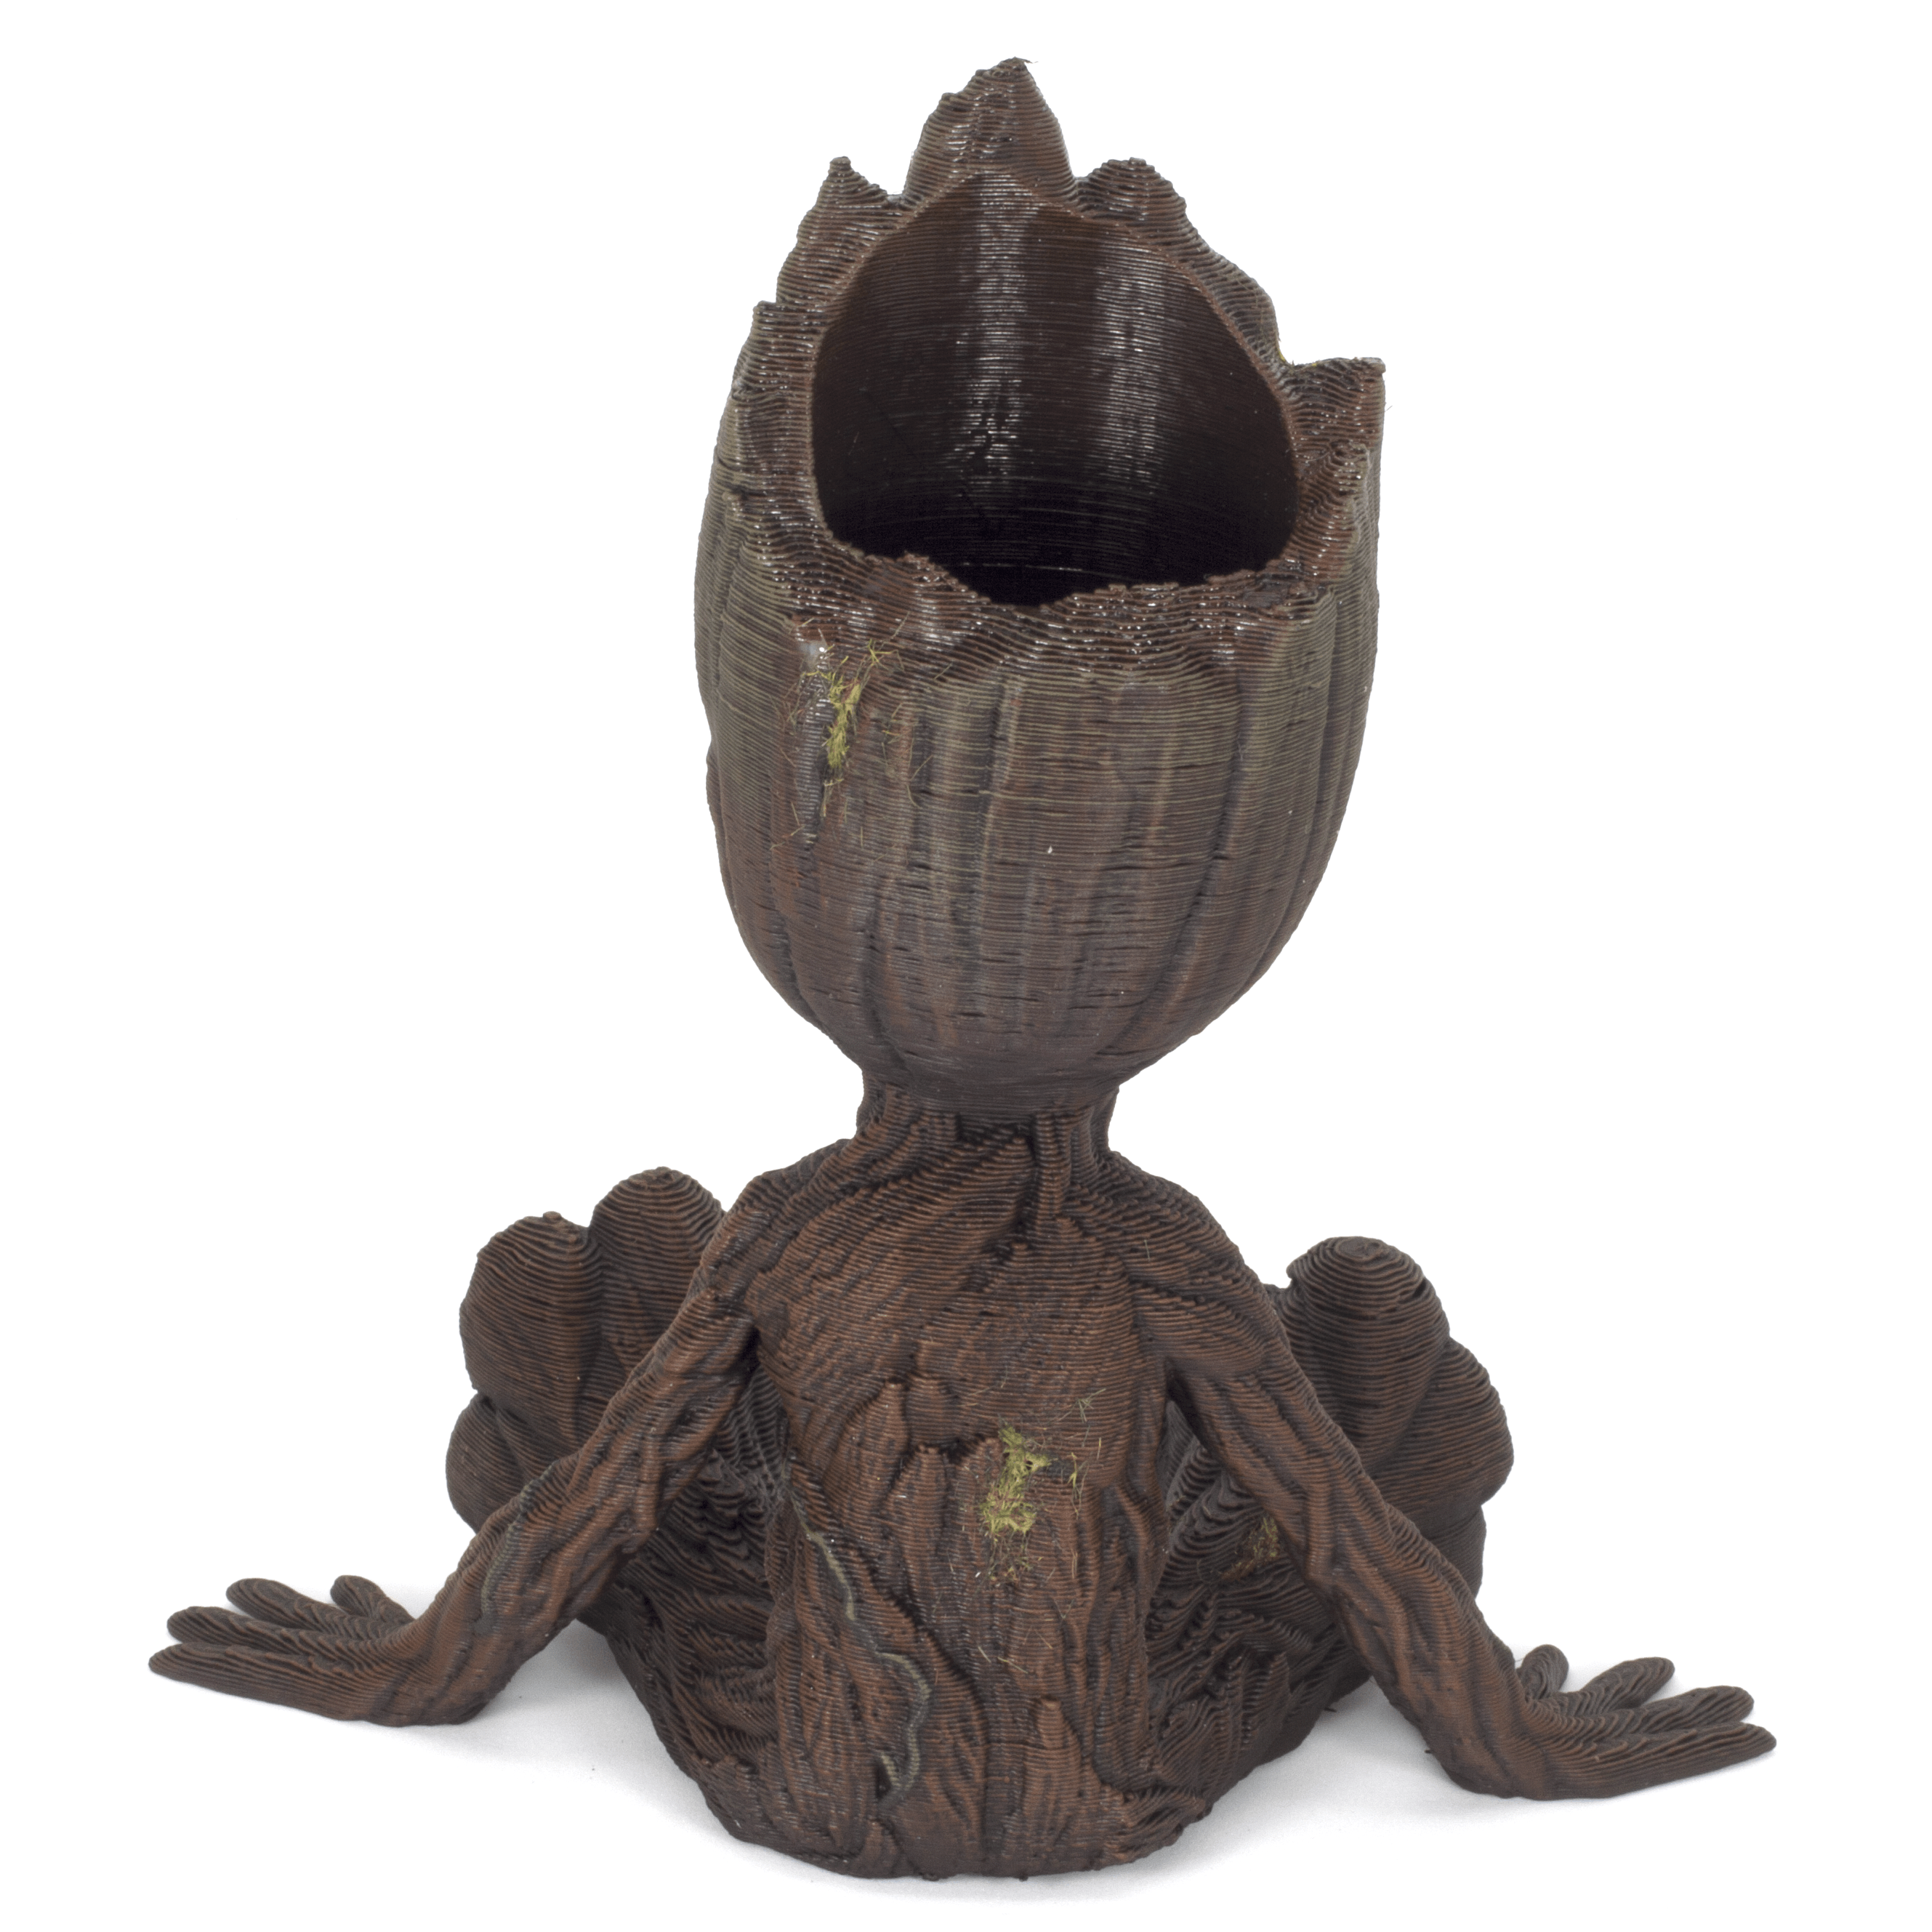
I added some PVA Glue into the top too, this was to seal any gaps the 3D print left and allow it to be watertight enough to put a plant pot in without much risk of spillage.
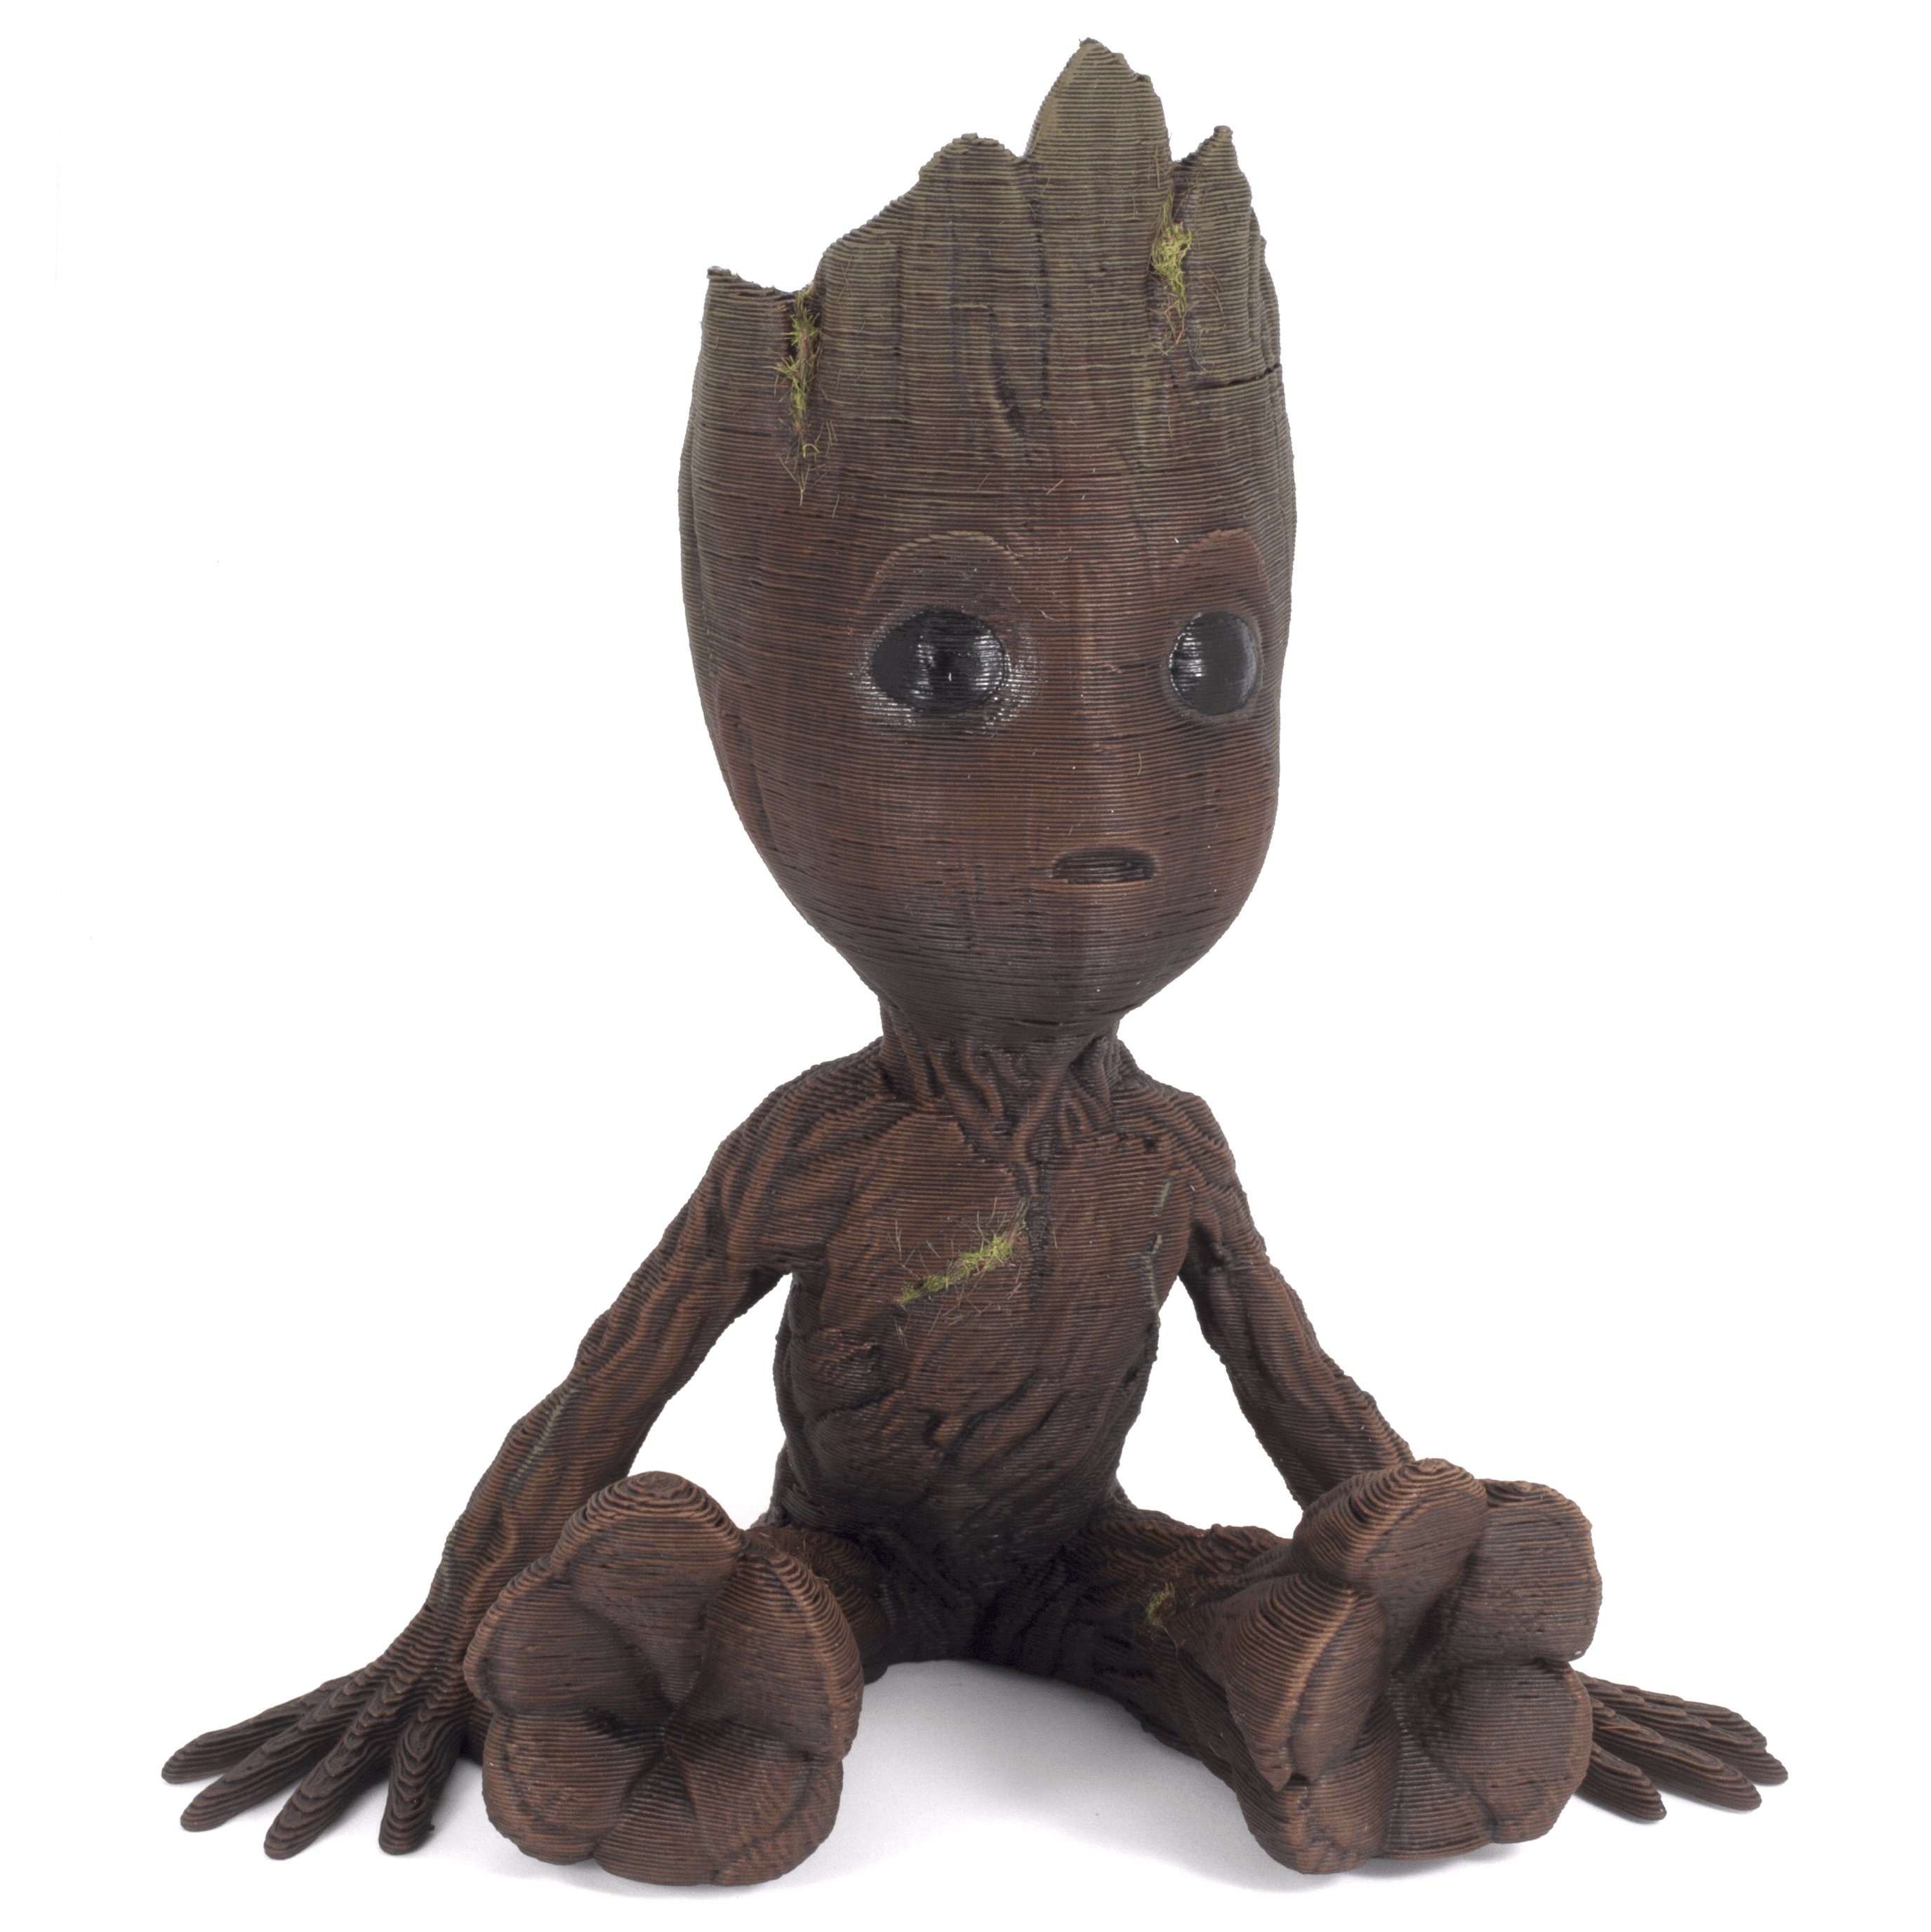
The Finished 3D Printed Groot model
And here he is, the final 3D Printed Groot model, photos taken in my cheap mini photo booth this is the first larger model I’ve ever painted and I’m looking forward to doing some more, but I think next time I’d like to get back to some actual minis; I have the whole Dark Imperium Boxed Set to paint and my First Strike Models.
Let me know in the comments what you think of Baby Groot?
If you really like what I’m doing here and find it cool or interesting; how about a share on your favourite Social Platform?
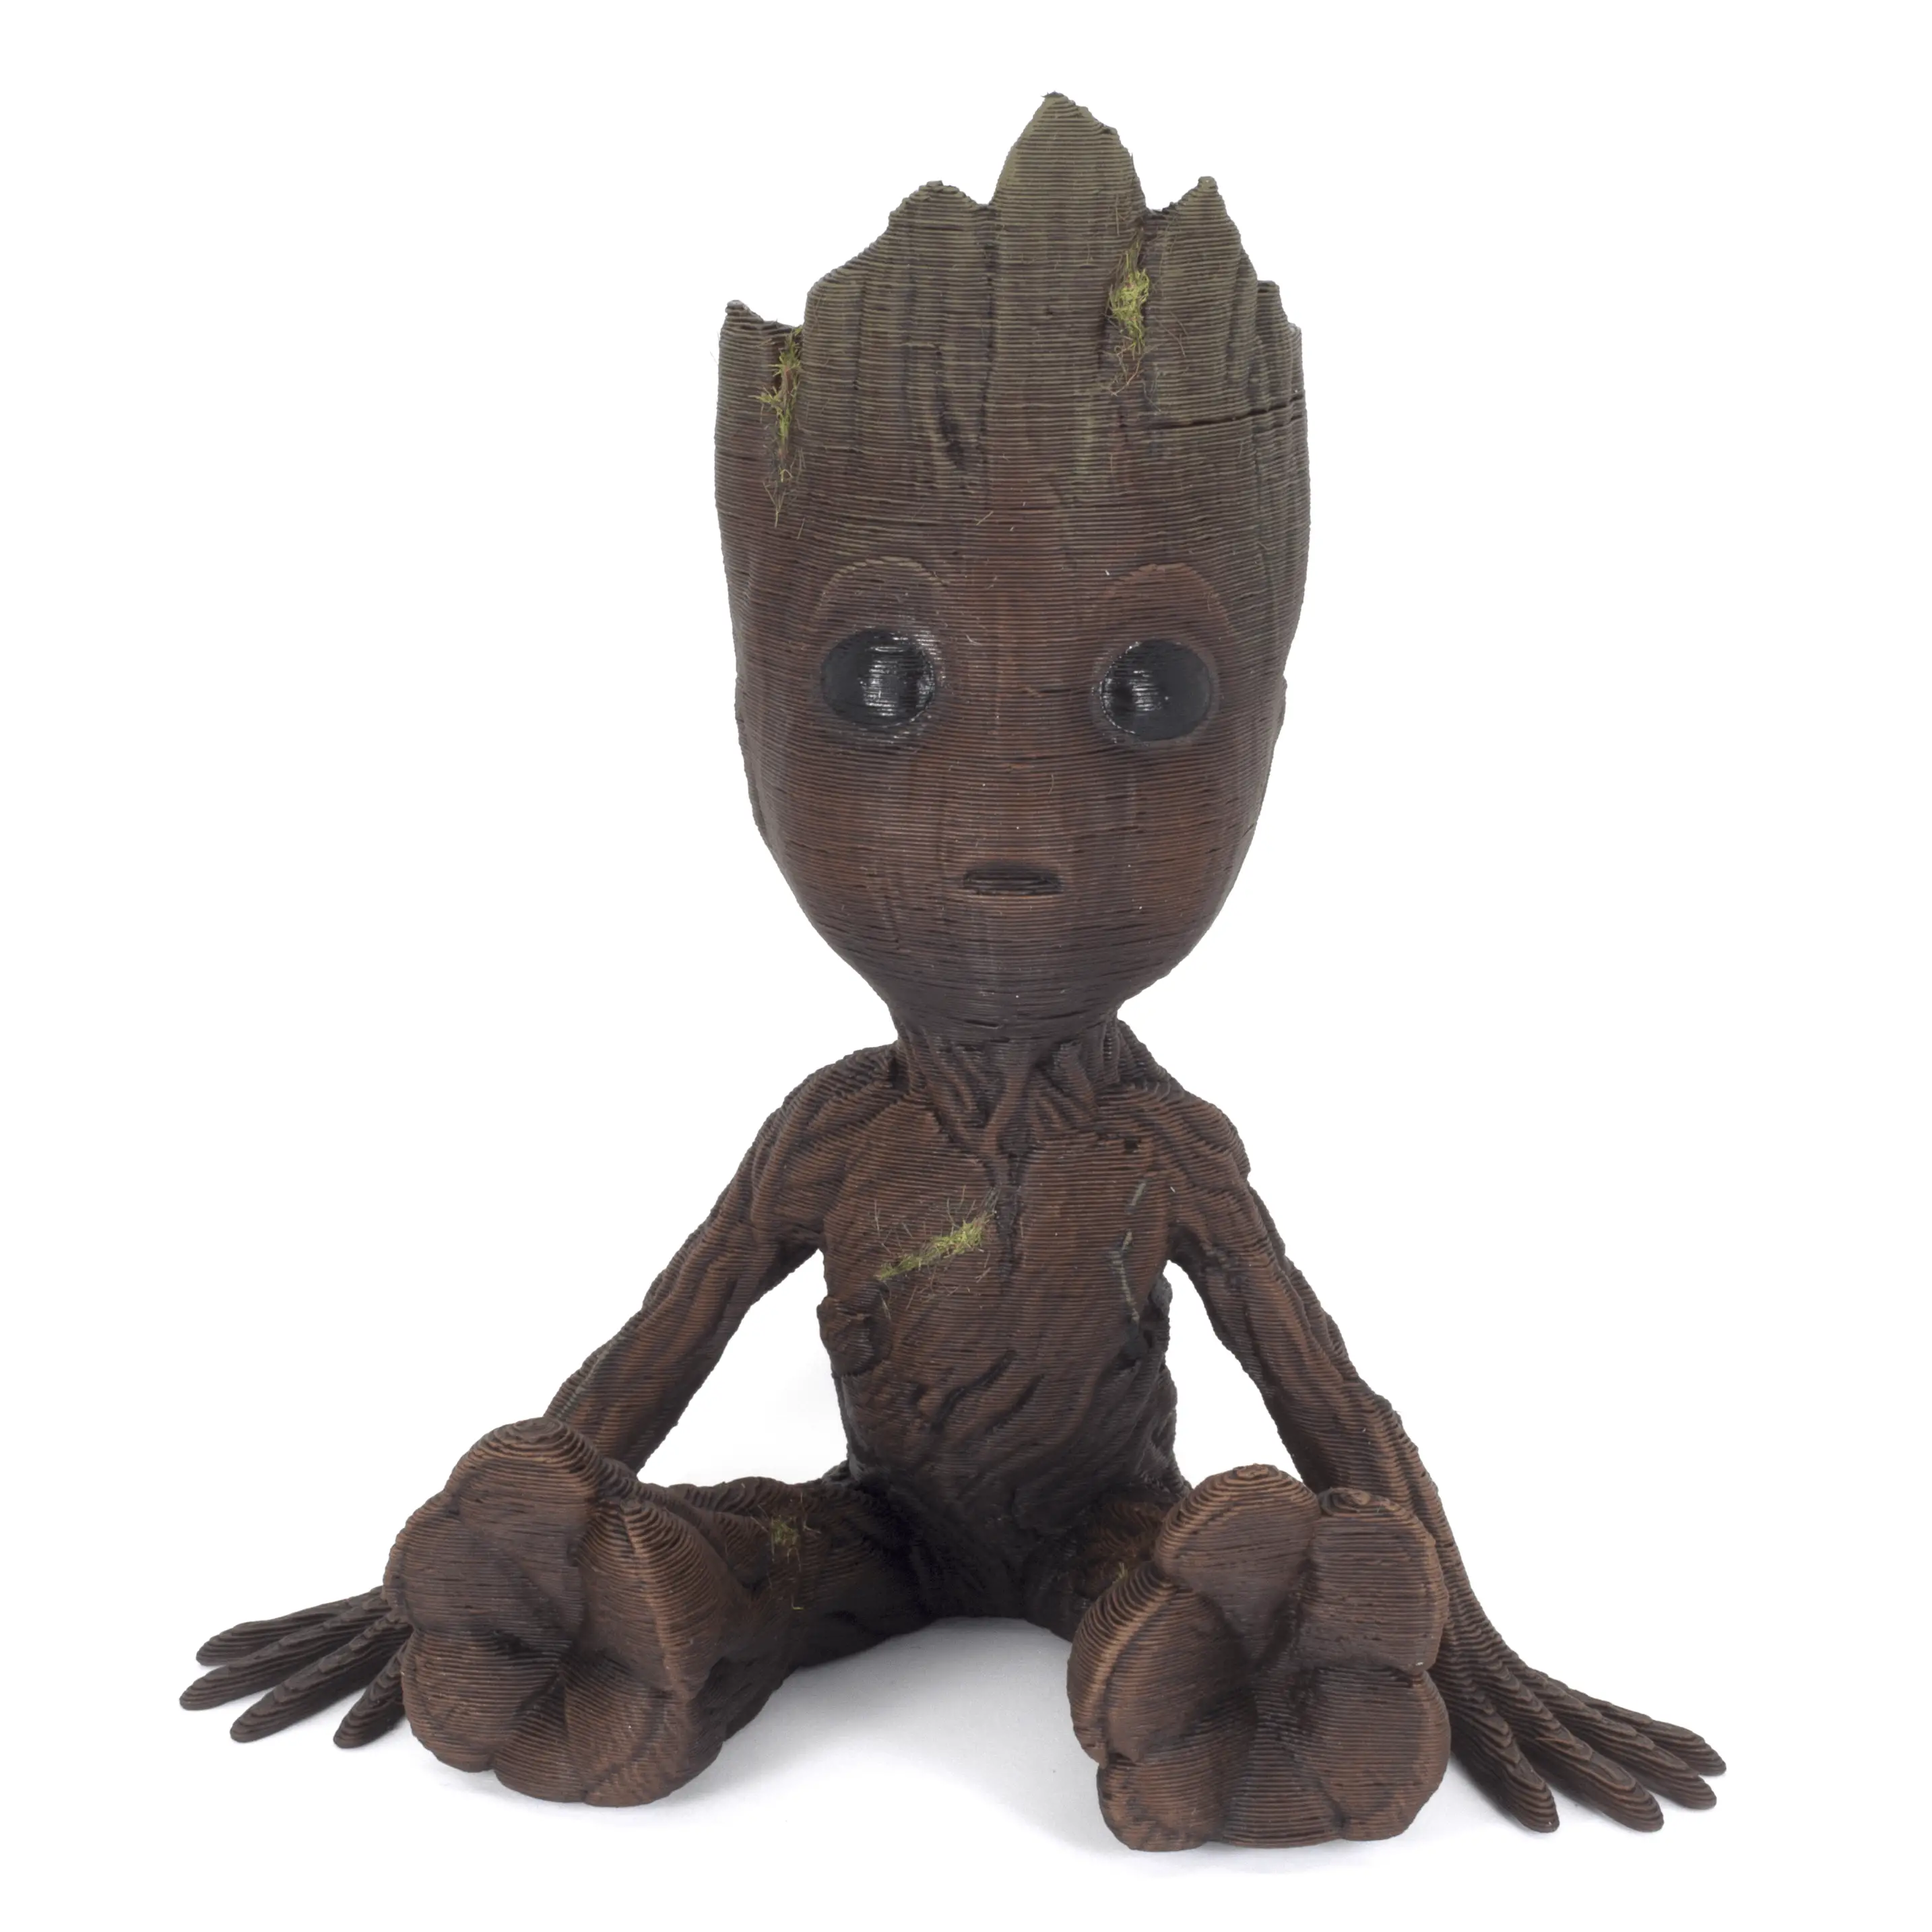 3D Printed Baby Groot Plant Pot
Author