
Best Beginner Airbrush for Miniatures, Wargames, Gunpla & 3D-Printed Models
Last Updated on July 28, 2024 by FauxHammer
This article here is specifically focused on your first ever Airbrush, maybe you want something to get started on your own with little to no existing knowledge. Maybe you have had some experience with a friend’s airbrush (though if that’s the case you’ll probably just copy what they got). If you’ve been reading articles telling you something like a Badger Patriot 105 (a brilliant mid-tier airbrush) or Cult of Paint Infinity CRplus (the best airbrush for miniatures) are “the best” beginner airbrush, sorry to tell you – No. That’s likely just to sell you a more expensive product for better affiliate returns. Whereas we’re 100% here to show you your real options so you can buy “the right thing for you”. And why believe us? not just because we’ve had actual hands-on with everything below, and not just because we are actual hobbyists who paint Miniatures, 3D Prints and Models. But, and I’m assuming you are new to FauxHammer.com and want to know if our advice can be trusted? Then with all due respect – Ask Around. Anyway, have a look at the below options so that you can choose “your” Best Beginner Airbrush for Miniatures, 3D Prints and Models.
Before you read on, If you already know you are looking for a more high-end airbrush, be sure to check out our Top 10 Airbrushes for Miniatures & Wargames Models post and its accompanying Best Airbrush Compressor for Miniatures post here.
Please Note: This site uses affiliate links. Our Affiliate Partners are shown below
(Affiliate links will result in compensation to the site on qualifying purchases)
Click this link & buy your hobby stuff from Element Games for the UK & Europe to support FauxHammer.com – Use Code “FAUX2768” at the checkout for double reward points.


Our Affiliates / Hobby Stores
- UK: Element Games, The Outpost, Wayland Games, Mighty Lancer, Goblin Gaming, Forbidden Planet, Model Scenery Supplies, eBay, Amazon
- US/Canada: MTechCave, GameKastle, eBay (US), eBay (CA), Amazon
- Germany: Taschengelddieb
- Europe: eBay (DE), eBay (FR), eBay (ES), eBay (IT), Amazon
- Australia: eBay, Amazon
- Global: RedGrass Games, Warcolours
- 3D Printers: Phrozen 3D, Elegoo, Anycubic
FauxHammer – Latest Video on YouTube
Best Beginner Airbrush for Miniatures & 3D Prints – Introduction
Looking for Best Beginner Airbrush for Miniatures (and other stuff) can be quite daunting. There are so many guides online and contrasting opinions that it took me 6 months of research before I dove in. What I have found since is that I didn’t need to spend all this time. In the end, my beginner kit was much simpler and much cheaper than I expected, or in some cases was led to believe. (you don’t need to spend anywhere near £100 (or the local equivalent) on an entry-level airbrush. So I’d like to share with you below what a beginner kit consists of. And to reiterate, the best part is, that it’s not going to cost hundreds for you to get started. It’s not actually that expensive at all.
I will stress that this guide is not for everyone, because not everyone wants or even cares about airbrushing. And if you are happy and getting good-enough results with a normal brush, then fine, stick with that (but at least check out our guide on the Best Brushes for Miniatures). But before you walk away, you must be here because your interest in airbrushing is at least somewhat piqued. So please consider that there are other benefits to Airbrushing than just improving how your mini’s look. Because that’s not always the case. As there is an insurmountable number of cases where an airbrush will not automatically improve your painting results.
Best Beginner Airbrush for Miniatures & 3D Prints – Summary
Best Beginner Airbrush – The Quick version
You can read all the detail below you want but this is actually really easy, you just need two things!
- A Compressor
- An Airbrush
You may already know that and are just overwhelmed by the options available. Yeah, I was too! but just keep those simple concepts cemented in your mind and it’s actually really simple. we just look at the available Beginner Airbrush Kits and sets and we’ll split these into the below tiers – growing in expense.
- A Generic Portable Battery Operated Airbrush Kit
- A Generic Mini Airbrush Kit
- A Generic (but solid) Airbrush Compressor (normally comes with a free airbrush) The Sweet Spot!!
- A Generic (but solid) Airbrush Compressor and a high-quality beginner airbrush
- The “I’m All In” approach of picking The Best Airbrush for Miniatures and The Best Airbrush Compressor for Miniatures & 3D Prints separately. (requires further reading)
So, are you with me? you know you need the 2 things, Airbrush & Compressor. And there are essentially 5 ways you can go next.
The one you will probably choose is Option 3 – The Sweet Spot, this is what most people do
Below we look at each one so you can choose what is right for you. Something expensive like the aforementioned Badger Patriot 105 is actually the last thing I would recommend. I’d still recommend it, very much, it’s an amazing airbrush. But it will definitely be amongst the last group.
And yes, there are other things that go along with Airbrushing, like paints & cleaners amongst other accessories – we’ll cover them below. But don’t worry too much about them at all for now. Just focus on the Airbrush and Compressor combo that’s right for you.
The Best Tools For Miniatures?
FauxHammer.com is dedicated to finding the best tools for your hobby. Start with our list of Essential Hobby Tools which will lead you to find the Top-10 tools for each category.
To see all of our guides to the Best Tools for Miniatures, click on the image above.
Best Beginner Airbrush for Miniatures & 3D Prints – The Benefits
It’s likely you already know this, but there were a few reasons I wanted to get an airbrush, and many more advantages I’ve found since.
- You can prime your models all year round
- This is the primary benefit, especially for those in cold or damp climates, with rattle-cans you will find inconsistent results depending on the outside temperature and humidity. In some cases, you simply cannot prime your minis as the air properties will have too much of an impact on the drying of a spray can, and your primer coat could be ruined.
- You can primer your models in a greater variety of colours
- Ok, I’ve not done an exhaustive comparison here, I’m really just directly comparing Games Workshop’s and The Army Painter’s Spray Primer range to something Like Vallejo’s Airbrush Primer range where the colour availability is much greater. But I know many of you will use something like Rustoleum or other sprays where I have no idea of the number of colours available.
- It’s much cheaper to prime your mini’s
- Yes, the initial outlay for an Airbrush could be more than several primer cans, but you will make that back and then some in your first bottle of airbrush primer. I have primed over 100 models using a 60ml bottle of Vallejo Black Surface Primer (73.602) which cost £5.99 and I still have half the bottle left. In fact, I’m still using the same bottle I bought at the same time as the airbrush. Although to be fair, I have bought other bottles too, but still, 100+ models in half a bottle of Primer is damn impressive. If you want to work out the value of getting an airbrush now vs more cans, just ask, do you think you will be painting more than 100 standard miniatures in your future? If so, get an airbrush now.
- You can actually see how much primer you have left in a bottle of Airbrush Primer
- If you’ve been modelling for a while you have surely had a situation where you are trying everything to get those last few dregs out of a can to finish that last model you are priming and nothing works. You’ve either ended up with a half primed model or the primer has dried funny in your incessant twisting and shaking as you spray. With airbrush primer, you can see how much is in your bottle before you start, and if it runs out halfway through, just come back later when you get more.
- You can primer your models indoors
- The same is true with cans I suppose, but the smell is enough to put most people off using them inside the home. Beyond that, the width of overspray on a can is the second thing that would put you off. With an airbrush, it’s a very direct, small light spray. so long as you have a decent-sized box, you can use your airbrush at your desk. (but get a mask too so you aren’t breathing in the atomised paint)
- It will greatly speed up your army painting
- Once you have primers out of the way, you can buy Airbrush Paints. Games Workshop now does a pre-thinned range of Citadel airbrush paints. which is fine for the convenience, but you can easily thin any of the existing Citadel range with something like Car Screenwash or Distilled Water. This is much easier too if you have already transferred your Games Workshop Paints to Dropper Bottles. Now you can Prime and base a Squad or whole army in minutes as opposed to hours, so if you’re wanting to get your models built and painted for a tabletop battle ASAP, there is no easier way.
- You will have much smoother base coats than with a brush
- I may be wrong here, There may be some master painters out there who are able to paint incredibly smooth base coats without any brush strokes visible. Just look at the likes of Brushstroke and his tutorials. But I can’t match this. After years of painting, my base coats are still quite terrible. I don’t accept this about myself and consider myself a poor painter until I can master this basic technique, But I saw an Immediate and impressive boost in my finished model quality when I started using an Airbrush. I’ve added comparison pictures below.
- You can create some incredible effects.
- The easiest and most common effect is Zenithal Shading, this is where you base the model in 1 colour, then from above at a 45-degree angle spray the model with a lighter colour to show how it would be lighter in the areas as the sun hits it. But beyond this, you can also mask off your model with putty and paint other colours on different areas. you can easily do Object Sourced Lighting (OSL) to show the glow off lights and weapons. A bit of masking tape will give you stripes, Blu tack will give you some cool camo effects and get some sequin waste to do some incredible colour patterns,
- Airbrush paint is thinner than spray
- (Or perhaps I was always just too heavy-handed) with my spray cans. But I have found significantly less detail loss since switching to an Airbrush. The primer is like a thin coat of dust across the model surface. Less than dust even, but that’s probably just because I need to clean my house more.
Best Beginner Airbrush for Miniatures & 3D Prints – The Kit
So, what do you need to get started? I’ve listed all the necessary kit elements below.
Your first airbrush kit (which may come as a set or even be one connected device) will have two distinct components, an Airbrush and a Compressor.
Let’s have a look at your options, starting with the cheapest and working up from there.
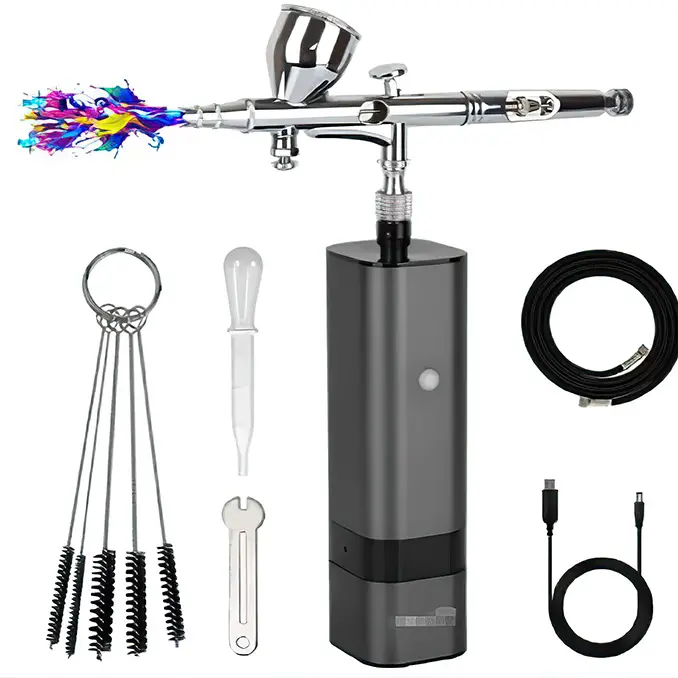
4. A Generic Portable Battery Operated Rechargeable Airbrush Kit
Why Buy? This is the one for people with very limed space or a specific need for portability
So, as I said in the header, I’ve had hand’s on with all of these, including this. Now let me start by telling you why you probably don’t want this. then we can get on to why you do.
They feel cheap, the airbrush is trash, they are heavy, their charge doesn’t last very long and the pressure is rather poor.
First of all, this, like most of the options presented has been referred to as Generic. And that’s because they are. You’ll find these online listed under numerous brand names and appearing in various different colours. Some company just buys them raw from the manufacturer slaps a badge on it (normally based on best for-profit to them) They all look similar and do the same thing and they all do it just as well (poorly) as the next. If it looks like or even just similar to the picture below – it’s one of them and choosing between the different ones really doesn’t matter.
Miniature Painters may be familiar with these types of devices as they are available from Green Stuff World (an awesome Hobby retailer with some super cool stuff). But remember what I was saying about Generic – Green Stuff World’s kit is this, with a GSW logo on.
Now the one pictured above specifically is actually the best of these portable compressors and you can use it both as a complete unit (as pictured), but this is heavy and awkward to wield. Or you can attach an airbrush hose and use it as a battery operated airbrush compressor. But it’s still battery operated and rather weak. You’ll definitely need to thin your paints a little extra and that alone can lead to trouble with horrible runs on your miniature rather than a nice dusted coat.
This model specifically (the one shown above) also has the benefit of dual-action operation. once connected to an airbrush, the compressor will only engage when you push down the airbrush trigger.
But it comes with the heftiest price tag. And honestly, when you see the cost of the better performing options are below, it alone makes this one appear almost redundant as a choice. But hold on…
You can also find cheaper options like the ones pictured below. I’ve had one of these and had even more problems. Now, they do work. but the pressure is so low that I’ve even had to thin airbrush primer to get it to spray. I’ve never needed to do that with any other airbrush.
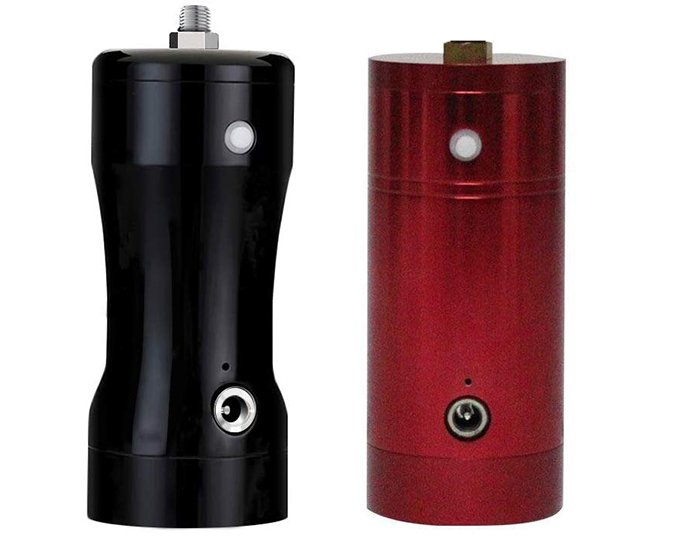
These are cheap, super cheap and the battery lasts for hardly any time at all, I was genuinely lucky to get 5 minutes out of one. Seriously. and this is made worse by the fact that once you turn it on it is continually pumping air until you turn it off. But thankfully it will operate whilst plugged in – but that makes the portable element somewhat redundant.
Look, I’m just gonna say it. DO NOT GET ONE OF THESE. unless you are in a very specific circumstance where it is your only option. Or you have a rather unique need for it’s portability.
It works but you can do better…
3. A Generic Mini Airbrush Kit
Now we’ve looked at what not to do, let’s look at an actual consideration, and it may surprise you that this is cheaper than the previous option (in the case of the first one above). or at least equally priced to the second one shown above.
Anyway, here it is. one of these. and yet again, we use the term generic because they are all the same but with different badges.
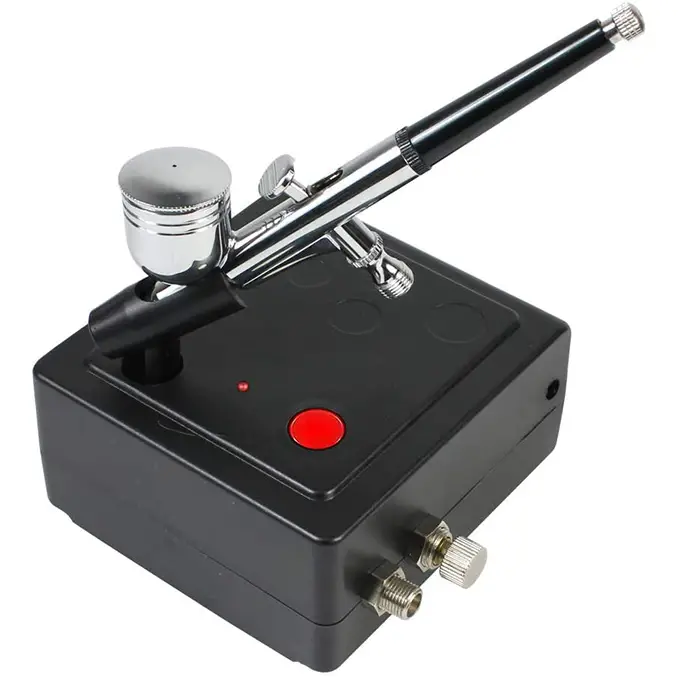
Now, these aren’t actually half bad. not great, but not terrible either. I first saw one of these on a painting course where I met Luetin – he had a similar one. And I would happily say that if you are on a very sharp budget, then this is the best beginner airbrush for Miniatures and 3D printings.
It’s mains powered and the pressure is strong enough to work with most airbrush primers and paints without any extra thinning.
It is a single action always on so it’s constantly whirring and pumping air, all you need to do is pull back the trigger further to express more paint. It also has a slight pressure regulator. essentially an airflow valve which releases some air to lower the pressure. but honestly, you’ll use this 99% of the time with the pressure at max.
It’s small, compact and not only can you prime and paint, but you can also do some effects like Zenithal highlight (shading directly from above with lighter colours of paint) and volume shading (like zenithal but focussed on specific shapes of the model).
The airbrush is crappy, like pretty much all of them on this list, but it’s super cheap and can be replaced if damaged by an equally cheap airbrush. and that’s one of the main things to do with your first airbrush, cut your teeth on something inexpensive. you can gunk up the mechanism or bend the needle easily due to inexperience. would you rather do that on something cheap or something 10 times the price?
Again, you can do better, but if you want to save space or jet your first taste of airbrushing on a low budget – get this. it’s not half bad. I was genuinely surprised.
2. A Generic Airbrush Compressor Kit (THE SWEET SPOT)
This is the absolute sweet spot, it’s relatively inexpensive and if you do it right it will set you up for years to come – possibly your entire airbrushing career. I had one of these for 5 years and only upgraded to something more serious so I could run 2 brushes at the same time on one unit when teaching people how to airbrush. Or having one airbrush for acrylics and running another for enamels. The point is, if you start here, the majority should never need to upgrade their compressor further.
There are two options here and each should be available as a bundle with a cheapo airbrush or two thrown in… yay!
These are once again fairly generic and whilst some look different they all do the same thing. Often referred to as either the FD or AS,182 or 186 airbrush compressor. Agin if it looks like either of the ones below. it’ll do.
Compressor without Tank
Here’s the first choice. Both pictured without airbrushes but that’s intentional and we’ll get onto that in a mo.
An airbrush compressor without a tank.
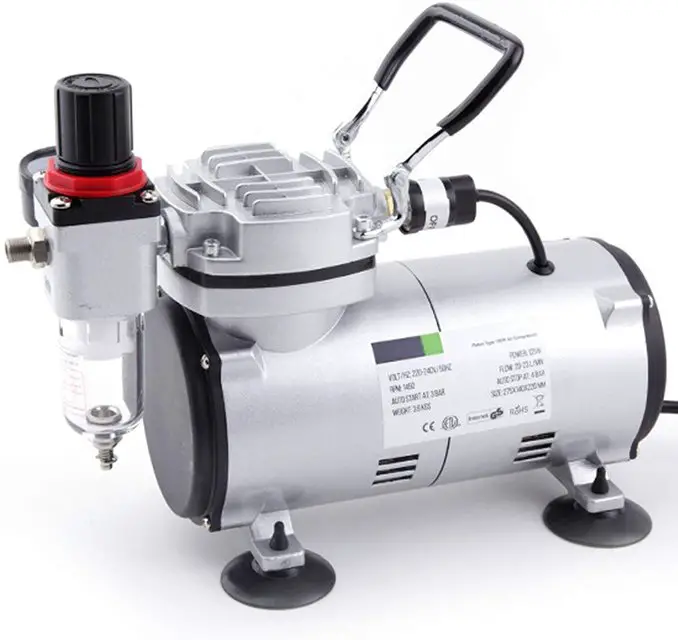
These are both proper airbrush compressors with everything you need to get started and continue for years. Strong pressure which offers everything you need for miniature painting. You even get pressure regulation for then you need to lower the pressure for thinner paints. and unlike the mini compressor in the section above you actually get a pressure gauge so you can tell what PSU/BAR you are spraying at.
You also get a small moisture trap as compressed air can create water which could end up in your airflow and ruin your paint – though they are not the best with the tankless option above. They are relatively loud when compressing but allow for dual-action airbrushes, so they only express air when the airbrush trigger is pushed down.
Airbrush Compressor with Tank
TLDR, this is where you want if you can stretch to it. It’s not that much bit is probably still almost doubled the cost of the portable and mini airbrush options above.
Now the benefit of having a tank is generally that nobody will mess with you. especially if it’s loaded.
But the benefit of having an air tank on an airbrush compressor is that it stores large volumes of compressed air, this has two main benefits.
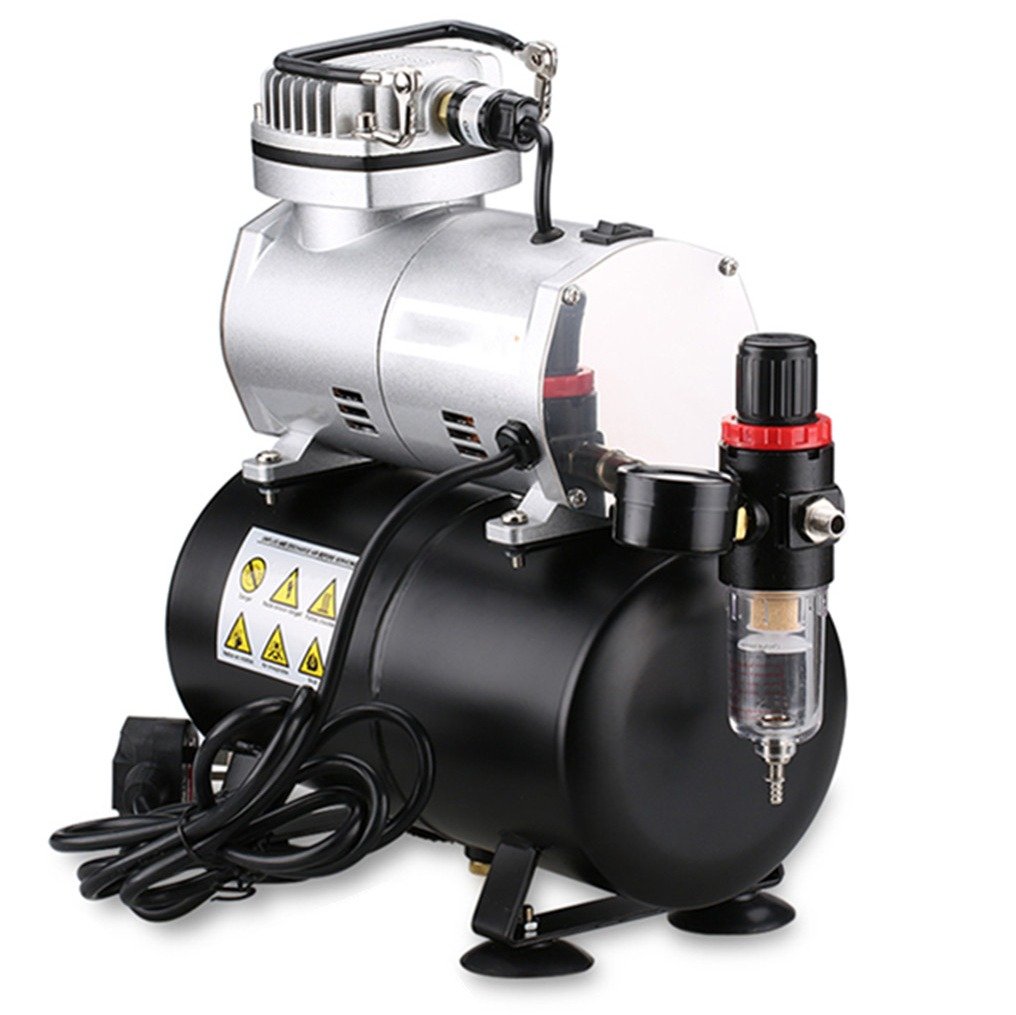
One is that the compressor doesn’t kick in every time you push down the trigger, it only kicks in when the air in the tank falls below the pressure threshold. so whilst it isn’t quieter when compressing, it is much quieter overall as it does not compress anywhere near as frequently.
The other bonus is you generally get better pressure regulation. You’ll set these, like any compressor to a certain psi but when you pull the trigger, that immediately drops. At higher pressures on the tankless model, you will often find that the compressor struggles to keep up with the pressure want to be spraying at. With the tank, the pressure is able to stay up as the air in the tank flows out at the rate at which you have set the gauge.
These things will work well with every airbrush from our Best Airbrushes for Painting Miniatures list
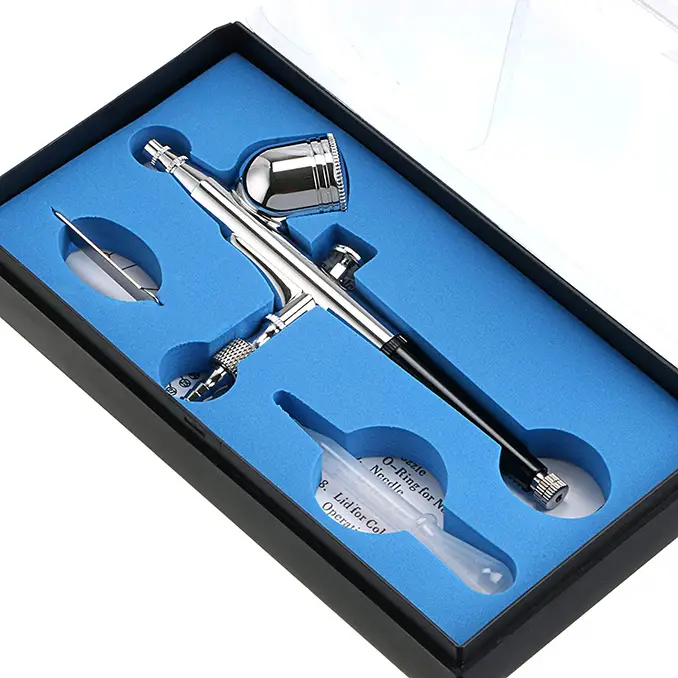
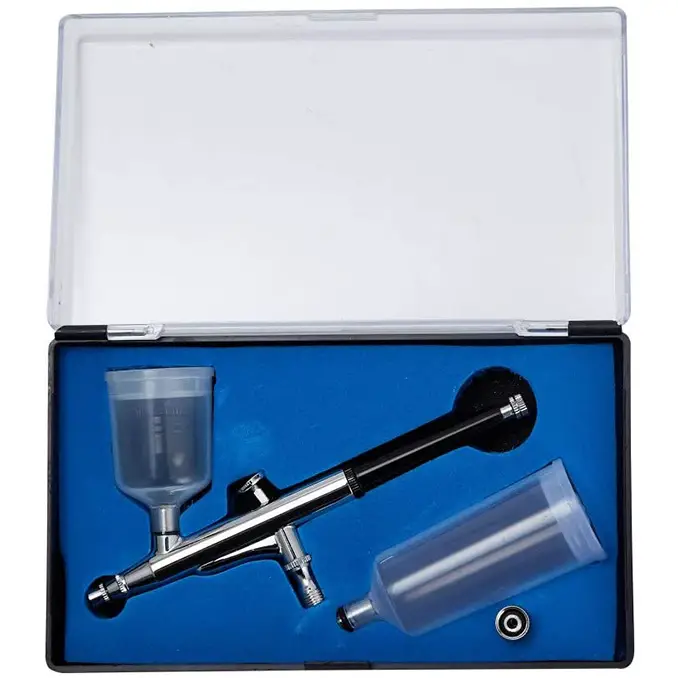
Generic Airbrush
So, as I said, and you may have noticed, the images above are both shown without an airbrush. And that’s because depending on which bundle you pick when browsing online, you’ll probably get an airbrush (or two) with it. you may just want to know what to pick.
So, if you airbrushing miniatures then you’ll want what is called a gravity fed airbrush. This is where the paint cup is on the top of the airbrush and the paint flows using gravity down to the nozzle. They are easier to wield than the alternative I’ll get onto in a mo.
Now when it comes to 3D prints, for small models and detail work, you’ll still want a gravity-fed airbrush. but let’s say you are doing something large scale, let’s say replica helmet or larger. Then you may want something which olds more paint. You can get a side loading gravity fed airbrush which often have the option of a larger paint hopper.
But bigger still is siphon fed airbrushes which can hold large jars of paint underneath. But this is generally for the primer or initial base coat stage only.
You’ll still want a gravity-fed brush for the detail work. so if it’s one of the other, just go gravity-fed and for the larger things, just keep refilling the cup.
As for which specific to choose, at this stage, it really doesn’t matter, you can get these kits with 1 or two free airbrushes and those airbrushes are cheap and nasty things. but the operative word is “cheap”! and the ones shown above are no better. Just search Amazon for Gravity Airbrush or Siphon Airbrush and consider the cheapest thing you find.
The seals are poor, the metal for the needle is cheap, they can clog, but they do the job and they are cheap. if you have never used an airbrush before it may surprise you that they need some maintenance to keep them working. You’ll need to learn how to strip one down fully, and in my experience the first one I took apart had a spring fly out across the room and I never saw it again. So yeah, I wrecked my first ever airbrush before even using it so that you don’t have to.
Whilst you’re learning this you can break an airbrush, again do you want to take that risk with something super cheap or something 10 times that price.
Seriously, if you don’t get an airbrush free with your compressor consider starting with the cheapest airbrush you can find, but there is one other minor consideration. The Needle/Nozzle Size
Needle/Nozzle Size
So, in principle, like paint brush sizes #2, #1, #0, #000 etc, the smaller the brush/nozzle the finer the paint/spray line. And just like paintbrushes, beginners will often believe the smaller the better for miniatures. But it gets a bit more complicated with airbrushes because of things like the Cult of Paint Infinity CRplus (the best airbrush for miniature painters). Where you get a twin tapered 0.4mm needle allowing for finer lines than a typical 0.02 needle.
Again, at this stage in your airbrushing career, it matters little. smaller needle/nozzle generally means a finer spray but more prone to clogging. larger is less clogging but it’s harder to spray tiny details. and vise-versa for the larger nozzles.
But also like brushes, the numerical (0.Xmm) designation means little between different brands because the spray is as much about the taper of the needle as it is about the width of the nozzle. So, just aim to get something between 0.2mm – 0.5mm (0.3mm is usually the sweet spot). by the time it actually matters to you, you’ll be buying a proper Airbrush.
The Iwata Neo is a very popular beginner airbrush, it’s relatively inexpensive but quality-wise. Honestly, it’s comparable to the cheap models I’ve just shown you above. I love Iwata, I really do they make some of the best airbrushes in the world with unrivalled precision and incredible engineering, but the Neo. Well, inexpensive isn’t the correct word. The correct word is “cheap” it’s cheap. Sorry Iwata, but I worry this thing has put more people off airbrushing than turned them on to it.
I’m saying this from personal experience of showing numerous people what a real airbrush does in direct comparison.
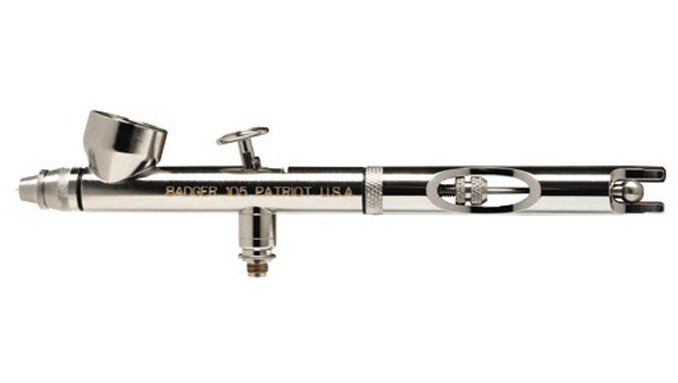
If you really want a decent entry-level airbrush, get the Badger Patriot 105, it’s the same price as the Neo and it’s an awesome workhorse.
See, told you it would be the last thing I recommend – but that’s only for those who are immediately budget conscious.
The Final, “Ultimate Choice” for the beginner
Until very recently (assuming you read this in 2024) When it comes to beginner airbrushes, this typically meant, cheaper parts and fewer functions. However Harder & Steebeck have literally taken complete ownership of the Beginner airbrush markey by releasing the 2024 version of their “Ultra” Model Airbrush…
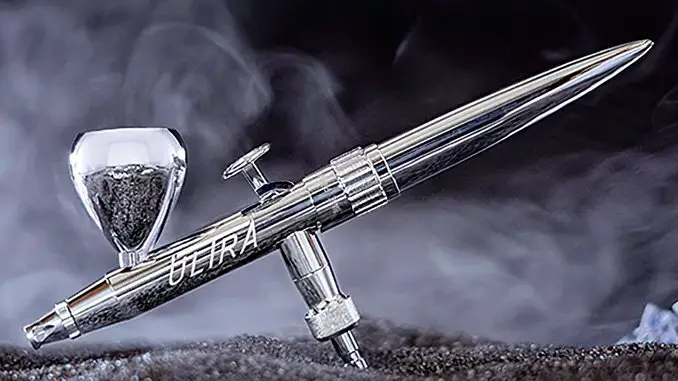
Not only is this now the cheapest of the beginner airbrushes, but they have left in Harder’s signature quality. There’s no cheapo bendable, almost-tin-like parts in this (I’m looking at you Iwata Neo), The New Ultra comes with the same 0.45mm needle and Nozzle that you get in more expensive Evolution and Infinity ranges!
And that’s before it’s features like the adjustable trigger restrictive collar. which trains you how far back to pull the trigger when Priming, Base coating. or any of the other 3 retraction settings.
But because the trigger itself will also stop you from pulling it back to release paint, until you have first pressed it to release air (one of the airbrush golden rules you should train yourself on first) this thing actually and mechanically trains you on how to use an airbrush properly!
This thing as no earthly reason being the price it is, there is simply no other choice for the beginner.
Get your cheap airbrush compressor as mentioned above, Play about and learn to disassemble and maintain that cheap airbrush, then buy this one.
1. The “I’m All In” approach
Now, if you are already fully committed to airbrushing and you know that this is the direction you want to take your hobby. Then you want to look at buying a compressor and airbrush separately, but that will take some extra reading on your part because this is where we get into the detailed consideration.
Airbrush
Start by looking for the airbrush you want by reading our Best Airbrushes for Miniatures article.
The summary version is.
- Budget Option – Badger – Patriot 105
- Intermediate Option – Harder & Steenbeck – Evolution CRplus or Cult of Paint Harder & Steenbeck – Evolution CRplus
- Intermediate Option – Iwata – Eclipse HP-BS & HP-CS
The Badger – Patriot 105 is the best airbrush you can get in its price range and you don’t want to be paying less for a decent airbrush than the cost of one of these. Though I still recommend you cut your teeth on a cheapo practise model above if you have any concerns you could break one.
The Harder & Steenbeck – Evolution CRplus is an excellent airbrush, (with the Cult of Paint Harder & Steenbeck – Evolution CRplus being the same thing with an improved more precise trigger) and in many eyes (the likes of Squidmar, Artis Opus & Cult of Paint) is better than the below option, not only is it cheaper, it has some great features like a compression fit nozzle, which unlike the Iwata and Badger options posted here is much larger (therefore harder to loose during a teardown). And since we are often pushing acrylic paints through a device made for airbrush specific paints and inks. They do clog and need to have the nozzles cleared regularly. This is also part of the same family as the Cult of Paint Infinity CRplus (again, the best airbrush for Miniatures) so any parts you buy for this can be used in that airbrush too. cross-compatible components are really useful as you upgrade your setup. (my call, if you have the budget, get this one)
If you want a high-quality airbrush and have a bigger budget, the Iwata – Eclipse HP-BS & HP-CS is awesome and was our number 1 airbrush for miniatures back in 2019 before we tested a few others. however, if you ever want to upgrade from this, you are buying a whole new brush. And with this precision airbrush comes smaller components that are easy to lose. (I’ve lost some)
Compressor
Now when it comes to the compressor we also have an article looking at the best of those, you can see that below.
But you’ve actually already read the summary of that article. it says the same thing we said here. Just get the generic compressor with a tank. There are several more expensive options with features allowing for quieter operation, dual airbrushes. larger tanks and other various things. so have a read and see if you have a particular need for any of these features. but otherwise again, just get the generic one. None of the more expensive options will give you better air.
Best Beginner Airbrush for Miniatures & 3D Prints – Essential Airbrush Accessories
So, now you have your airbrush picked, what do you need to go along with it? well, once again, we have another article covering “all” of the essentials. But don’t go thinking you need “everything” just to get started. Grow as you go.

You can check that article here but below we’ve listed some bare essentials in what we think is the progressive order of necessity.
Particle Mask
Safety first and all that,
Yeah before you even get some paint you may want to consider what you are breathing in. Whilst miniature paint is generally non-toxic. we’ve learned over the last couple of years how important our lungs are. Airbrushes pretty much atomise paint and I’ve had a few painting sessions sans mask or extractor where i;ve spent the evening wiping coloured snot from my nose.
Gross, yeah, but remember that paint belongs on your model, not inside your body. licking it off a brush is one thing, you don’t want to be breathing it in.
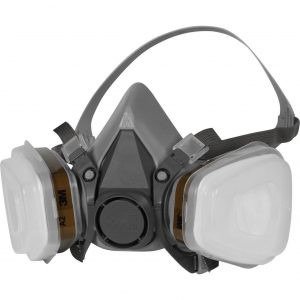
If you don’t want to stretch to a full extractor station then the least you can do is pick up a face mask to protect yourself from the particles and airbrush cleaner fumes.
Airbrush Cleaner
Vallejo & Iwata sell airbrush cleaners which are cheap enough. Just make sure to do what I didn’t and read the instructions on the label. specifically; dilute 50/50 with water. I didn’t read that and pretty much melted some seals… and that’s the story of how I ruined my second airbrush.
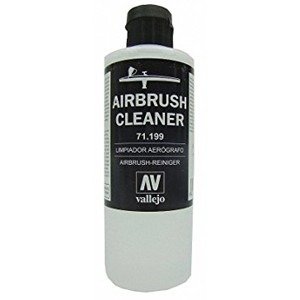
This cleaner will pull away bad paint and lubricate the mechanism. Just rinse out most of your unfinished paint with water first and use the cleaner to finish it off and get it squeaky.
You can make your own Airbrush cleaner using Isopropanol and other chemicals/fluid. I’ve not done that yet but there are Youtube for guides on this.
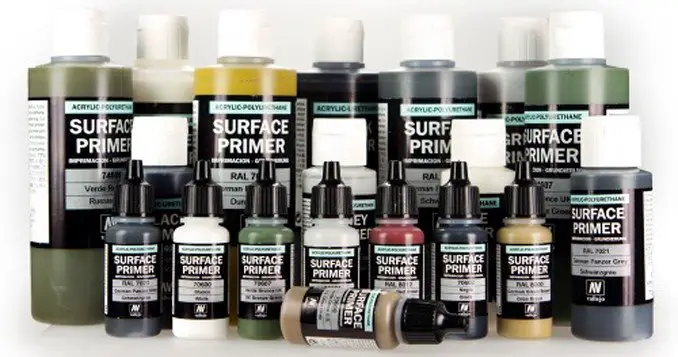
Airbrush Primer
Several Companies do Airbrush primer. As a preference, I like to use Acrylic Primers because they’re easier to work with, and generally don’t need to be thinned with anything alcohol based, they are easier to clean and you can strip your minis back to bare plastic too If you are unhappy with the output. Which is exactly why I used the Deathwing model in this Stripping miniatures guide. For the beginner Acrylic Primers are perfect.
There are 2 main Primer Brands I recommend;
The first is Vallejo. they have a huge primer range, they are pre-thinned and will spray immediately from the bottle after a good shake. The bottles come in various colours and sizes. 17ml. 60ml and 200ml. Which is great when you are starting out as you can practise with the little bottles to see if you like it before you shell out on a big bottle. As I said above, I’m still using a 60ml bottle I bought back when I first got my airbrush.
Click the links below to view Vallejo Airbrush Primer
| Amazon | Click Here |
| Click Here | |
| eBay – US | Click Here |
| eBay – Australia | Click Here |
| eBay – Canada | Click Here |
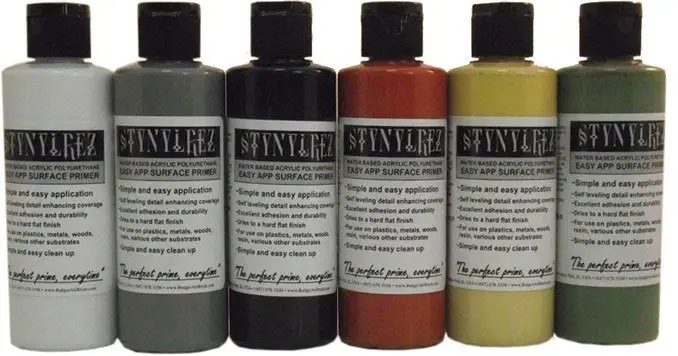
The other brand I recommend and my personal favourite is the lesser known Stynylrez from Badger Easy App Surface Primer. Once again this is pre-thinned and comes in a variety of colours and sizes. But I prefer the finish this gives over the Vallejo and the Grey (which is my preference in most cases) is more of a 50% grey (estimate) than Vallejo’s more 25% grey (estimate) which may as well be called Dark White. But this is harder to come by (in the UK at least), is a bit more expensive and can be more prone to clogging in the British climate. But If more people buy this though they’ll hopefully start exporting more, so if you want to support me in any way, please try some so we can get more over here.
Click the links below to view Stynylrez Airbrush Primer
| Amazon | Click Here |
| Click Here | |
| eBay – US | Click Here |
| eBay – Australia | Click Here |
| eBay – Canada | Click Here |
Airbrush Wash Station
Pretty much one of the first things you should buy after you get your airbrush. This very useful and cheap bit of kit that allows you to stand your airbrush when not in use. Which is pretty necessary, you can’t lay an airbrush down when it’s full of paint.
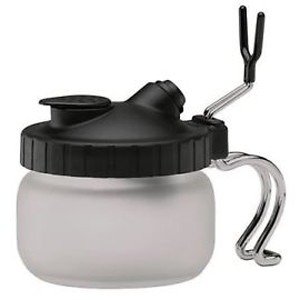
The Pot’s main function is to give you somewhere to spray your waste when you’re cleaning your airbrush out. It saves you wasting tissues as you spray water through to clean it. Just spray into this pot and it will capture everything without leaving a mess.
That’s It
Yeah, that’s all you need. £85 for an airbrush and about £8 – £12 for some airbrush primer. Your existing paints will work through your airbrush when they are easily thinned but this is literally everything you need to get started.
Yes, there’s loads of other airbrush stuff, and you can add other things as you go. But this the just the start of your airbrushing journey and this is all you need. 2 things, which is really just the compressor with airbrushes bundled in and some paint, that’s the lot.
If you want to have a look at the rest of the kit you will want to get alongside your airbrush, have a look at our guide to Essential Airbrush Accessories.
Best Beginner Airbrush for Miniatures & 3D Prints – How to Airbrush
When you get your airbrush kit it’s really simple to assemble, just connect one end of your hose to the obvious outlet on the compressor, connect the other end to the obvious inlet on your airbrush. Plug it in and turn it on.
Turn the dial on top until the pressure gauge reads somewhere between 20-25psi (about 1-1.5 bar). If your paint is a bit thicker you can up it to 30-35psi (about 2-2.5bar)
Pour some water into the cup.
Airbrushes are normally dual action, even these cheapo ones, Press down for air, pull back for paint. the further you push down, the more air comes out, the further you pull back the more paint comes out. Switching up a variety of these actions will give different results, so spray at some paper first. You’ll probably do what I did, just push the hammer all the way down to get all the air coming out, then slowly pull back to release the paint (or water in this case). This is fine, you’ll get better control in time. But this pretty much works for me, even now.
The reason you put water in is to get used to the action and get an idea of how to control it. when you’re ready. Pour or spray the water out and put some drops of paint in. Then spray that. Try it on an old sprue first. Just put some backing down first so you don’t spray your whole desk. A big box will do.
When you are done, clean it, Spray lots of water through it to clean out the inside, If you have some, spray some thinned down IPA through it which you may have bought already after following this paint stripping guide. A ratio of 1:10 IPA to Water will suffice. If you don’t have this, water will do for now. Put a couple of drops of water in the cup, press your finger over the end (where the paint comes out) and slowly push down and pull back the hammer. This will push the air and paint back up through the brush. don’t do it too hard or it will fly out and cover you and your desk, it should just blow bubbles of pain in the water. repeat these steps until it’s running clear both ways.
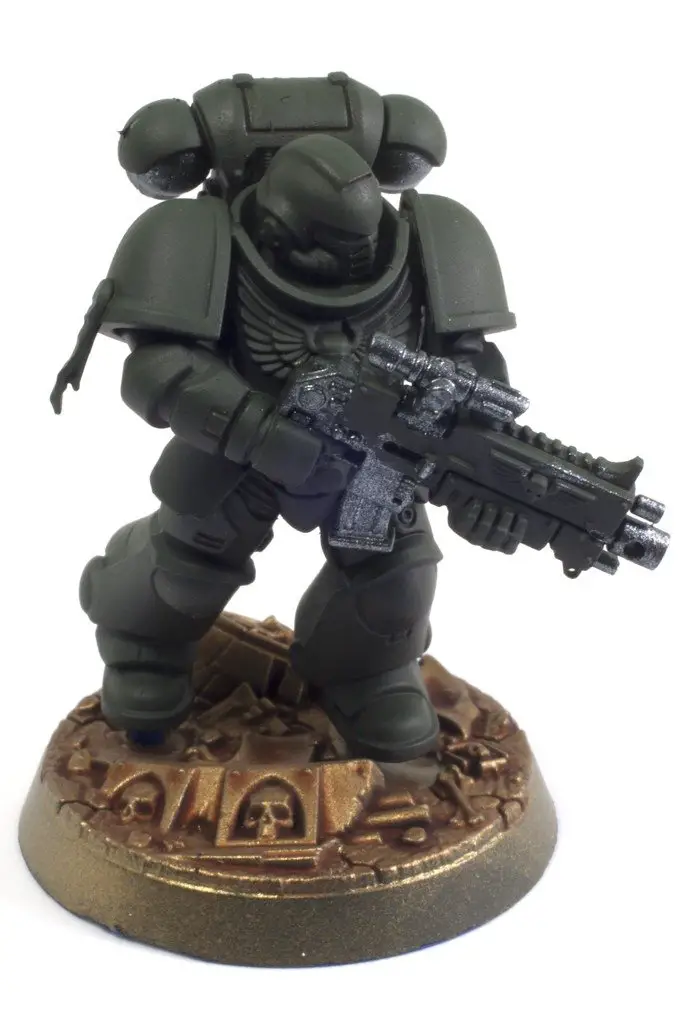
Next, grab that piece of paper that came in the case with the airbrush, most of the writing is in Chinese or Chinglish (that sounded way more racist than it was meant to, but my spellcheck agrees that its a word). But the picture should show you the parts. You want to take your airbrush apart and understand how to strip it down. There are guides online that will help. Just try to follow the instructions and learn what you can remove vs what you should remove before you start. Or you will do what I did and send a tiny spring flying across the room never to be seen again….. and that’s the story of how I ruined my first airbrush within an hour of owning it.
Best Beginner Airbrush for Miniatures – Results
Below I have added some pictures of my models before and after I got my first Airbrush. In most cases, these models have been painted justdays apart with my brushed models being used as my colour scheme tests and my airbrushed models being the final result. can you see the difference in finish quality?
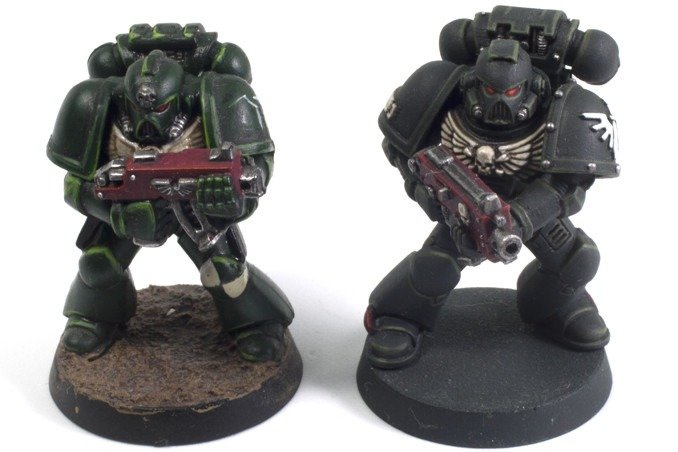
This is my practice Dark Angels Space Marine against the Airbrushed version, Fair I used different colours but we are comparing the paint consistency on the armour here. as you can see the airbrushed model looks much smoother with no brush marks
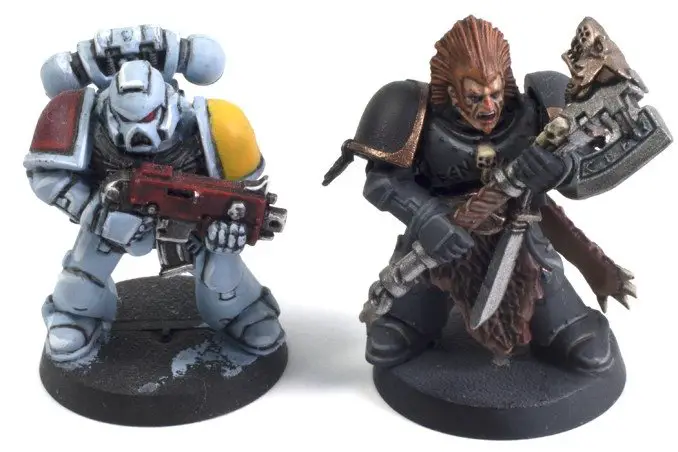
This is my Space Wolf colour test versus an airbrushed version. I also airbrushed the face with Bugmans glow before I washed it with Reikland Fleshshade.
Below, I have compared my Primaris marines I’m using for a future blog post, The ultramarine was base-coated with a brush and the shading is glazed on (It’s in progress). This took about 3 hours and about 4 thin coats of blue over a grey primer.

Here is my new Dark Angels colour scheme. Compared to the Ultramarine above you can see the quality level. Ignore the backpack, I got some excess glue on it. You can see the difference an airbrush makes. This took less than half an hour including priming and recess washing some areas with Agrax Earthsahde. It was painted over a black primer. The base was also painted with an Airbrush using Liberator Gold and washed with Reikland Fleshshade.
On the back you get a better view of the Zenithal shading, this was 3 colours. The Vallejo Black Primer, Vallejo German Cam Dark green with a Luftwaffe Cam Green highlight.
The side profile really shows off the Zenithal effect with the shoulder pad. The front and top are in a light green with the rear underneath in a solid black.
Some of you may recognise this guy below from my guide on stripping paint off miniatures, He seemed the perfect model to test out some flesh paint on and the image below shows how much I screwed this up originally. Again about an hour and 3 layers of paint + a wash for the standard brush.
This took less than 10 minutes to airbrush after priming with the Stynylrez grey surface primer. A layer of Rhinox Hide, then Bugman’s Glow from above. a quick top-level highlight of P
The back shot shows the Zenithal effect again where the inner arch of the back and under the arms is more Rhinox Hide as it is in shadow.
Best Beginner Airbrush for Miniatures & 3D Prints – TLDR
You may have skimmed the article above so here’s the summary,
You don’t need a top quality compressor or airbrush to get started, just grab an airbrush set which has a compressor and tank from the links below. get one that comes with an airbrush or two. Then get some primer and you’re good to go. You can get the benefits immediately by saving money on spray cans and airbrush priming your models. Then to save time. lay down some basecoats and shading by thinning your existing paint so it has similar properties to milk.
Airbrush Kit
- Click here to buy an Airbrush kit in the UK
- Click here to buy an Airbrush kit in the US
- Click here to buy an Airbrush kit in Australia
- Click here to buy an Airbrush kit in Canada
Airbrush Primer
Vallejo Surface Primer
- Click here to buy Vallejo Airbrush Primer in the UK
- Click here to buy Vallejo Airbrush Primer in the US
- Click here to buy Vallejo Airbrush Primer in Australia
- Click here to buy Vallejo Airbrush Primer in Canada
Stynylrez Syrface Primer
- Click here to buy Stynylrez Airbrush Primer in the UK
- Click here to buy Stynylrez Airbrush Primer in the US
- Click here to buy Stynylrez Airbrush Primer in Australia
- Click here to buy Stynylrez Airbrush Primer in Canada
Please Note: This site uses affiliate links. Our Affiliate Partners are shown below
(Affiliate links will result in compensation to the site on qualifying purchases)
Click this link & buy your hobby stuff from Element Games for the UK & Europe to support FauxHammer.com – Use Code “FAUX2768” at the checkout for double reward points.
Our Affiliates / Hobby Stores
- UK: Element Games, The Outpost, Wayland Games, Mighty Lancer, Goblin Gaming, Forbidden Planet, Model Scenery Supplies, eBay, Amazon
- US/Canada: MTechCave, GameKastle, eBay (US), eBay (CA), Amazon
- Germany: Taschengelddieb
- Europe: eBay (DE), eBay (FR), eBay (ES), eBay (IT), Amazon
- Australia: eBay, Amazon
- Global: RedGrass Games, Warcolours
- 3D Printers: Phrozen 3D, Elegoo, Anycubic
FauxHammer – Latest Video on YouTube
What did you think of this article? Please let us know in the comments.
If you like what we’re doing here you could really help encourage more content with a share on any social media platform.
Click the share links at the bottom of this screen (or on the left for computers and tablets).
Want to keep updated with the blog? You can subscribe in the sidebar for RSS or by email below
(Sidebar is below the article on Mobile Devices)
Author

I really don’t understand why this article hasn’t been commented yet. Great job, very useful. I’ve been thinking about adquiring an airbrush and a compressor, and this is an incredibly good guide (as usual in this website). It Will help me a lot when I finally decide to buy It. Congratulations, thank you very much and greetings from Spain
Thanks so much! I’ll be honest, I missed this comment when you posted it but I’m so grateful for your kind words
I keep coming back to read this… I’ve so little patience for the initial layers and I don’t think Contrast will be the answer for armour. My finger keeps hovering over the Amazon buy button ?
Lol, I think Cintras and classic painting are 2 very different things. Both leading to different results. For me if it’s this or contrast, I’d choose this. But I’m an old man now and stuck in my ways.
Contrast does look incredible though.
(Nudge, click that buy button. You won’t be disappointed)
Thanks for the awesome down to earth article. I’ve been involved with art in one way or another for 30 years, and not once have I subscribed to the idea that you need top of the line everything when starting out. To this day I still use acrylics that aren’t top of the line, in a pinch I might use student grade stuff or cheaper brushes for dry effects. Anyway, I want to start airbrushing my 3d prints, so thanks again, I’ll check out some more posts.
Thanks for the feedback, glad this has been useful. If you haven’t already please join our facebook group and share pictures of your 3D printed models.
Thanks for the article it was a good read. However, while the advice given is good for most people, some look to do a lot more than priming and basecoating from the get go. In that case I think it is better to go for a more expensive airbrush, obviously nothing too expensive but i think something with some quality to it will be better.
Yeah, and that’s fine, but I doubt that many people are looking to dive straight into detail shading or patters the first time they buy an airbrush. But even if they are, these cheap models can still do that. They are just bad quality and won’t last very long.
Hey dude. Just wanted to say a massive ‘thank you’ for this guide! I bought my first airbrush set up based on your recommendations and my base coats are super smooth! I’m really looking forward to learning a bit more technical painting with it and hopefully getting better.
Big fan of your work.
Nick
Thanks so much man that’s really kind of you to say! I’m really glad these articles are helping so many people, and a better airbrush can lead to even better results
I read this article with great interest, firstly because I know you ;) and secondly because I have wanted to dip my toe into airbrushing for a long time but have never had a solid idea of where to start, sure there are reviews but most will push one brand or another that is so expensive that it puts you off, this article was honest and a relief, for that I thank you.
However while this was centred around using the airbrush for miniatures I intend to use it for resin printed busts, large models and dioramas, From watching your YouTube videos you seem to print a lot of these yourself but from what I’ve watched so far you don’t tend to paint these is there any chance of a video on this in the future ? or can you point me in the right direction?
Thanks again chap
Craig
Is this also you! Craig S? From Tech Guys?
In regard to painting. It’s not something I don’t do, just something I don’t have time to do anymore between the job, the site and the YouTube channel.
It’s not too disimmilar between busts and minis, but you can put so much more detail in busts.
Airbrushes are great for initial basecoats, highlighting colours and even advanced techniques by intentionally speckling to create texture and variation on skin.
There’s a ton of guides on YouTube from people far better at it than I’ll ever be.
When you get your 8k, check out the busts by SidNaique, so much detail in them they paint themselves almost.
Glad you liked the article and you read it with the intent it was written!!!
Cut your teeth on this mate, it may take time to get the balance of paint and thinner right, but it’s worth it in the end. Such an awesome tool.
Just remember the cheap airbrush you get here is nit the full experience. But it’ll do to start with. If you can airbrush ok with one if these, you’ll be overjoyed with a better brush down the line
Such a useful and honestly written guide! I was on the fence, but have now ordered a compressor with tank and two brush kit (current price on eBay £95), some primer and cleaner. The clincher was you helping me realise I’d cover the cost in rattle cans for the 150 minis I have waiting for paint! Cheers! Nathaniel
Really useful article! Thank you