
The Army Painter Warpaints Review for Miniatures & Wargames Models
Last Updated on April 23, 2021 by FauxHammer
This is a review for The Army Painter Complete Warpaints range. It’s rather in-depth. The aim here is to cover everything you could possibly want to know about the range before diving in. (If you have a question this article hasn’t answered, please let us know in the comments).
Please Note: This site uses affiliate links. Our Affiliate Partners are shown below
(Affiliate links will result in compensation to the site on qualifying purchases)
Click this link & buy your hobby stuff from Element Games for the UK & Europe to support FauxHammer.com – Use Code “FAUX2768” at the checkout for double reward points.


Our Affiliates / Hobby Stores
- UK: Element Games, The Outpost, Wayland Games, Mighty Lancer, Goblin Gaming, Forbidden Planet, Model Scenery Supplies, eBay, Amazon
- US/Canada: MTechCave, GameKastle, eBay (US), eBay (CA), Amazon
- Germany: Taschengelddieb
- Europe: eBay (DE), eBay (FR), eBay (ES), eBay (IT), Amazon
- Australia: eBay, Amazon
- Global: RedGrass Games, Warcolours
- 3D Printers: Phrozen 3D, Elegoo, Anycubic
FauxHammer – Latest Video on YouTube
The Best Paints for Miniatures & Wargames Models
This article is part of our series looking at The Best Paints for Miniatures & Wargames Models.

If you want to check out what the best paints are for your projects, please check out our Best Paints article by clicking the image above.
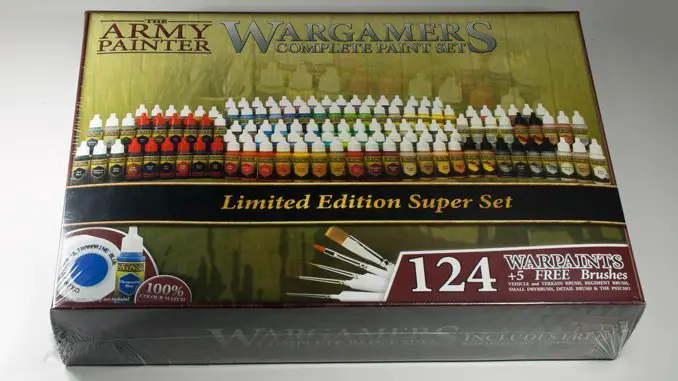
The Army Painter – Complete Warpaints Set
First things first; the primary focus of The Army Painter line is… you’ve guessed it… painting armies. The clue is in the title. Although perhaps not a “must-have” for serious display painters, there are some genuine diamonds in this rough and ready range.’
This review is sponsored by The Army Painter, who sent their Limited Edition Complete Paint Set (how limited this is I’m unsure) along with a couple of primer sprays and all 3 of the Quickshade Tins. This exhaustive set contains the entire Warpaints set of paint bottles which gave me all of the possible options available to try our their SPRAY, PAINT, DIP, DONE method. Aside from sending me the above, I have had no instruction and made no agreement with The Army painter over the detail included within this article. The information below is our own unbiased opinion.
At the time of Writing, The Army Painter Warpaints range consists of the following;
- 96 Acrylic Colour Warpaints
- 8 Metallic Warpaints
- 11 Quickshade Washes
- 9 Effects Paints
All of the above are included in the complete warpaints set along with 5 Wargamer Brushes and an Army painter painting guide. (I’ll be reviewing the brushes separately).
Packaging & Unboxing The Army Painter – Complete Warpaints Set
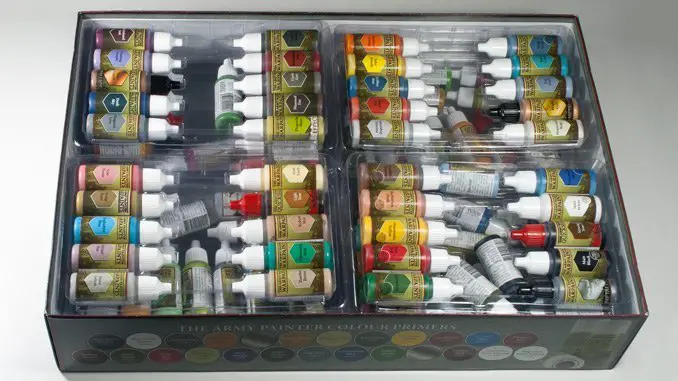
The Complete Warpaints Set comes in an impressively large and heavy box. One of the things their range showcases is the 100% colour match of their paint bottles to their spray primers. (I’ll cover this later on).
All of the images below show the exact state of the paints when I opened the box.
What’s in the box! What’s in the box!!!
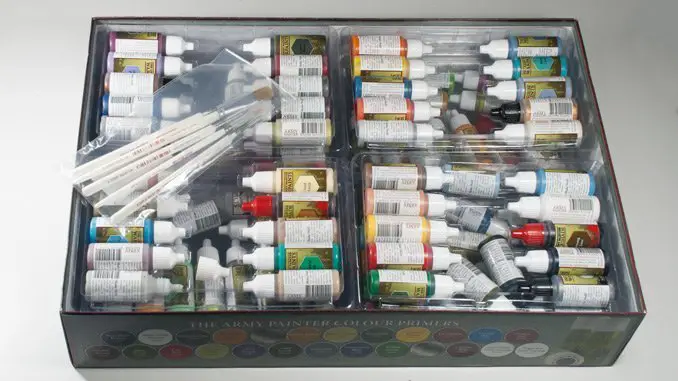
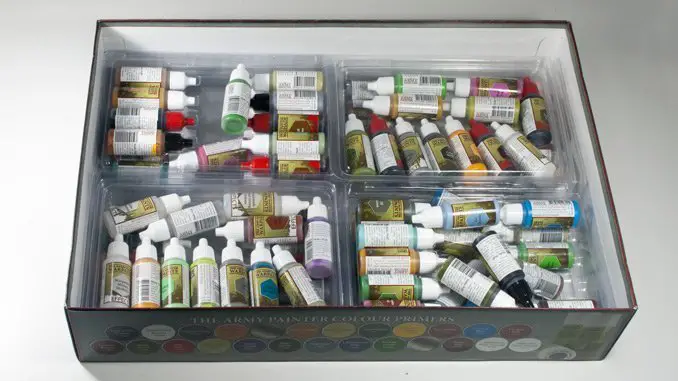
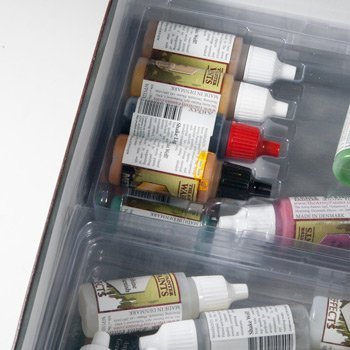
The set is separated down into 3 layers, comprising of 10 plastic trays, each containing 10 paints and 2 plastic compartments of equal dimensions, these compartments contain 12 paints each. Making up your complete set of 124 paints.
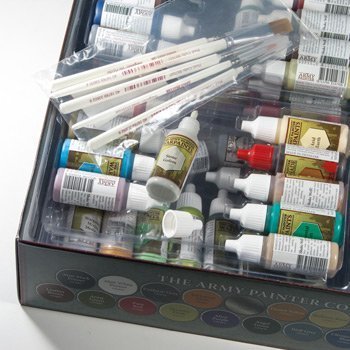
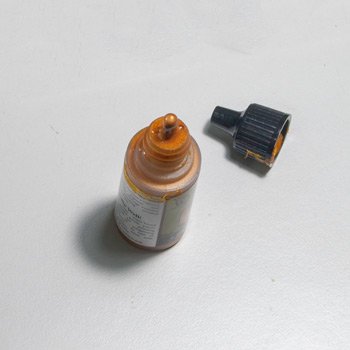
One thing I immediately noted was that Stone Golem had lost its lid in transport. This may be due to pressure build-up in the pot, or more likely excessive shaking by the couriers. There was no visible damage to the outside of the box. And thankfully I had only lost a little bit of paint medium.
The second layer contains the 2 boxes of 12 paints. Many more paints had come out of the trays
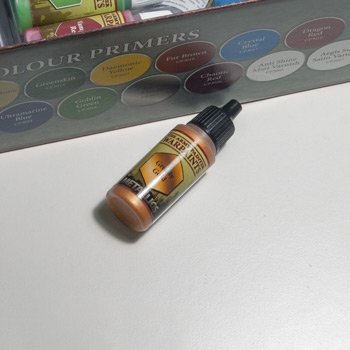
Greedy Gold (whilst it had not lost its lid) had also leaked somewhat. This is what leads me to believe there had been some issue with the pressurisation of the bottles. I’m not sure if this was transported by air as it had been despatched by The Army Painter directly. they are based in Denmark and I’m in the UK. Unless this came via a UK distribution centre, my assumption is that this has been on a plane. In any case, this is a minor issue as the paint cleaned up easily enough.

The lowest layer again showed more paints out of the storage areas, however there was no issue with the paints themselves.
The above image was just a little experiment by me to show how the presentation of the set could have been slightly improved. This really won’t matter to most people. However, as we are in an age where companies are starting to provide some really impressive packaging (sure, this is really in regard to smartphones and other technology products) Presentation of all products is starting to matter much more to more people.
The main thing I would have liked to have seen is just some better organisation of the paints themselves. I would have expected to see the Metallics, Quickshades and technical paint grouped with their respective partners. and then the acrylic warpaint in some kind of colour order. I would presume that these sets are put together by automated picking & packing machines as this current organisation would be a QA tester’s nightmare. But just the effort of better organisation would have made the presentation of this whole set much nicer.
First impressions an’all
Storage Trays
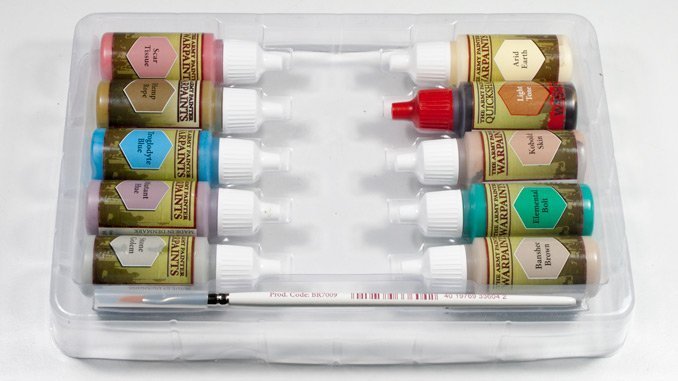
These plastic paint trays are used in numerous The Army Painter sets, Including this Complete Warpaints set and the 50 bottle Mega Paint Set. But the packing tray unit was clearly designed for the Starter Paint set. Which comes with 10 paints and a red-handled – Hobby Highlighting Brush. That brush, fits in the recess these trays have on the side. Of all the brushes you get in this Complete paints set, none of them will fit in that recess. Loosing out on an opportunity to successfully use these as mini project trays.
Painting Guide
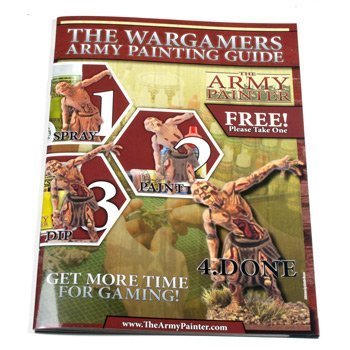
The final part of the boxed set (aside from the brushes which will have their own review) is the painting Guide booklet. This is not to be overlooked (like I did). It gives some great tips on painting. But most importantly it explains how to use The Army Painter painting system and how to prepare your paints for their first use. I ignored this booklet initially as advertising fluff. This was a mistake. But more on this later.
You can actually check out the whole guide book yourself now in Digital Form by downloading it from The Army Painter’s Website. They have a ton of other guides you can check out too!
Dropper Bottles
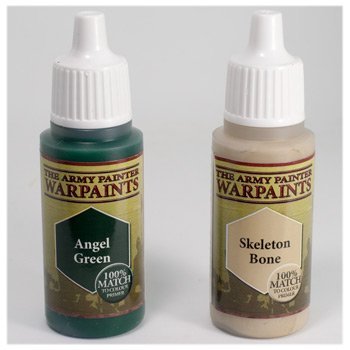
As shown with Angel Green and Skeleton Bone above (matching to the sprays I received and use below). All of the paints come in 18ml dropper bottles. So this range immediately goes into the + column, just for being in dropper bottles in the first place. But they get another + as 18ml is one of the largest individual quantities you can buy for typical miniature paints.
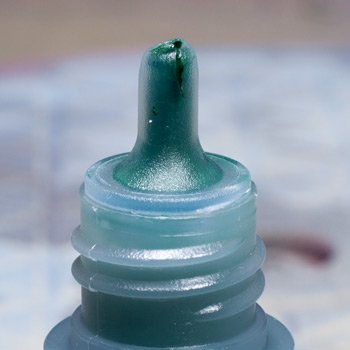
I did have some issues with some of the paints I opened as more than several of them had cracked spouts. Which, more than anything, is just annoying, as it stops precision control. This is important if you are mixing colours and measured by the number of drops. The Army Painter do sell empty dropper bottles (although these are only 12ml, not 18ml) yet they don’t seem to do replacement spouts.
Yet another + is that once your 18ml of paint is poured into the bottles. they are all topped off with clear paint medium to completely seal the bottle and stop the paint drying. This ensures the paints can be stored much longer. However, this excess medium is something you need to actually deal with before using the paints. It’s mentioned in the painting guide (I didn’t read at first) so you’ll see what happened to me in the PAINT section of this article.
Please Note: This site uses affiliate links. Our Affiliate Partners are shown below
(Affiliate links will result in compensation to the site on qualifying purchases)
Click this link & buy your hobby stuff from Element Games for the UK & Europe to support FauxHammer.com – Use Code “FAUX2768” at the checkout for double reward points.
Our Affiliates / Hobby Stores
- UK: Element Games, The Outpost, Wayland Games, Mighty Lancer, Goblin Gaming, Forbidden Planet, Model Scenery Supplies, eBay, Amazon
- US/Canada: MTechCave, GameKastle, eBay (US), eBay (CA), Amazon
- Germany: Taschengelddieb
- Europe: eBay (DE), eBay (FR), eBay (ES), eBay (IT), Amazon
- Australia: eBay, Amazon
- Global: RedGrass Games, Warcolours
- 3D Printers: Phrozen 3D, Elegoo, Anycubic
FauxHammer – Latest Video on YouTube
SPRAY – The Army Painter Warpaints Review
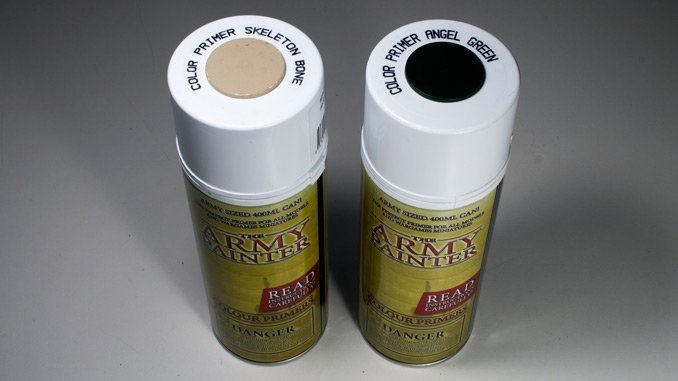
The first thing to test in the Army Painter Warpaints System was the Primer Sprays. Both for coverage and against the claim that they are a 100% match for their dropper bottle’s warpaints.

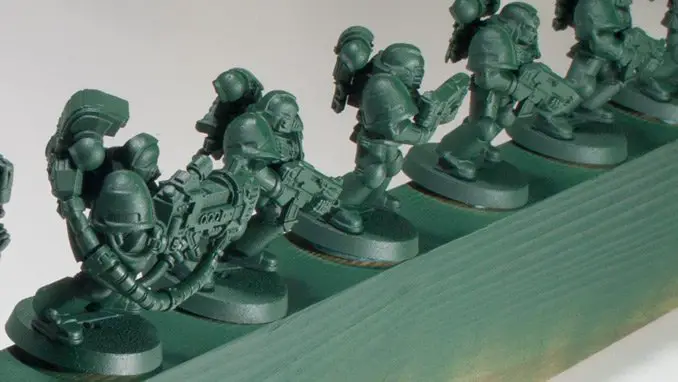
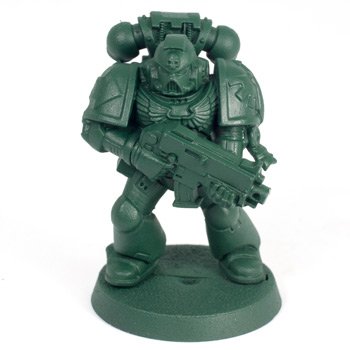
The Army painter provided Sprays of both Skeleton Bone and Angel Green which gave me the nudge I needed to finally finish these old Space Marine models.
The coverage was generally fine, I’m not personally a fan of Aerosol Sprays. Since getting an airbrush I am an advocate of Airbrush Primers primarily (however, they come with many of their own drawbacks). I found with these sprays the propellant was rather light. Instead of a direct spray which would powerfully propel wet paint on the model and cause runs. This created a soft mist at a distance (approximately 20cm, no further) for the majority of the models. However for some of the more tucked away details, I needed to get in closer.
As the propellant was not too strong. I was able to get in rather close (within 10cm) and lightly touch up any missed areas. Everything settles down smoothly and I was able to get a good coverage which flattened down to nice even coat.
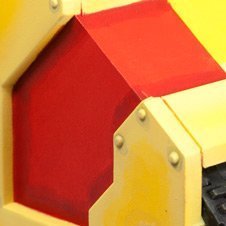
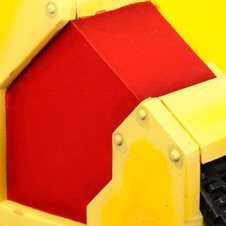
100% Colour Match Primer?
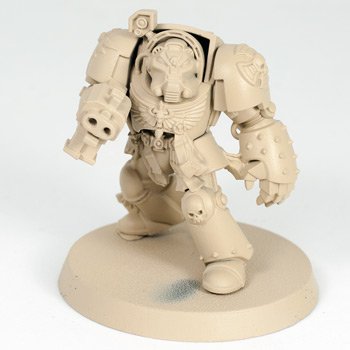
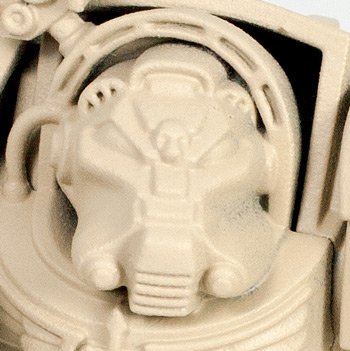
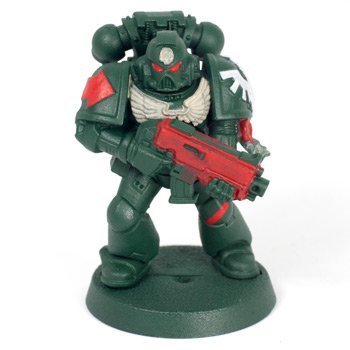
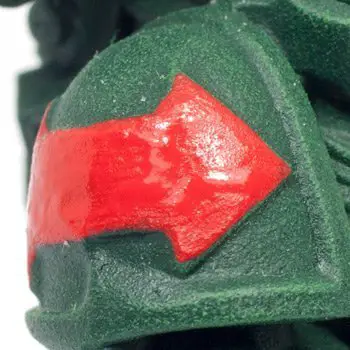
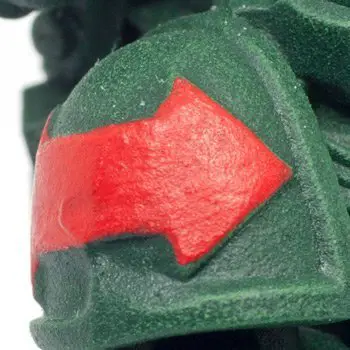
Both the images above and below show models which were primed with the primer spray and then the left half (your left, not the model’s left) was re-painted with the equivalent Skeleton Bone Warpaint from the bottle. Appropriately thinned and spraying through an airbrush.
Above, the right image shows a very minor area where the models left cheek was not completely covered by the spray primer. But I could easily have touched this up with more spray. Looking at the left image above you can see that this is hardly noticeable anyway and it will be entirely covered anyway once we apply a Quickshade or Quickshade Wash. (they are different things, more on this later)
The test here was to see if the Angel Green Spray Primer is a 100% Colour match to the Bottled paint. In my own analysis, I have to surmise, that I can’t tell.
Both colours have a slightly different finish texture due to one being applied with a spray can and the airbrush paint leaving a slight grain. The Skeleton Bone looks perhaps a touch darker on the airbrush side, Angel Green looks to be the exact same colour. Honestly, I’ve seen a more significant change just from different paint batches from other brands than I can see here.
I’m sure under some scientific equipment we’ll see some differences which say this is not a 100% match. But for the naked eye, I cannot personally see any change. Again, another + for this range.
Please Note: This site uses affiliate links. Our Affiliate Partners are shown below
(Affiliate links will result in compensation to the site on qualifying purchases)
Click this link & buy your hobby stuff from Element Games for the UK & Europe to support FauxHammer.com – Use Code “FAUX2768” at the checkout for double reward points.
Our Affiliates / Hobby Stores
- UK: Element Games, The Outpost, Wayland Games, Mighty Lancer, Goblin Gaming, Forbidden Planet, Model Scenery Supplies, eBay, Amazon
- US/Canada: MTechCave, GameKastle, eBay (US), eBay (CA), Amazon
- Germany: Taschengelddieb
- Europe: eBay (DE), eBay (FR), eBay (ES), eBay (IT), Amazon
- Australia: eBay, Amazon
- Global: RedGrass Games, Warcolours
- 3D Printers: Phrozen 3D, Elegoo, Anycubic
FauxHammer – Latest Video on YouTube
PAINT – The Army Painter Warpaints Review
The images above show 2 angles of the same model after a basic layer of coverage. I need to stress here that I had made a serious error before painting these. So take the next bit as a sign of my ignorance and not an issue with the paint.
After the primer layer of Angel Green, I started quickly putting down some layers of the base colours. What you are looking at above is 2 layers of Skeleton Bone for the beige parts, 2 Layers of Spaceship Exterior for the white part and 10 Layers of Pure Red for the (obviously) red parts. That is not a typo. 10 layers and It’s still semi Transparent!
I actually started with the Pure Red. I intended to test medium & light colour coverage over a dark base and this hit the nail on the head. I was honestly thinking, “oh dear, how can I possibly be positive about this range if the coverage is that bad”. Then I worked on the beige and white parts and I was slightly alleviated (there were some good paints, phew). I was still thinking, “oh dear”, this red was bad!
There’s something you NEED to know about The Army Painter Warpaints. As I mentioned briefly in the Unboxing Section. The Army Painter Warpaints Bottles contain 18ml of Paint. then as a final touch, before the cap goes on, they add a blob (approximately 4 drops worth) of extra none-coloured medium. This fills the bottle to the literal brim and that extra medium is there to ensure the already-pigmented medium is protected from natural evaporation during storage. It does say “Shake Well” on the bottles (which I didn’t read) and it even states clearly in the painting guide (which I also didn’t read) that you should squeeze out 4 drops before initially shaking the paint. Even then, I’d say, make sure you have some agitators such as The Army Painter Mixing Balls (2 per bottle is optimal) and shake it until your arm hurts, repeat with the other arm, then shake some more. Both the Paint and the Medium in these bottles is rather heavy so they need some formal encouragement.
Reviewing this range actually inspired me to investigate a range of paint shakers and invest in a Vortex Paint Mixer! and I’m so glad I did! It literally changed some of the colours from being irritatingly unworkable to being some of my favourite colours.
Once I understood the required level of shaking, I had much better results with Pure Red as I will show below.
Advice for Army Painter; get this advice about the extra medium printed on the bottles. Put it on the front of all boxes, get some neon signs about it and commission some sky-writing over new customers houses.
Advice for new Army Painter customers; RTFM.
Self-Leveling Medium
Whilst the above section seems to put some hate on the Army Painter formula. The medium is actually this range’s greatest strength. Yes, the pigment is heavy. Yes, the medium is thick. But the heavy pigment, generally gives a richer paint coverage (generally), and the medium dries, just ever so slightly slower than some other brands. The medium also seems to either self-level or mostly evaporate. Which means that (in most cases) brushstrokes are a thing of the past. Unless you continue to brush the model as it’s drying.
Thinning down the paint with water loses some of these properties, but just marginally. Your paint coverage is slightly weaker and it dries faster. But without doing this you are prone to easily clog up some of the finer recessed details. We will show this on the 3 Ultramarines below.
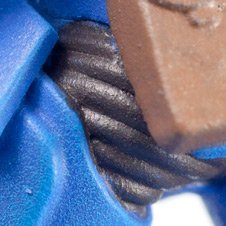
The images above show a very thick layer of Pure Red, pretty much immediately after the brush left the model. Then the same squad marking after it was dry, without moving the model or the camera. As you can see, once dry, all the large blobs of paint have settled. Even the mould line in the middle of the squad marking has reappeared when the paint settled around it.
The Army Painter Warpaints Vs Citadel Colour
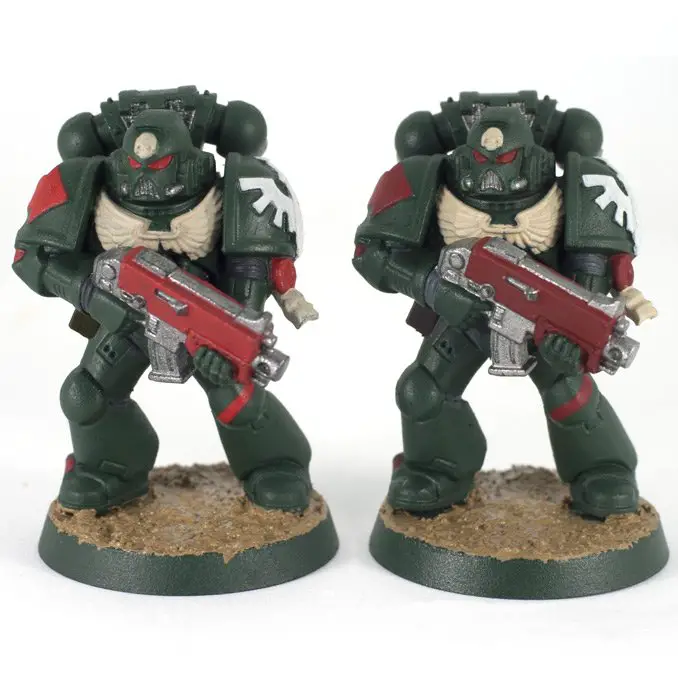
Another test I wanted to do was to compare the range to Citadel. I posted the above image on the FauxHammer Instagram and Facebook pages asking people if they could Identify which was which? Some got it, The guys from The Army Painter nailed it and even identified the exact colours. But the point was not to test who got it right. the point was to show if the quality difference on the model was obvious. Based on the results, it isn’t obvious.
As you are following this article, it’s easier to tell which is which. As you have seen the stages which lead to this point. But just to confirm it for you, The Army Painter Warpaints were used on the left model and Citadel paints were used on the right.
There aren’t really any “direct” colour equivalents across the two brands. I would generally suggest that the Army painter colours are lighter hues. Which makes sense alongside the SPRAY, PAINT, DIP, DONE method as the DIP will darken them all down.
Overall I found That Citadel had much better coverage for the Red, Grey (Grey used in wrists and inner arm joint) and brown (used on the sidearm holster). However, The Army Painter had much more workable colours with their white, beige & metallic paints. So much so, Plate Mail Metal (the silver used above) is now my go-to silver for any metal work.
Drybrushing The Army Painter Warpaints
Another test I wanted to quickly try out was dry-brushing. After having seen The Army Painter’s Ultramarine Blue Sci-Fi Marine painting video, (see below).
It’s true that due to the more gel-like medium which The Army Painter Warpaints have, they do stay more fluid for longer (which is generally a positive and I’ll show this later on). But with drybrushsing, you don’t want wet paint, you want paints which are almost dry. Initially, I was seeing results almost similar to the below video. Using Greenskin to drybrush highlight the above model. As the paint within the drybrush bristles stayed wet. I got lots of streaked wet paint across the surface.
However, just spending a little more time working the paint off onto a tissue, I was able to drybrush without any significant issue.
Painting with The Army painter Warpaints
This video made me worry that The Army Painter Warpaints weren’t suitable for Drybrushing. As it turns out, this video was approached from the perspective of someone who is a novice painter and is intended to show beginner results. Having now seen Adam’s (The guy in the video) other work. I know he is a much better painter than is shown here. Nevertheless, I still cringe when watching this video. If this is for a beginner, all it has done is just teach them how to drybrush incorrectly. It also does not show The Army Painter paints in their best light. And, whilst the approach was to show decent amateur results. Put simply, the results do not look good.
So let’s see what we can actually do with these paints using the exact scheme shown in the video above. If you’re after the recipe for these models, then start with the video above.
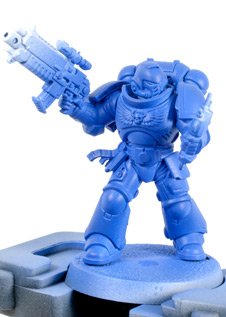
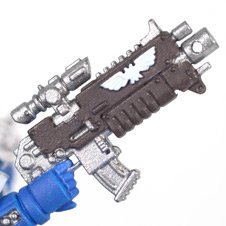
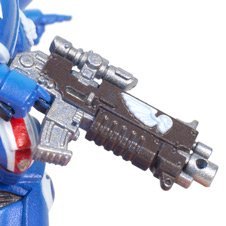
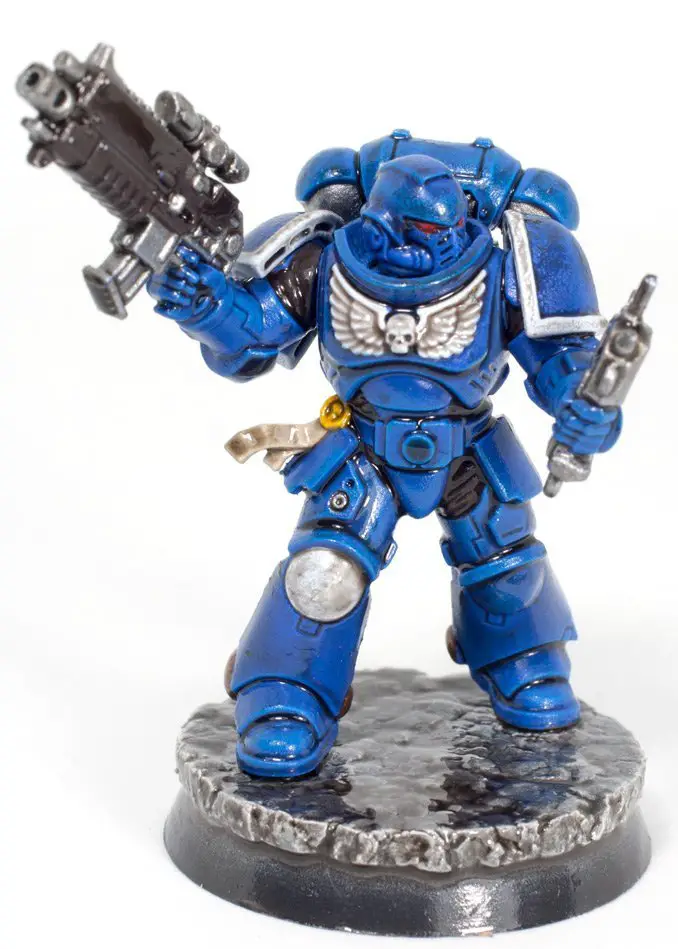
The models above were part of my Warhammer Conquest Subscription and Used for the next Series of painting Tests. All were primed in a third party white airbrush primer and then airbrushed with The Army Painter Ultramarine Blue. You’ll get similar results using the Ultramarine Blue Spray Primer. I also have to note here. Airbrushing Ultramarine Blue was a pain. I simply could not get a good airbrush consistency. It was either too thick leading to almost immediate clogging which meant fully emptying the airbrush (wasting lots of paint) or too thin, leading to terrible wash-like runs and watery paint (see the bolter on the middle guy above). I lost 3/4 of my bottle just doing these guys.
For the sake of keeping up with the upcoming tests, Were gonna call them A, B & C respectively.
Marine A – (The guy with the Auspex) was painted in a similar way to the video above. Straight from the pot, minimal paint thinning (literally, just having a moist brush was the only attempt at thinning we made). Except we just spent a little more time on him with better drybrushing (not shown in the image above) the Viking Blue. We also finished painting our individual layers, instead of leaving any transparency.
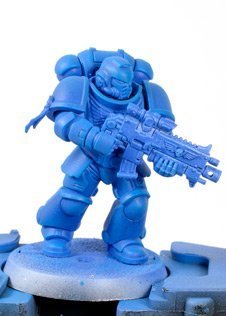
Marine B – (The guy with the Bolter) was similar, but we put a lot more effort into the layers. Appropriately thinned paints and an attempt to leave as smooth a surface as possible, whilst still painting quickly to get an army complete.
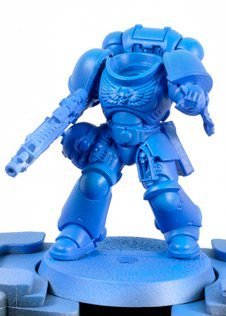
Marine C – (The guy in Charge) Was me pushing it to the max (my max in any case). Instead of dry brushing the highlights on, we airbrushed the Viking Blue as a zenithal highlight. then we added a touch more to the really raised areas like the backpack, chest, upper arms, head, shoulders knees & toes.
Marine A
Overall the none-thinned coverage with these paints was really, really good. As The Army Painter Warpaints have this rather gel-like medium. They initially seem a bit thicker on the brush than many other brands. However, once applied to a model, this tends to settle down nice and flat as it dries. It can still lead to detail clogging if applied in thick globs. I made sure to keep away from the creases as much as I could on the second and third layers. Only the White, Yellow and Beige areas of this model had 3 layers. The rest were only 2 layers.

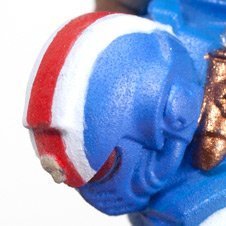
The Boltgun and Softer parts of the armour were painted with Dark Stone, a Brown-Black which really good approach to painting black areas. It still appears as a black. But it’s light enough so that the later Quickshades will darken down the recesses still to show depth.
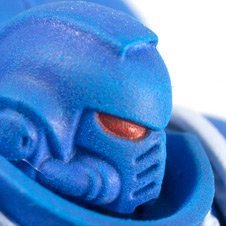
Mars Red was used on the eyes, which is a brighter red than the Pure Red used on the above Dark Angels. It’s a very odd colour as it looks orange in the bottle and as it pours. A quick whiz with your brush on the palette and this appears more like the red it is. This is something else I noticed with the range, a few colours, such a Gorgon Hide also will appear different in the bottle to how they appear on a palette or the model itself.
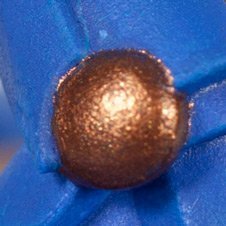
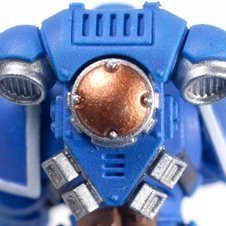
The silver (Plate Mail Metal) went on very smooth and whilst I said the above was applied straight from the pot, the Metallics required a wetter brush than the other paints. This is quite common with Metallics as they have larger and heavier pigment particles than flat colour paints. I had similar results with True Copper, used on the copper parts to add some accents.
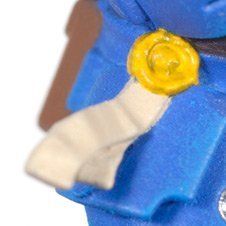
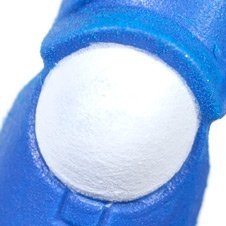
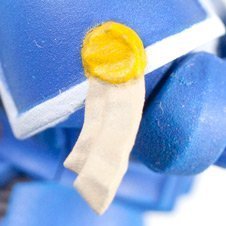
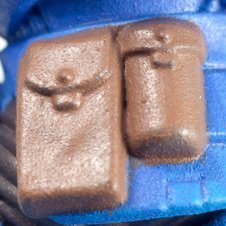
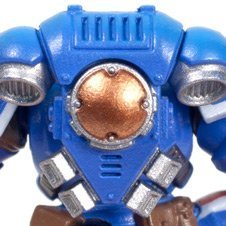
A step away from the model in the video guide (as the model in the video did not have purity seals) I used Daemonic Yellow for the Wax on The Seal and Skeleton Bone again for the parchment. Like every other brand I know, yellow coverage is on par with what I expected. In that, it’s rather poor. 3 coats later and I have clogged recesses of the details and it’s still very transparent. This should have had a white layer first, but we were going for speed here.
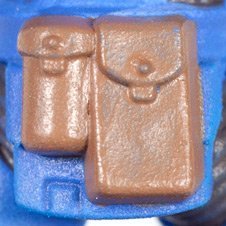
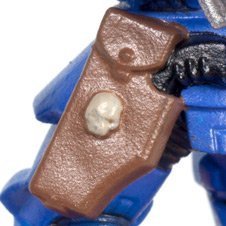
Leather Brown is fairly average, the above showed just 2 coats, which was enough for the shading coming next.
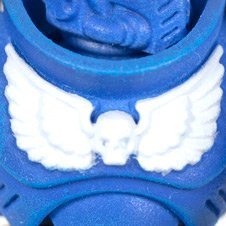
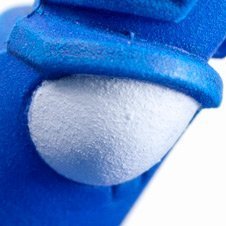
And finally, (briefly mentioned above) one of my new favourite colours Gorgon Hide. I have no idea what a Gorgon is or why it’s hiding. But it’s colour is fantastic! This looks like a blue in the bottle, but you can see from the pictures above, this is white. A white with a slightly blue hue, making it a cool white and a perfect complimentary colour for these Smurfs. As it is an off-white it also means we can highlight with pure Matt White later on. I’m used to 3 different kinds of white. 1. Those that paint like chalk, and 2. those that are from quite expensive brands. the 3rd kind of white is those that are from expensive brands and paint like chalk. But with The Army Painter, the thicker medium keeps the white pigments suspended longer and much more workable.
If you are someone looking for better ways to paint white, grabbing some of The Army Painter whites will be a great decision.
Marine B
I hope like me that with the image above you can see the subtle but immediate difference in the colours once we simply applied some thinning. In regard to how thin these paints were. They were on a wet palette and I added as much water as possible. But stopped adding water if the paint became transparent as I moved it about. This is what I generally refer to as correct layer consistency. (Ignore that age-old Thin to the consistency of milk statement, it’s not true, thinning is dependant on each paint).
At this consistency, most of the paints actually required no more layers than Marine A above (with the exception of the yellow which now had 5 layers, and the white/beige with both had 3 layers)
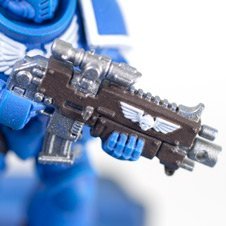
Thanks to the increased flow offered by the water the images above show the most minor detail loss. The Purity Seal wax took a few more yellow layers, but the coverage is far more consistent now. The Skeleton Bone parchment is also crisper. The eyes pop better, the Bolt Rifle and Aquilla still hold all of their recesses too. This is especially good on the Bolt Rifle’s Aquilla which has very fine recesses separating the wing spines.
The Metallic parts also appear crisper, and flatter white areas such as the white knee pad are a great example of the detail. As you can still see the texture of the drybrush layer through the white. This just shows how thin the layers were applied and how good the coverage was.
All of these smooth layets will really help when it comes to shading the miniature.
All of this improved the painting quality and the paint was more fluid too, meaning it was more workable. However, this lost some of the gel-like consistency of the Army Painter Medium. This meant the layers dried faster and they weren’t workable for as long as they were before
Marine C

Oooh, Shiny, this may be the first thing you notice when looking at the mini above. That’s because this one had a coat of The Army Painter Gloss Varnish through my airbrush. This served two purposes. One was to act as a base for the Decals. the other was for the next section of the review (DIP).

In the images above, especially on the Backpack and Shoulder Pad, you may notice the colour gradient of Viking Blue (from above) to Ultramarine Blue. this was the result of the Airbrush highlighting versus the drybrush used on the previous two models. The Viking Blue airbrushed much cleaner than the Ultramarine Blue. The latter of which caused the grain of the basecoat (see the helmet), due to the large pigment molecules.
Viking Blue would not have been the colour I’d have picked to highlight with as there is not enough contrast. However, I was working to match the tutorial itself. (and it works out well in the end #SpoilerAlert).
I also had to contend with a face on this model, which I based with Barbarian Flesh and then a layer from above of Corpse Pale. This was a brush version of a zenithal highlight. The hair was painted with Filthy Cape.
We’ll come back to these marines shortly in the DIP section of this article, but first. let’s look at some of the other tests we’ve put these paints through.
Rhino, I Choose You!
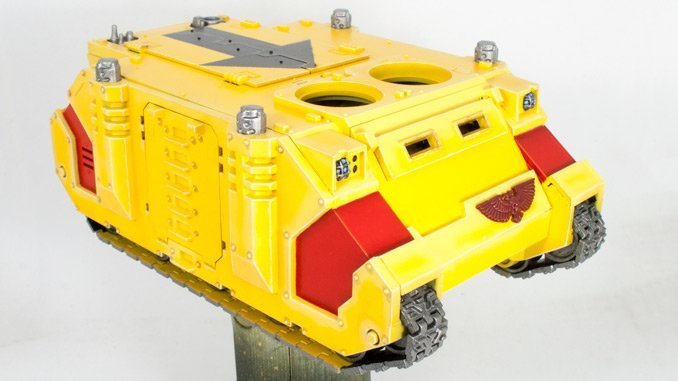
The Pikachu Inspired Imperial Fists tank above was painted for a few reasons, but the main ones were to test more airbrushing and to try out some glaze shading.
The airbrushing was generally fine. Over a white airbrush primer, I applied Phoenix Flames to the recessed areas when an all over layer of Daemonic Yellow.
I also didn’t have any issues glazing the paints. Over a base of Pure Red, I added a quick layer of Vampire Red Into the recesses. About 30 or so glaze layers later, this came out as a somewhat respectable blend. This is where the more transparent reds from The Army Painter range really came in handy. As they were already on their way to transparent before adding them to water. This let me be a bit thicker with my layers, allowing a touch more control.
We’ll come back to this tank in the next section.
I Love Goooooooold!
The model above is not the result of an unfortunate smelting accident. It was Airbrushed Greedy Gold, then a Zenithal highlight of Bright Gold. Both of these went through the airbrush well and have a really smooth, almost real metallic finish when used that way. We’ve already brushed on metallic paints above, however, metallics can be difficult to run through an airbrush due to the density and size of individual pigment particles. No issue here.
We’re just going to park this model here for a moment and we’ll revisit it in the next section.
Basing Miniatures
The Army Painter range doesn’t have any textured basing paints. Fine with me as I don’t generally use them anyway. The Army Painter does make some great basing materials and do a really good starter basing kit. But I don’t have that so I’m going the DIY method from cork board. A good excuse to test out the Brush-on Primer.
I literally slapped it on as shown in the above photo and it dried flat and neat. I’d be far more careful on a miniature. But so long as I kept the brushstrokes in the same direction around the base it settled perfectly fine in just one coat.
Once this was dry, I simply added a liberal coat of Necromancer Cloak. In all honesty, it took two coats of this to cover all of the flat areas. Then a heavy drybrush with Filthy Cape and a final edge drybrush of Mummy Robes.
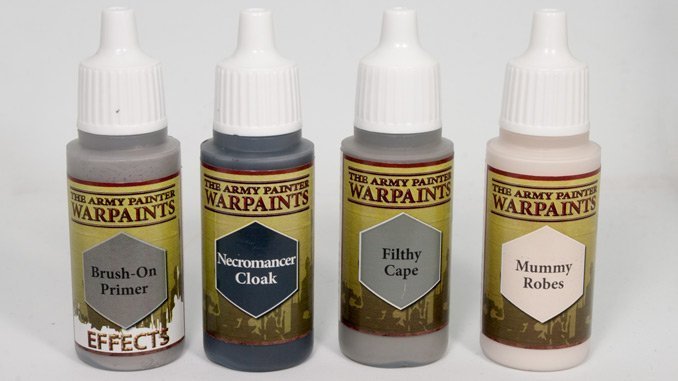
So if you want to make some quick concrete bases for your miniatures just pick the colours that should be used for old clothes.
Please Note: This site uses affiliate links. Our Affiliate Partners are shown below
(Affiliate links will result in compensation to the site on qualifying purchases)
Click this link & buy your hobby stuff from Element Games for the UK & Europe to support FauxHammer.com – Use Code “FAUX2768” at the checkout for double reward points.
Our Affiliates / Hobby Stores
- UK: Element Games, The Outpost, Wayland Games, Mighty Lancer, Goblin Gaming, Forbidden Planet, Model Scenery Supplies, eBay, Amazon
- US/Canada: MTechCave, GameKastle, eBay (US), eBay (CA), Amazon
- Germany: Taschengelddieb
- Europe: eBay (DE), eBay (FR), eBay (ES), eBay (IT), Amazon
- Australia: eBay, Amazon
- Global: RedGrass Games, Warcolours
- 3D Printers: Phrozen 3D, Elegoo, Anycubic
FauxHammer – Latest Video on YouTube
DIP – The Army Painter Warpaints Review
The Army Painter has an interesting and somewhat unique approach to shading miniatures. Whilst they openly admit, they never came up with this technique themselves. Their Quickshades shown above (not to be easily confused Quickshade Washes) are tins of Gloss varnish with shading pigment added,
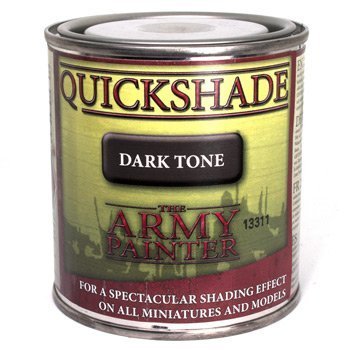
There are 3 colours available in these Quickshades (again, not to be confused with QuickShade Washes), Dark Tone (Black), Strong Tone (Brown) and Soft Tone (Sepia).
I’ve mentioned a couple of times, do not confuse Quickshades with Quickshade Washes. It’s rather obvious to any of the Army Painter initiated. But for anyone considering this range from the outside, it’s a mix up you can easily make.
If you have been looking at guides online which have suggested you use The Army Painter products to shade your models. The community will refer to either of these products interchangeably as “Army Painter Quickshade“.
So let’s make this clear right now.
Quickshade; A 250ml tin of gloss varnish with a semi-transparent shading pigment mixed in, available in 3 colours
Quickshade Wash; An 18ml Bottle of Acrylic based Wash medium with semi-transparent shading pigment mixed in. Available in 11 colours
So, to make this article clear I’ll be using the names above exclusively to refer to each item.
But honestly, it would make more sense if The Army Painter just called them different things. The Dip tins could be the Quickshades and the bottles could just be called Washes.
Quickshade
Let’s take a look at the Quickshade first. This is the shading method advertised in the Army Painter marketing materials. And there’s 3 way’s to apply it. 1. Dip your mini in the tin, shake off the excess and let it dry. 2 is to do the same thing but you wick away any excess with a brush before it starts to cure and 3 is to just paint it on with a brush in the first place.
Marine A

For the Marines, I used The Army Painter Dark Tone (Black). The Quickshade tin requires a good stir before you dip a model in it. The varnish medium and the pigment will easily separate in storage. It needs stirring, not shaking. Firstly Shaking will cause bubbles in the solution, which you don’t want as they will transfer to your miniature ruining the smooth finish. Secondly, the settled pigment is like a thick sludge. Shaking simply will not do a good enough job to separate the different elements of the Quickshade formula.
Dipping your miniature is quick but you will pull out with a lot of fluid on it. You need to leave it over the pot until most of it runs off. Then you need to move the wet miniature over to a box (without dripping it all over your desk) and shake off any excess. As you dip the mini in upside down, this will cause the pigment to move to the top of your miniature. and settle on the upper parts. Once the model is stood upright. most of this will quickly run to the lower regions. But any flat surfaces on the model (and specifically in the areas where it was dripping off) will retain pools of shade pigment.
You also don’t want to get this stuff on your fingers. It’s an enamel based paint which you need to clean off with spirits. Get some gloves, at least and an old dipping tool will be helpful too. I used a crocodile clip attached to a cable.
The model above (now dry) had the aforementioned issue with pooling on the top of the helmet. (unfortunately, I lost my photos of this, but you can see the idea on the side of the bolt rifle and on the next model). In a rush as the varnish was still curing. I started to pull back the excess shade using Isopropanol and some (none-hobby-grade) cotton swabs. This has caused the texture on the helmet, backpack, shoulder pads and knee pad.
The Quickshade took almost 4 days to fully dry. Before this time it was still tacky to the touch. What the above results show however is that the heavily applied wash does, in the most part flow into the recesses. What is really great is that any pooling does not leave tide marks as most acrylic shades would. The enamel based varnish keeps the pigment suspended as it dries. This makes for a much more pleasing shade result.
The pooling (which I tried to remove) which is still shown on the Rifle, belt Buckle and Elbow Pad on the marines right arm, is ideally not what you want to see on flat surfaces. So next we’ll have a look at what we can do to quickly deal with some of that.
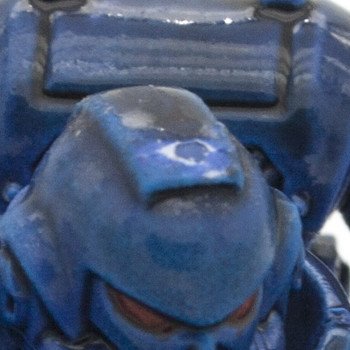
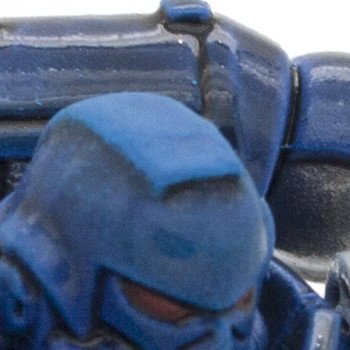
Marine B
Note: As briefly mentioned above I lost some of my digital camera photos (don’t buy cheap SD cards off eBay). So I’ve had to revert to my Instagram In-Progress pics (I’m so glad I took them now).
FauxHammer
The marine above is a better example of how the dip method causes the shade to sit on the upper surfaces. Specifically where the larger pools were as it dripped off the mini when it was upside down. Which on this model were the top of the head, his left shoulder pad and the same area on the backpack exhaust. the latter of which took the brunt of the drip/pooing.
The flat surfaces on this model are marginally improved over the previous model as I did give it a decent few layers of The Army Painter Gloss Varnish before the Quickshade dip. Which is also when I applied the decals.
With any shading paint. a Gloss coat always helps. The pigments in paints are naturally the part that sticks. Any slight texture on the surface of a model will cause pigment particles to bind to those areas. then other pigment particles will attach to that. This is why you get pooling on flat surfaces, even when they are almost perpendicular to the base.
This (combined with the thinner layers applied to this model) is why the eyes on this model really pop when compared to Marine A. It’s why the chest Aquilla details are really defined and why the flat surfaces of the Bolt Rifle don’t have any pooling.
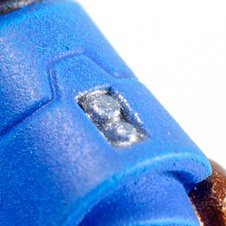
You may also notice that inside the neck rim has no shade applied. I must have created an air bubble as I dipped the model. Now I’m aware of this. I’d spend some time as I dip a model stirring it around at different angles. to remove any captured air.
One thing you can’t see is how solid this shade-varnish layer dries. I actually went back with some Isopropanol on a hobby grade cotton swab to take back some of this pooling. But it’s damn tough to shift and I risk removing some of the base paint colours. (you’ll see what happens when I do this, in the DONE section)
Leave this as it is and you’ll never need to worry about chipping paint in tabletop games.
Soft Tone
The above images shows 3 things.
- The Army Painter Soft Tone (Sepia)
- Quickshade application over a glossed metallic surface.
- The Dip & Wick Method
The Dip and Wick method is possibly the most commonly used approach for quickly shading miniatures. essentially once you have dipped your miniature. Use a brush to wick away any excess pooling, wipe it off onto a tissue and repeat until the shade is settling into the recesses only.
This approach by far gives the best final look with your shade as everything is balanced across the miniature. You do need to be quick with the wicking stage as the paint will start to dry as soon as it’s out of the tin. You have a good 5 minutes (less in hot environments) before you can start to feel and even see the Quickshade resist your brush. It starts to show the brush lines. Don’t worry, these initial lines will settle. But you need to be winding up this process when that happens.
Also, do not under any circumstances use your best brushes for this. You need to use methylated spirits to clean your brushes after this. use synthetic brushes where possible.
Quickshade Wash
The Washes are an entirely different formula, they still have the same shade pigments in them which result in a colour match to the Quickshade tins. But these pigments are suspended in your standard acrylic based medium. (so you can use your good brushes).
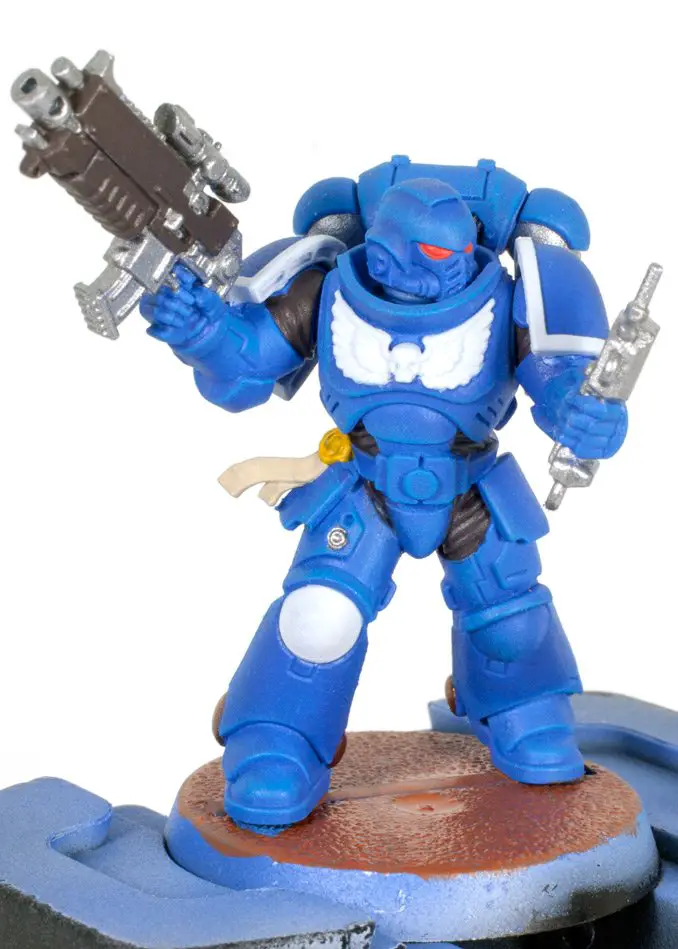
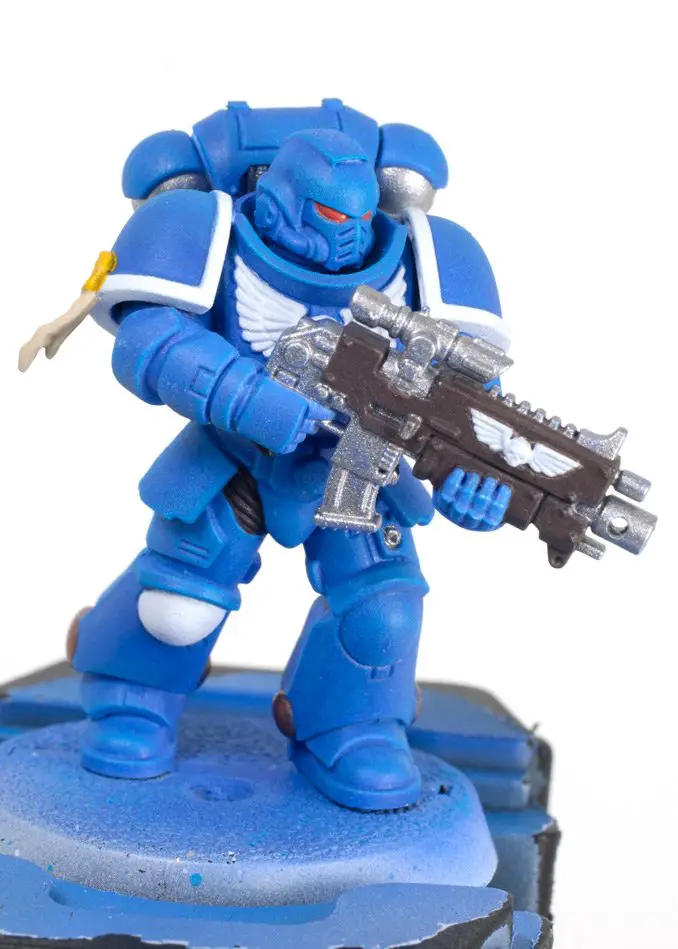
Marine C
This model was also covered with a few layers of The Army Painter Gloss Varnish. Applying a mix of 1:1 The Army Painter Dark Tone Quickshade Wash and The Army Painter Quickshade Mixing Medium. The latter was just to thin down the intensity of the shade. This was applied liberally by brush over the entire miniature and, as above, was quickly wicked away in any areas of heavy pooling. As this is an acrylic medium, you don’t have as much time to wick as the paint dries much quicker.
This has created a very subtle shade which is still prominent in the deepest recesses. The final two pictures in the above series show this method in the best light on the marines right shoulder pad and helmet. With a gradual shade between the outer surfaces and recesses. The Shoulder Pad especially shows a smooth gradient from the top (light) to the bottom (shadow).
The other benefit to this (over a gloss coat) is that any mistakes can be pulled back easily using a hobby grade cotton swab dipped in isopropanol. Which I’ll do before the next stage.
Tanky McTankface
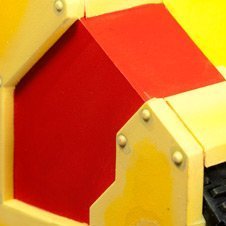
The same process was applied to Pikatank The Imperial Fists Rhino. after a coat of Gloss Varnish. Soft Tone Quickshade Wash, mixed 1:1 with the Quickshade Mixing Medium was applied to the recesses of the yellow instead of full coverage. (as that would just be a waste). There was some slight overspill but I can clean this up using Isopropanol.
The red and black areas had the same mix applied but with Strong Tone in place of Soft Tone.
The Army painter medium helps here too. Normally a paint would immediately start to absorb into the underlying paint. this causes unintended discolouration of those areas. The Army painter medium keeps the paint suspended in the medium, separating it from the underlying surface. The pigment then gently lays atop the paint ensuring the shade is applied to those areas where it settles only.
This isn’t a magic solution, it’s only a slight difference which is helped more by the gloss coat. But it’s a little benefit which puts these Quickshade Washes ahead of most of the competition.
Put simply, if you don’t already have any Quickshade Washes in your painting collection, you should.
Please Note: This site uses affiliate links. Our Affiliate Partners are shown below
(Affiliate links will result in compensation to the site on qualifying purchases)
Click this link & buy your hobby stuff from Element Games for the UK & Europe to support FauxHammer.com – Use Code “FAUX2768” at the checkout for double reward points.
Our Affiliates / Hobby Stores
- UK: Element Games, The Outpost, Wayland Games, Mighty Lancer, Goblin Gaming, Forbidden Planet, Model Scenery Supplies, eBay, Amazon
- US/Canada: MTechCave, GameKastle, eBay (US), eBay (CA), Amazon
- Germany: Taschengelddieb
- Europe: eBay (DE), eBay (FR), eBay (ES), eBay (IT), Amazon
- Australia: eBay, Amazon
- Global: RedGrass Games, Warcolours
- 3D Printers: Phrozen 3D, Elegoo, Anycubic
FauxHammer – Latest Video on YouTube
DONE – The Army Painter Warpaints Review
And that’s it, your models are technically ready to use once your Quickshade is dry. However, even The Army Painter suggests a finishing coat of Matt varnish to take away the heavy shine which the Quickshade Gives. Or for the Quickshade Wash, which has a matte finish, the Varnish will help to protect the surface of the model.
But I don’t have any of The Army painter Matt Varnish. So I’ll substitute it for an Airbrush Matt Varnish.
So, when we say “DONE”, sure, it can be described as done at this stage. But I surmise that the DONE Stage is all about adding those signature flourishes and finishing touches.
Interactive Photos
So, we’ve gone from poor quality photos to really high-quality interactive ones. During this review, I got my hands on a Foldio 360. So the photos from here will be much more detailed and you can now spin them and see all of the detail.
Marine A
All we did on Marine A (after going back and applying the decals) was paint the surround of the base, and apply a Matte Coat. Technicaly after the Quickshade we did strip it back somewhat with Isopropanol, But this was shown above.
Marine B
Marine B also had some shade stripped back with isopropanol, however as this layer was so hard when it was dry. I started pulling back the blue layers. This needed repainting to rescue the damage (shown below). All-in-all the best solution for applying Quickshade is to wick it away or apply it with a brush in the first place.
After that, we simply painted the surround of the base and applied a matte coat.
Marine C
This guy had all the flourishes I could add. After his Layer of Quickshade Wash (remember this is the, wash, not the dipping tin). I applied a Wash of thinned Strong Tone to the brown & beige areas like the leather pouches and the purity seal. It was also applied to the copper areas.
We then applied an edge highlight to all of the remaining areas. Blue for the Blue Areas, Matt White for the White. Flesh then Skeleton Bone for the scratched leather. The Gun was highlighted with Grey
The damage was applied by stippling the edge highlight colour onto each area. The Ceramite armour had Oak Brown painted inside of these stippled areas and the gun had Plate Mail Metal painted inside the stippled paint.
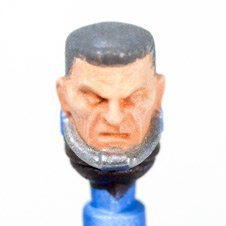
This guy also needed his face painting. The gloss coat helped here. After this gloss coat, we painted the recesses with Quickshade Washes of Soft Tone, Strong Tone and Dark Tone respectively, the deeper into the face we went. We then highlighted with Corpse Pale. Gave him some hair and eyebrows before dotting the eyes.
Once all this was done, he had the rim of his base painted and then had an all over matte coat to balance out the surface textures. We also put a little extra effort into the base for this guy too. But only by digging out some of the cork and adding some textured paint to the upper surface. oh, and some paperclips for rebar.
Pikatank
This was looking so much like a Pokemon that I just had to get some brass-etch chapter badges. A quick coat of Matt White and Matt Black and we are now looking much more like an imperial fists Rhino. Horay. There was some damage to the paint job on the front left-hand side due to one of my kids getting black marker on it before the gloss coat and I tried to clean it off with Isopropanol. But Overall a successfully painted yellow tank.
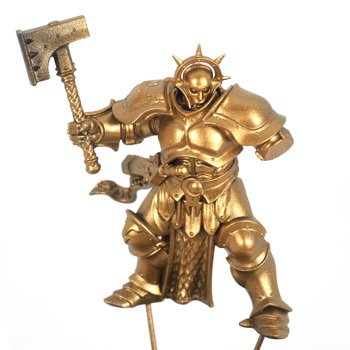
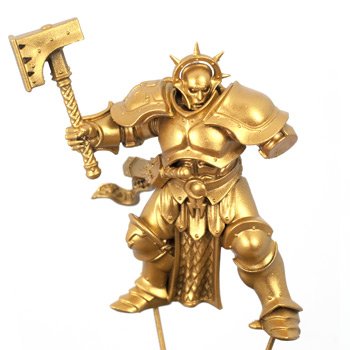
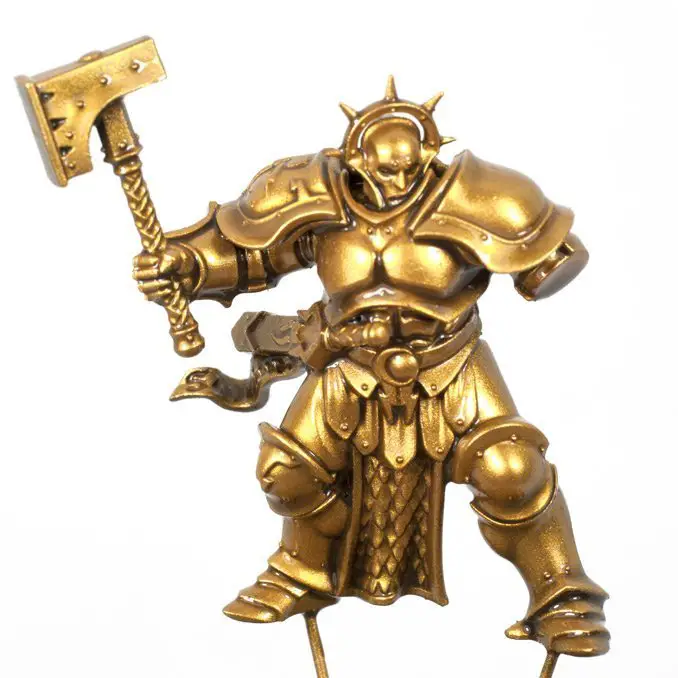
Stormcast Liberator
Ok, so the gold is muted down now due to the Matt Coat. But the shine across the chest still follows the light as you rotate the image above. All I’ve done to this guy is slap-on the rest of the base colours before washing them with Dark Tone. But this is enough to review the final results with the gold. all-in-all, these are really nice metallics to work with.
Please Note: This site uses affiliate links. Our Affiliate Partners are shown below
(Affiliate links will result in compensation to the site on qualifying purchases)
Click this link & buy your hobby stuff from Element Games for the UK & Europe to support FauxHammer.com – Use Code “FAUX2768” at the checkout for double reward points.
Our Affiliates / Hobby Stores
- UK: Element Games, The Outpost, Wayland Games, Mighty Lancer, Goblin Gaming, Forbidden Planet, Model Scenery Supplies, eBay, Amazon
- US/Canada: MTechCave, GameKastle, eBay (US), eBay (CA), Amazon
- Germany: Taschengelddieb
- Europe: eBay (DE), eBay (FR), eBay (ES), eBay (IT), Amazon
- Australia: eBay, Amazon
- Global: RedGrass Games, Warcolours
- 3D Printers: Phrozen 3D, Elegoo, Anycubic
FauxHammer – Latest Video on YouTube
The Army Painter Warpaints Availability
The Army Painter paints are everywhere. If your local hobby shop is specifically a miniature wargames shop. They will very likely have some of The Army painter products. If not your local shop, then your favourite online Hobby retailer.
As for paints themselves, you have many options. You can obviously buy the individual bottles. With the standard acrylic Warpaints at 18ml for $2.99 (USD), £2.00 (GBP) or €2.50 (EUR) RRP. (With the Metallics and Quickshade Washes being slightly more expensive). They are some of the best value pints on the market. Then you have the boxed sets.
The Army Painter – Colour Primers
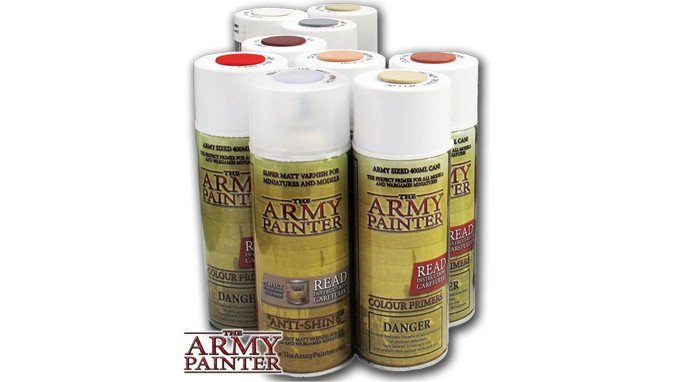
Starting off are the 22 Colour Primers which are direct colour matches to the equivalently named Warpaints bottles. This collection of sprays also includes Varnishes too. The list of available primers is quite extensive.
- Matt Black
- Matt White
- Leather Brown
- Army Green
- Pure Red
- Barbarian Flesh
- Uniform Grey
- Desert Yellow
- Skeleton Bone
- Necrotic Flesh
- Greenskin
- Daemonic Yellow
- Fur Brown
- Crystal Blue
- Dragon Red
- Alien Purple
- Angel Green
- Ultramarine Blue
- Goblin Green
- Chaotic Red
- Plate Mail Metal
- Gun Metal
Please Note: This site uses affiliate links. Our Affiliate Partners are shown below
(Affiliate links will result in compensation to the site on qualifying purchases)
Click this link & buy your hobby stuff from Element Games for the UK & Europe to support FauxHammer.com – Use Code “FAUX2768” at the checkout for double reward points.
Our Affiliates / Hobby Stores
- UK: Element Games, The Outpost, Wayland Games, Mighty Lancer, Goblin Gaming, Forbidden Planet, Model Scenery Supplies, eBay, Amazon
- US/Canada: MTechCave, GameKastle, eBay (US), eBay (CA), Amazon
- Germany: Taschengelddieb
- Europe: eBay (DE), eBay (FR), eBay (ES), eBay (IT), Amazon
- Australia: eBay, Amazon
- Global: RedGrass Games, Warcolours
- 3D Printers: Phrozen 3D, Elegoo, Anycubic
FauxHammer – Latest Video on YouTube
The Army Painter – Warpaints Starter Paint Set
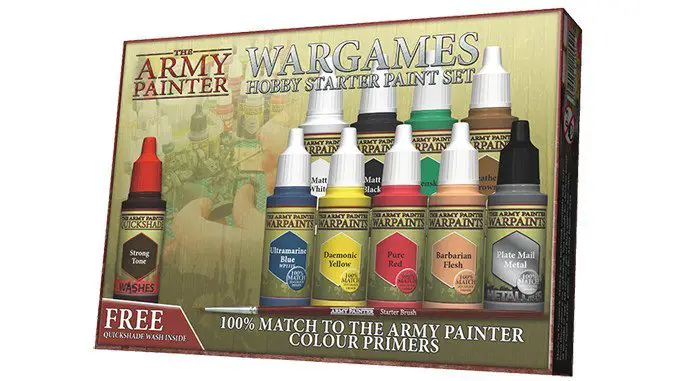
A nice little starter set featuring all of your primary colours, White Black, Brown, Flesh. Along with a Silver and your first Quickshade Wash. (You also get a very basic brush). This is a great starter set for a beginner Army painter or for someone who just wants a taste of the army painter range.
Please Note: This site uses affiliate links. Our Affiliate Partners are shown below
(Affiliate links will result in compensation to the site on qualifying purchases)
Click this link & buy your hobby stuff from Element Games for the UK & Europe to support FauxHammer.com – Use Code “FAUX2768” at the checkout for double reward points.
Our Affiliates / Hobby Stores
- UK: Element Games, The Outpost, Wayland Games, Mighty Lancer, Goblin Gaming, Forbidden Planet, Model Scenery Supplies, eBay, Amazon
- US/Canada: MTechCave, GameKastle, eBay (US), eBay (CA), Amazon
- Germany: Taschengelddieb
- Europe: eBay (DE), eBay (FR), eBay (ES), eBay (IT), Amazon
- Australia: eBay, Amazon
- Global: RedGrass Games, Warcolours
- 3D Printers: Phrozen 3D, Elegoo, Anycubic
FauxHammer – Latest Video on YouTube
The Army Painter – Quickshade Washes Set
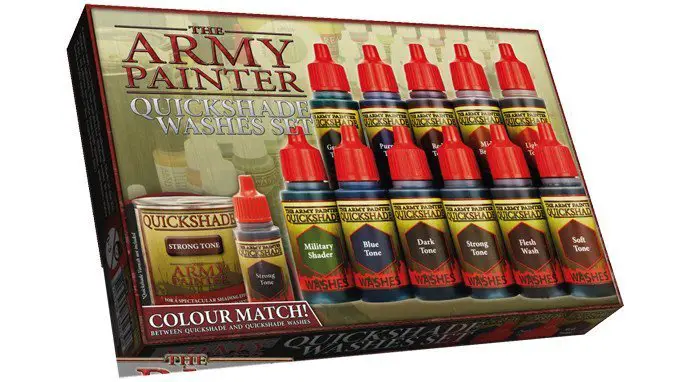
The Quickshade Washes are IMHO the pinnacle of The Army Painter Range. if nothing else in this review piqued your interest, you really should pay attention to the Qyuickshade washes. Depending on how you shade your minis, you may want this whole set to add colourised depth for each paint you apply and keep that richness. But for anything typically Grimdark, Soft Tone, Strong Tone & Dark Tone are the trifecta of excellent washes.
Please Note: This site uses affiliate links. Our Affiliate Partners are shown below
(Affiliate links will result in compensation to the site on qualifying purchases)
Click this link & buy your hobby stuff from Element Games for the UK & Europe to support FauxHammer.com – Use Code “FAUX2768” at the checkout for double reward points.
Our Affiliates / Hobby Stores
- UK: Element Games, The Outpost, Wayland Games, Mighty Lancer, Goblin Gaming, Forbidden Planet, Model Scenery Supplies, eBay, Amazon
- US/Canada: MTechCave, GameKastle, eBay (US), eBay (CA), Amazon
- Germany: Taschengelddieb
- Europe: eBay (DE), eBay (FR), eBay (ES), eBay (IT), Amazon
- Australia: eBay, Amazon
- Global: RedGrass Games, Warcolours
- 3D Printers: Phrozen 3D, Elegoo, Anycubic
FauxHammer – Latest Video on YouTube
The Army Painter – Warpaints Mega Paint Set
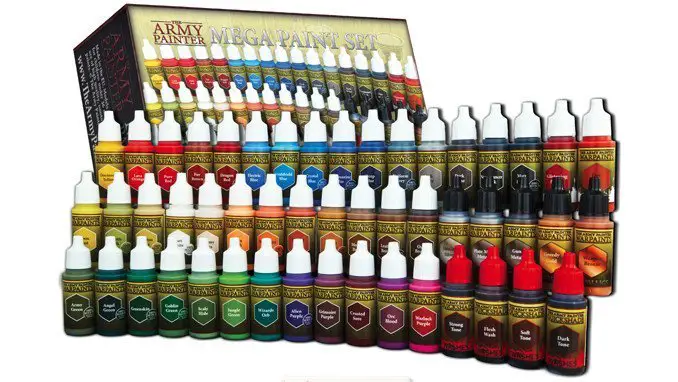
This is typically the starter set everyone goes for. If you are interested in the army painter range. This sweet spot of a set will cover the majority of your painting needs. 50 Warpaints in total comprising of; 39 Acrylic Warpaints, 5 Metallic Warpaints, 4 Quickshade Washes and 2 Effects Warpaints. Oh and a Regiment Brush. the majority of painters would want this and maybe a few individual army specific colours.
If you buy this set and love the range you can always top up to the complete set easily by buying the “Wargamers Complete Upgrade Set” exclusively from The Army Painter online store.
Please Note: This site uses affiliate links. Our Affiliate Partners are shown below
(Affiliate links will result in compensation to the site on qualifying purchases)
Click this link & buy your hobby stuff from Element Games for the UK & Europe to support FauxHammer.com – Use Code “FAUX2768” at the checkout for double reward points.
Our Affiliates / Hobby Stores
- UK: Element Games, The Outpost, Wayland Games, Mighty Lancer, Goblin Gaming, Forbidden Planet, Model Scenery Supplies, eBay, Amazon
- US/Canada: MTechCave, GameKastle, eBay (US), eBay (CA), Amazon
- Germany: Taschengelddieb
- Europe: eBay (DE), eBay (FR), eBay (ES), eBay (IT), Amazon
- Australia: eBay, Amazon
- Global: RedGrass Games, Warcolours
- 3D Printers: Phrozen 3D, Elegoo, Anycubic
FauxHammer – Latest Video on YouTube
The Army Painter – Limited Edition Complete Warpaints Set
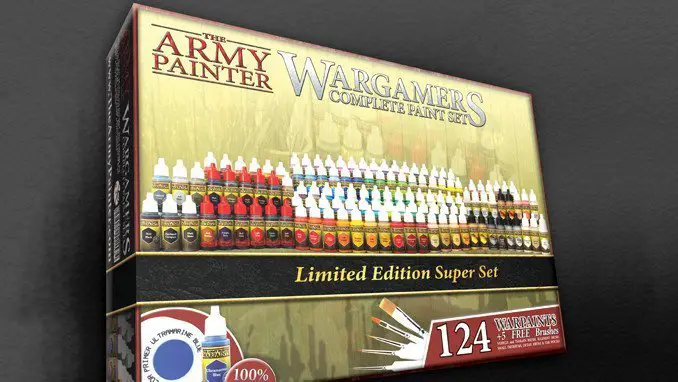
The big daddy collection. This is an excellent value set, All 124 warpaints which comprise of 96 Acrylic Warpaints, 8 Metallic Warpaints, 11 Quickshade Washes and 9 Effects Warpaints. This is literally everything they do. And it also includes 5 of the Wargamer Brushes. This is the set for those who can A, afford is and B are sure they are fully invested in the whole Army painter Range. It’s not exactly an impulse buy and it is Limited Edition (but what Limited means, I’m unsure). If you are sure The Army Painter range is for you. Grab this incredible value set whilst it’s available.
Please Note: This site uses affiliate links. Our Affiliate Partners are shown below
(Affiliate links will result in compensation to the site on qualifying purchases)
Click this link & buy your hobby stuff from Element Games for the UK & Europe to support FauxHammer.com – Use Code “FAUX2768” at the checkout for double reward points.
Our Affiliates / Hobby Stores
- UK: Element Games, The Outpost, Wayland Games, Mighty Lancer, Goblin Gaming, Forbidden Planet, Model Scenery Supplies, eBay, Amazon
- US/Canada: MTechCave, GameKastle, eBay (US), eBay (CA), Amazon
- Germany: Taschengelddieb
- Europe: eBay (DE), eBay (FR), eBay (ES), eBay (IT), Amazon
- Australia: eBay, Amazon
- Global: RedGrass Games, Warcolours
- 3D Printers: Phrozen 3D, Elegoo, Anycubic
FauxHammer – Latest Video on YouTube
The Army Painter – Quickshade
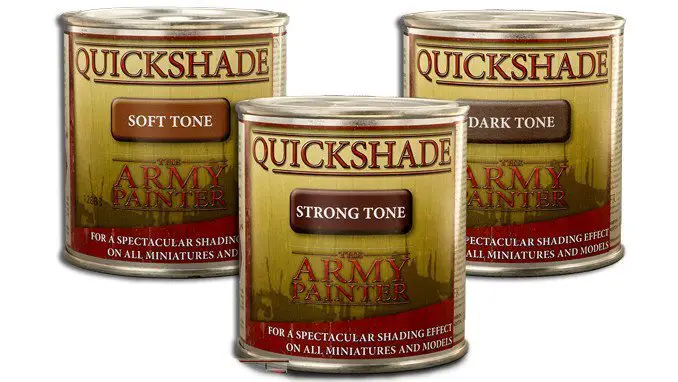
If the Dip technique or the Dip and Wick technique are right for you then these tins will speed up your hobby painting to no end. Also a colour match to the Quickshade Washes. This will also give the added benefit of almost completely protecting your model’s paint job during transport or on the tabletop. (Seriously, this varnish is rock solid).
Please Note: This site uses affiliate links. Our Affiliate Partners are shown below
(Affiliate links will result in compensation to the site on qualifying purchases)
Click this link & buy your hobby stuff from Element Games for the UK & Europe to support FauxHammer.com – Use Code “FAUX2768” at the checkout for double reward points.
Our Affiliates / Hobby Stores
- UK: Element Games, The Outpost, Wayland Games, Mighty Lancer, Goblin Gaming, Forbidden Planet, Model Scenery Supplies, eBay, Amazon
- US/Canada: MTechCave, GameKastle, eBay (US), eBay (CA), Amazon
- Germany: Taschengelddieb
- Europe: eBay (DE), eBay (FR), eBay (ES), eBay (IT), Amazon
- Australia: eBay, Amazon
- Global: RedGrass Games, Warcolours
- 3D Printers: Phrozen 3D, Elegoo, Anycubic
FauxHammer – Latest Video on YouTube
Will it Improve my Hobby
Without a doubt, I found that switching to the Army Painter Quickshade Washes made an immediate improvement to the final look of my models. The metallics I also found much easier to use and provided a better finish than the paints that people would normally use on these models.
If you’re looking for a magic paint that suddenly makes you a better painter, then these won’t do that. Time, Experience and above all Patience are what you need. They are paints like any other. You need to see how they work and play to the strengths detailed in this article.
If improving your hobby means, you’re looking to get your models to stand out from your friends. Just changing the hues of paint you use to another brand such as this will give them enough difference to do exactly that.
If improving your hobby means getting more paint for your buck, they will do that too.
If having a wider range of paints to work with is important, they will also do that.
If improving your hobby means getting an army painted as quickly as possible with smooth surfaces and decent shading. Here’s a brand for you.
Final Thoughts
| Pros | Cons |
| Quickshade Washes Strong Metallics Wide Colour Range Colour Match Primers Quickshades Inexpensive Plenty of Starting Options Wide Availability Free Online Painting Guides (Generally) Brand Agnostic Gel-like Medium | Inconsistent Coverage Shake Until Your Arms Hurt Mixing Balls are Necessary Cleaning Quickshades Keep Shaking Them Weak Range of Effects Paints In-Box Presentation Numerous Split Spouts Are you still Shaking |
Overall I’d give this whole range 4 stars (out of 5) for their solid, no-nonsense approach. These paints “do exactly what they say on the tin” and it’s such a pity that a masonry paint company already has that as a tagline. It’s just so fitting here.
I’ve added inconsistent coverage in the Cons column above. Many people say this and I have to agree. I’ve pretty much resolved this with by understanding the extra medium added to the bottles and with power-assisted mixing. But most people don’t have or can’t really justify buying a vortex mixer (even though they are cool as hell!) just to use a range of paints. But you can always just pull the dropper cap off and give it a good mix inside with an old brush before your first use.
This thickness, however, is due to the gel-like medium which IMHO is one of the biggest strengths of this range. You need to learn to work with it over some other ranges you may be used to, but once you do you will see it’s a benefit. It somewhat self-levels and even increasing working time just slightly. You will need to water it down to prevent smaller details being clogged. This means it loses some of the above properties, but finding that balance is always the secret to mastering individual paints.,
The inconsistencies of the range come with a wide array of positives too! Sure we had a colour that inexplicably would not airbrush to kindly. But then in contrast to this, we had a massive range of white hues and other light colours which have excellent fluidity and coverage I simply didn’t expect.
Put simply, if you’re a wargames/army painter, just looking to get your armies up to the tabletop standard. The SPRAY, PAINT, DIP, DONE approach is very, very quick. The SPRAY & DIP parts especially, offer the biggest timing savings. Meaning the only time spent is on the layer PAINT (the fun bit). The DONE stage can be as complex as adding detailed features or as simple as stuffing your minis in a box once they are dry and ready to game with.
As an example, here’s the rest of the old Space Marines Squad I started this article with. I painted these in a couple of evenings. With the most basic version of this process (Including a drybrush of the green). It would have been quicker but I was waiting for paint to fully dry.
As a hobby painter who just loves the process of painting to relax, here’s a range of decent paints which you can churn through without breaking the bank so much.
As a display painter, here are some extra colours for you to play with. If you haven’t tried the Quickshade Washes or Metallics. Please give them a go, you’re likely to love them.
The real reason to invest in this brand is due to its self-awareness. The Army Painter team aren’t going out there shouting “these are the best paints!”. The approach is more; here is a great set of paints for your armies and we’re selling them at a decent price.
So I’ll say, try some out, chances are, you’ll really enjoy them.
Please Note: This site uses affiliate links. Our Affiliate Partners are shown below
(Affiliate links will result in compensation to the site on qualifying purchases)
Click this link & buy your hobby stuff from Element Games for the UK & Europe to support FauxHammer.com – Use Code “FAUX2768” at the checkout for double reward points.
Our Affiliates / Hobby Stores
- UK: Element Games, The Outpost, Wayland Games, Mighty Lancer, Goblin Gaming, Forbidden Planet, Model Scenery Supplies, eBay, Amazon
- US/Canada: MTechCave, GameKastle, eBay (US), eBay (CA), Amazon
- Germany: Taschengelddieb
- Europe: eBay (DE), eBay (FR), eBay (ES), eBay (IT), Amazon
- Australia: eBay, Amazon
- Global: RedGrass Games, Warcolours
- 3D Printers: Phrozen 3D, Elegoo, Anycubic
FauxHammer – Latest Video on YouTube
Follow FauxHammer by subscribing to the site (below). You can also follow on Twitter or Facebook for the latest updates.
What do you think of this in-depth review? let us know in the comments.
Author


Great article. I look forward to picking some up to try.
Great review and very helpful
This is such a funny review. 4 stars for what is probably the worst paints on the market, LOL.