Green Stuff World Chameleon Colourshift Set 1 Review
Last Updated on April 23, 2021 by FauxHammer
I’ve been so excited to review Green Stuff World products and here we’re taking a look at their Chameleon Colorshift Set 1. If you don’t know who they are already, I would assume you are new to wargames miniatures, or you live in a cave. As a miniature painter myself, I essentially live in a cave. I call it my man-cave, yet most of the people I know in the real world don’t seem to consider this to be very manly.
Anyway, on that note. Let’s have a look at some sparkly paints.
In summary, the Green Stuff World Chameleon Colorshift paints are really interesting to look at. They do however come with their own tricks for how to work with and apply them for the best look.
Note, They are called Colorshift, I’ll do my best to refer to them as Colorshift. However as I’m in the UK, forgive me for any instance below where I fall back to my natural method of spelling and refer to them as Colourshift.
The Best Paints for Miniatures & Wargames Models
This article is part of our series looking at The Best Paints for Miniatures & Wargames Models.

If you want to check out what the best paints are for your projects, please check out our Best Paints article by clicking the image above.
Green Stuff World Chameleon Colorshift Packaging and Unboxing
The Green Stuff World Chameleon Colorshift Packaging is Nice and Simple, Just a plain cardboard box, large enough for the 6 paint bottles.
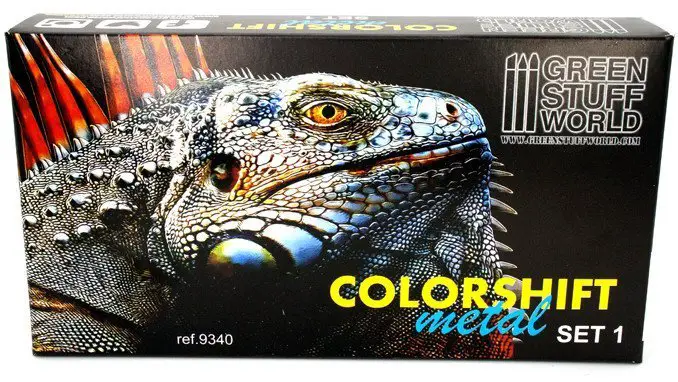
The Chamelion imagery is common across the range of Colorshift paints they do. The pack here is Set 1. But they now have Set 2 and Set 3.
The back of the box is really useful, this gives an indication of the colour shifts and has the instructions on best use.
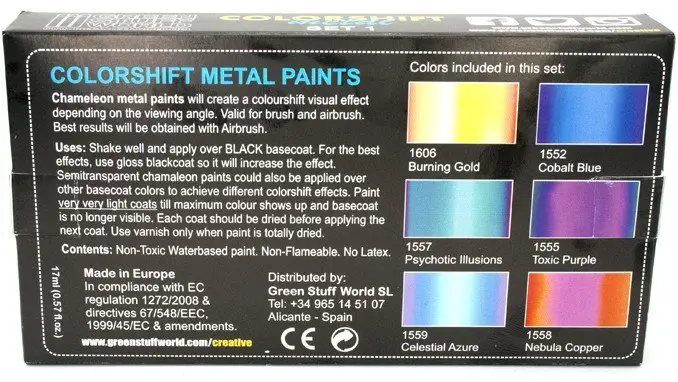
For anyone unable to see the image clearly enough.
COLORSHIFT METAL PAINTS
Chameleon metal paints will create a colorshift visual effect depending on the viewing angle. Valid for brush and airbrush. Best results will be obtained with Airbrush.
Uses: Shake well and apply over BLACK basecoat. For the best effects, use gloss blackcoat so it will increase the effect. Semitransparent chamaleon paints could also be applied over other basecoat colors to achieve different colorshift effects. Paint very very light coats till maximum colour shows up and basecoat is no longer visible. Each coat should be dried before applying the next coat. Use varnish only when paint is totally dried.
Contents: Non-Toxic Waterbased paint. Non-Flameable. No Latex.
A couple of things to take note of here. One, as they say, “Best results will be obtained with Airbrush”. This is arguably true of any paint, but we’ll be testing this below. Two, “For the best effects, use gloss blackcoat”, something we will again be testing below.
Green Stuff World Chameleon Coloushift Colours
Taking the smart route, Green Stuff World had the good sense to use dropper bottles for their paint. This seems to be the prefered container type for miniature painters and we know Green Stuff World well enough to be sure they know what the community wants.
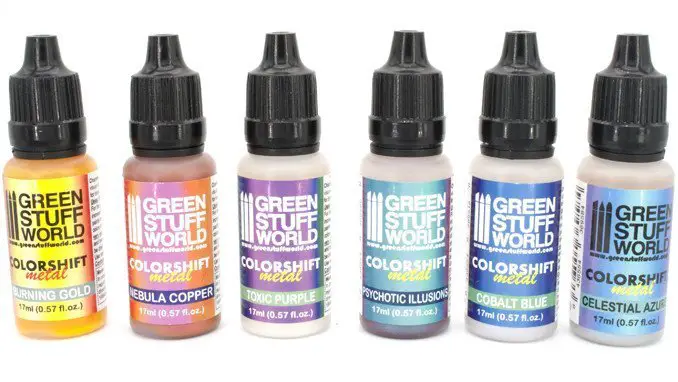
It is, however, hard to tell the paint colour by looking into the bottles. Some of the colours appeared as nothing more than an off white. I actually wondered how Toxic Purple, Cobalt Blue and Celestial Azure would make the purples & blues. It’s the labels which show the colour, although heavily mixed in with all the lettering the colour is slightly obscured. It would have been better (IMHO) to leave a dedicated area to show the transition.
I did notice that the colours which are shown on the label and especially the back of the box don’t give the best representation of the final colours. I’m not sure if the width of the gradient was intended to be representative of the final colour shift ammount. The inconsistency of this gradual with on the different colours on the different bottles did seem intentional.
I couldn’t find any direct colour reference examples. Even on the individual colour pages on Green Stuff World’s website. So before diving into models, I decided to make my own.
The images below were painted over a matte black primer

There are some differences in the colours, Burning Gold specifically didn’t come out as a deep warm gold. Instead, the lighter gold area just seemed to have more of a greenish hue.
But the colours themselves are really nice and the shifts in colour are clear to see.
The below images are the colours in the same order, applied over the opposite side of the spoon primed in white.

Ok, So I expected a difference when priming over white, as with all metallic paints. but even after several coats. there was very little change from the base white for some colours. It’s hard to see in the image above (or even on the spoons themselves) but the colours did have a very slight tinge of the paint colour, giving them a minor purple or blue reflection. If you’ve ever had or seen white cars that have a metallic sheen up close, you get that similar effect here.
Psychotic Illusions had the biggest change, going from an Aqua-Purple Shift to a darkish salmon colour. This was my favourite of the paints in the set.
I think it’s clear from this example that a black basecoat, really is the way to go.
Green Stuff World Chameleon Colorshift Colour Tests
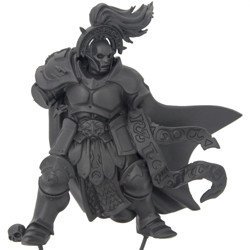
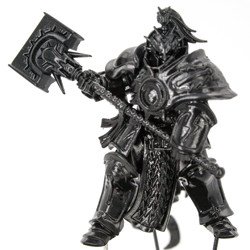
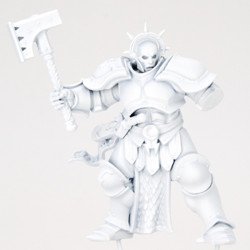
To see what the paints are like on models, I decided to apply them over 3 different finishes. Matte Black, Gloss Black, and Matte White.
All of the colours in this section were applied by airbrush, unless otherwise stated. The paint went through the airbrush fine without dilution, Yet I did notice that to cover these models, I used quite a lot of the paint. I’d say 25% of the bottle was used to paint these 3 guys and both sides of the spoon above.
I picked the Stormcast models as I figured their ethereal nature would support models using a variety of the chameleon colours.
When looking at the set, I have considered why these particular bottles have been pared together. I don’t see many commonalities between them and they aren’t really complimentary either. I suspect these were just the first 6 colorshift paints Green Stuff World came up with, and it’s easier and cheaper for consumers to buy in sets.
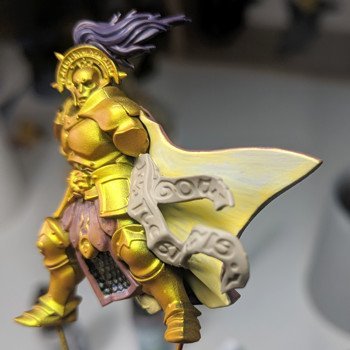
The Model below was Burning Gold Painted over Matte Black
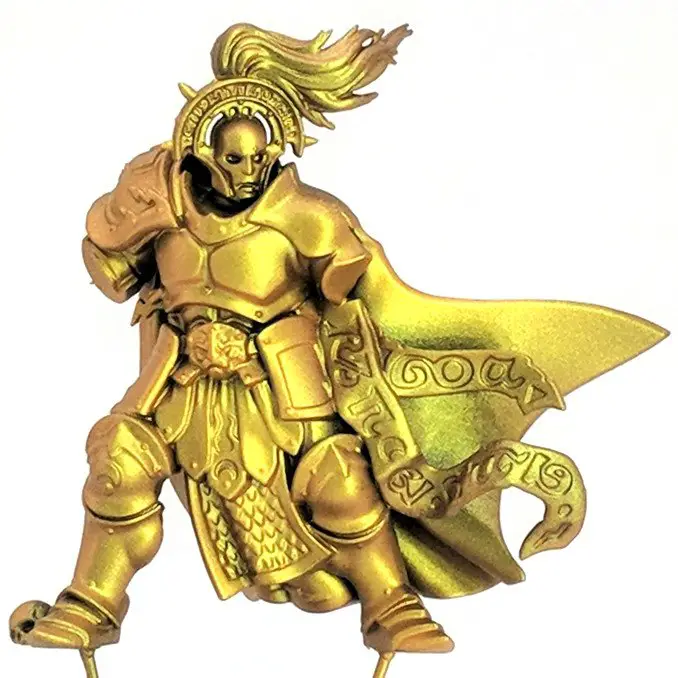
It was quite difficult to photograph these miniatures to show off the colour shifting properties. Unfortunately, you can only see the effect properly when the model is moving (Don’t worry, I’ve got this covered further down). As we can see from the image above there is a good transition from a warm orangey gold on the left side of the image, to a much yellower gold in the centre. If you look at the cape, however, you can see the greenish colour the lighter gold gives off. this is more pronounced across the model in real life. It’s not a problem just an interesting observation I made.
The following model was painted over a gloss black base
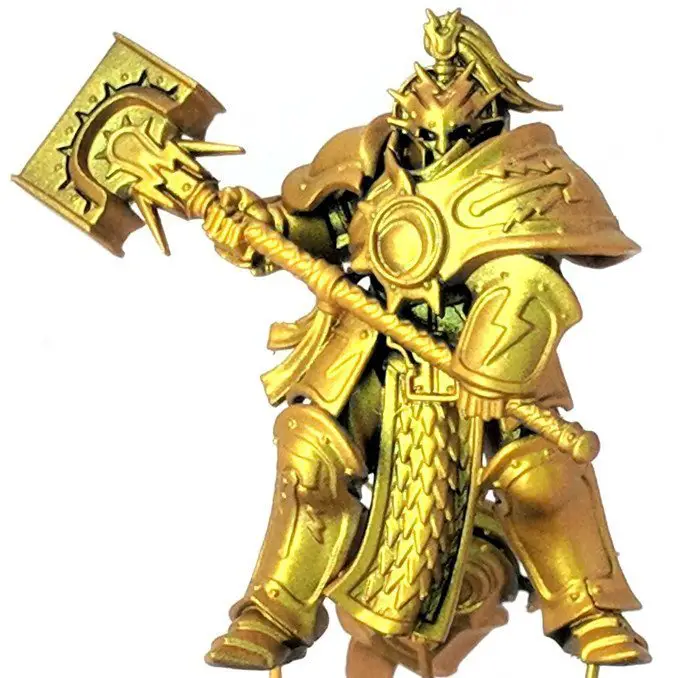
By applying this over the gloss, it did not make the colour shifting properties any more pronounced. But it did make the model just slightly shinier. When looking at the model directly the brighter areas are much brighter as there was a lot more reflection due to the extra gloss. Both of the above two photos were shot under the same conditions, only minutes apart.
If you are wanting the metallic surfaces to be more reflective, go with the gloss black. but if you like your metals to have more of a dull look. You’ll be fine with matte black. Neither coat makes for a more pronounced shift.
The model below was primed in White

Like the spoon, the white model really wasn’t very impressive. The metallic reflection has gone and the colour shift is greatly weakened. This is the equivalent of a somewhat pearlescent yellow.
Black is definitely the way to go with these paints, but try experimenting over different colours. possibly for some more interesting results.
Before we move on, let’s take a quick look at this in 360° to see how the colour shifts as the model moves. Drag the image below left and right to turn the model.
Green Stuff World Chameleon Colorshift – Washes
For the following stages, I wanted to test how the colorshift paints reacted to a wash.
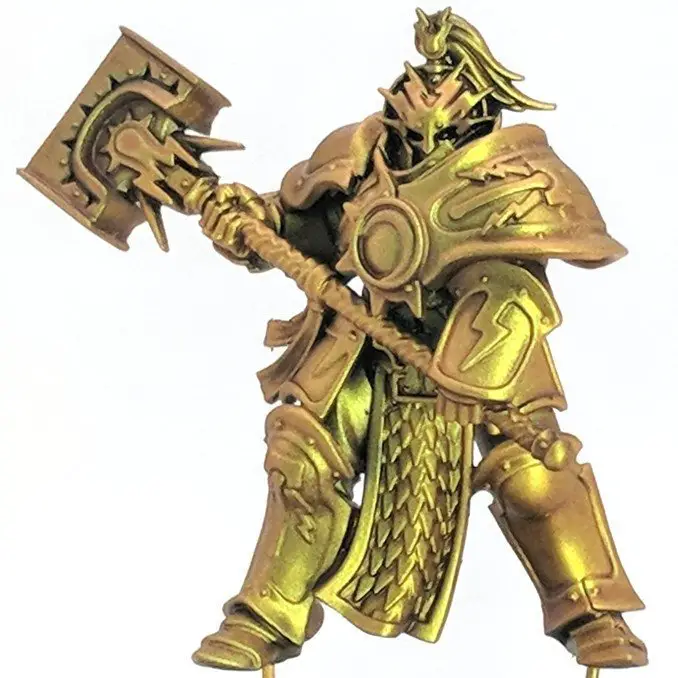
On both of the models above and below I applied a thinned brown wash (you can see more details on the washes I used in this review). This wash worked really great over the model above and thanks to the already glossy surface of the colorshift paint I didn’t feel like I needed to apply a clear coat beforehand as I normally would with an all-over wash.
One thing I noticed here is that, after applying some wash to the model, when I put my brush back to the palette, it has a slightly yellowish hue. I thought nothing much of it rinsed it off and carried on washing. (I’ll come back to this note shortly). As you can see in the image above, the wash has stripped away a lot of the warmth which was present beforehand. We now have more of that greenish hue which was only noticed in the more shaded areas before. The colour shift is still present, but the matte of the wash has toned it down. I personally like the look, as I can see a greater range between the colours now, but it depends on what you want.
Green Stuff World Chameleon Colorshift – With Base Colours
As briefly noted above, I found when washing the model my brush was lifting a yellow tint. As I started to apply the base layers, this was even more obvious.
Shown above, as I applied a light grey to the inside of the cape, the yellow medium of the colour shift was actually being reactivated and mixing in. This was a really heavily pigmented grey used for applying base layers.
What appears to be happening (and I don’t understand the chemical formula, so this is my own interpretation). Is that the colorshift pigments are suspended in a yellow medium. I assume liquid pigments (commonly used in inks and washes) play some part of this particular formula. The metallic pigment was adhering to the model, but the liquid pigment could be reactivated with water. I contacted Green Stuff World about this. They advised that it could be from an old batch, but they do recommend applying a clear coat over the colorshift paints before base layers of other paints. Fair enough, the finish would benefit from a gloss coat anyway as this would have given some extra shine.
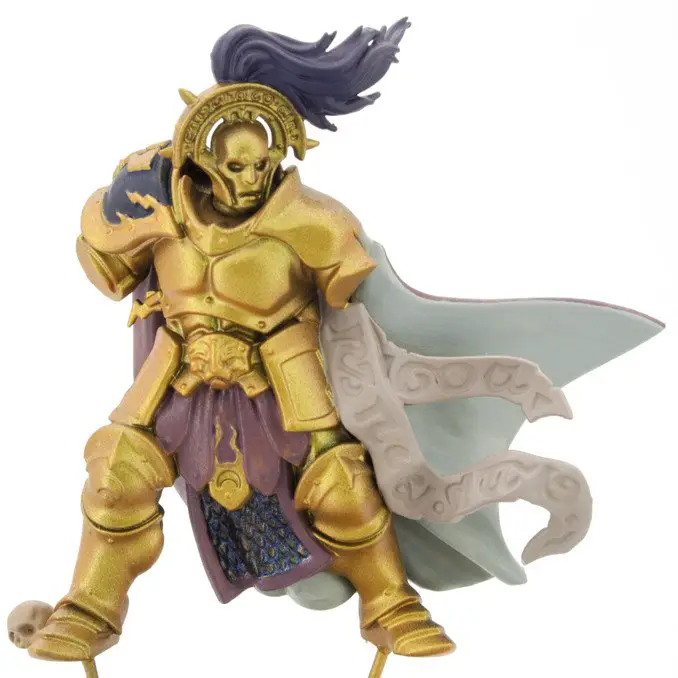
I finally managed to paint the grey in after several thick layers.
I then moved on to the model I previously applied a wash to so I could practise applying colours with a brush. I started by applying gloss black to the areas I would then paint with the colorshift paints
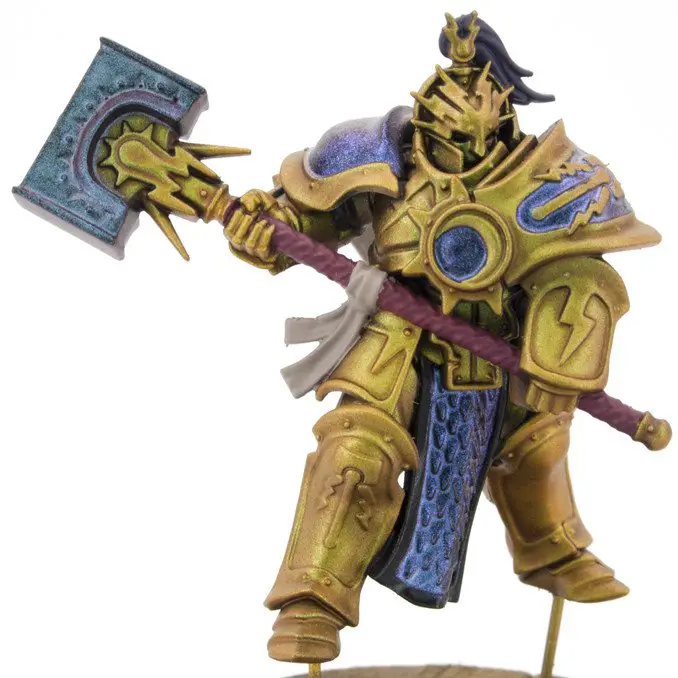
I’ll admit, I’ve never been the best brush painter, so please forgive the amount of detail loss in the above. I applied Cobalt Blue to the shoulders, chest & loin armour. Psychotic Illusions was applied to the hammer. I applied 5 layers of both of these colours.
The medium for this paint is very thick so it needs some watering down. This, of course, thins out the colour density. so many more layers are needed than your standard paints. On the plus side, I only needed one thinned drop to do a layer on all the surfaces above.
When working with this paint, the medium alone seems to act like a thinned PVA glue. It also has a quick drying time. I noticed I needed to paint quite fast and avoid retouching anywhere I had already applied paint to. Or I could physically see the medium being pulled back up like thin glue.
Brushing is not impossible with these paints, but even Green Stuff World themselves recommend airbrush as the preferred method to apply it. They have some tutorial videos on their page which have a much better example of applying these paints by brush.
Green Stuff World Chameleon Colorshift Application to Models.
After my initial test models. I started looking online for examples of colour shift usage. The best applications I saw were mostly larger models. I think the larger surfaces just lend themselves better to seeing that gradual shift in colour. On Smaller models, the changes are a bit too immediate and direct to fully appreciate. You can still see the shift, I just think it just works better when you can see a single surface glimmer in and out of a specific tone.
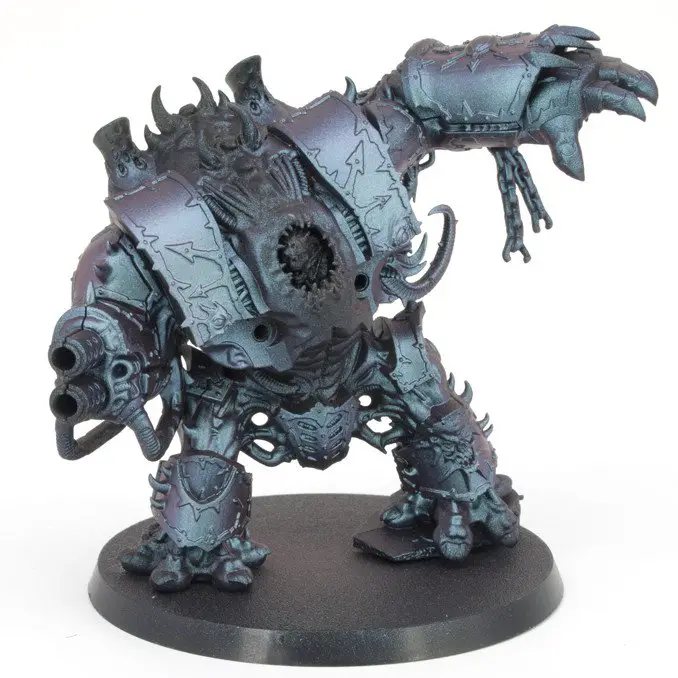
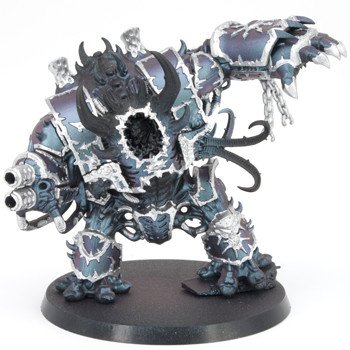
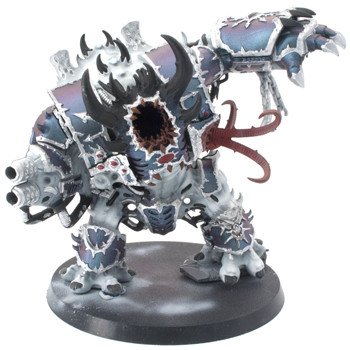
On that note, I pulled out my old Hellbrute from Dark Vengeance. I’ve wanted to paint this for a long time and never had the right drive to do so. It was perfect for this paint
After the colour shift, I just applied a silver trim. Ony becasue I’d seen a video using that particular paint and how it covers smoothly in just one coat. I posted the left image above to Instagram, Facebook & Twitter asking for inspiration as to what legion I should attach this to. Everyone pretty much said Alpha Legion, but I wasn’t feeling it. Then Twitter User @RHDMiniatures suggested Night Lords. This spoke volumes to me. So I added all the base colours as you can see in the image above on the right. This also gave me a chance to review the accuracy of an airbrush.
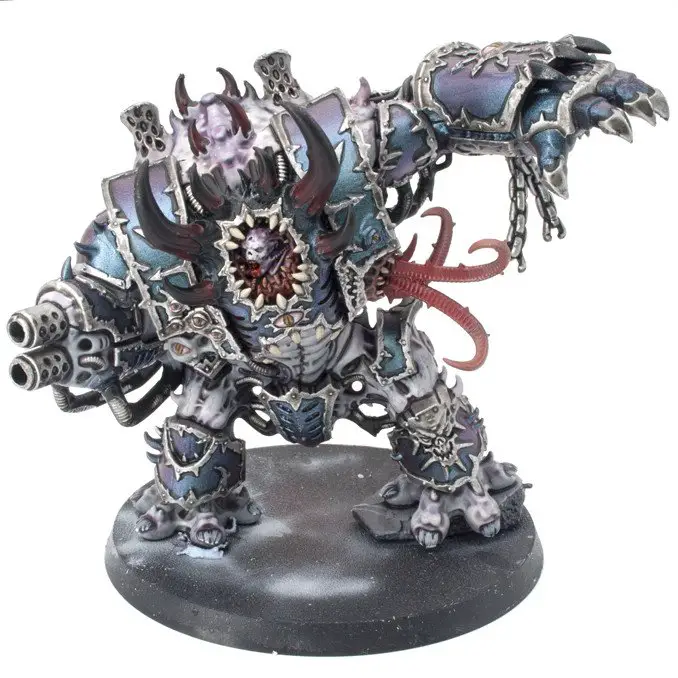
Honestly, I think this turned out great, and the colour shift looks absolutely fantastic even after a matte coat. I avoided getting any shade or washes on the body of the colour shift paint to ensure that it still stood out. But the purple-blue really was the right choice for Night Lords. I don’t even feel like I need to add any of the Typical Lightning bolts you would normally see on that legion’s armour.
The colour shift is really impressive, even in the static picture above, but of course, you can achieve this same static look with blending. To really show off the shift, you need to see how the colours change in the light as the model moves.
See below for another interactive 360° image of exactly that. (This image was taken before the matte coat)
Ignore the crack on his left side. I forgot to paint the head before the rest and had to pull it apart after painting base layers.
Will Green Stuff World Chameleon Colorshift paints Improve My Hobby?
Honestly, it depends on what you want to get out of your hobby? If you want your models to stand out on the tabletop. These will certainly make that happen. Just remember to be subtle with the application. there’s a fine line between a flourish and a fail.
The paints certainly won’t make you a better painter. In fact, you need decent control already to apply these with a brush. But with the patience they require, you can end up with something pretty darn special.
Green Stuff World Chameleon Colorshift – Final Thoughts
| Pros | Cons |
| Incredibly Unique Colours | No Colour Examples on Web Poor Brush Application Used up Quick Requires Clear Coat before painting over Colours in the set aren’t complimentary Dries quick Thick Medium |
Right, so you may have read the box above and see there are a lot more negatives to say about this range of paints. But this doesn’t mean they are bad. They are great paints. But you’ve probably read this article and at some point thought “what can I use them on?”. And this is the crux of the product. Like much of Green Stuff World’s products they have very unique and particular use cases.
It’s the nature of their originality which makes the stuff in the cons column true. Most people’s point of reference will be your more traditional paints. Even in comparison to metallics. Due to the nature of what they are, they need to be made in a very particular way for them to work. The properties of these paints are something which simply needs to be accepted so you can move on to having fun with them.
You need an airbrush or they are hard to use, they don’t go a long way and I don’t understand why these 6 colours are in the same box. But the individual colours themselves genuinely turn heads when used right. I’ve had more likes shares & comments on this Hellbrute than any other model I painted. And all I did differently was paint it using colorshift.
What did you think of this Review? please let us know in the comments.
If you like what we’re doing here you could really help encourage more content with a share on any social media platform.
Click the share links at the bottom of this screen (or on the left for computers and tablets)
Want to keep updated with the blog? You can subscribe in the sidebar for RSS or by email below
(Sidebar is below the article on Mobile Devices)


