How to Paint Horus Heresy Death Guard – Quick, Easy and Dirty.
Feel like fielding your own army of soon-to-be-Nurgle-worshipping space marines from the Thirty-First Millennium but unsure of how to paint them? Our super easy painting guide below is full of painting cheats and hobby hacks to help you create detailed miniatures without relying on thousands of hours of experience using a paintbrush.
Please Note: This site uses affiliate links. Our Affiliate Partners are shown below
(Affiliate links will result in compensation to the site on qualifying purchases)
Click this link & buy your hobby stuff from Element Games for the UK & Europe to support FauxHammer.com – Use Code “FAUX2768” at the checkout for double reward points.


Our Affiliates / Hobby Stores
- UK: Element Games, The Outpost, Wayland Games, Mighty Lancer, Goblin Gaming, Forbidden Planet, Model Scenery Supplies, eBay, Amazon
- US/Canada: MTechCave, GameKastle, eBay (US), eBay (CA), Amazon
- Germany: Taschengelddieb
- Europe: eBay (DE), eBay (FR), eBay (ES), eBay (IT), Amazon
- Australia: eBay, Amazon
- Global: RedGrass Games, Warcolours
- 3D Printers: Phrozen 3D, Elegoo, Anycubic
FauxHammer – Latest Video on YouTube
Speed Painting Death Guard Space Marines Quickly.
Well, if you got this far, the image of the model has attracted you enough that you are interested. But if you have just stumbled here thinking of this as sub-par work, first of all, thanks! But secondly, the point here is not to show off any particular skill. Check out our Instagram page for the quality we can put out.
But the point of these guides is to get models painted “FAST”. Miniature painting is a small subsection of the Warhammer hobby. And in many ways, when other brands are considered, it is in itself a separate hobby.
For 90% (assumed) of Wargamers, they just want half-decent looking models on the tabletop quickly. So the aim of this guide is to do just that. The Games Workshop approach of edge highlighting everything works great for people who have all day every day to paint. After-all how many times have you seen an army just spray painted red and called Blood Angels?
The point here is to rapidly get anyone through an army quickly and provide decent looking results.
No real skill is required here, just follow the techniques and you’ll rapidly have an above-average looking army in no time. Airbrush, Drybrush, Oil Wash – Done!
How to Paint Death Guard – Paints and Tools
Tools
- You will, of course, need some brushes. In the accompanying video guide, we used an airbrush to paint parts of the figure – though this isn’t necessary. You can complete this scheme with regular brushes. Those included in your FauxHammer Artis Opus Mixed Brush Set will do nicely. Wait, what do you mean you don’t have one yet?
- You’ll want to make sure that one of your brushes is a decent drybrush. You know, the FauxHammer Artis Opus Mixed Brush Set contains a couple of good drybrushes.
- A piece of sponge
Paints
- Rhinox Hide (Citadel)
- Mournfang Brown (Citadel)
- Karak Stone (Citadel- in the accompanying video, we use the Air version of this paint, but you can use the regular Layer paint)
- Typhon Ash (Citadel – this is only available as an Air paint, so if you’re a regular brush user you may wish to swap this out for something like Screaming Skull)
- Death Guard Green (Citadel)
- Ogryn Camo (Citadel)
- Seraphim Sepia (Citadel)
- Coal Black (Pro Acryl)
- Nuln Oil (CItadel)
- Celestra Grey (Citadel)
- Ulthuan Grey (Citadel)
- Wild Rider Red (Citadel)
- Trollslayer Orange (Citadel)
- Yriel Yellow (Citadel)
Metallics
- Gunmetal Grey (Vallejo Metal Color)
- Copper (Vallejo Metal Color)
Oils & Enamel Paints
Dark Brown Panel Liner (Tamiya – you could substitute this with Agrax Earthshade or a very well watered Rhinox Hide)
- Copper Oxide Blue (Abteilung 502)
- Turquoise Lights (Abteilung 502)
- Light Rust (Abteilung 502)
- Oxide Patina (Abteilung 502)
Consumables
- Silly Putty or other masking material
- Worn Effects (AK Interactive)
- Gloss Acrylic Varnish (Vallejo)
- Micro Set
- Micro Sol
- Mineral Spirits
- Matt Acrylic Varnish (Vallejo)
How to Paint Death Guard – Introduction
With the release of the new edition of the Horus Heresy around the corner, Ross has been getting down and dirty with the filthiest of the Traitor Legions: the Death Guard – which oddly enough matches his general dress style.
One of the first of the Emperor’s Legions to throw their lot in with Horus at the start of the Heresy, the Death Guard, led by their aptly-named primarch Mortarion, eventually become the gross, swollen, rotten Nurglings now seen very slowly making their way across the many battlefields of 40k Ninth Edition. Before then, though, they looked like regular Space Marines.
In the guide below, Ross will show you a quick and easy way to paint your Warhammer 30K Death Guard that requires no skill and only a handful of easy-to-grasp techniques.
Let’s get stuck in.
How to Paint Horus Heresy Death Guard – Video Guide
This guide below is also twinned with our video version of the same. check out that video below.
Don’t forget to Like – Comment & Subscribe.
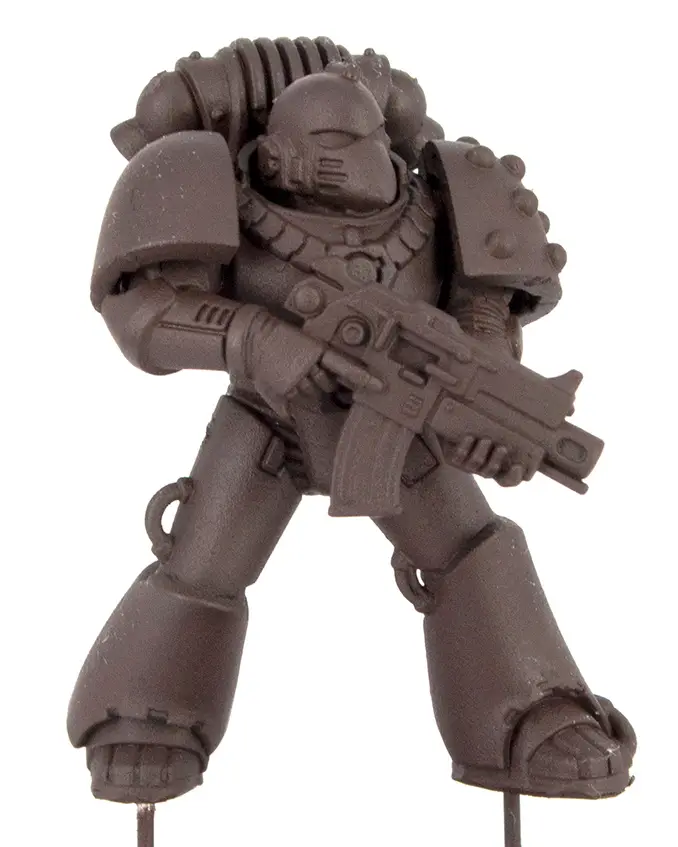
Step 1 – Rhinox Hide
The first step is good and simple: cover the model in Rhinox Hide.
Now as we have said, we are using an airbrush in this guide for the sake of speed, if you are a brush painter, we recommend you skip to step 5.
This will provide a great foundation for all the weathering we’re going to do in order to create that grimdark far future feel.
Step 2 – Mournfang Brown
Next, take a piece of sponge and some Mournfang Brown. Dab the sponge onto the miniature, like in the picture below.
Ensure that you’ve not saturated the sponge as you want to create a rough, uneven finish with the Mournfang Brown.
Step 3 – Masking
This step is optional. In the accompanying video guide, we applied the paints in the following steps using an airbrush, so wanted to keep the paint off the shoulders. If you’re using regular brushes and trust yourself to be neat, you don’t need to cover the shoulders of the miniature.
Anyway, if you’re going to be painting with an airbrush, take some masking material (Ross likes his Silly Putty) and cover the model’s shoulderpads.
You can now spray away with your airbrush without fear of getting any paint on the model’s shoulders.
Step 4 – Worn Effects
Lightly apply some AK Interactive Worn Effects to the surface of the model using either a brush or an airbrush.
Don’t apply this too thickly, so take your time when completing this step. Don’t let the product pool anywhere, either.
Step 5 – Karak Stone and Typhon Ash
Apply Karak Stone to the entire miniature. You want to apply this before the Worn Effects product has entirely cured. Depending on your local temperate, you’ve got about an hour to complete this step after applying the Worn Effects.
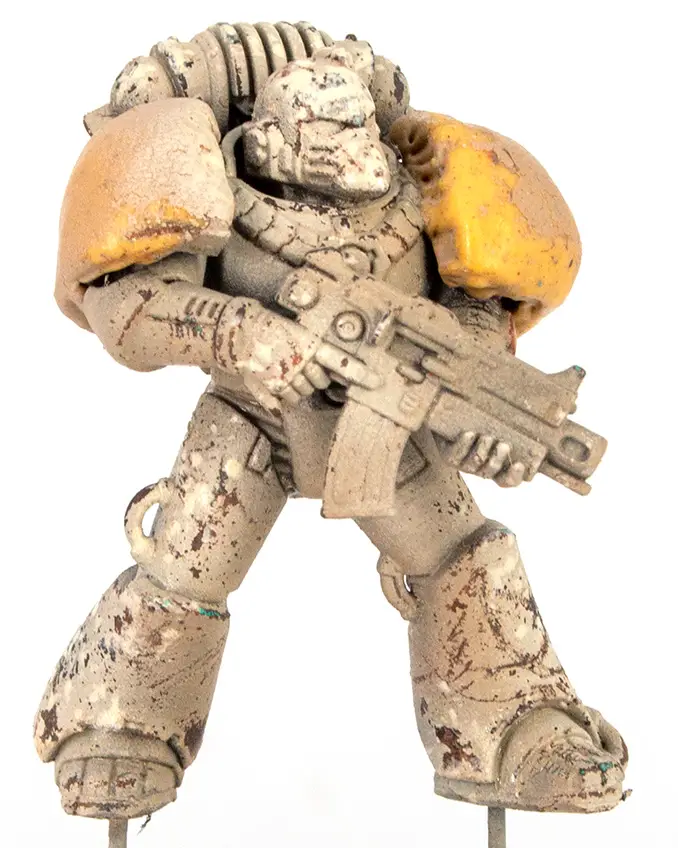
Once you’ve done that, apply Typhon Ash to the raised areas of the miniature. Try to pick out the individual forms on the figure: the top of the helmet, the highest part of the backpack, any limbs that are sticking out. Consider your light source and where this would hit the figure.
But for ease, just try to add some clear contrast to each individual form.
Note that Typhon Ash is only available as an Air paint, so if you’re using regular brushes, you’ll want to try drybrushing Screaming Skull (or perhaps the Tyrant Skull dry paint) to the miniature.
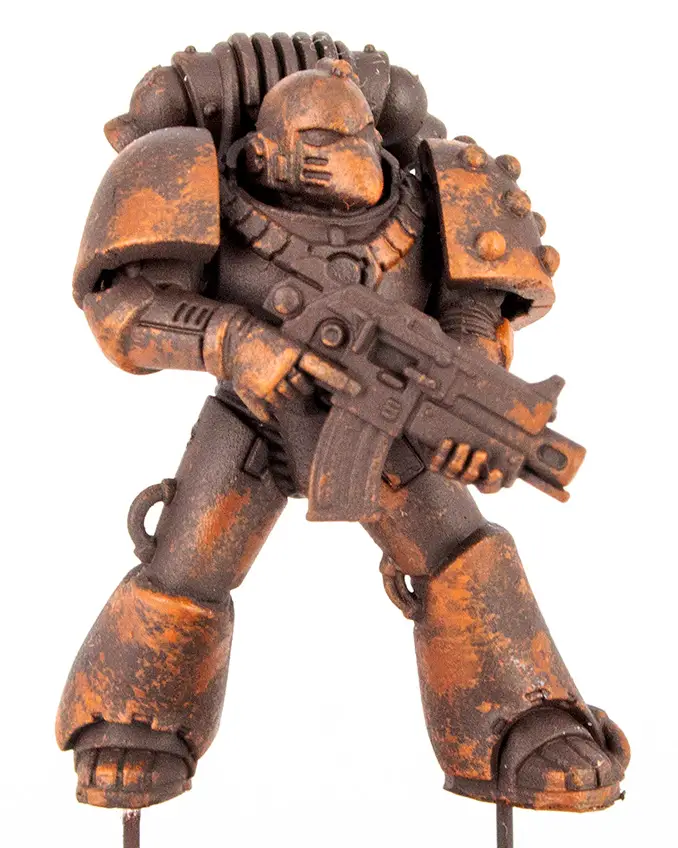
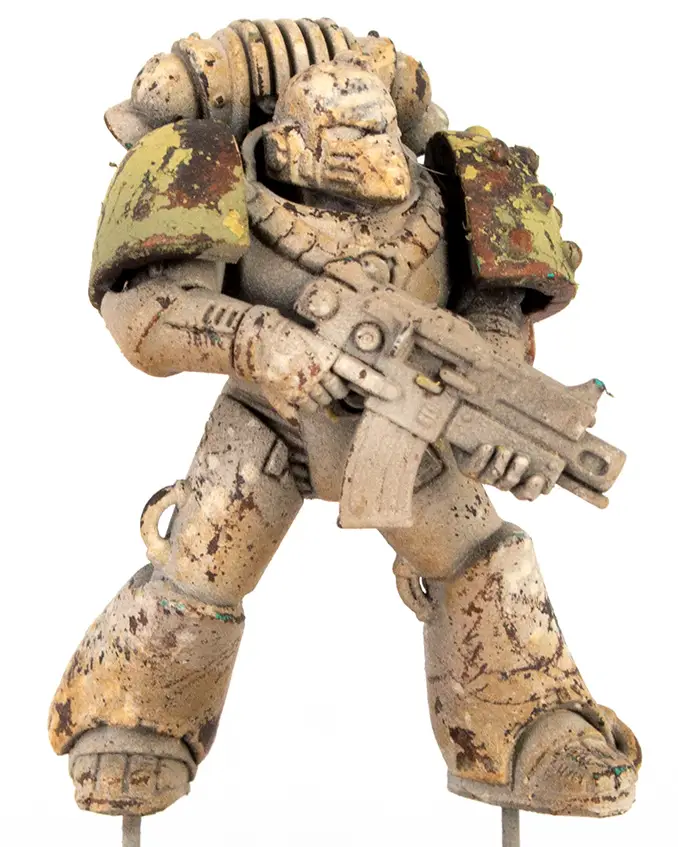
Once you’ve done that, your figure should look something like the one above.
Step 6 – Weathering
Brush painters skip to the bottom of this step.
Next. we’re going to start revealing that weathered stuff we applied in the first few steps. Take a brush you’re not too attached to, wet it, and start brushing away at your miniature.
In the accompanying video, you can see we used an old Citadel L Dry brush for this. This is a great brush for doing this step as the firm, wiry bristles will start to chip away the paint layers to reveal the weathered stuff beneath. Once you’re happy with the effect, let the model dry.
If you wish, you can also use your sponge and some Typhon Ash/Screaming Skull/Tyrant Skull to very lightly apply some blotches of your highlight colour over the miniature again. This will help create a multi-levelled effect on the flat armour panels, and give the impression the paint is peeling off the armour. You can see this best on the right leg in the picture above.
Now, if you are a brush painter, you can achieve a similar effect here by simply stippling on the Rhinox Hide and Mournfang brown from the first two steps. Use some sponge to do this and concentrate on raised edges. You can also paint on thin lines as armour scratches.
Step 7 – Masking
As with step 3, this step is somewhat optional depending on whether you’re painting with regular brushes or an airbrush. If you’re using an airbrush, you’ll want to cover the entire figure aside from the shoulderpads in masking material.
If you’re using regular brushes, you don’t have to do this.
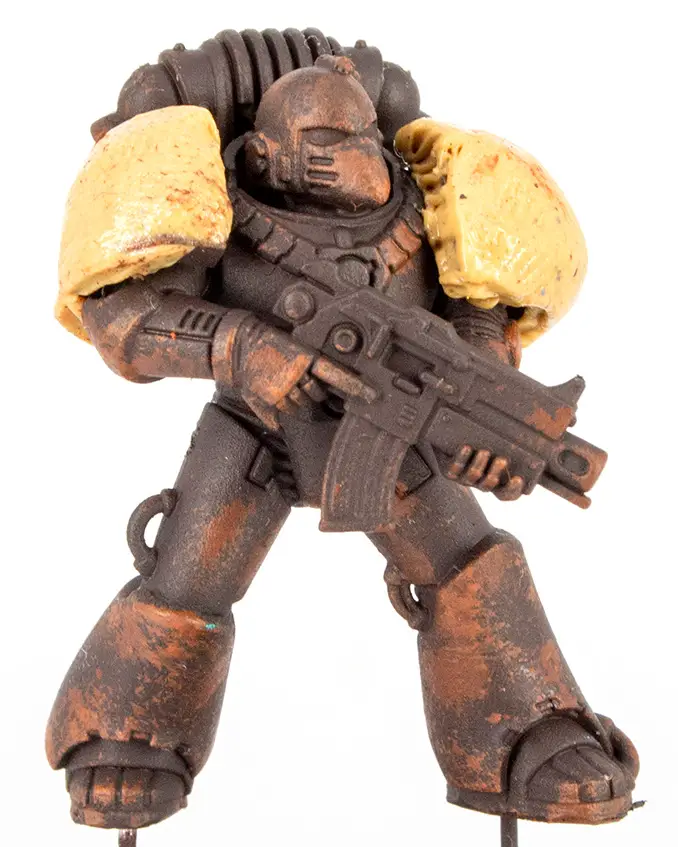
Step 8 – Worn Effects, Death Guard Green and Ogryn Camo
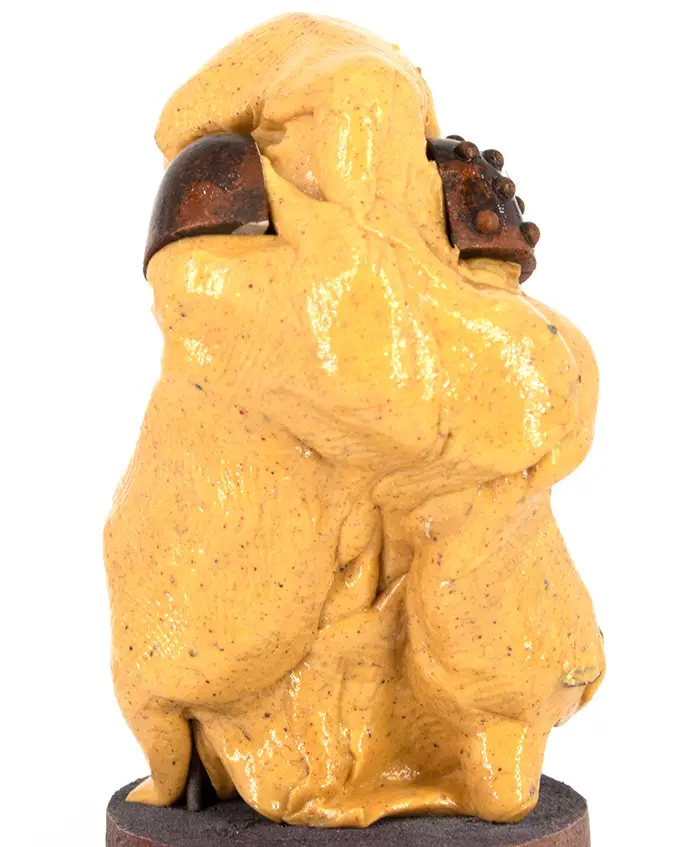
First, apply the AK Interactive Worn Effects product to the model’s shoulders. Then, paint them with a layer of Death Guard Green. Apply this over the entire shoulderpad.
Once you’ve done that, it’s time to apply a highlight of Ogryn Camo. If you’re using an airbrush, pick out the highest parts of the shoulderpad. If you’re using regular brushes, drybrush downwards from the most raised part of the shoulderpad to create a similar effect.
Step 9 – More Weathering
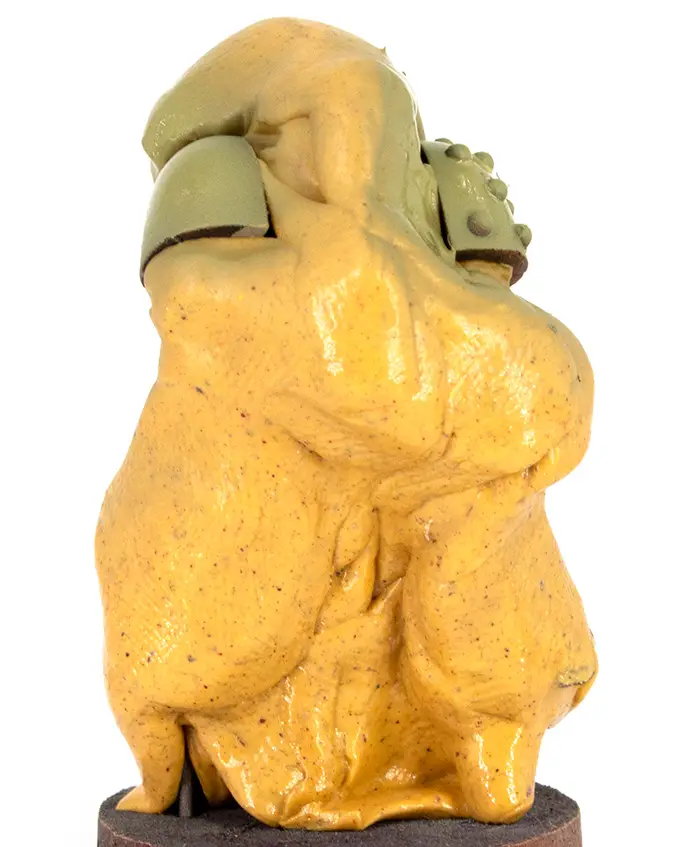
If you used any masking product, now’s the time to remove it. As we did in Step 6, we’re now going to scratch away some of that paint on the shoulders to create a similar grimy, weathered effect.
The best thing about worn effects is it allows the paint to flake away, which is a more natural way of paint coming off. you can see this best on the right shoulder pad, where a flake of the Ogryn camo colour from the top of the pad, has settled onto the lower edge,
Do this until you’re pleased with the coverage you have. You can also re-apply some Ogryn Camo with a sponge if you want to add a little extra detail to the effect.
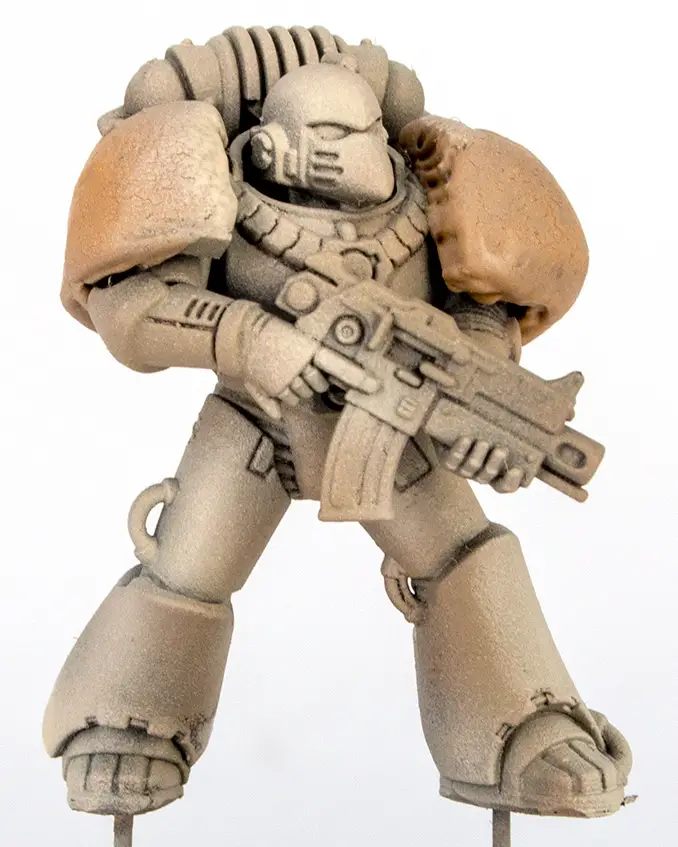
Step 10 – Seraphim Sepia
Next, apply some Seraphim Sepia to the miniature. Aim to apply this to areas that would be in shadow naturally. Have a look at the image below for reference.
In the accompanying video, we applied this with a piece of sponge to give the effect that the Seraphim Sepia’s is creating a shadowed, weathered area on the uneven surface of the battle-worn miniature.
Step 11 – Coal Black
Next up, we’re going to apply some Coal Black from Pro Acryl to the as-yet unpainted parts of the miniature. Apply this in as many thin coats as it takes to build up a solid, opaque colour.
We used Coal Black as it’s not a deep pure-black (and itt goes on smooth in just one coat). this allows us to shade it down further in the recesses later.
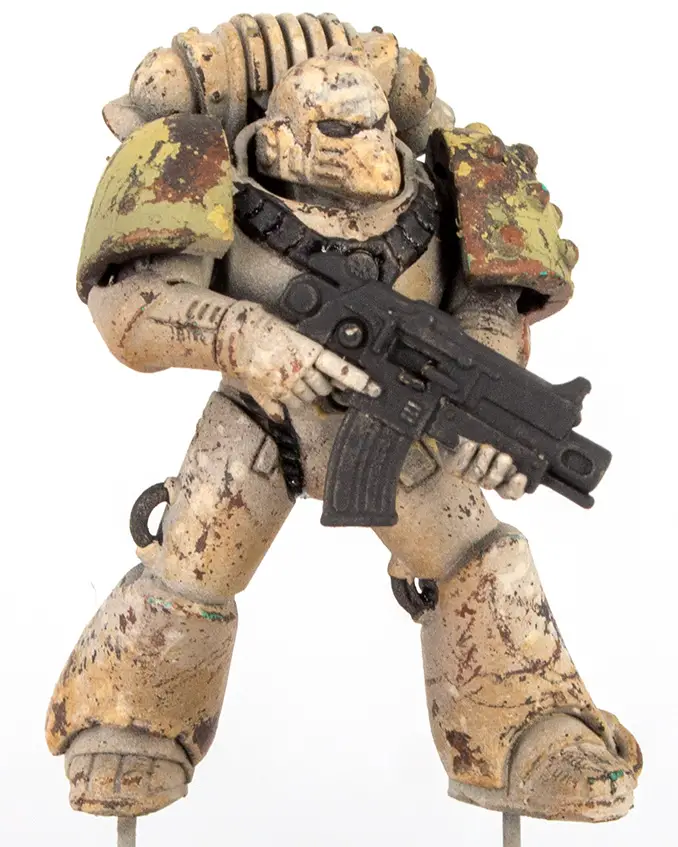
Aim for the cables gun casing, and the softer armour between armour plates on the miniature. Also, ensure you do the eye lenses with this colour.
Step 12 – Metallic Bits
We’ll paint the metallic areas now. Take some Gunmetal Grey from Vallejo and apply this to all the metallic areas on the miniature.
Take care to apply this to the details on the gun and some parts on the miniature’s backpack. Once this is completely dry, apply Nuln Oil to the metal areas and the black areas.
Step 13 – Copper Details
Copper parts next. Use some Vallejo Copper to paint any shoulder study, the detail on the chest plate
Some of these details are quite small, so take your time when painting them to ensure you don’t get any paint on the areas you’ve already finished.
At this point, I recommend skipping ahead to Step 16, then coming back to step 14, you’ll see why.
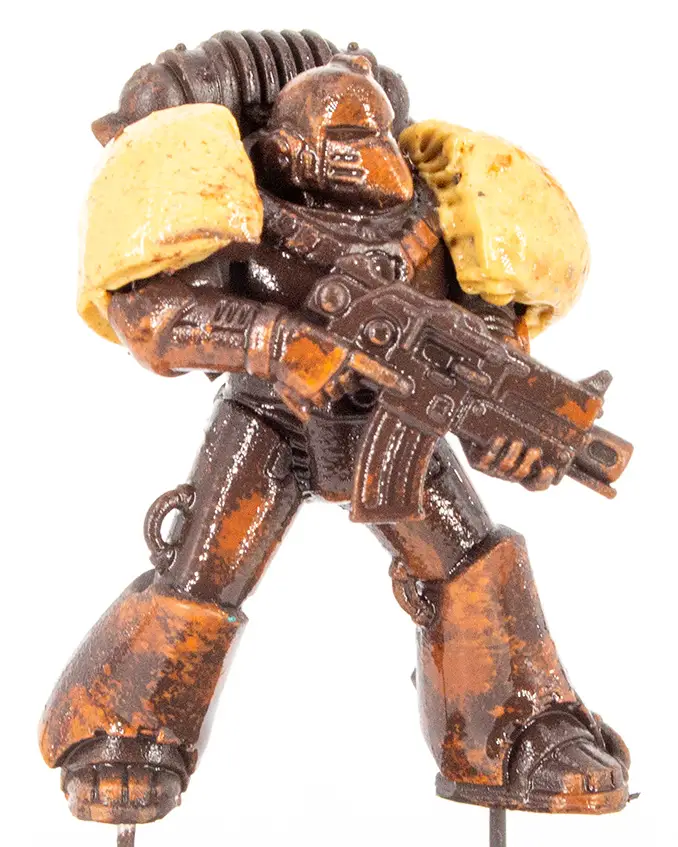
Step 14 – Varnish
For the next step, apply some Vallejo Gloss Varnish (or whatever gloss varnish it is you prefer) to the entire miniature.
Apply this in a thin layer. You don’t want this to gunge up any details on the figure.
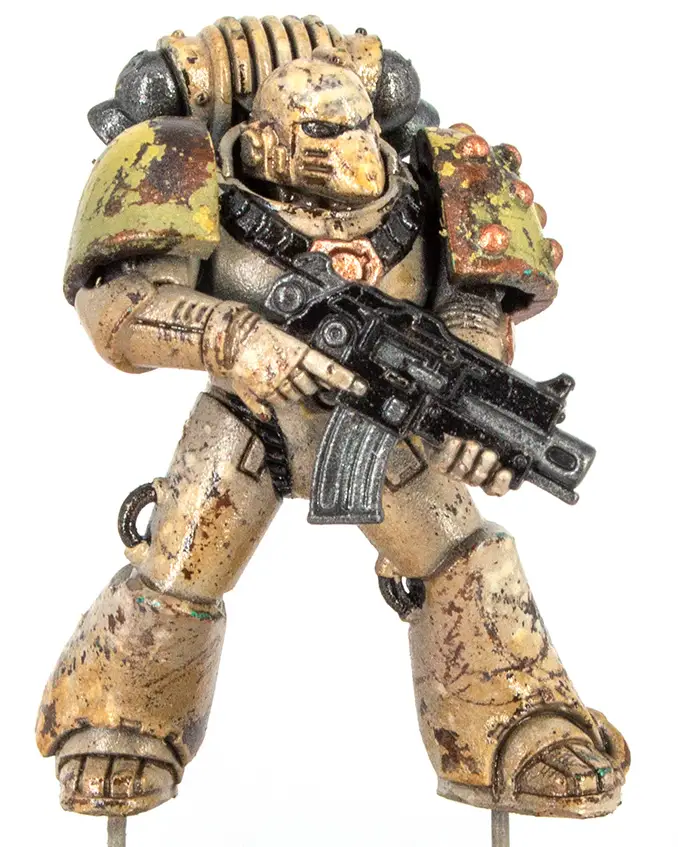
Once this has dried, very carefully apply some Tamiya Dark Brown Panel Liner into all the deepest, darkest parts of the miniature’s armour. We’re looking at the details on the feet and around the bottoms of the leg armour, as well as the details on the arms in particular. Use the image above as a reference.
You could do this with Agrax Earthsahde or a very watered down Rhinox Hide if you don’t have any Tamiya Dark Brown Panel Liner.
Step 15 – Decals
We’ll apply our decals and transfers in this step. First, soak your decal on some tissue until it has come free from the backing paper. Then, using a brush that is soaked in Micro Set, apply the transfer to the area of the model where you want it.
Once it’s in place, leave it for 10-20 minutes.
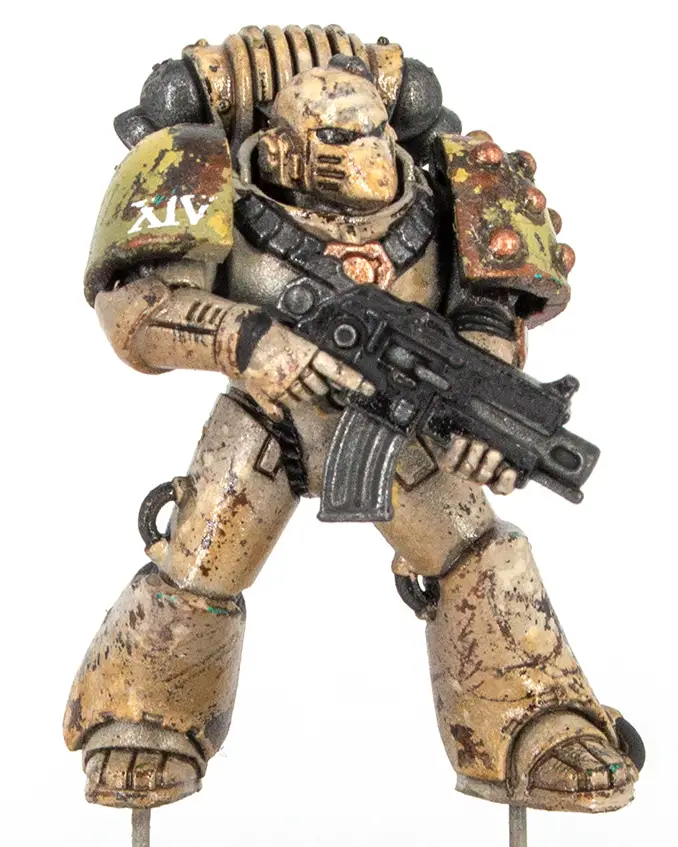
Once the Micro Set is completely dry, you may want to pick away some parts of the transfer in order to get it to match the texture on your model. You must make sure the transfer is completely dry before you do this, or else you risk damaging it unintentionally.
Once you’re happy with your transfer, apply a coat of Micro Sol over it. This will embed your transfer into the surface of your miniature and ensure it doesn’t slide off.
Step 16 – Black Highlights and Copper Weathering
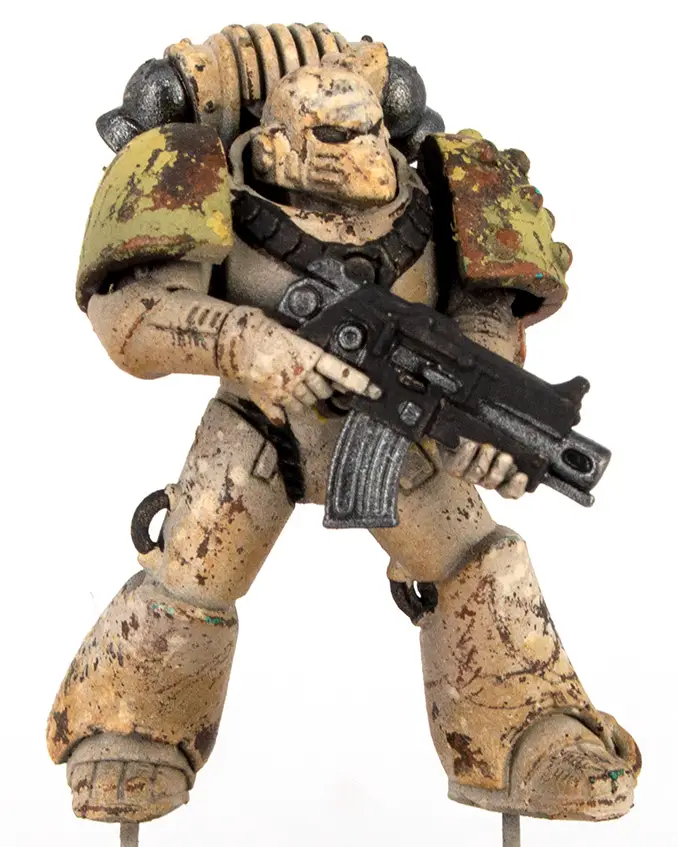
First, using a good domed drybrush, apply a highlight of Celestra Grey to all the black areas. That’s the gun casing and those soft armour areas. Once that’s done, apply an even lighter drybrush of Ulthuan Grey to the same areas, focusing around the highest edges.
We recommend a Medium Artis Opus Series D brush for this.
Now, this should have really been done before the gloss coat, but It was forgotten about.
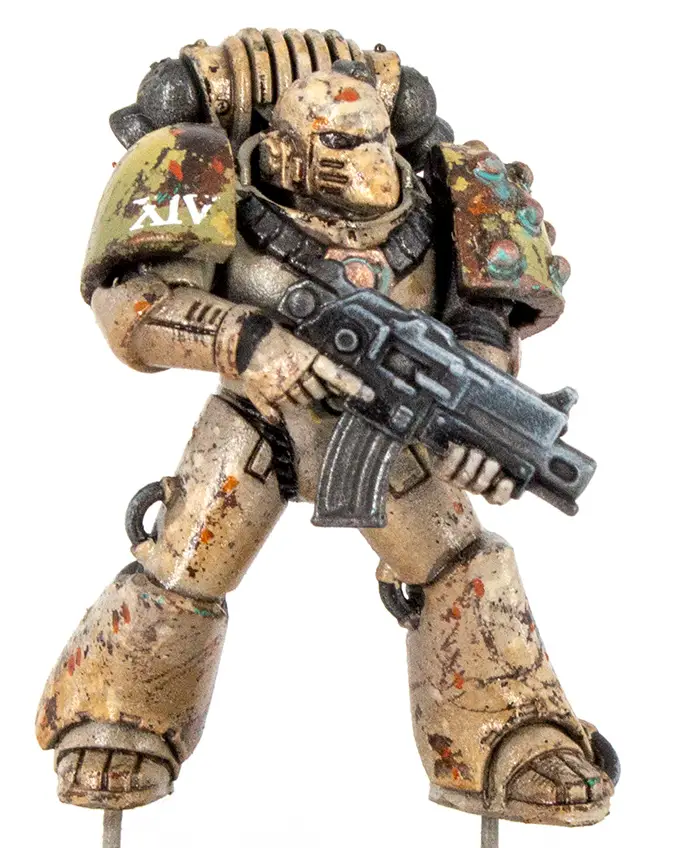
Once you’ve highlighted your black, mix some Abteilung 502 Copper Oxide Blue mixed with some artist-grade mineral spirits to a thin, watery consistency that flows easily around texture. Apply this carefully into and around the copper-painted areas on the miniature. Once that’s dry, apply a very small amount of Abteilung 502 Turquoise Lights onto any areas where the Copper Oxide Blue has pooled heavily. This will help add depth and interest to the weathered texture.
Finally, to complete the weathering, take some Abteilung 502 Light Rust and Oxide Patina. Apply both in small dots to the brown weathering already on the cream-coloured armour panels. If you wish, you can the use an old brush to smear this downwards and make steaks. This will creature the effect of water causing the rusty colours to run.
Step 17 – The Eyes and Protection
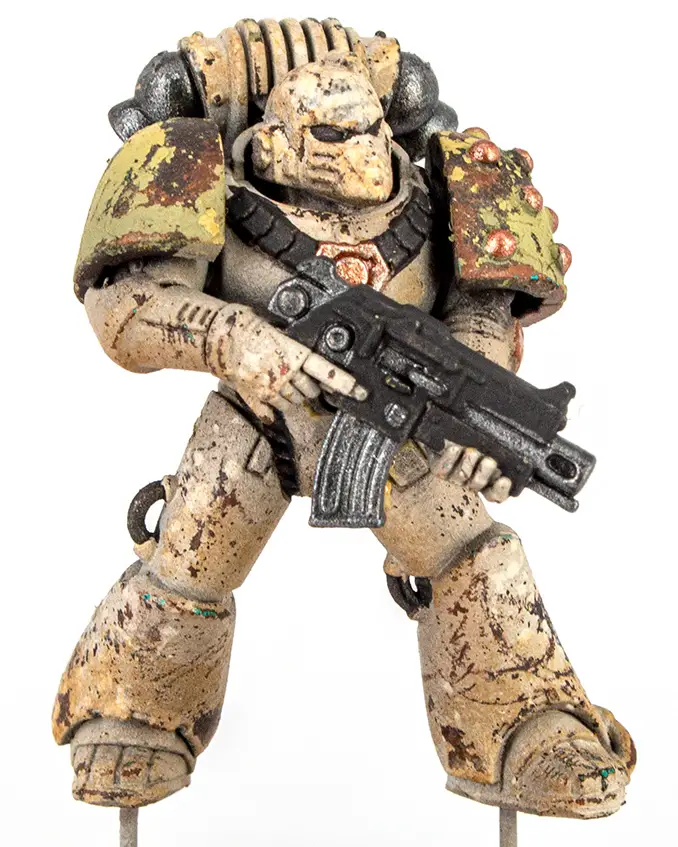
The final bit of painting we need to do is the eyes on the miniature. First, take some Wild Rider Red and apply this to the whole eye lens. To create the glow effect, thin the Wild Rider Red down to glaze consistency and apply it to the armour on the face around the eye lens.
Next, take some Trollslayer Orange and paint this onto the eye lens. Leave some Wild rider Red visible around the edge. Finally, add a dot of Yriel Yellow to the centre of the lens.
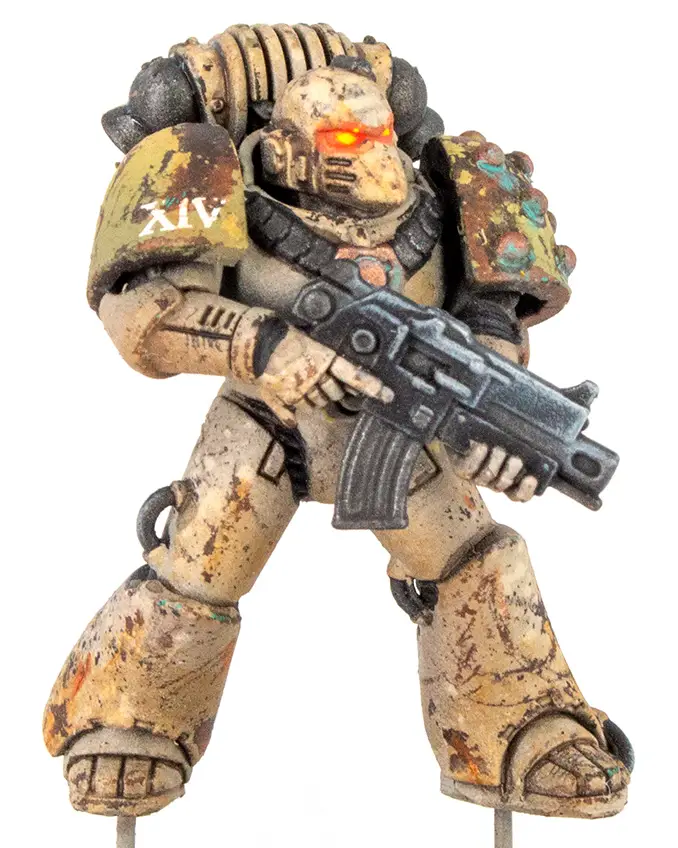
Once you’ve painted the eyes and allowed them to dry, coat the model in a thin layer of matt varnish to seal the model and keep your paint job safe.
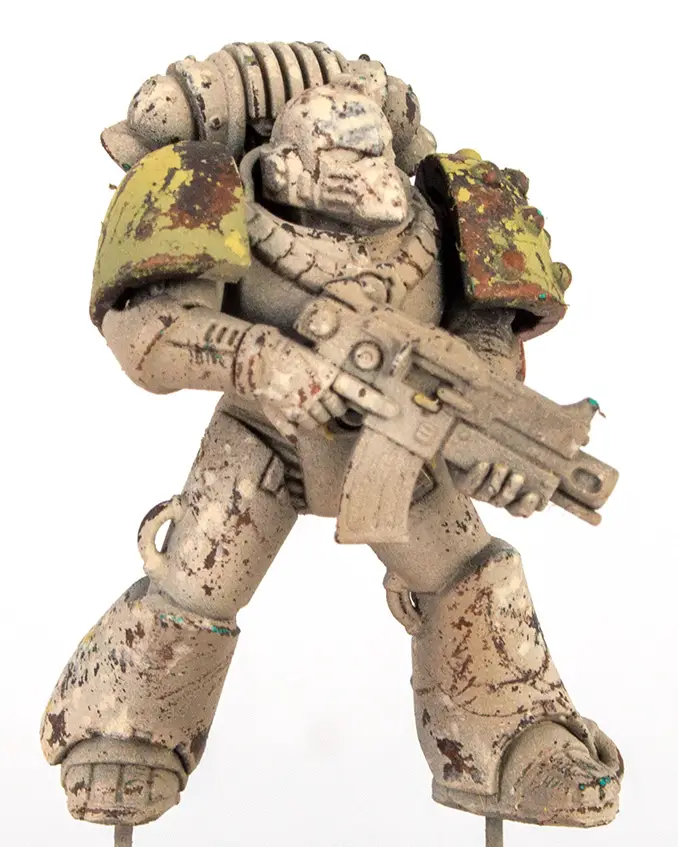
How to Paint Death Guard – Finished Model
Here’s how your finished model should look.
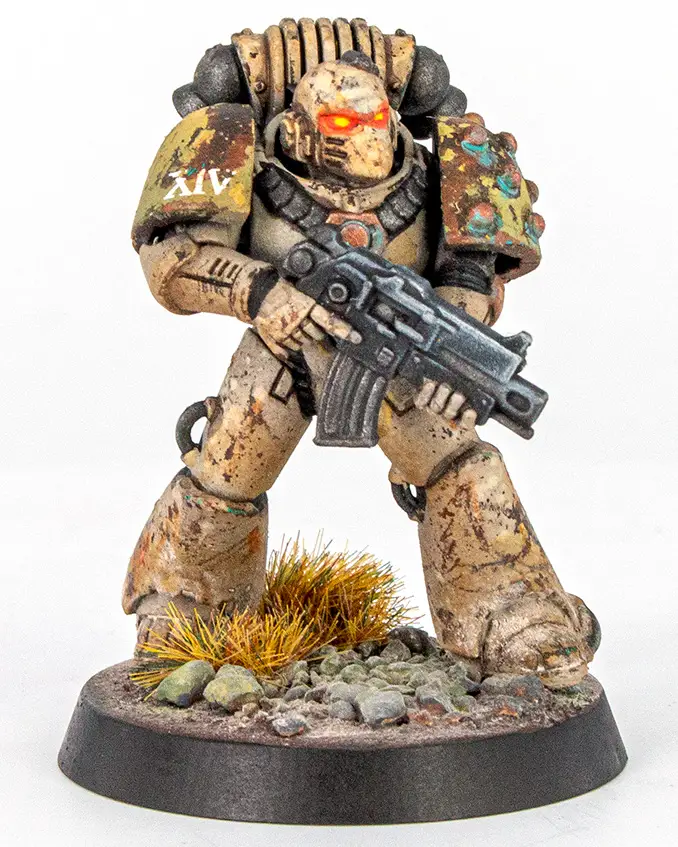
Remember: no model is complete without a good base!
Please Note: This site uses affiliate links. Our Affiliate Partners are shown below
(Affiliate links will result in compensation to the site on qualifying purchases)
Click this link & buy your hobby stuff from Element Games for the UK & Europe to support FauxHammer.com – Use Code “FAUX2768” at the checkout for double reward points.
Our Affiliates / Hobby Stores
- UK: Element Games, The Outpost, Wayland Games, Mighty Lancer, Goblin Gaming, Forbidden Planet, Model Scenery Supplies, eBay, Amazon
- US/Canada: MTechCave, GameKastle, eBay (US), eBay (CA), Amazon
- Germany: Taschengelddieb
- Europe: eBay (DE), eBay (FR), eBay (ES), eBay (IT), Amazon
- Australia: eBay, Amazon
- Global: RedGrass Games, Warcolours
- 3D Printers: Phrozen 3D, Elegoo, Anycubic
FauxHammer – Latest Video on YouTube
What did you think of this Tutorial? please let us know in the comments.
If you like what we’re doing here you could really help encourage more content with a share on any social media platform.
Click the share links at the bottom of this screen (or on the left for computers and tablets)
Want to keep updated with the blog? You can subscribe in the sidebar for RSS or by email below
(Sidebar is below the article on Mobile Devices)