How to Paint Space Wolves Space Marines for Warhammer 40,000
If you are looking for a quick way to paint your army of Space Wolves, check our guide below which is aimed at Army Painting Plus quality. These guides are super simple to follow, using only a few techniques. The key takeaway is that anyone can do this, So check out our Army/Speed painting guide on How to Paint Space Wolves.
Please Note: This site uses affiliate links. Our Affiliate Partners are shown below
(Affiliate links will result in compensation to the site on qualifying purchases)
Click this link & buy your hobby stuff from Element Games for the UK & Europe to support FauxHammer.com – Use Code “FAUX2768” at the checkout for double reward points.


Our Affiliates / Hobby Stores
- UK: Element Games, The Outpost, Wayland Games, Mighty Lancer, Goblin Gaming, Forbidden Planet, Model Scenery Supplies, eBay, Amazon
- US/Canada: MTechCave, GameKastle, eBay (US), eBay (CA), Amazon
- Germany: Taschengelddieb
- Europe: eBay (DE), eBay (FR), eBay (ES), eBay (IT), Amazon
- Australia: eBay, Amazon
- Global: RedGrass Games, Warcolours
- 3D Printers: Phrozen 3D, Elegoo, Anycubic
FauxHammer – Latest Video on YouTube
How to Paint Space Wolves Space Marines for Warhammer 40,000 – Paints and Tools
Paints
Throughout the accompanying video guide, we use a number of Citadel Air paints. Now, anything that we do with an airbrush in this video can be accomplished with a good drybrush. As such, in the list below, where applicable paints have been marked as Layer/Base paints as well as Air paints for those following this guide without an airbrush.
Flat Colours
- Vallejo Surface Primer (though any black primer will do)
- The Fang Air (Citadel – available as a Base paint for non-airbrush users)
- Russ Grey Air (Citadel – comes as a Layer paint for non-airbrush users)
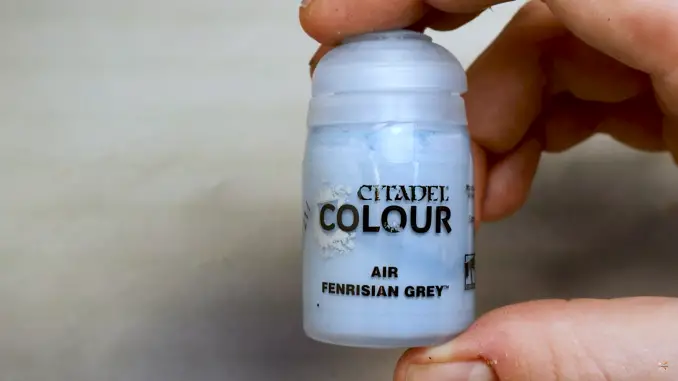
- Fenrisian Grey Air (Citadel – comes as a Layer paint for non-airbrush users)
- Fenrisian Grey (Citadel – you’ll also need the Layer paint version for this guide if you’re an airbrush user)
- Mephiston Red Air (Citadel – available as a Base paint for non-airbrush users)
- Trollslayer Orange Air (Citadel – comes as a Layer paint for non-airbrush users)
- Averland Sunset Air (Citadel – available as a Base paint for non-airbrush users)
- Flash Gitz Yellow Air (Citadel – comes as a Layer paint for non-airbrush users)
- Rhinox Hide (Citadel)
- Deathclaw Brown Air (Citadel – comes as a Layer paint for non-airbrush users)
- Kislev Flesh Air (Citadel – comes as a Layer paint for non-airbrush users)
- Mechanicus Standard Grey (Citadel)
- Bugman’s Glow (Citadel)
- Screaming Skull (Citadel)
- Corvus Black (Citadel)
- Wraithbone (Citadel)
- Vallejo Model Color Black (Vallejo)
Metallics
- Vallejo Metal Color Dark Aluminium (Vallejo)
- Vallejo Metal Color Copper (Vallejo)
Washes/Contrast
- Light Rust Enamel Wash (AK Interactive)
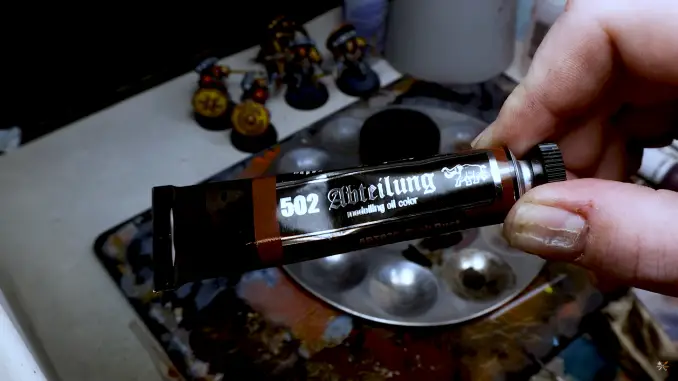
Oil Paints
- Abteilung 502 Shadow Brown (Abteilung)
- Abteilung 502 Dark Rust (Abteilung)
- Abteiling 502 Copper Oxide Blue (Abteilung)
- Abteiling 502 Fantasy Turquoise Lights (Abteilung)
Consumables
- Vallejo Gloss Acrylic Varnish (Vallejo)
- Vallejo Matt Acrylic Varnish (Vallejo)
- Micro Set
- Micro Sol
- Mineral spirits
Tools
- An Airbrush. Not necessary, but much much faster for certain steps. Any airbrush should do here (we use a Badger Sotar 20/20 for priming, and a Cult of Paint Infinity CR+ for everything else).
- A set of domed drybrushes (we use Artis Opus Series D drybrushes).
- Any regular paintbrushes with sharp tips for painting base layers. (We use an Artis Opus Series S #3 for everything, except the finest details where a Series M #0 is used).
- Small piece of sponge
- Makeup sponge
- Silly putty (for airbrush users)
- Q-Tips, cotton buds, or whatever it is they’re called where you live
How to Paint Space Wolves Space Marines for Warhammer 40,000 – Introduction
If you’re looking for an alternate way to paint your Space Marines as grimdark Space Wolves for either your games of Warhammer 40,000 or just for display, we’ve got you covered.
In the guide below, we’ll take you through all the steps you need to create some dark and weather super-human super-soldiers from the far future. Grab your paints, your brushes, your oils, some make-up sponges, and some cotton buds and read on!
How to Paint Space Wolves Space Marines for Warhammer 40,000 – Video
You’ll shortly find this guide has an accompanying video, the difference? that’s the faster version, whereas this version goes into more detail.
If you like the content, don;t forget to Like the video, subscribe leave us a comment with any questions and hit the notification bell..
How to Paint Space Wolves Space Marines for Warhammer 40,000 – Tutorial
You might notice throughout this guide and the accompanying video that our Space Wolves have a few non-Games Workshop components on them. You can buy these, and loads of other cool parts for your own Space Marine legion, from The Custom Bit.
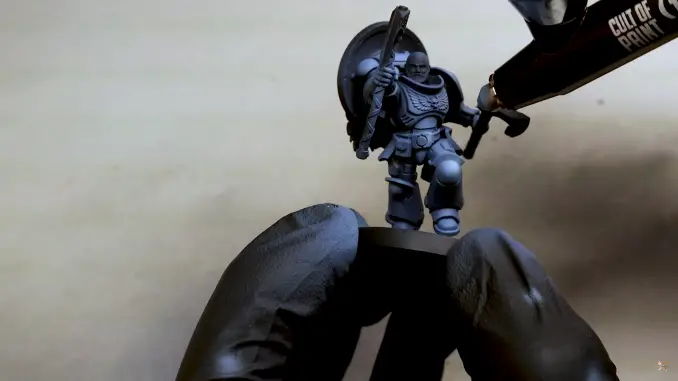
Step 1 – Priming
Prime the whole model black. That’ll help ensure you get a good, deep, rich colour with the rest of your basecoating.
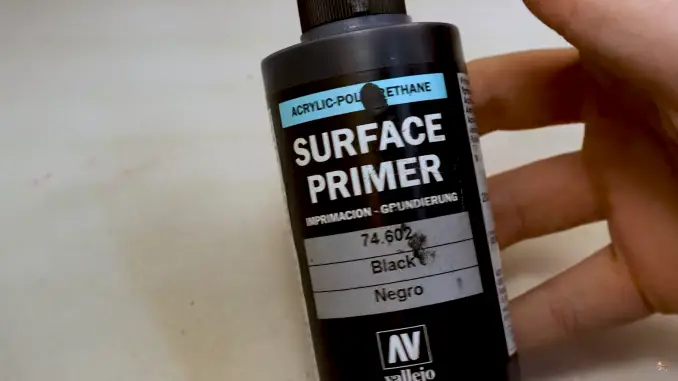
In the video, we use an airbrush to prime this model. This doesn’t mean you have to, though: you could use any good black base paint or a spray can – whichever is your preference.

We used an airbrush as it’s easier to control how thick the layer of paint that goes on to the miniature is. At this stage – and any stage hereafter – we want our layers to be as thin as possible so we don’t lose any of that nice sculpted detail.
Step 2 – Basecoating
First things first, put down a layer of The Fang over the entire miniature.
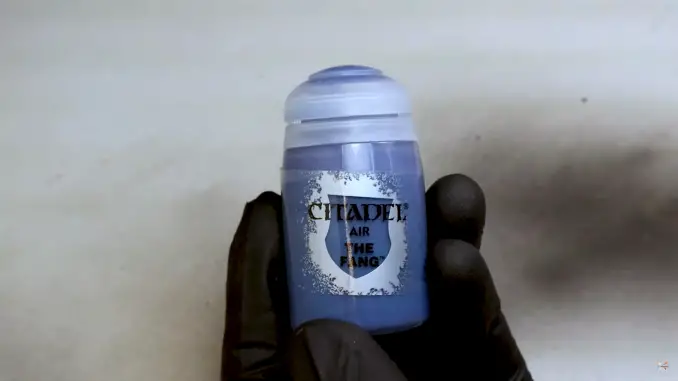
This is a lovely, frosty blue-grey that’s perfect for Space Wolves.
In the video, we use an airbrush to apply this, but Citadel’s The fang paint is also available as a Base paint, so if you would rather use regular brushes to apply this, you can do. Just ensure you thin the paint with water, as Base paints are quite thick by design. You don’t want to cover up any detail by putting the paint on too thick.
Step 3 – First Highlight
Next, apply your first highlight using Citadel’s Russ Grey. Again, we used an airbrush to apply this, but you can easily do this with any good drybrush.
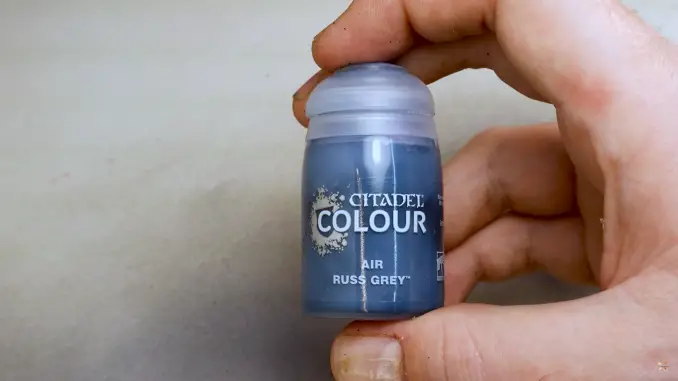
In this step, you want to be picking out individual forms on the miniature. Here, you want to focus your airbrushing or drybrushing on any parts of the miniature that are sticking out or raised: knees, arms, hands, the tops of shoulder pads, the tops of the backpack and so on.
The trick is to consider where light would be hitting the model: those parts of the figure that are sticking out or closer to the imagined light source would be hit by more light, so would be brighter. If you’re drybrushing, you can afford top drybrush quite heavily here.
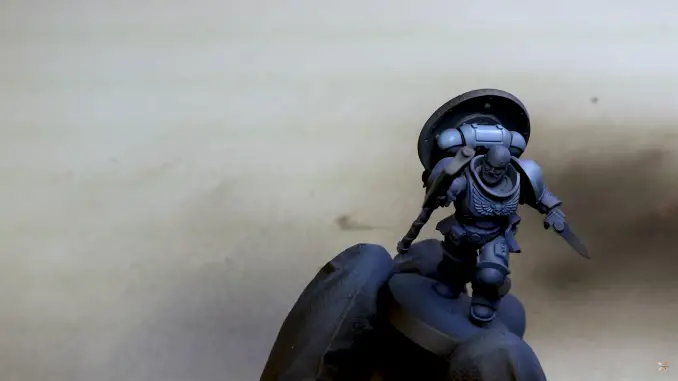
Step 4 – Second Highlight
Similar to what we did in the last step, now use Citadel’s Fenrisian Grey to apply a finer highlight within the Russ Grey Highlight you just did.
If you’re using an airbrush, accuracy is key here. Aim the tip of your airbrush to create small dots or lines of colour along the various forms of the miniatures that you’ve already highlighted.
If you’re drybushing, ensure you drybrush more lightly than you did in the previous step. You want to create a transition in colour from your base of The Fang, through your mid-tone Russ Grey and into your final, light highlight of Fenrisian Grey.
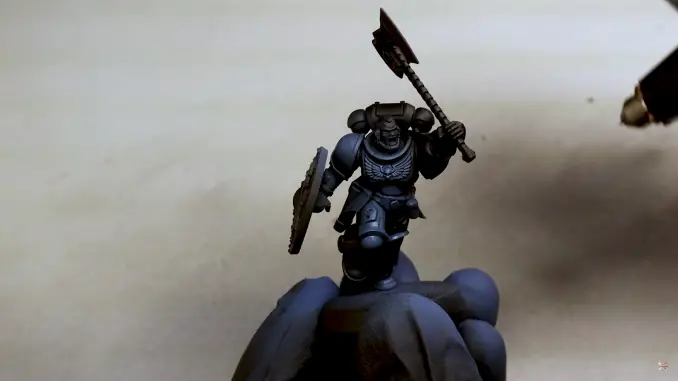
Step 5 – First Edge Highlight
Now, for those airbrushing, we’re going to use a drybrush to do all the edge highlighting on the blue armour panels of the miniature. If you’re already drybrushing your miniature, you may be able to skip this step if you’ve done this as part of the last step. If you aren’t then read on.
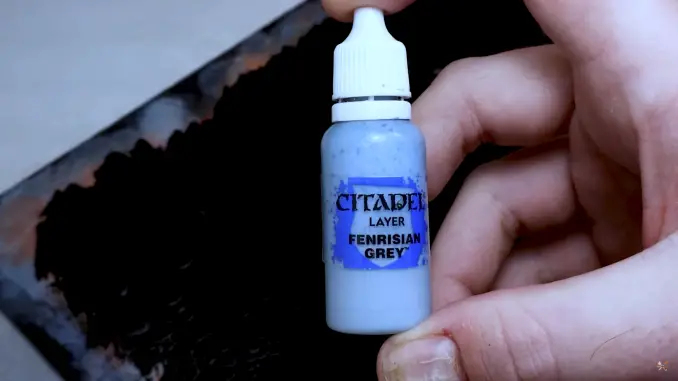
Taking some Fenrisian Grey Layer paint, work it into your drybrush. Take some time to ensure the paint is well and truly worked into the bristles of your brush.
Once you’ve got the paint worked into the bristles of your brush, drybrush the very edges of the miniature’s armour panels. We’re looking for al those sharp edges, so as along the tops of helmets, around the sides and bottoms of leg armour, and so-on.
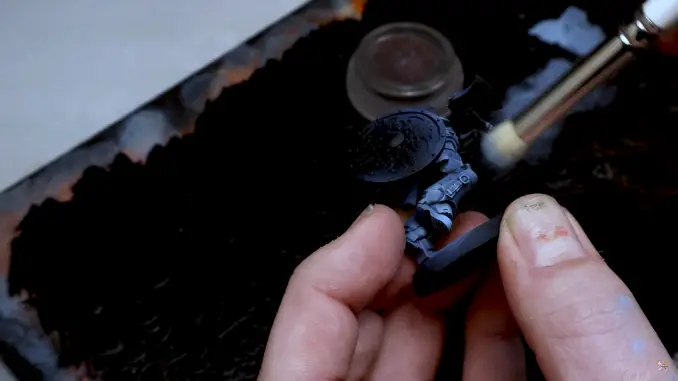
Step 6 (Optional) – Adding Distress
The whole thing with Space Wolves is they’re all about getting into fights. They love brawling with just anyone who’ll give ’em a reason to. As such, it’s fair to assume that their armour might look a little worse for wear in places.
As such, we used a small piece of sponge and some more Fenrisian Grey layer paint to add some distress to those blue armour panels.
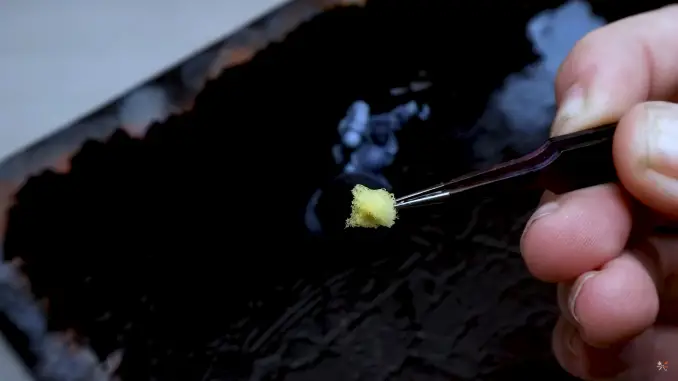
Similar to what we did when drybrushing, work the paint into the sponge using either a texture palette or a piece of kitchen towel (as in the stuff you use to wipe up spills, not the stuff you bake your cakes in; I understand there’s been some confusion in the past)!
Then, gently dab the sponge onto the areas of the armour panel you want to seem damaged.
This will give the impression that there is an uneven finish to the armour, as if it has been chipped and worn.
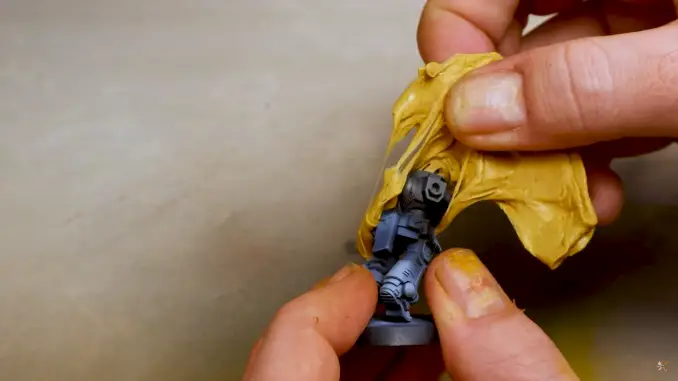
Step 7 (Optional) – Masking
If you’re an airbrush user, at this point you’ll need to cover up some parts of the model.
We’re going to be painting the shoulderpads on the miniatures next, and we’re going to be using a red and yellow paint, so we don’t want to get this on the nice blue we’ve created on the rest of the armour panels.
In the video, we use silly putty to mask the parts of the miniature we don’t want to paint. We’ll mask everything but the parts we want in red first.
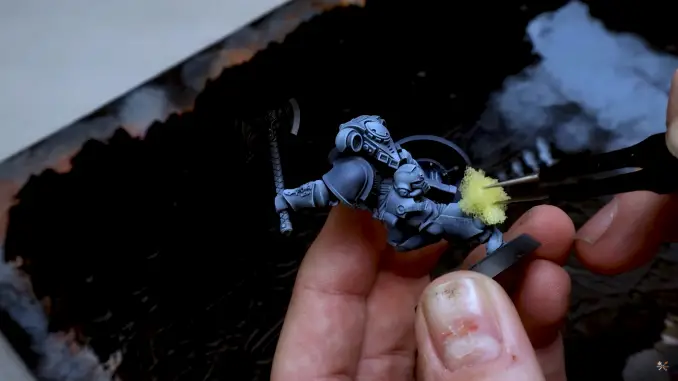
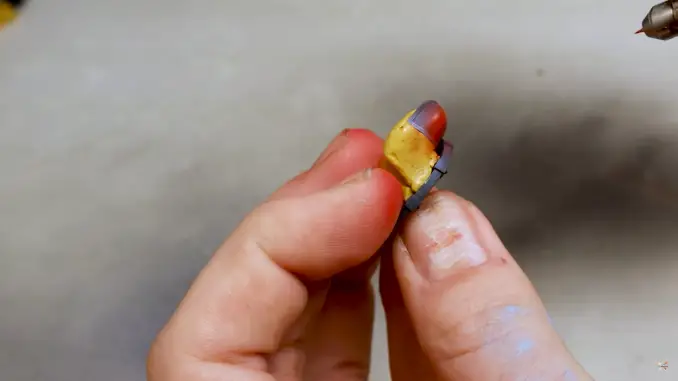
Step 8 – Painting Shoulderpads Part 1
Now, we’re about to start painting some shoulderpads.
In this video, we painted the right shoulderpad of our Assault Intercessors red. Whilst this is the “correct” way to paint a lot of Space Wolf units shoulders. In the instance of Assault Intercessors, this apparently isn’t correct.
Be aware that if you’re a particular sucker for the “lore” attached to unit colours and proper heraldry in Warhammer 40,000, Space Wolves have different coloured shoulders depending on their battlefield role. Apparently, Assault Intercessors should have both shoulders yellow, now one red and one yellow like a lot of Space Wolf units.
But whatever.
So, for most Space Wolves, you’ll need a red right shoulder at this point. So, take some Mephiston Red.
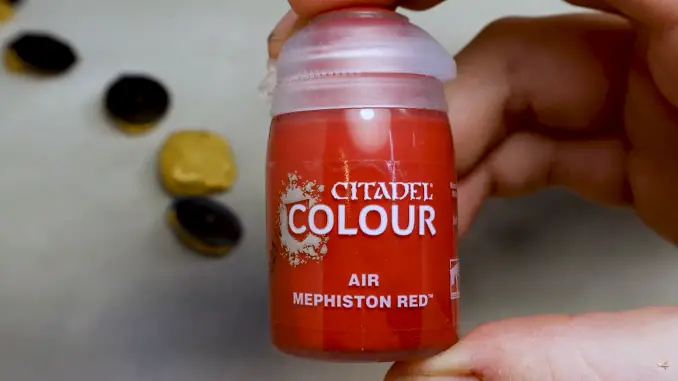
Apply this to the right shoulderpad using either an airbrush or a regular brush.
(Or don’t if you’re the sort of huge nerd who takes gratification if pointing out other people’s mistakes online.)
Step 9 – Painting Shoulderpads Part 2
Next up, we need to highlight that nice red we just put down. Take some Evil Sunz Scarlet,
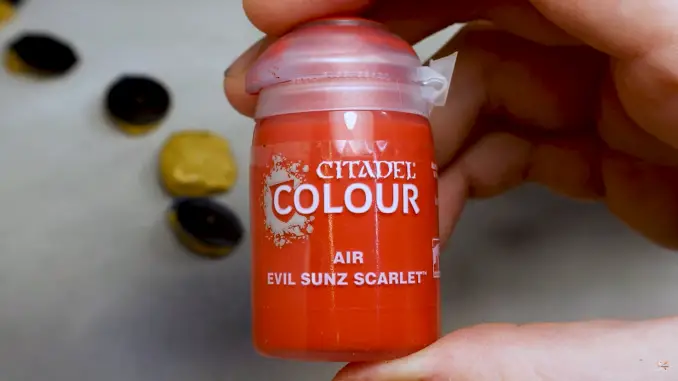
Similar to what we did with the armour, apply this to the uppermost parts of the shoulderpad.
Be aware of the shoulder pads orientation when it’s on the model

In the video, we used an airbrush, but you can easily do this with a drybrush too.
Step 10 – Painting Shoulderpads Part 3
Finally, we’re going to do a small highlight on the red of the shoulderpad.
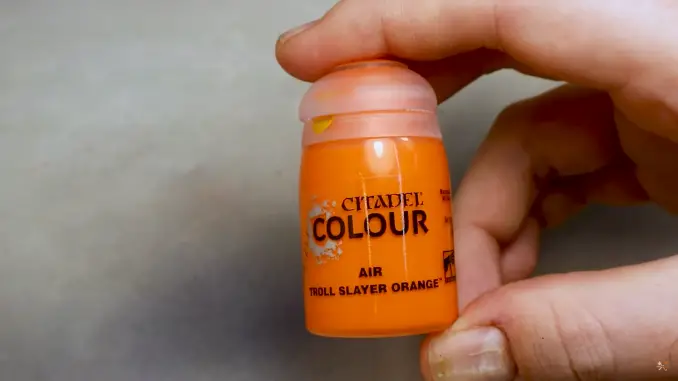
Take some Trollslayer Orange (also available in a Layer Paint for non-airbrush users) and apply a small amount within the last highlight you did, focusing on the most raised part of the form.
As ever, you can also do this with some very careful drybrushing.
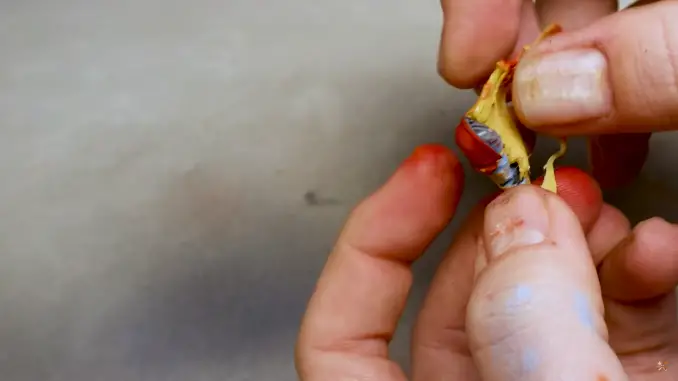
Step 11 (Optional) – Unmasking
We’ve now got the other shoulderpad to do along with the weapons, if you’re painting in sub assemblies, you can now remove your masking from the areas you’ve just painted.
Hopefully you’ll have a really neat colour on your shoulerpads.
Don’t discard your putty just yet, though, as we’ve got more masking to do now!
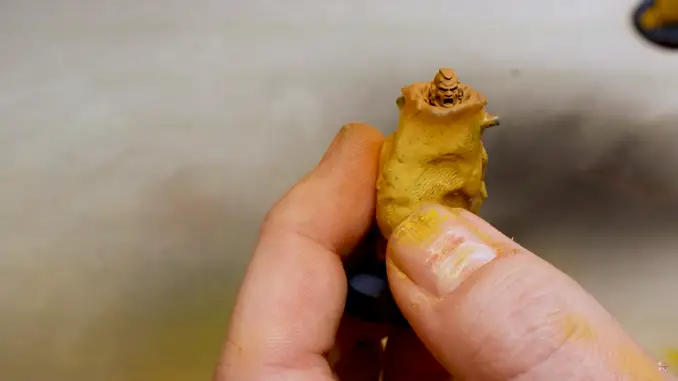
Step 12 (Optional) – More Masking
As we just said, we’ve got the yellow to do. If you’re building in sub-assemblies, you may need to mask some more arms right now.
If you haven’t done so already, mask the other areas you don’t want to get covered in yellow paint when we do the next step.
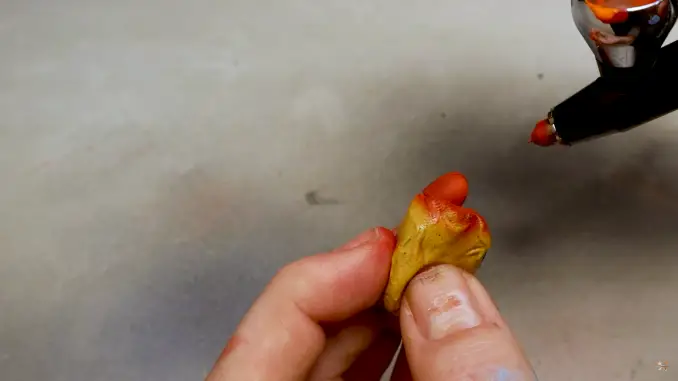
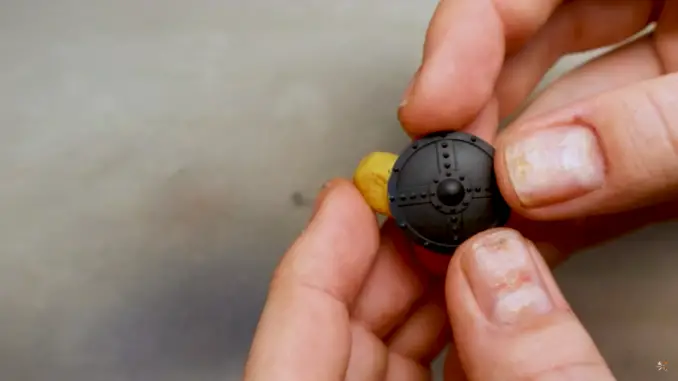
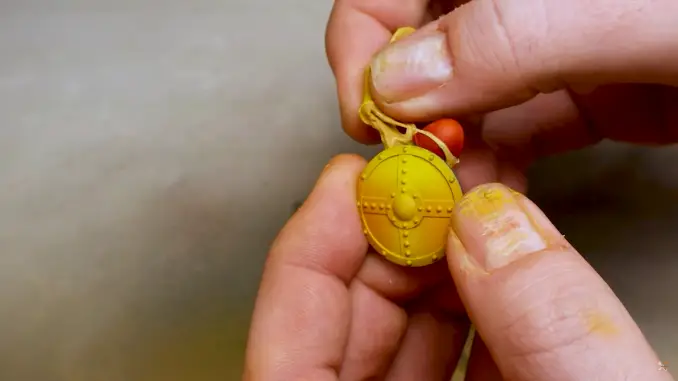
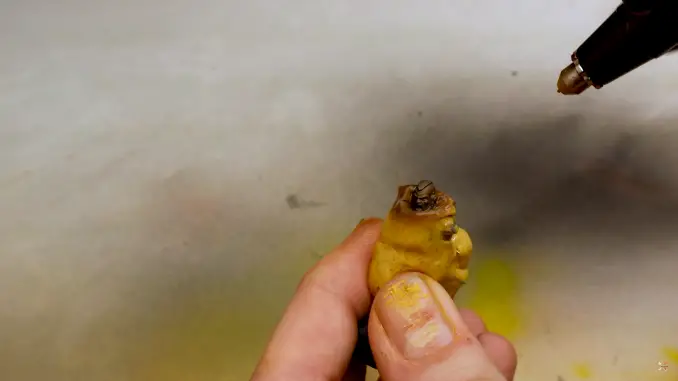
Step 13 – Painting the Other Shoulderpad and Details, Part 1
We’re going to be doing some of the other details on the miniature, particularly those on some of our weapons as well as the left shoulderpad in yellow. You might want to do any gun casings or chainswords yellow too, but it’s entirely up to you.
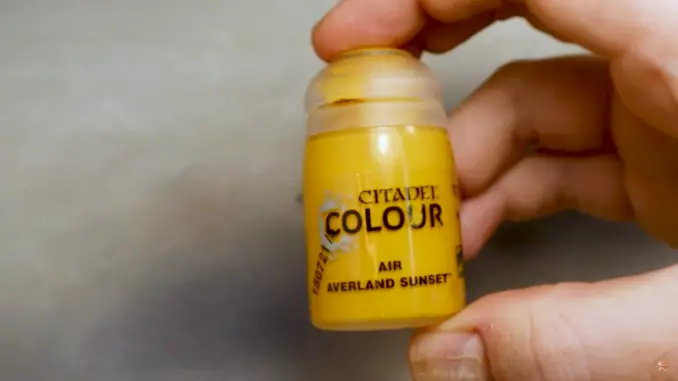
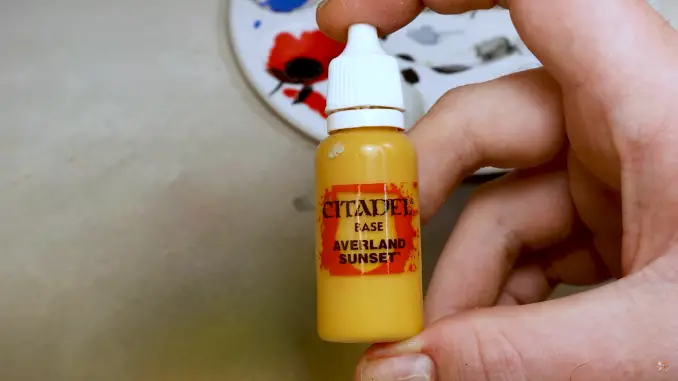
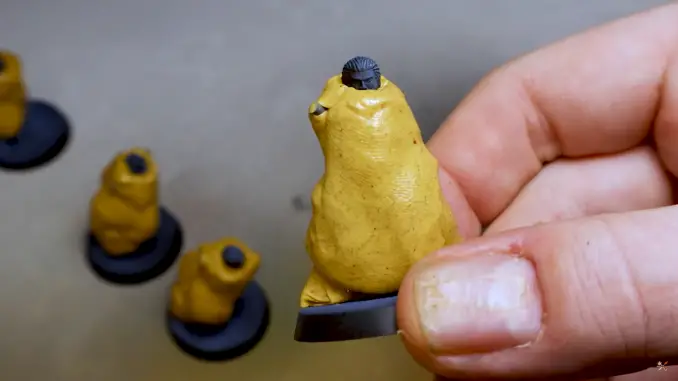
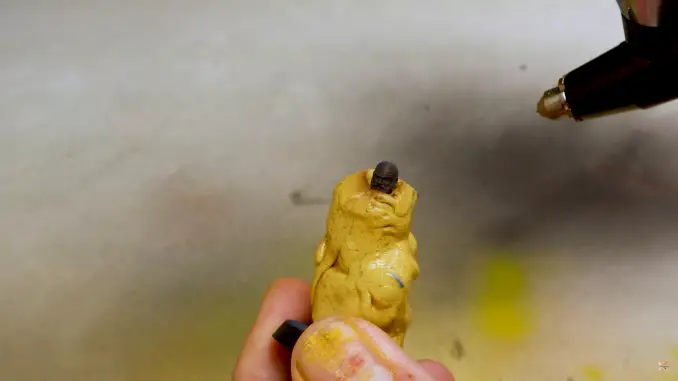
As such, grab your Averland Sunset and get brushing/spraying.
You’ll need to do a good few coats in order to build up a nice opaque layer on your miniature. Yellow paints often don’t have amazing coverage at the best of times, and because we’re going over a black or dark blue basecoat, it’ll take a little bit of work to make sure the paint is built up to a good level.
Build it up steadily in thin layers, if you’re airbrushing, it should dry really quick.
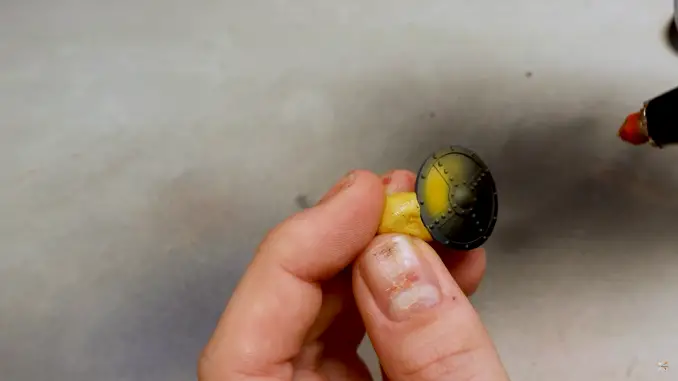
Step 14 – Painting the Other Shoulderpad and Details, Part 2
As we did when painting the red , we’ll now highlight the yellow areas.
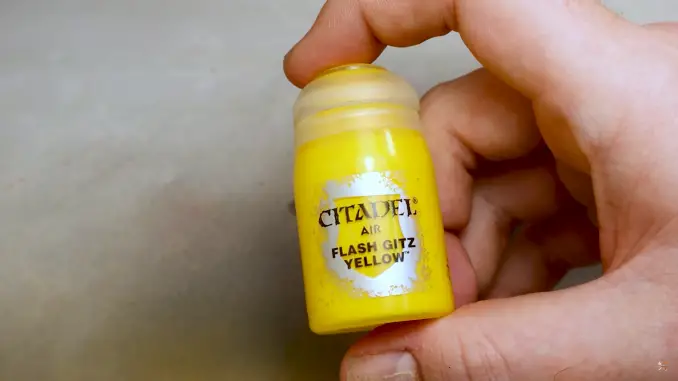
Take some Flash Gitz Yellow and apply this to the raised parts of any of the forms.
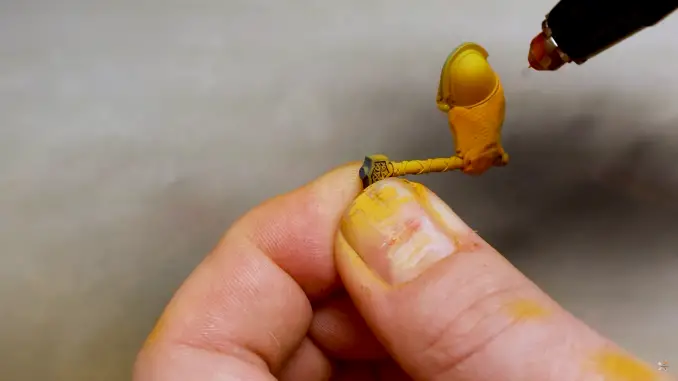
As ever, you can also do this with a good drybrush.
Step 15 (Optional) – More Unmasking
You guessed it!
Remove the mask from the rest of the miniature. Keep your masking material of choice close by though, as you’ll need it again in a moment!
Step 16 – Tidying Up
There’s a chance you might’ve masked some areas on the miniature that needed to be painted yellow. If so, now’s a good chance to go back and paint them. Grab a brush with a good, fine point on it, as well as a pot of Averland Sunset.
Paint any areas you may have missed. In the video, our masking of the blue on our miniatures’ arms means a few areas on their weapons hadn’t been painted.

You might not need to do this depending on how good you are at masking and using an airbrush. If you don’t, move on to the next step.
Step 17 (Optional) – Painting Faces, Part 1 – Return of the Masking
We’re going to be painting the faces on our miniatures in a moment, so if you’re using an airbrush you’ll need to mask the rest of their bodies. Regular brush users can skip this step.
You don’t want to get flesh colours on the lovely blue, red and yellow you’ve worked on, so take care to ensure all but the heads are masked. Of course, if you’re painting in sub-assemblies and haven’t attached the heads to your figures yet, you may not need to do this.
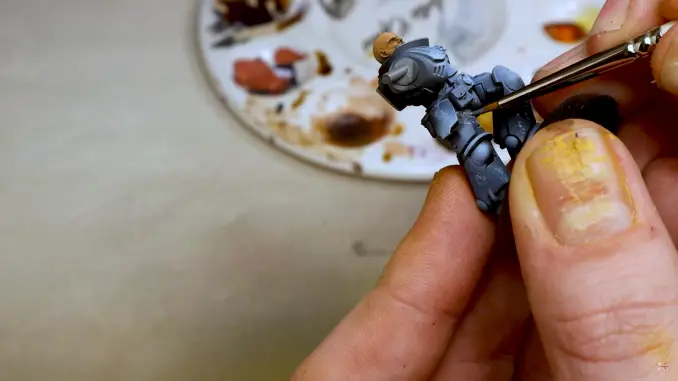
Step 18 – Painting Faces, Part 2
First, we’re going to basecoat the entire face. Take some Rhinox Hide.
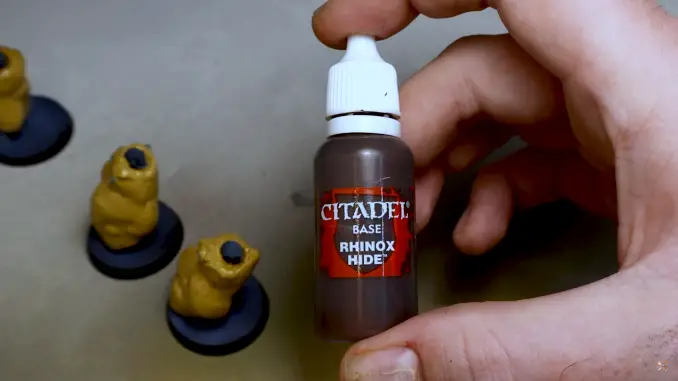
Ensure you get all the skin area with this colour.
This is a good colour to begin with as it works well as a recess shade.
Step 19 – Painting Faces, Part 3
Next up, take some Deathclaw Brown.
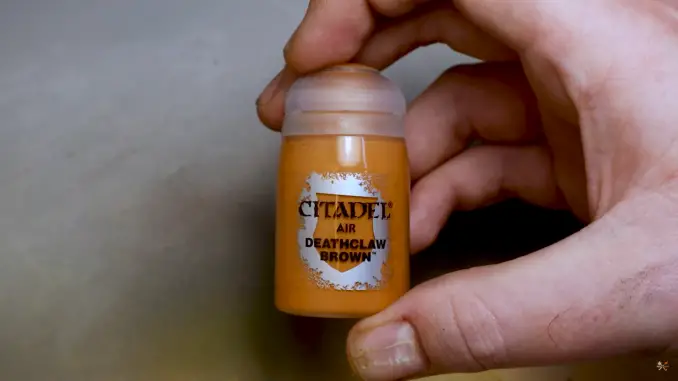
If you’re using an airbrush, spray from a 45-degree angle so as to ensure the Rhinox Hide shade remains on the darkest, most shadowy parts of the face.
Don’t spin the model completely. just spray from one side so that the lighter paint ctas a shadow down the face, but also across from one side.
Drybrush users will want to apply a crossways drybrush to the entire face.
Step 20 – Painting Faces, Part 4
The final part of getting down a decent skin tone is to apply some Kislev Flesh

Similar to before, airbrush users will want to apply this at a 25-35 degree angle, and aim to leave both some of the Deathclaw Brown and rhinox Hide visible where posible to ensure the skin has a smooth colour transition.
Drybrush users will want to do a gentle drybrushing in a downward motion to catch the most raised areas of any faces.
Step 21 (Optional) – Unmasking Again
You know the drill.
If you didn’t quite mask any areas you should have, now’s a good time to tidy them up.
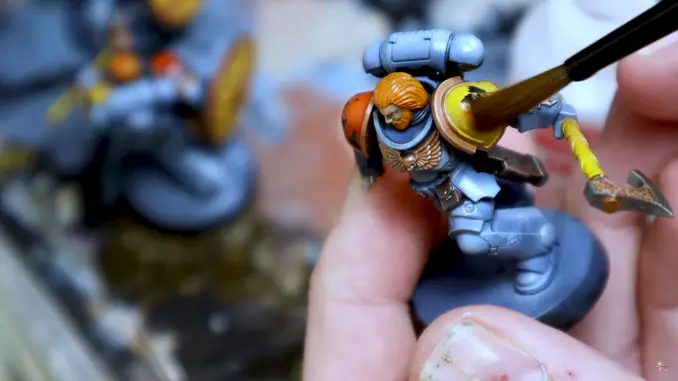
Step 22 – Blocking in Colours, Part 1
Take some Mechanicus Standard Grey
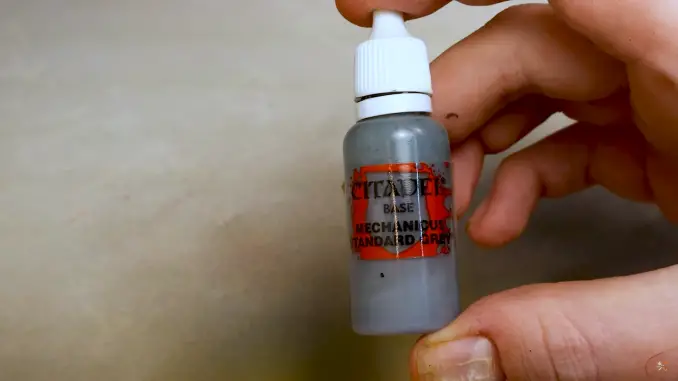
Use this to paint any parts of the soft armour between plates.
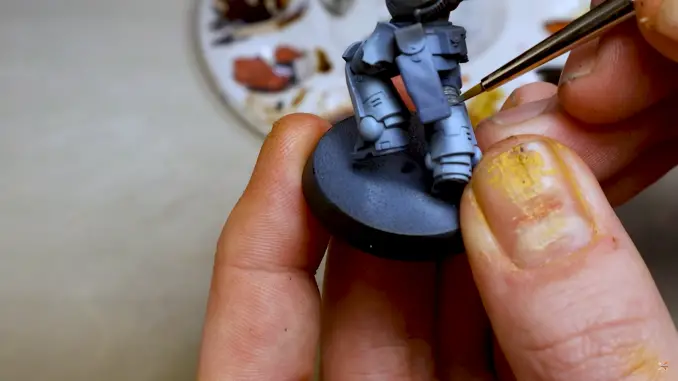
Look for armpits, the backs of knees, the palms of hands, and so-on.
Step 23 – Blocking in Colours, Part 2
Now, take some Rhinox Hide again.
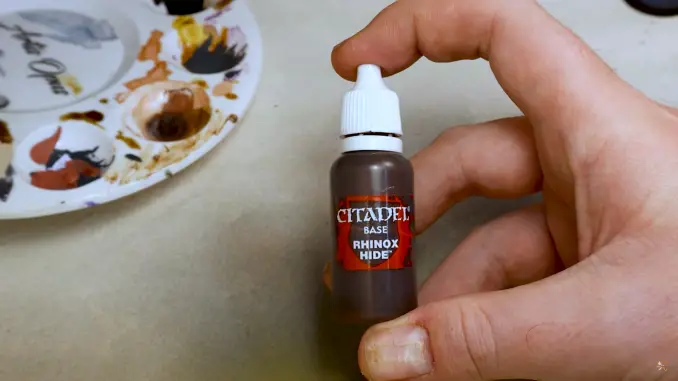
Use this to paint any leather areas.
Look for belts, pouches, and holsters.
Step 24 – Edge Highlighting Leather Areas
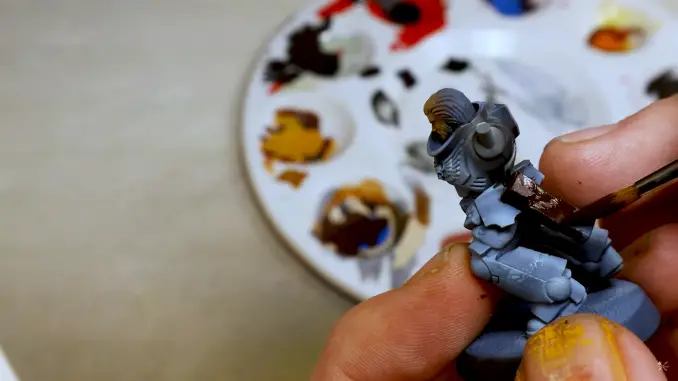
Take some Bugman’s Glow. This will create a highlighted and also distressed leather look.
When leather is worn, it generally returns to a more natural flesh colour.
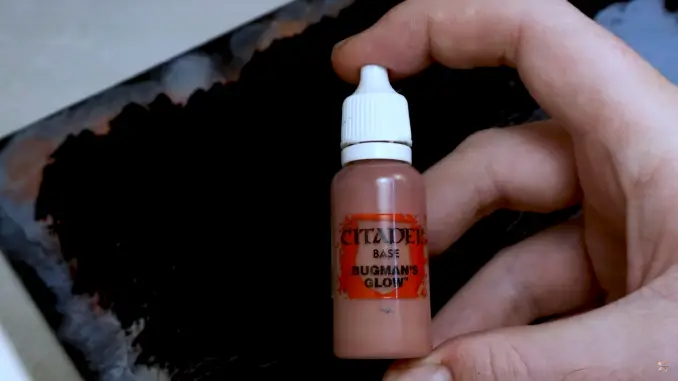
Using a drybrush, carefully apply this to any leather areas on the miniature that you previously painted with Rhinox Hide.
This will help give the leather a distressed, used look.
Step 25 – Highlighting Leather and Flesh
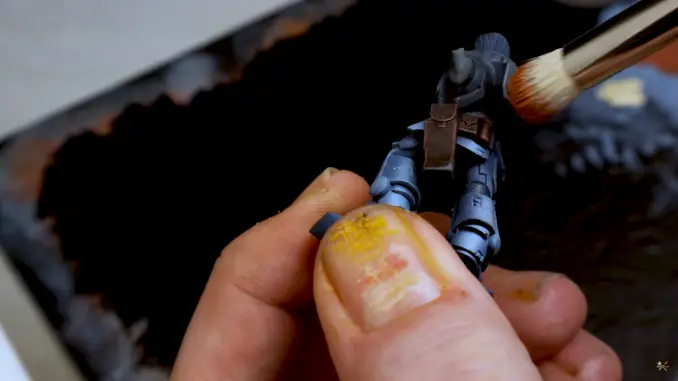
Take some Screaming Skull and mix this with your Bugman’s Glow to create a pinkish, off-white colour.
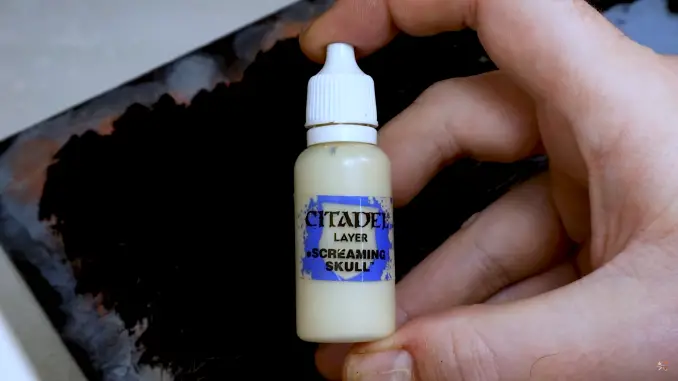
Very lightly drybrush this onto the leather areas you highlighted with Bugman’s Glow.
You will also want to drybrush this very lightly onto the face of your miniature, picking out the nose, brows, and cheekbones.
Step 26 – Hair
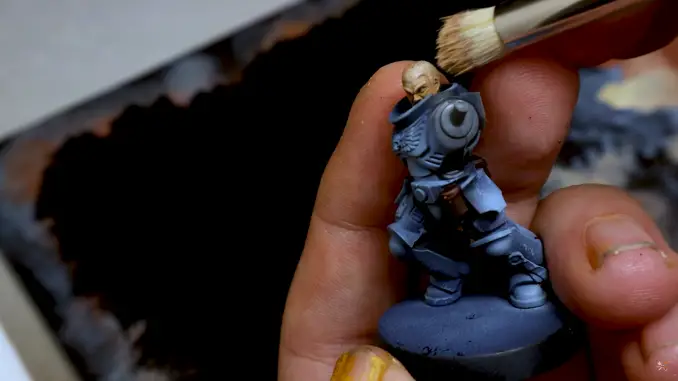
To paint the hair on your miniatures, take some Trollslayer Orange.
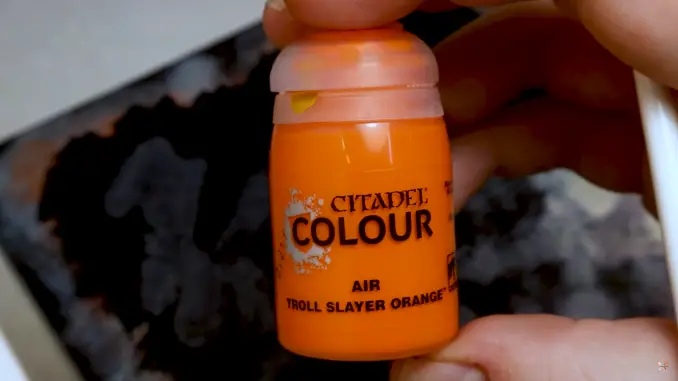
Brush this onto the hair of any of your miniatures.
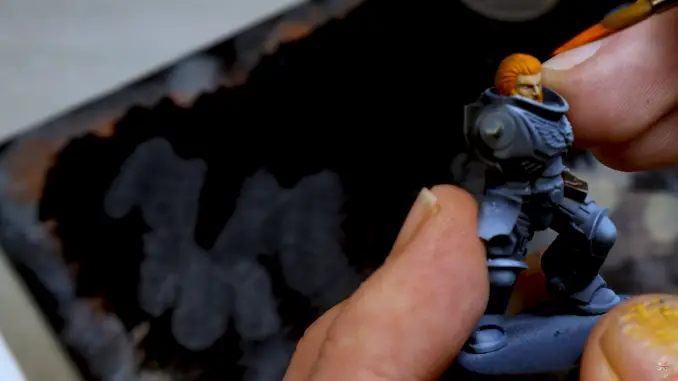
In the video, we used the Air paint to brush on. This goes on a little like a Contrast paint but slightly more opaque, but you can use a carefully thinned version of the Layer paint to get the same effect.
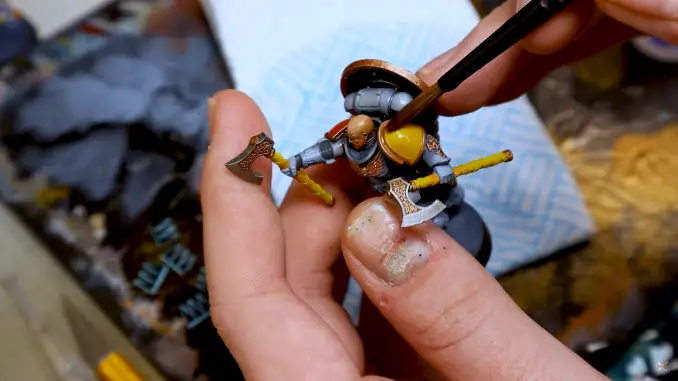
Step 27 – Purity Seals, Part 1
Your model might not have any purity seals on it. If it doesn’t, you can skip this step.
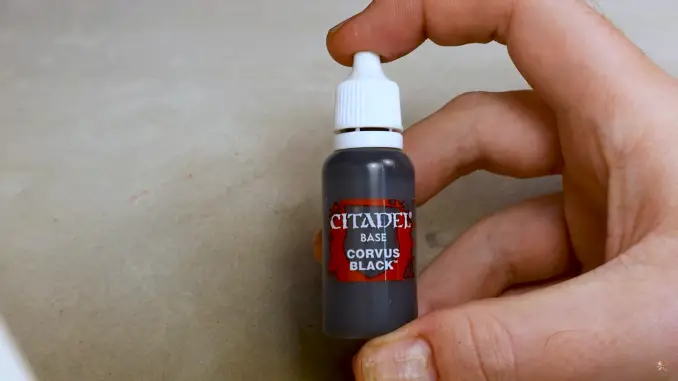
Purity Seals aren’t very Space Wolfey, so we decided to paint ours with Corvus Black to prevent them from standing out.

Use a small brush to do this, as you don’t want to get any paint on the blue of the armour.
Step 28 – Purity Seals, Part 2
Next, we’re going to do the cloth on the Purity seals.
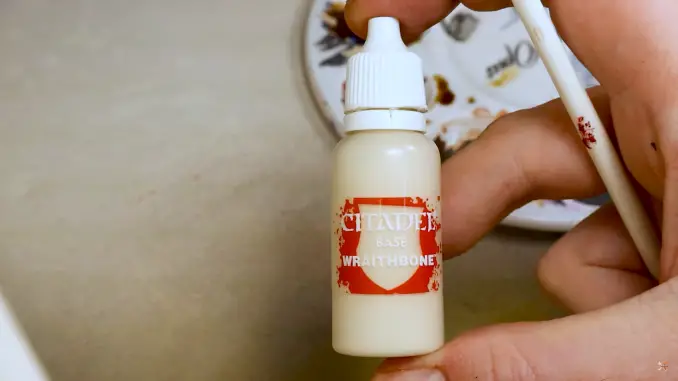
Take some Wraithbone and carefully use this colour to paint the whole area.
Don’t worry too much about building up a good solid colour using lots of layers – we’ll be coming back to this in a minute.
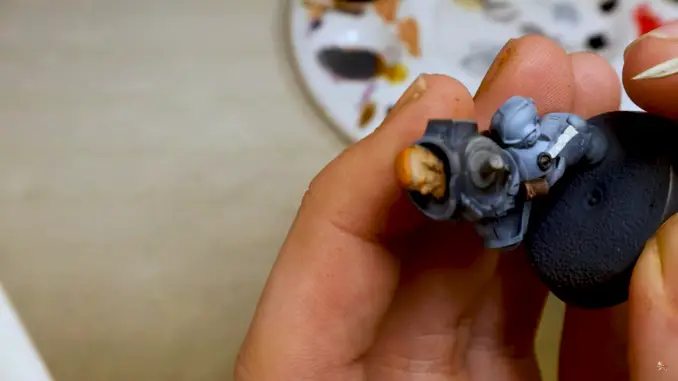
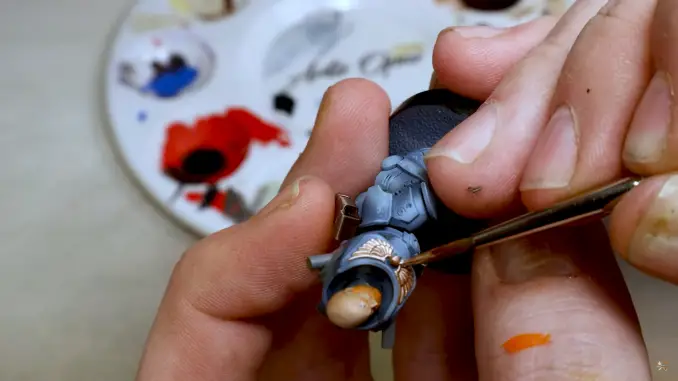
Step 29 – Metals, Part 1
To paint the metal areas on the miniature, we’re going to be using Vallejo Metal Color’s Dark Aluminium.
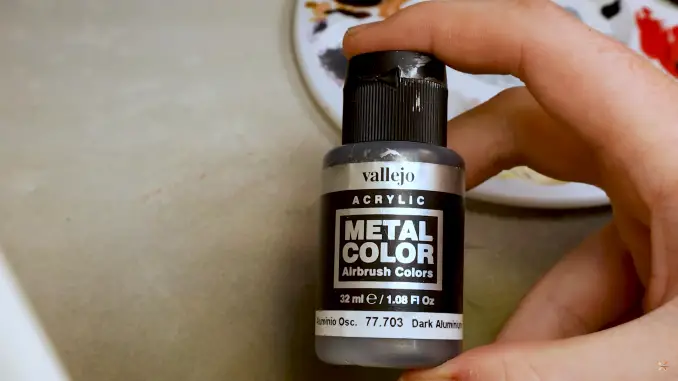
Brush this on to all the metal areas.
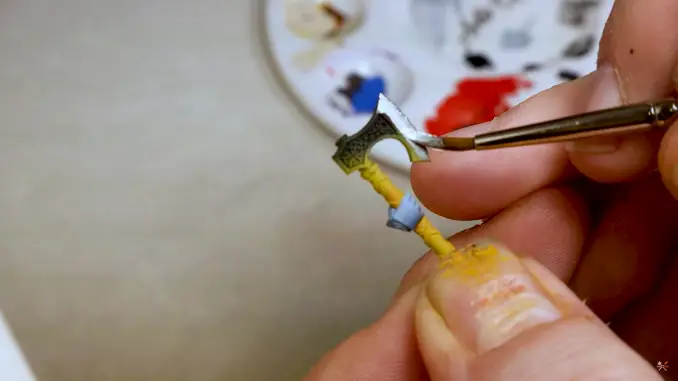
This paint is very smooth and has excellent coverage, so you shouldn’t need more than a single coat.
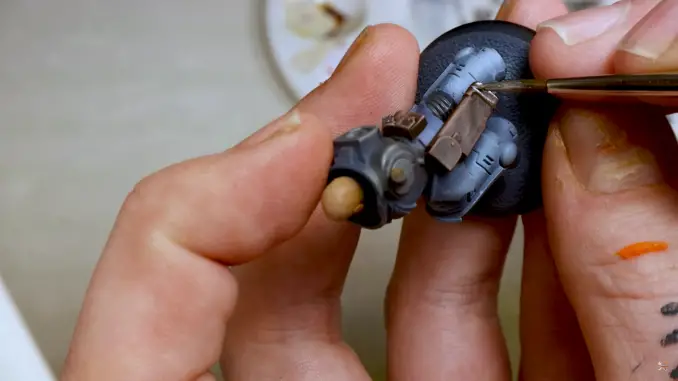
Step 30 – Metals, Part 2
Next, from the same Vallejo paint range, we’re going to use Copper.
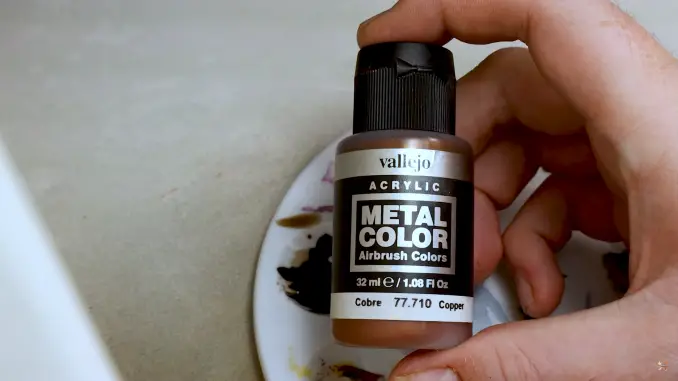
Use this on any of the metallic details on your miniature.
As before, this paint has excellent coverage, so you’ll only need one coat.
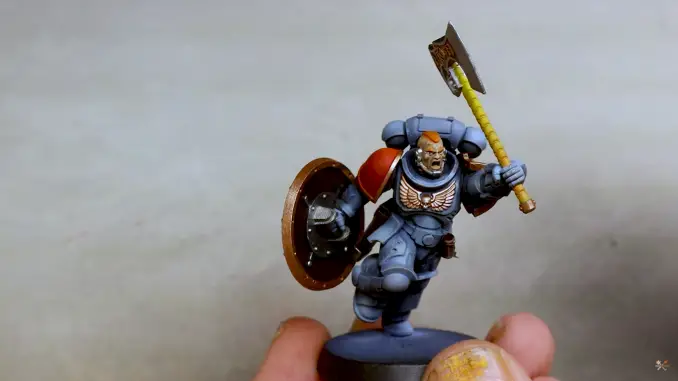
Step 31 – Intermission and Eyes
At this point, the majority of your model will now be painted, and with that most of the hard work complete.
You will, however, need to paint the eyes on your miniatures using any white and a dot of black. ensure you use a fine brush with a good, sharp point on it in order to do this.
If you wish, you could stop painting here and leave your ministers as they are. You’ll have a somewhat impressive squad of Space Wolves to your name. But they do look a little incomplete. If you want to take things a little further, you can do so very easily.
Step 32 – Varnish
Cover your miniature in a layer of gloss varnish.
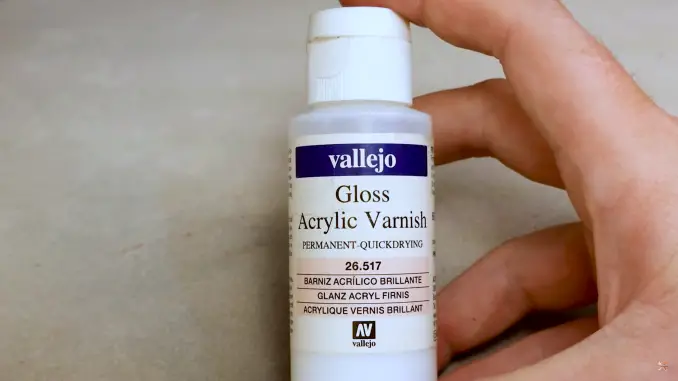
We’re going to be covering the entire miniature in some grime in a few moments, so we need to make sure that everything we’ve done so far is preserved.
Apply it carefully using either an airbrush or in thin coats with a regular brush. You don’t want this to gloop up in your details.
Leave this a good few hours – if not a whole day – to dry. You don’t want to be applying any products over this whilst it’s still wet.
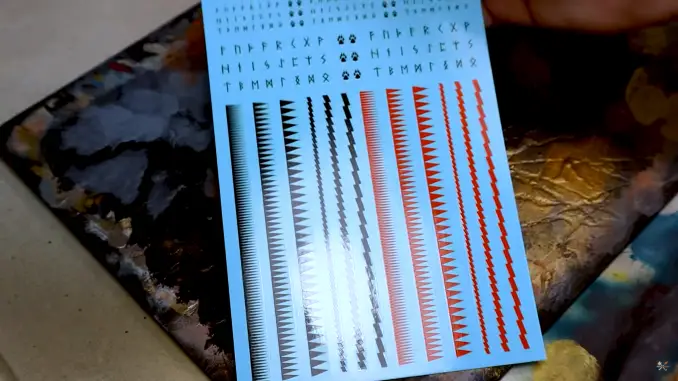
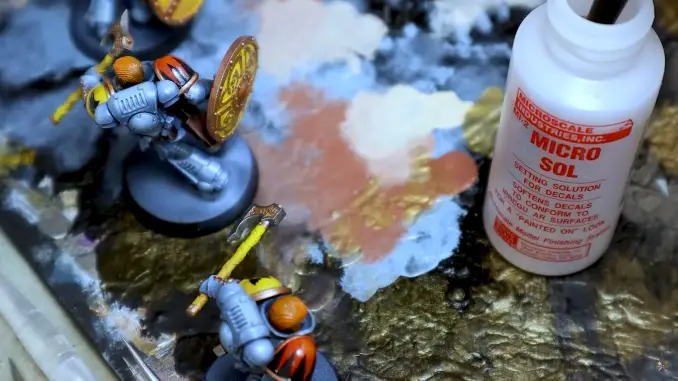
Step 33 – Transfers, Part 1
Next, we’re going to apply some transfers. In the video, we used some transfers from The Mighty Brush, as well as some of the trnasfers from the Indomitius box.
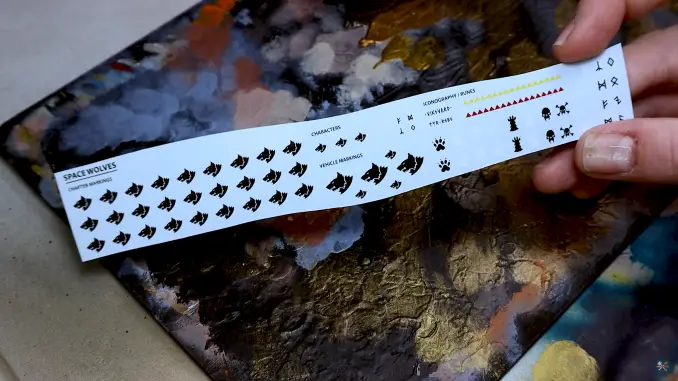
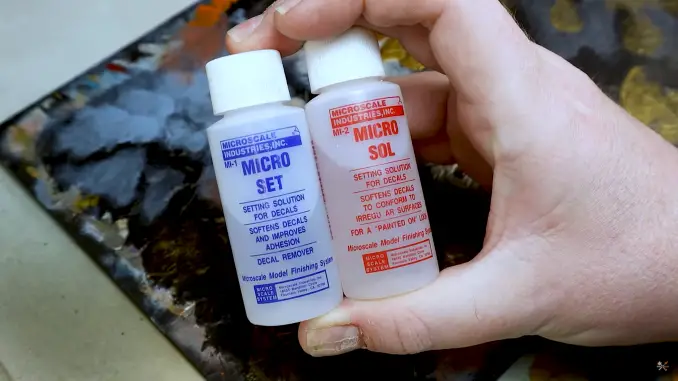
First, you’ll need some Micro Set and Micro Sol.
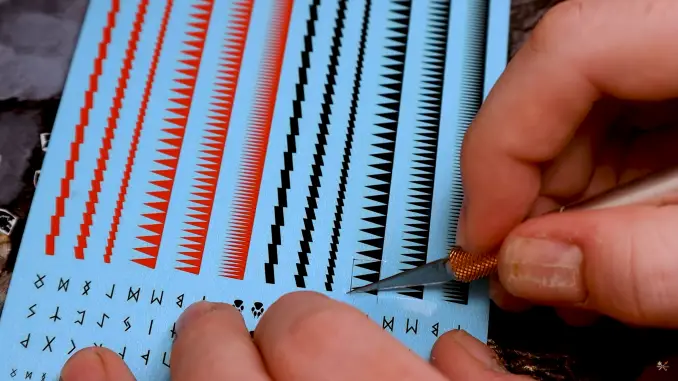
Next, and using great care, cut the transfers you want to use from their sheets.
Place your transfers onto a sheet of kitchen towel and soak them with water. Leave them for a moment, we’ll come back to them shortly.
Step 34 – Transfers, Part 2
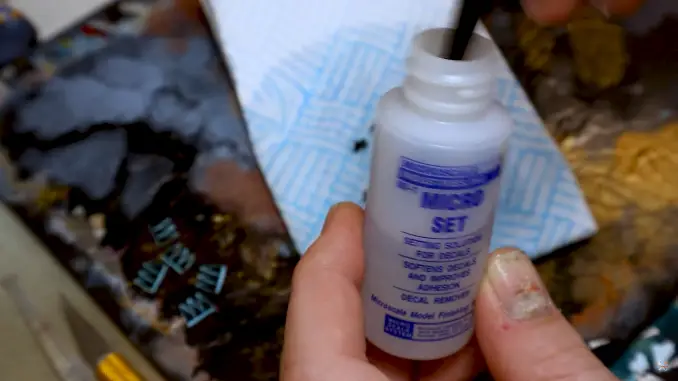
Take some Micro Set and apply it liberally to the area of your miniature you want to apply your transfer to.
Then, slide your transfer off the sheet and onto the area you want to apply it to.


Take some a cotton bud (or q-tip) and move the transfer into position.
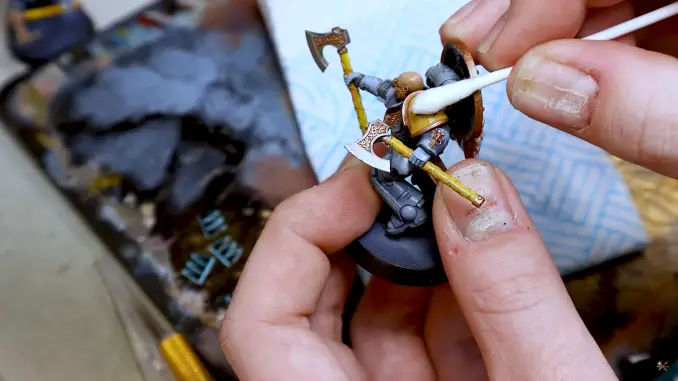
Try to remove as much of the excess fluid from the miniature as you can. Again, use either a clean brush or a cotton bud to do this. Leave this for an hour or so to dry.
Step 35 – Transfers, Part 3
Once the Micro Set has dried, apply some Micro Sol to the areas where there are transfers.
If you see any areas where there are wrinkles, try to press these down with a cotton bud.
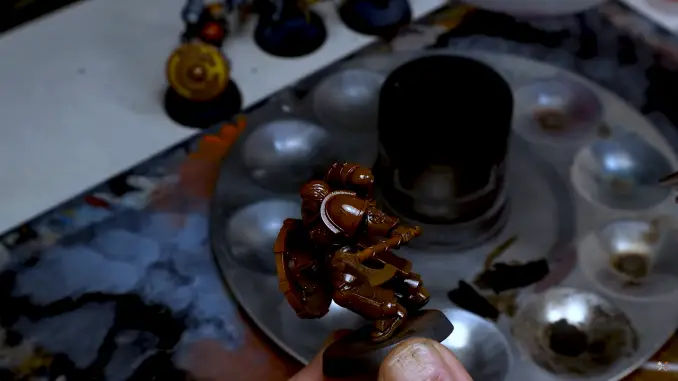
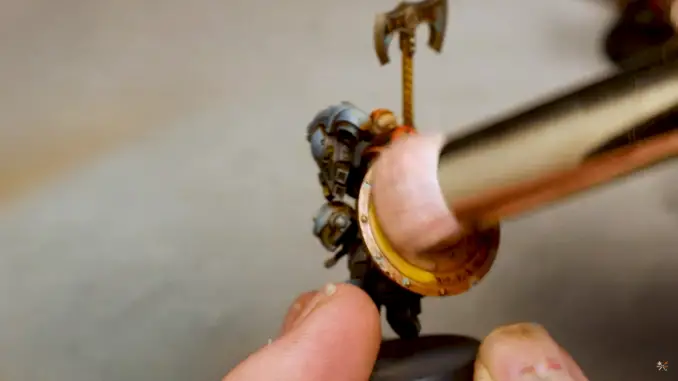
Step 36 – Weathering, Part 1
Take some Abteilung 502 Shadow Brown.
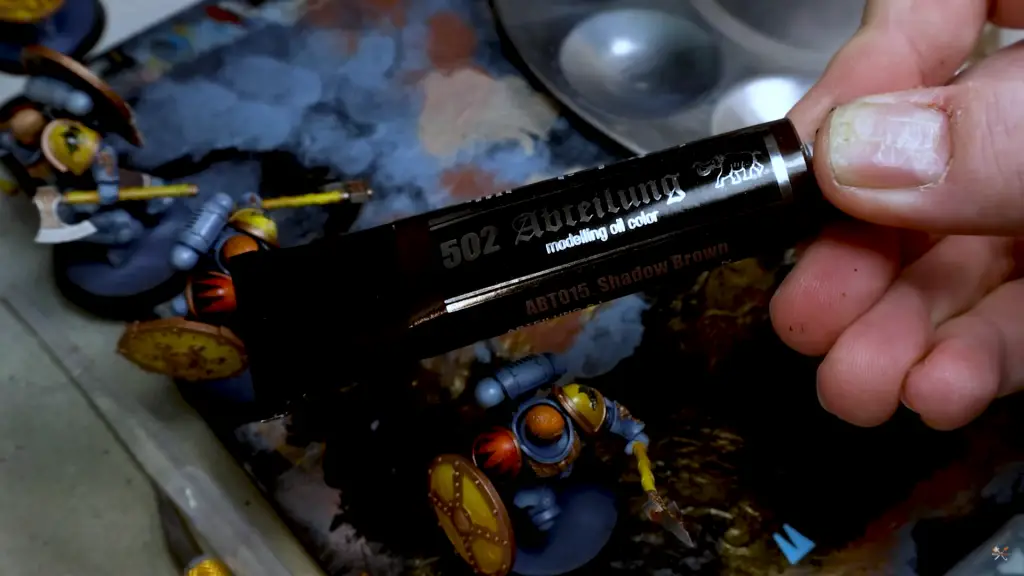
Thin it with mineral spirits.
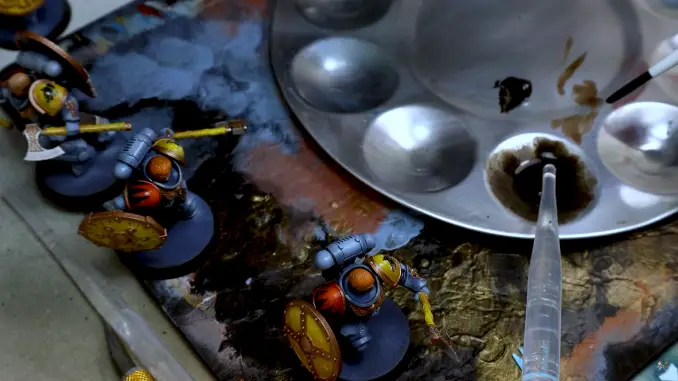
Once the paint has a nice, thin consistency, apply it to the entire miniature. Yes, all of it.
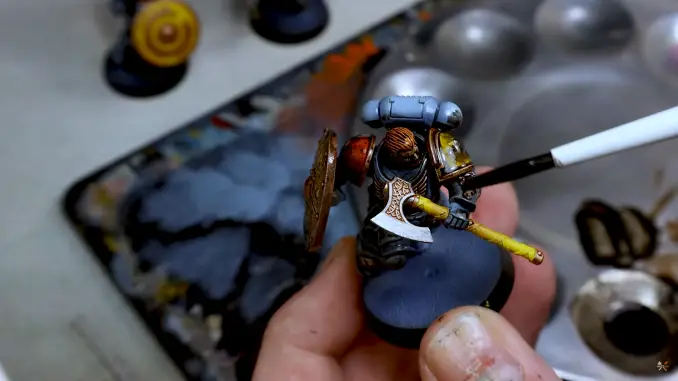
Don’t be too shy, get it on the face, the hair, the weapon, everywhere.
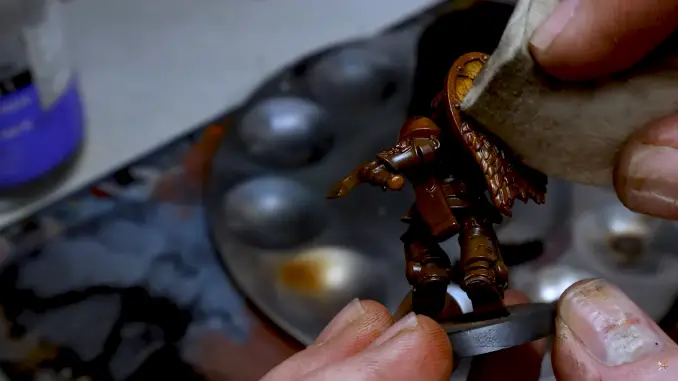
Step 37 – Weathering, Part 2
When the oil is dry, start taking it off the raised areas with something like a make up sponge.
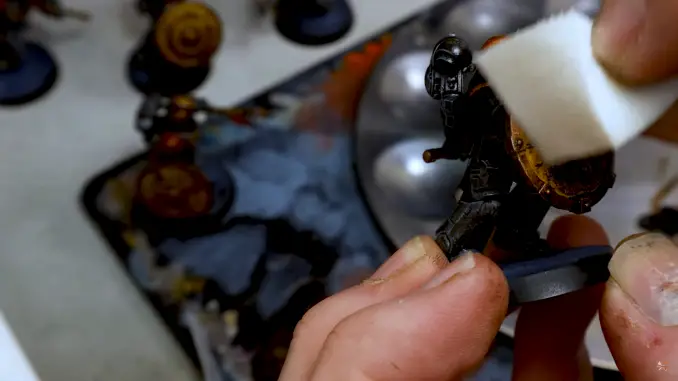
You’ll want to make sure that ths oil stays in the recesses and around any detaiuls to give a nice, weathered look.
Step 38 – Weathering, Part 3
Take some Abteilung 502 Dark Rust and thin it with mineral spirits again, just as you did with the Shadow Brown.
Then, apply it to the entire miniature again.
Once it has dried, wipe it off with a make up sponge.
You should be left with a weathered, realistic, multi-layered weathered look.
Step 39 – Weathering, Part 4
Take some Light Rust Enamel Wash from AK interactive,
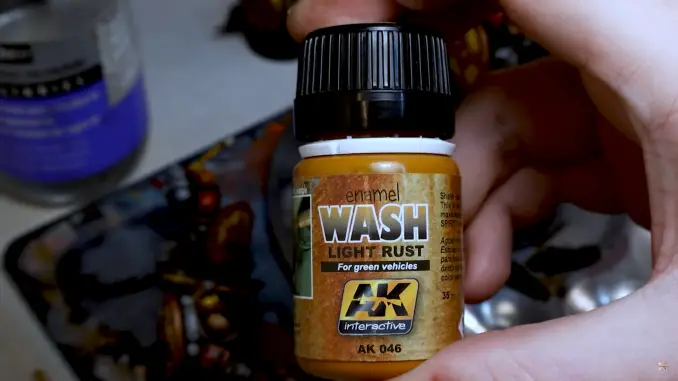
Carefully apply it into the most shadowy, darkest recesses on the miniature’s weapons and armour.
This will just help add a few little points of visual interest to the miniature where there are some very dark patches
Step 40 – Weathering, Part 5
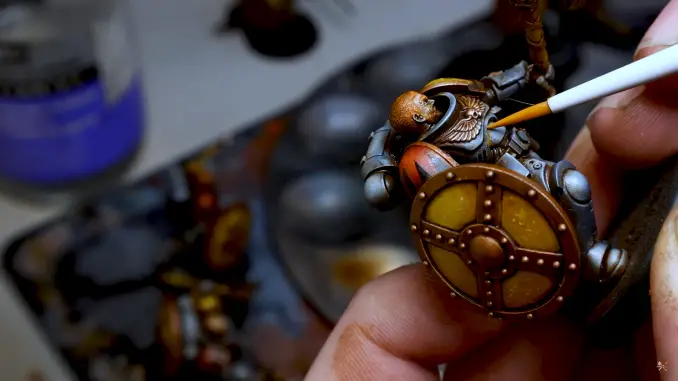
Next, take some Abteilung 502 Copper Oxide Blue.
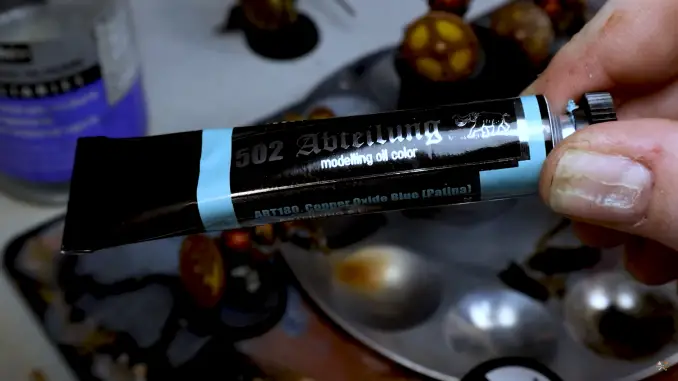
Thin it with mineral spirits, as usual, and apply it to some of the copper-coloured details, such as the aquila on the chest.
Then, once it’s dry, wipe off any excess.
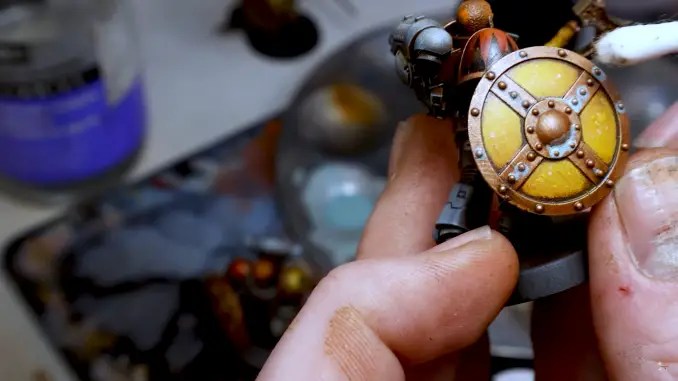
You should be left with a realistic, oxidised copper look on those copper areas.
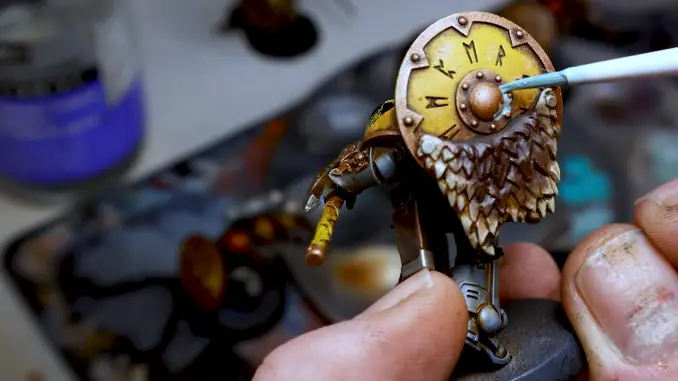
Step 41 – Weathering, Part 6
For the next bit of weathering, take some Abteilung 502 Fantasy Turquoise Lights

Apply this to any of the deepest, most oxidised and rusted parts of the miniature.
This is a really vivid blue, so will help add more visual interest to the figure.
Step 42 – Finishing Touches
We’re on the home stretch now. Take some matt varnish.
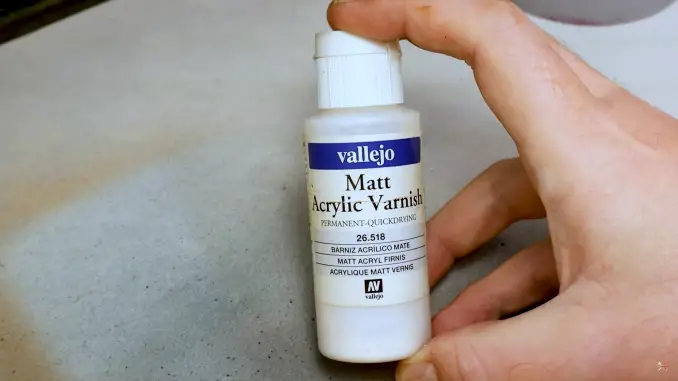
Before applying the matt varnish, give the model a quick dust down to ensure there aren’t any hairs or fibres on it.
Once you’re sure the model is clean, apply the varnish carefully.
In our video, we use an airbrush for this step.
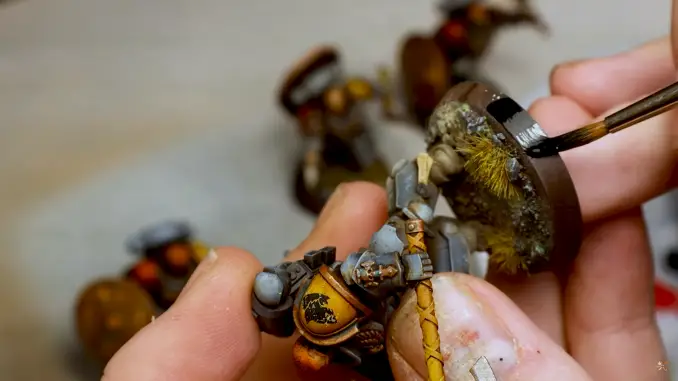
Step 43 – Basing, Part 1
This part is entirely up to you. Base the models however you see fit.
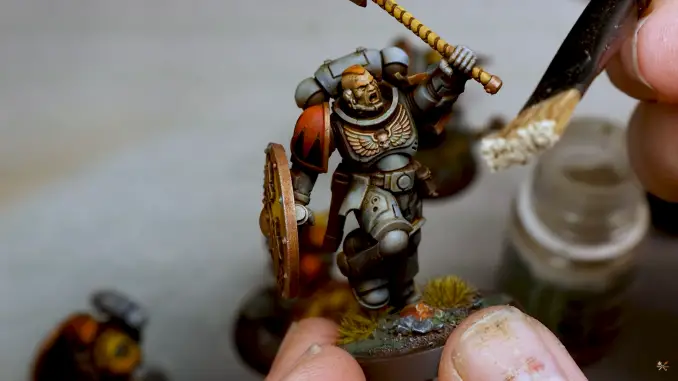
Here’s what we did for inspiration.
Step 44 – Basing, Part 2
Paint the rim of the model black to finish it off.
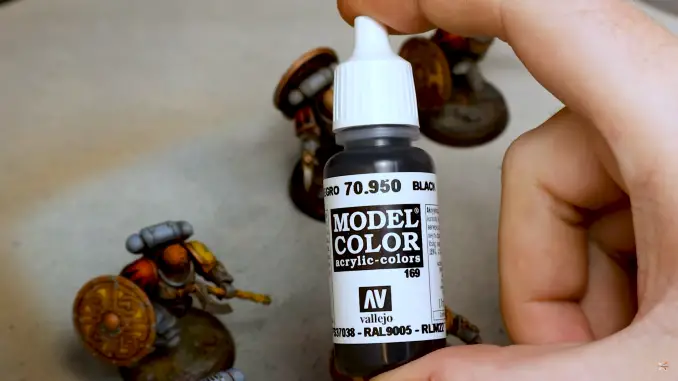
We use Vallejo Model Color Black, which is just an excellent paint by any measure.
Carefully run your brush around the very edge of the base, taking care not to get any black paint on the top of the base or any other part of the miniature.
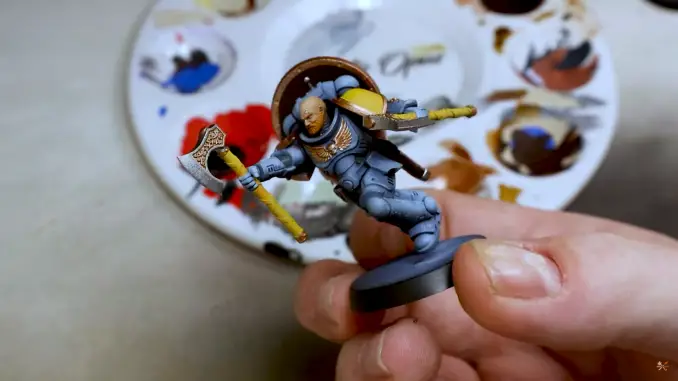
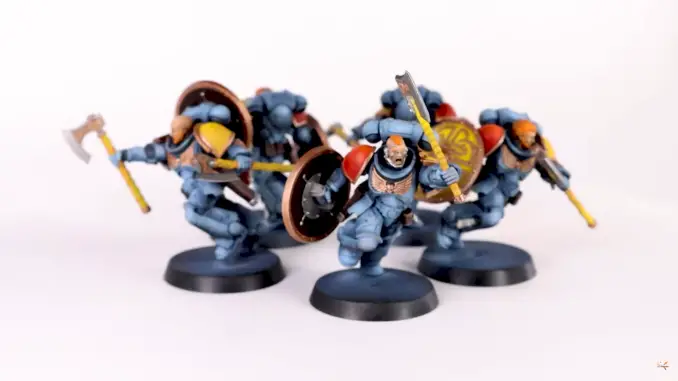
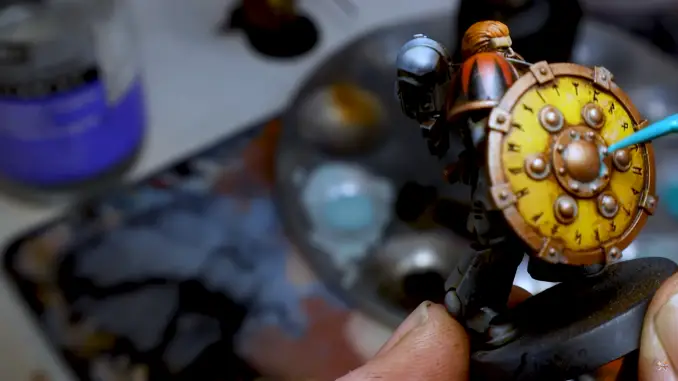
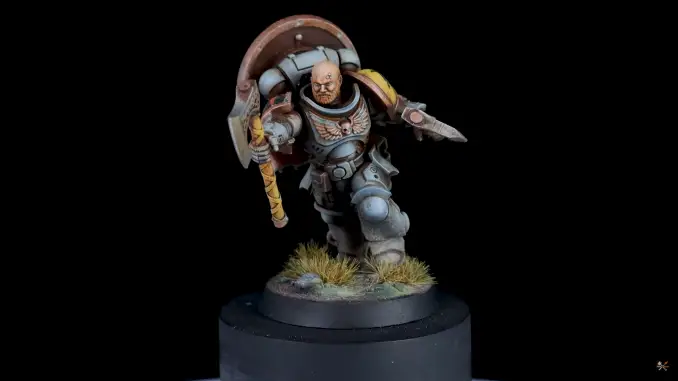
How to Paint Space Wolves Space Marines for Warhammer 40,000 – Completed Models
If you’ve followed all the steps to this guide, your models should look a little something like this.
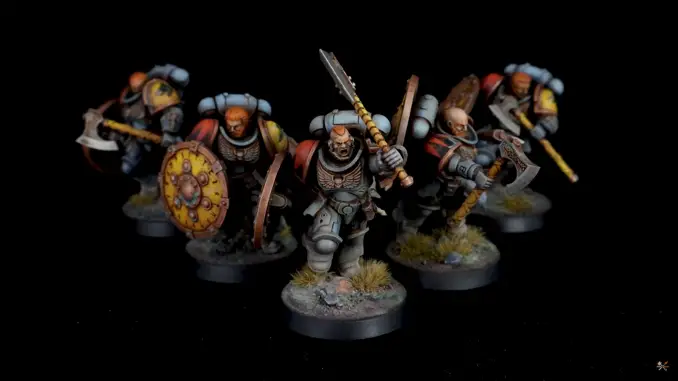
That grime and weathering that we applied in the last quarter of the guide really helps give the impression that these are battle-hardened warriors, slogging through dirt and carnage on some far-off world.
Liked this guide and want to see more? Have questions about what products are used? Or maybe there’s a guide you’d like to see us make?
Let us know in the comments below!
Please Note: This site uses affiliate links. Our Affiliate Partners are shown below
(Affiliate links will result in compensation to the site on qualifying purchases)
Click this link & buy your hobby stuff from Element Games for the UK & Europe to support FauxHammer.com – Use Code “FAUX2768” at the checkout for double reward points.
Our Affiliates / Hobby Stores
- UK: Element Games, The Outpost, Wayland Games, Mighty Lancer, Goblin Gaming, Forbidden Planet, Model Scenery Supplies, eBay, Amazon
- US/Canada: MTechCave, GameKastle, eBay (US), eBay (CA), Amazon
- Germany: Taschengelddieb
- Europe: eBay (DE), eBay (FR), eBay (ES), eBay (IT), Amazon
- Australia: eBay, Amazon
- Global: RedGrass Games, Warcolours
- 3D Printers: Phrozen 3D, Elegoo, Anycubic
FauxHammer – Latest Video on YouTube
What did you think of this Tutorial? please let us know in the comments.
If you like what we’re doing here you could really help encourage more content with a share on any social media platform.
Click the share links at the bottom of this screen (or on the left for computers and tablets)
Want to keep updated with the blog? You can subscribe in the sidebar for RSS or by email below
(Sidebar is below the article on Mobile Devices)