How to Paint Imperial Fists Space Marines for Warhammer 40,000
Last Updated on May 4, 2022 by FauxHammer
Today, we’re going to show you a way of painting your Imperial Fists Space Marines using a couple of different techniques. Aimed at making your Space Marines look as good as possible, but with the focus on very little time and with the barest of skill. This is going to result in a slightly grimdark tone whilst making the painting process as straightforward as possible, this guide is aimed at any painter, no matter their skill or experience. So let’s get on with How to Paint Imperial Fists Space Marines.
Please Note: This site uses affiliate links. Our Affiliate Partners are shown below
(Affiliate links will result in compensation to the site on qualifying purchases)
Click this link & buy your hobby stuff from Element Games for the UK & Europe to support FauxHammer.com – Use Code “FAUX2768” at the checkout for double reward points.


Our Affiliates / Hobby Stores
- UK: Element Games, The Outpost, Wayland Games, Mighty Lancer, Goblin Gaming, Forbidden Planet, Model Scenery Supplies, eBay, Amazon
- US/Canada: MTechCave, GameKastle, eBay (US), eBay (CA), Amazon
- Germany: Taschengelddieb
- Europe: eBay (DE), eBay (FR), eBay (ES), eBay (IT), Amazon
- Australia: eBay, Amazon
- Global: RedGrass Games, Warcolours
- 3D Printers: Phrozen 3D, Elegoo, Anycubic
FauxHammer – Latest Video on YouTube
How to Paint Imperial Fists Space Marines for Warhammer 40,000 – Paints and Tools
Paints
Flat Colours
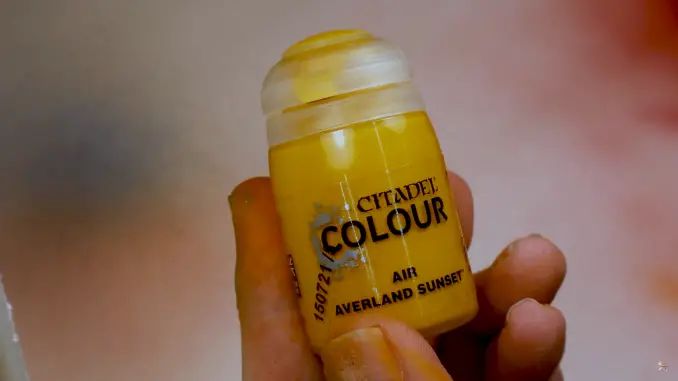
- Averland Sunset Air (Citadel)
- Troll Slayer Orange Air (Citadel)
- Yriel Yellow (Citadel)
- Rhinox Hide (Citadel)
- Deathclaw Brown Air (Citadel)
- Kislev Flesh Air (Citadel)
- Wraithbone (Citadel)
- Bright Warm Grey (Pro Acryl)
- Blue Black (Pro Acryl)
Metallics
- Vallejo Metal Color Duraluminium (Vallejo)
Washes/Contrast
- Gryph-Hound Orange (Citadel)
- Flesh Tearers Red (Citadel)
- Ultramarines Blue (Citadel)
- Snakebite Leather (Citadel)
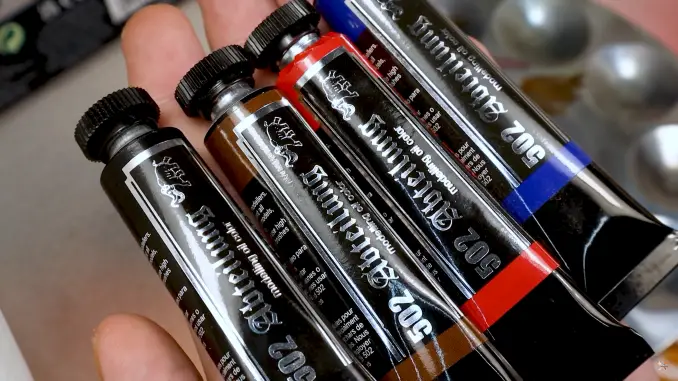
Oil Paints
- Abteilung 502 Black Oil (Abteilung)
- Abteilung 502 Burnt Umber(Abteilung)
- Abteilung 502 Red Oil (Abteilung)
- Abteilung 502 Midnight Blue (Abteilung)
Consumables
- Vallejo Gloss Acrylic Varnish (Vallejo)
- Vallejo Matt Varnish (Vallejo)
- Contrast Medium (Citadel)
- Mineral Spirits
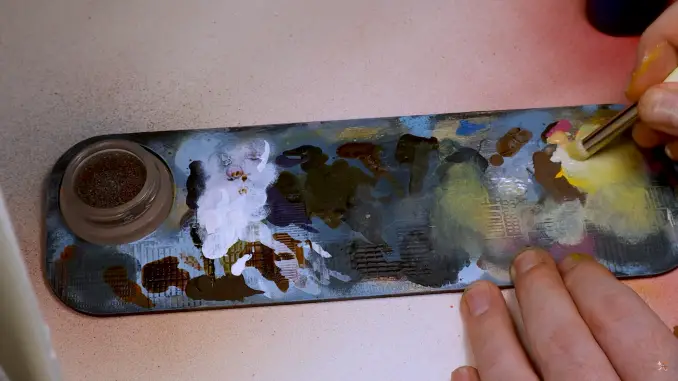
Tools
- An Airbrush. Not necessary, but much much faster for base layers, Any airbrush should do here (we use a Badger Sotar 20/20 for priming, and a Cult of Paint Infinity CR+ for everything else).
- A set of domed drybrushes (we use Artis Opus Series D drybrushes).
- Any regular paintbrushes with sharp tips for painting base layers. (We use an Artis Opus Series S #3 for everything, except the finest details where a Series M #0 is used).
- Putty for masking
- Make-up Sponge & Cotton Buds (Q-Tips)
Artis Opus – FauxHammer Starter Set
If you are after a good set of sable brushes, please check out our collaboration set of Artis Opus brushes . This is the “only” mixed-series set available from Artis Opus containing brushes from the S, M & D ranges.
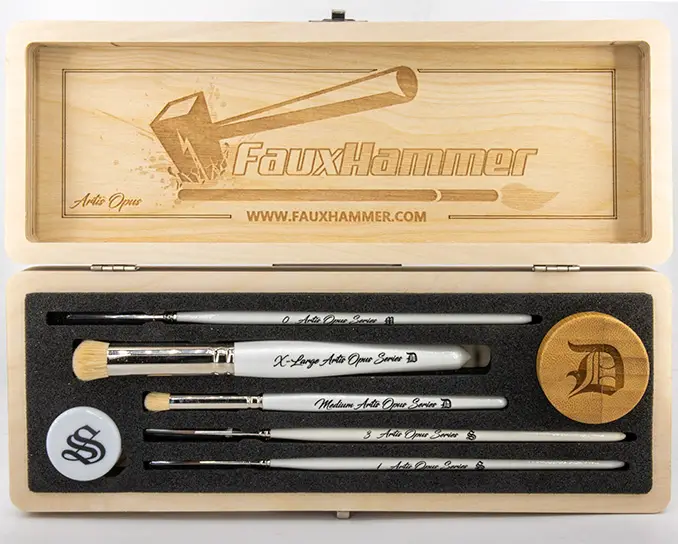
These are the only brushes we use – with this set you can follow all of our guides to the letter. Read more about this unique set here…
How to Paint Imperial Fists Space Marines for Warhammer 40,000 – Introduction
If you’re after an easy way to paint your Imperial Fists to a high standard, this is the guide for you. Using a host of hobby hacks to make the process as easy as possible, our guide for painting Imperial Fists is designed to take the “pain” out of “painting”.
There are two ways you can follow this guide. The first is by using the written instructions you’ll find in this article. The second is by painting along with us over on our YouTube channel.
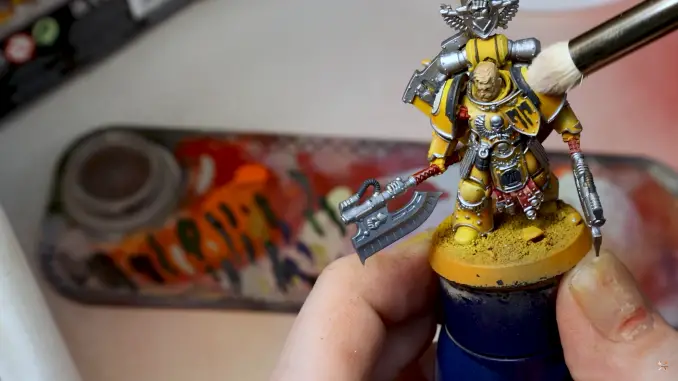
In this article and the accompanying video, We are painting a Fafnir Rann miniature from the Horus Heresy range, but you can use this guide to paint any of your Imperial Fists miniatures.
How to Paint Imperial Fists Space Marines for Warhammer 40,000 – Video
And since we just mentioned it, that video is available right here.
Don’t forget to like, comment, hit the notification bell and subscribe.
How to Paint Imperial Fists Space Marines for Warhammer 40,000 – Tutorial
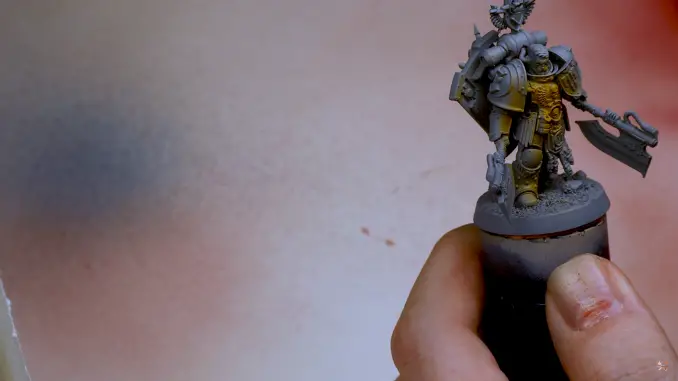
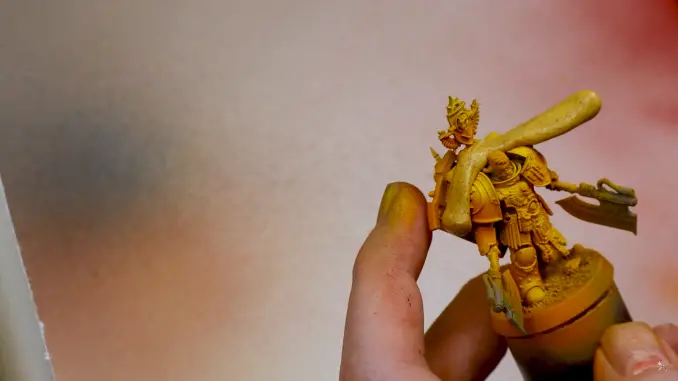
How to Paint Imperial Fists Step 1 – Priming and Basecoating
The first thing you need to do is prime your miniature. In the video, we use a grey primer from Vallejo. Lighter grey or white primers are the best colour to use when painting figures the majority of which are yellow, as they really make the yellow colour strong and vibrant.
Yellow’s are notoriously light when it comes to pigmentation, so coverage will take several layers. Save time (and details) by starting with a light or mid-tone primer.
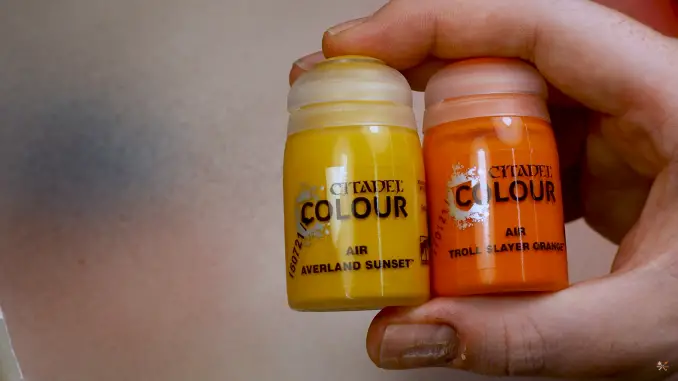
If you’re airbrushing, the next thing to do is create a 1:1 mix of Averland Sunset and Trollslayer Orange Air Paints from Citadel. You can also do this with a regular brush, using Citadel’s Averland Sunset Base and Trollslayer Orange Layer.
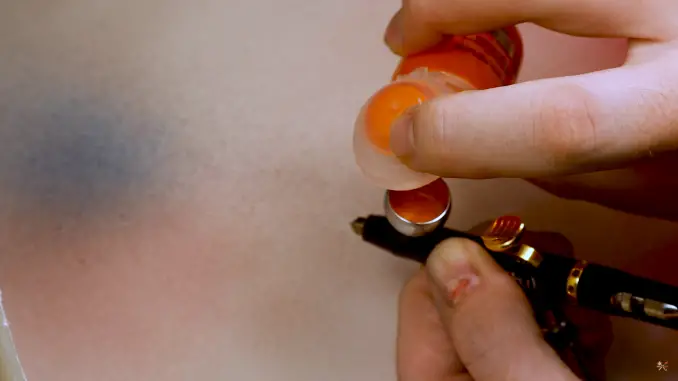
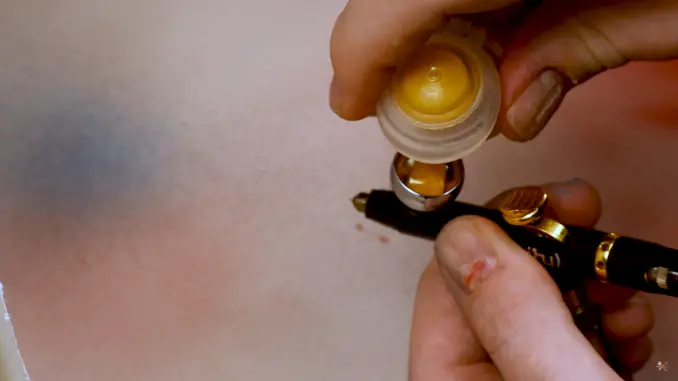
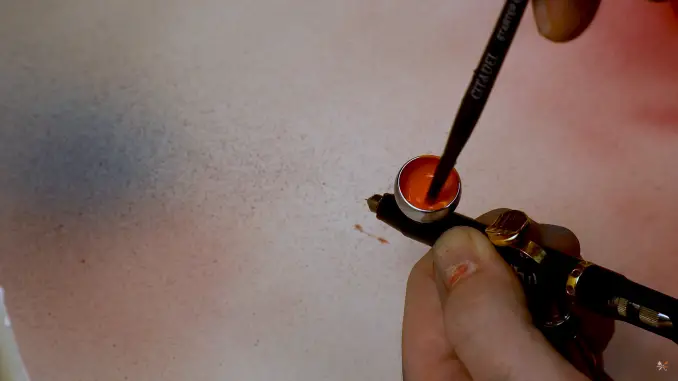
Mix the paints until you get a nice, deep, orangey-yellow colour and apply this in an even coat to your figure. You can add more orange for a darker armour shade if you like. This would result in more tonal contrast on your finished model.
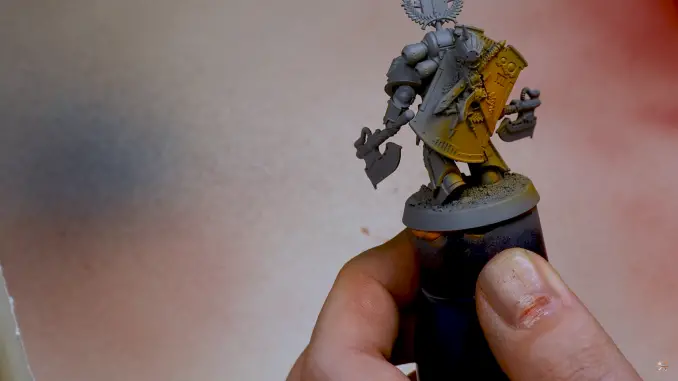
Whether you’re using a regular brush or an airbrush, be sure to build up a good, solid coverage across the entire figure using thin layers of paint. If you’re using a regular brush, take care to ensure that the previous layer is fully dry before painting the next one.
Once you have covered the entire figure, give it a few moments to ensure the paint is fully dry before moving on to the next stage.
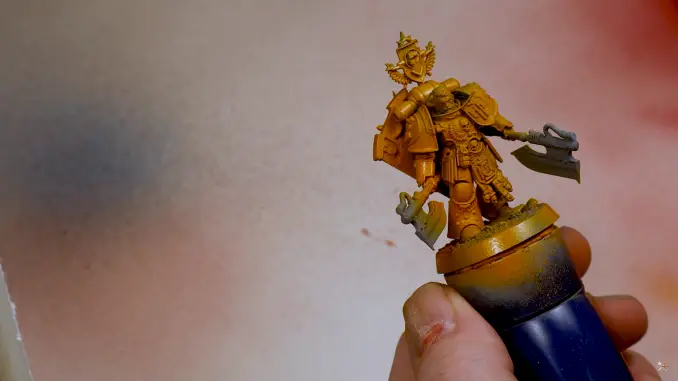
How to Paint Imperial Fists Step 2 – First Highlight
The next step is to create your first highlight over that entire yellow area. To do this, we’re going to use Averland Sunset again. If you’re an airbrush user, use the Citadel Air paint. If you’re using regular brushes, use the Citadel Base paint and a large drybrush for this step.
Focus your air/drybrushing on the larger, most raised areas of the figure that would be most likely to catch the light. Pick out individual shapes on the model and highly them with spots of colour, as best you can – so the tops of shoulder pads, backpacks, knees, feet or hands. Arms and legs are cylinders so if you have the control. ad a thin line of highlight across the cylindrical shape.
You can be quite heavy with this highlight, as we want to build up a good level of transition between the previous layer of orangey-yellow and this more true shade of yellow.
How to Paint Imperial Fists Step 3 – Second Highlight
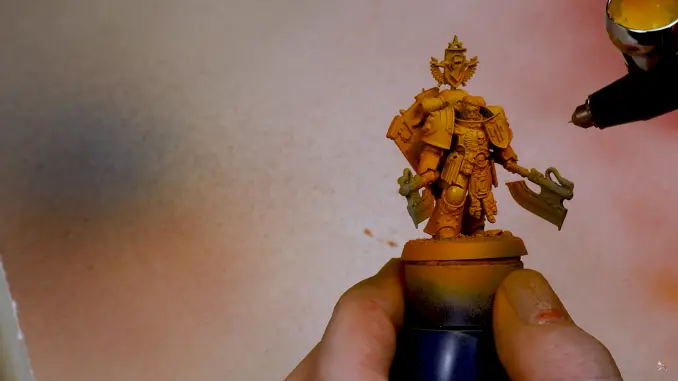
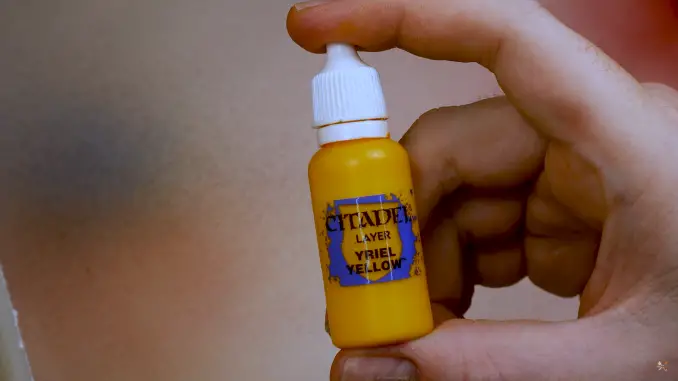
Once the paint from the previous layer has dried, you’ll need to apply a slightly more selective highlight of Yriel Yellow.
If you’re a regular brush user, apply a much lighter drybrushed layer to those areas you previously applied a heavier layer of Averland Sunset to.
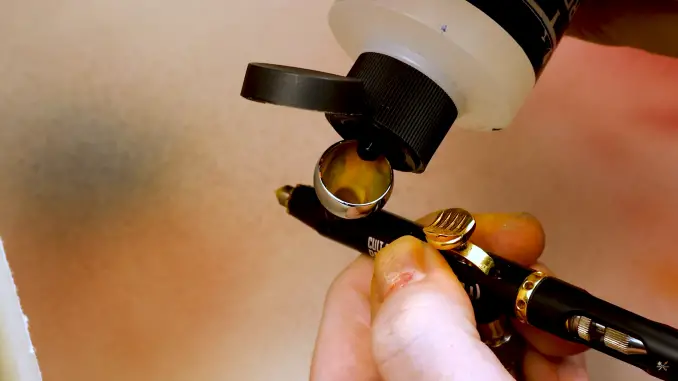
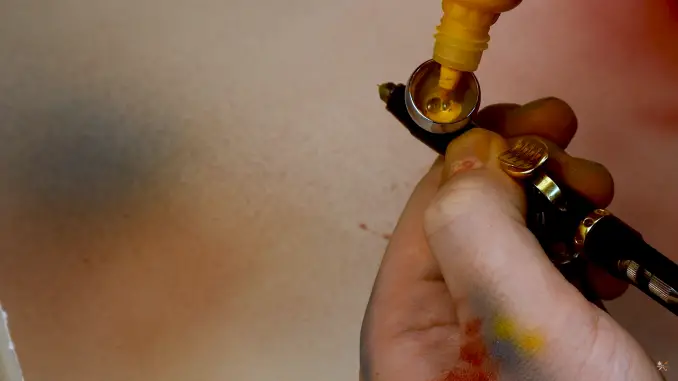
If, however, you are using an airbrush, you’ll need to mix a little airbrush thinner into your Yriel Yellow. Aim for a 2 drops of Vallejo Airbrush Thinner and 4 or 5 drops of Yriel Yellow in your airbrush’s chamber, then give them a good mix together.
Apply the bright yellow highlight to those most raised and obvious areas again, but make them spots and lines smaller and thinner respectively. keep it within the previous highlight and take care to create a smooth transition between the new, brighter shade of Yriel Yellow and the previous highlight of Averland Sunset.
As always, wait for the paint to dry fully before moving on to the next stage.
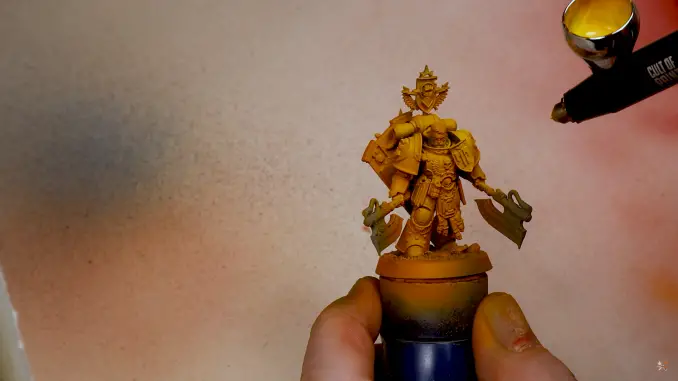
How to Paint Imperial Fists Step 4 – Reinforce Shadows
The next step is entirely optional, and is easiest to complete if you’re using an airbrush. (though you can also glaze it)
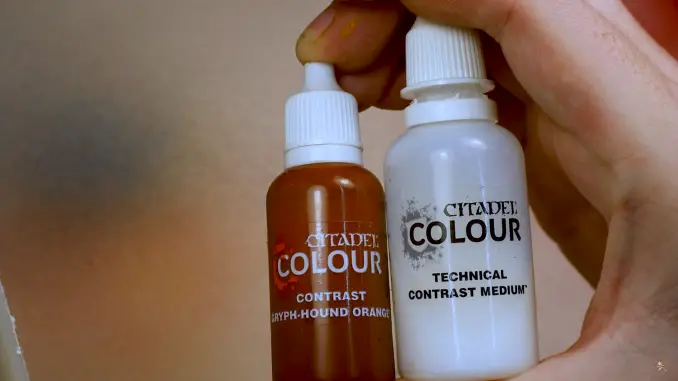
You’ll need Citadel’s Gryph-hound Orange and some Contrast Medium. Thin the Gryph-hound Orange with a little medium to create a muddy orange colour.
What you need to do is airbrush the underside of the model, essentially doing the opposite of what you did when highlighting the figure.
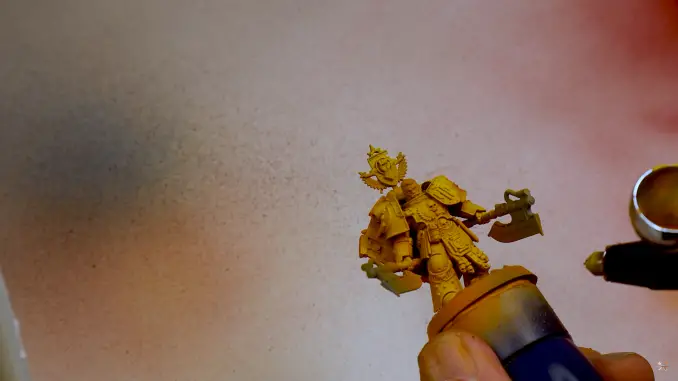
Look for areas such as the underside of the knees, the backs of the gauntlets, and the bottom part of the shield.
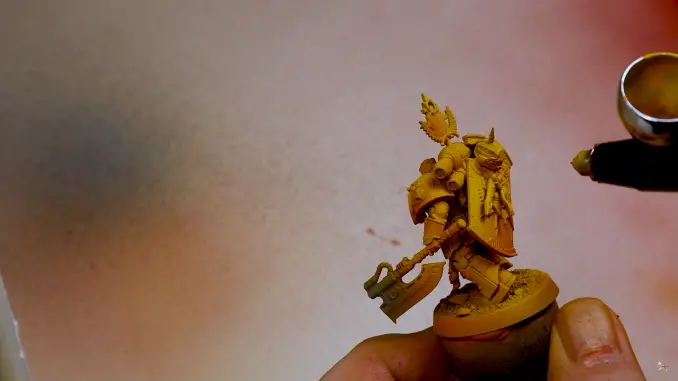
Take care to apply this only to those areas that would be darkest. Here, all you’re wanting to do is reinforce those shadowy areas – not re-paint whole sections of the figure.
How to Paint Imperial Fists Step 5 – Masking
Next up, we’re going to paint the face. If you’re using an airbrush, you’ll need to make sure all the areas of the figure you don’t want to get flesh colours on are covered up.
We sing the praises of Silly Putty, as it’s soft, malleable, and comes off easily. (blue-tack is far too sticky)
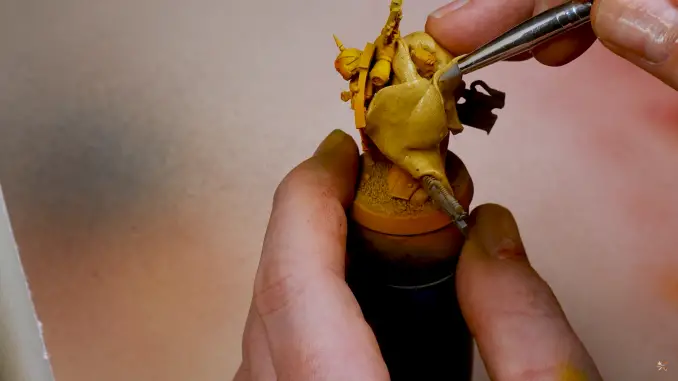
Take some time to make sure all the areas you don’t want to be covered with skin colours are fully masked. Again, this step doesn’t matter so much if you’re using regular brushes.
How to Paint Imperial Fists Step 6 – Painting Faces, Part 1
First things first, base the whole face with Rhinox Hide.
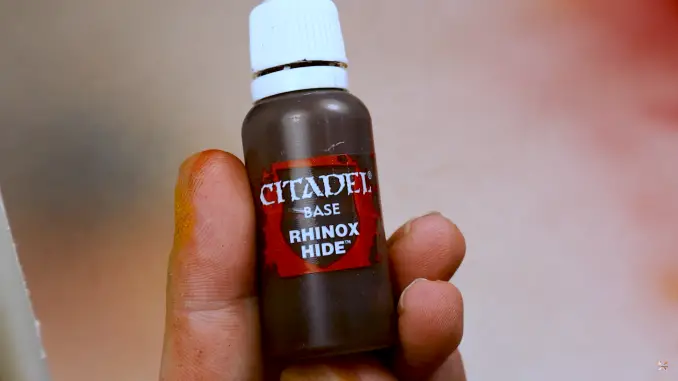
Rhinox hide has a lovely, reddish tone to it which makes it a good paint to use when painting ruddy, humanoid flesh.
Take care to build up a solid but thin layer of paint over the whole face, using either an airbrush or a regular brush. Make sure the paint is thinned appropriately, as Rhinox Hide is only available as a base paint and can go on quite thick.
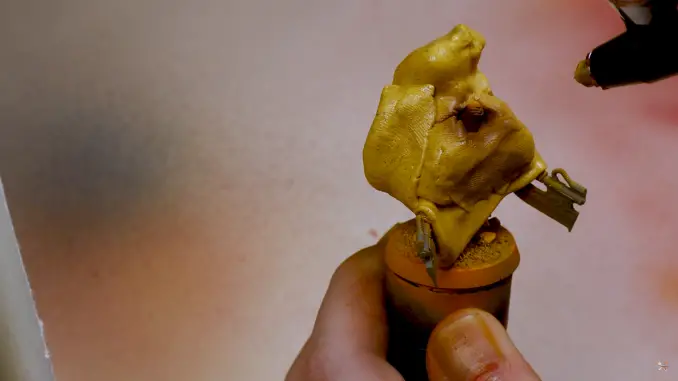
How to Paint Imperial Fists Step 7 – Painting Faces, Part 2
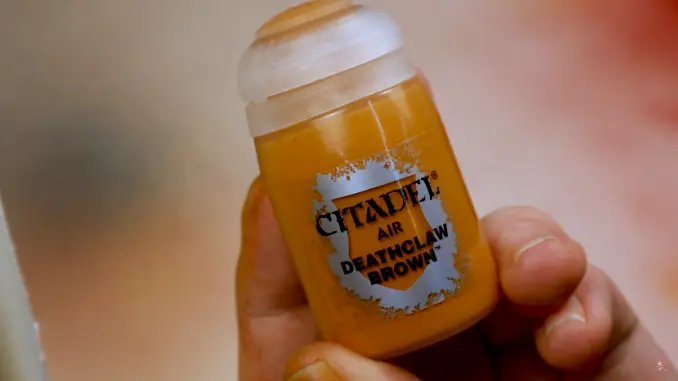
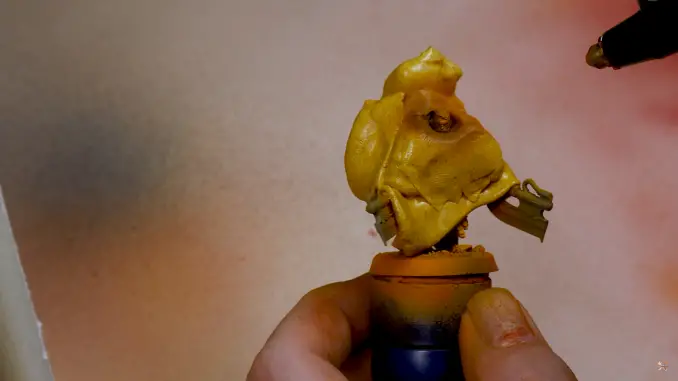
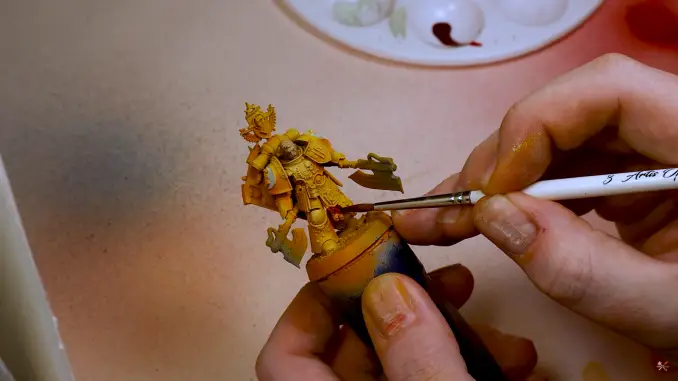
Next, use Deathclaw Brown to create a mid-tone. If you’re using an airbrush, use the Citadel Air version. If you’re using regular brushes, use the Layer version.
Focus this on all but the darkest, most recessed areas of the face. If you’re using an airbrush, try and ensure you spray the face from above, a similar angle to the photo below.
If you’re using regular brushes, now’s a good opportunity to break out a drybrush and do a fairly heavy, all-over drybrush layer.
How to Paint Imperial Fists Step 8 – Painting Faces, Part 3
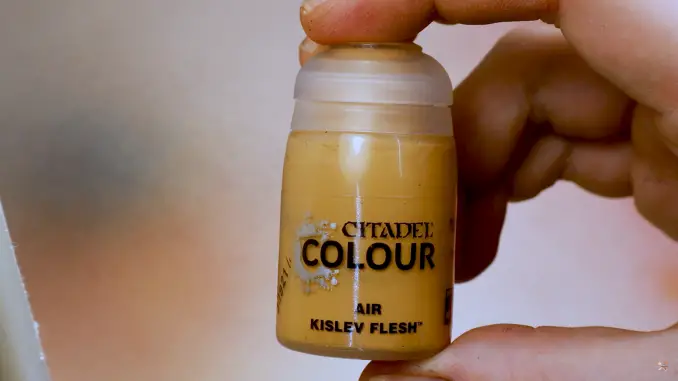
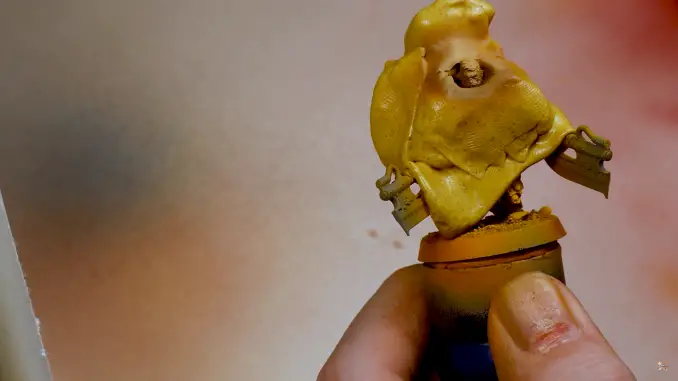
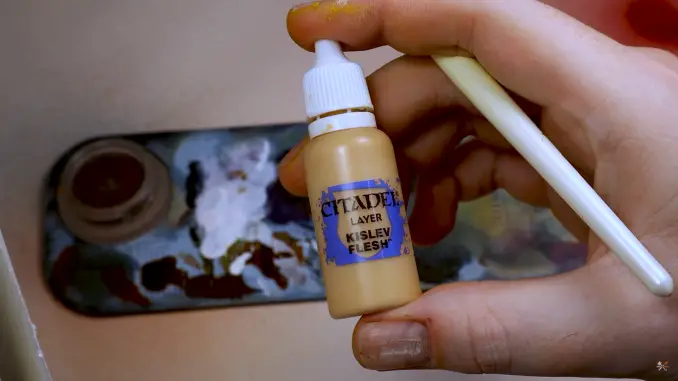
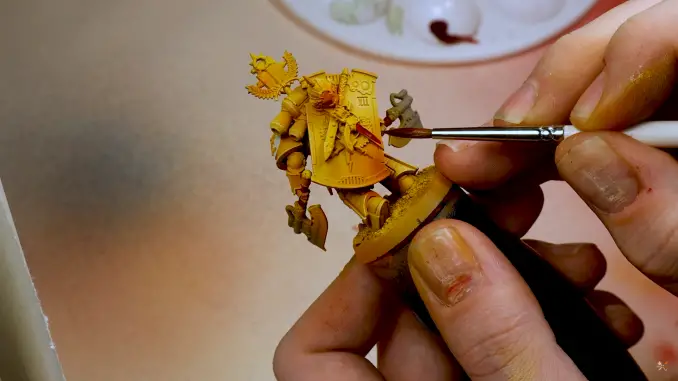
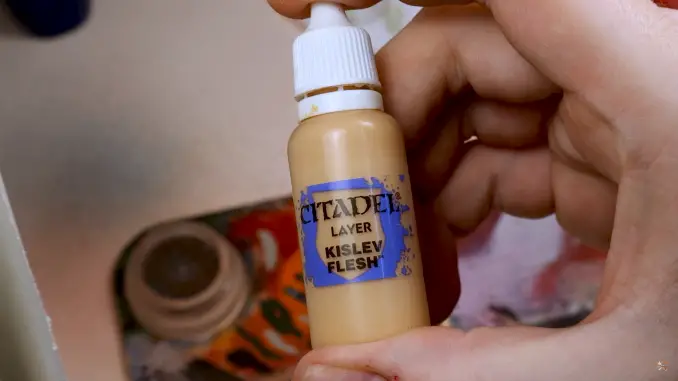
Finally, highlight the face with Kislev Flesh. Again, if you’re using an airbrush, use the Citadel Air paint. If you’re using regular brushes, use the Layer version.
As you did with the Deathclaw Brown, if you’re using an airbrush try and aim the brush down, and from the side of the face. This will show contrast from above and across which generally adds a touch more interest. Use very short, controlled blasts through your airbrush in order not to overwhelm the model with paint.
If you’re using a drybrush, make sure you brush fairly lightly. You might find it useful to brush in only one direction, so from the top down.
How to Paint Imperial Fists Step 9 – Remove Masking
If you masked the miniature with putty or another material, now is the time to remove it.

If you didn’t mask the model, skip ahead to step 10.
How to Paint Imperial Fists Step 10 – Edge Highlighting, Part 1
For this step, you’ll need a good drybrush, some Wraithbone paint form Citadel, as well as a tiny dot of Yriel Yellow.
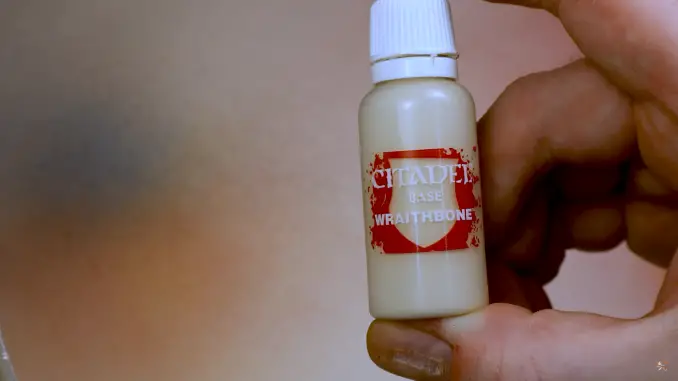
Mix the two paints together as seen below, working them into the drybrush as you go so you have a reasonable amount of paint stuck to the bristles. If you’re not confident mixing, perhaps consider using a paint like Dorn Yellow instead.
Once you’ve worked the paint onto the bristles, use it only to pick out raised textures, and lightly drybrush all the edges of the model, excluding the face.
Focus on areas around the edges of armour panels, as well as hands and fingers.
How to Paint Imperial Fists Step 11 – Edge Highlighting, Part 2
Next, we’re going to add some more highlights to the face. To do this, mix a small amount of Kislev Flesh in with some Wraithbone.
As before, ensure that the paint is worked well into the bristles of your drybrush. You want this paint to catch on only the most raised features, so take some time to make sure the paint is really worked into the brush.
Very gently and very carefully drybrush the face.
try to focus the paint onto the nose, brow and cheekbones if you can.
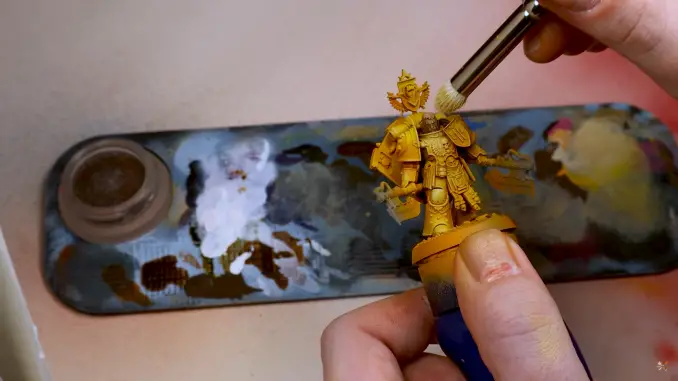
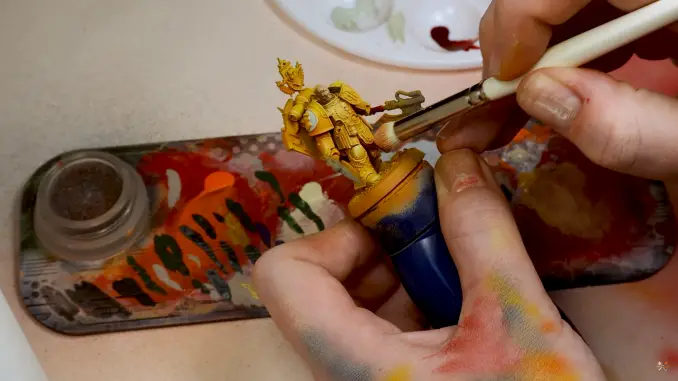
How to Paint Imperial Fists Step 12 – Basecoats, Part 1
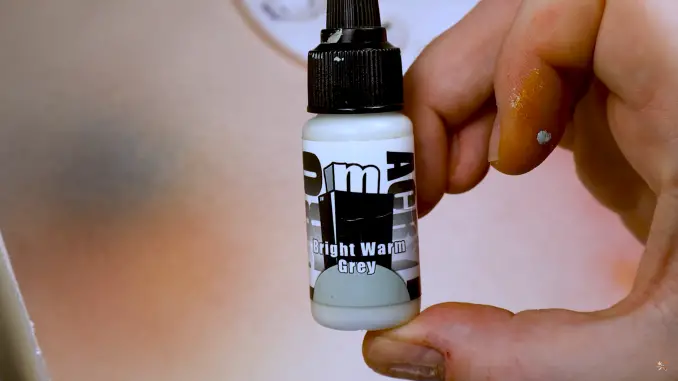
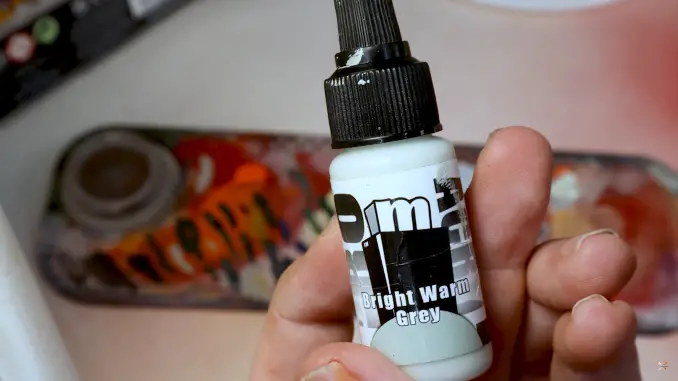
Next, we’re going to paint all the white areas on the miniature with Bright Warm Grey from Pro Acryl.
Whilst this is called “warm” grey, it;s actually a cool bluish grey, that colder tone will have more colour contrast against the warm yellow armour tones of the armour. A neutral or warm grey would look dull.
And yes, we want a light grey here, it will read to your eyes as white, but the whits should only be used to express the brightest possible areas of a model, if you paint white things with white, how would you then highlight them?
Ensure you use a good brush with a very fine point on it for this step, as you want to be as accurate as possible and avoid getting white paint on any of the areas you’ve already painted.
Focus this on any sculpted chapter badges, as well as the eyes on your miniature. (switch to a very fine brush for the eyes).
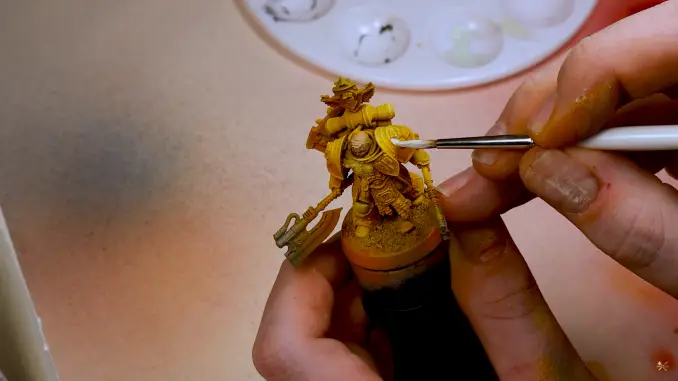
How to Paint Imperial Fists Step 13 – Basecoats, Part 2
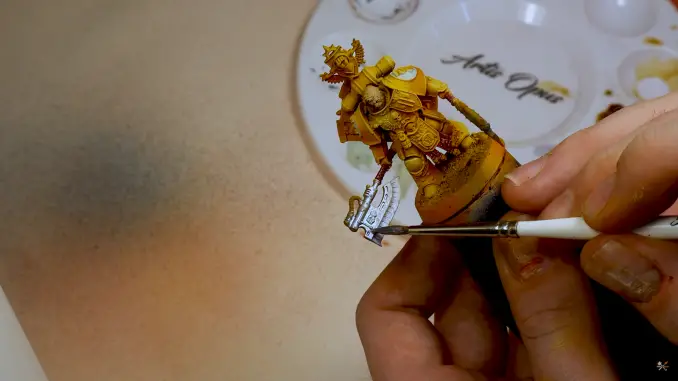
Next up, it’s time to basecoat all the leather areas. This includes the loincloth-like tabard on the front of the Fafnir Rann miniature, as well as the bindings on his back. If you’re painting other Space Marine miniatures following this guide, check for belts, pouches and holsters.

Use some Flesh Tearers Red and carefully brush this on to those areas.
Be as accurate as you can, as you don’t want the contrast paint to tun onto other areas of the miniature.
How to Paint Imperial Fists Step 14 – Edge Highlighting, Part 4
Once the Flesh Tearers Red is dry, edge-highlight those areas with Kislev Flesh. Flesh is a great highlight for leather, as leather is a form of flesh, wear and tear would see it return to its original pigment. So flesh is great when highlighting and distressing leather.
You can do this with a drybrush by really working the Kislev Flesh into the bristles of the drybrush and then very lightly brushing over the reddish areas.
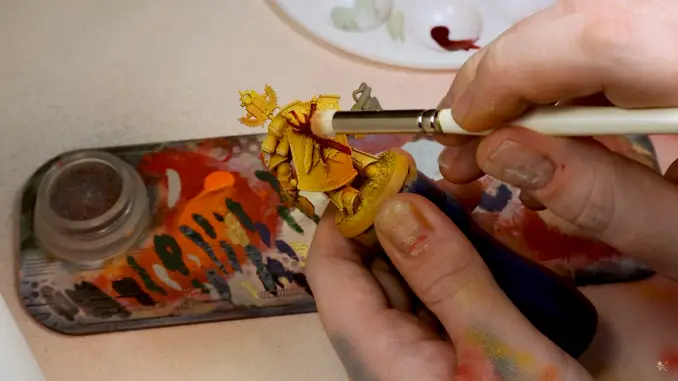
Be careful doing this, as you want to try and avoid getting this on any yellow areas if possible.
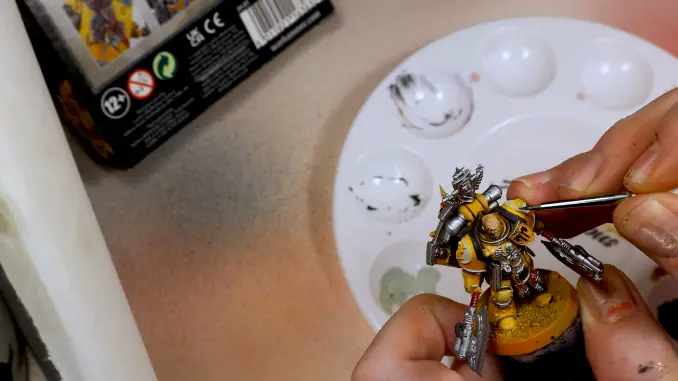
How to Paint Imperial Fists Step 15 – Painting Metallics
Next, we arrive at all the metallic areas. To do this, you’ll need Vallejo Metal Color’s Duralumium and Citadel’s Ultramarines Blue.
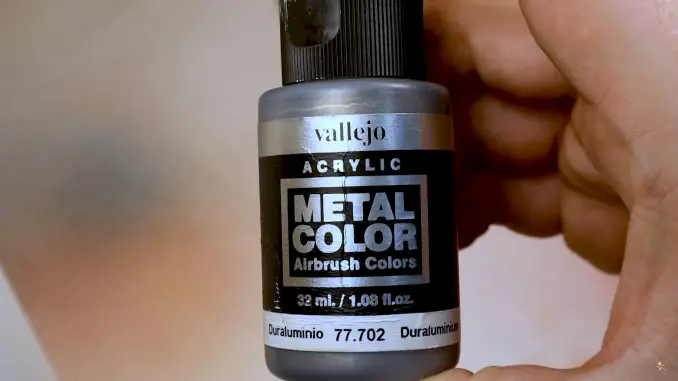
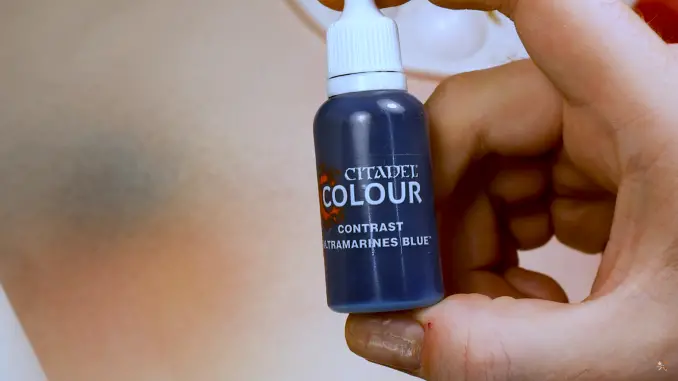
Mix a drop of Ultramarine’s blue in with 3 or 4 drops of Duraluminium. We don’t want the metal areas to look obviously blue, but we want a slight blue tint to it so that the metal areas are in the cool spectrum. As with the white areas above, this will add more contrast. The mix should not look to be blue, just ca colder metal colour in general.
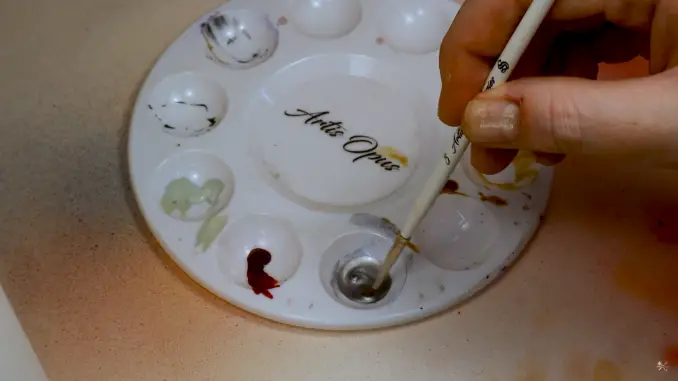
Once the paint is mixed, apply it to all the metallic areas of the miniature. This includes any weapons casings, as well as some areas on the armour.
If in doubt as to what should or shouldn’t be painted with metallic colours, refer to the box art.
How to Paint Imperial Fists Step 16 – Basecoats, Part 3
We’re going to be painting the darker areas on the miniature now, so take some Blue Black from Pro Acryl. Once again this will read as black to your eyes, but the blue hint will add contrasting cool tones.
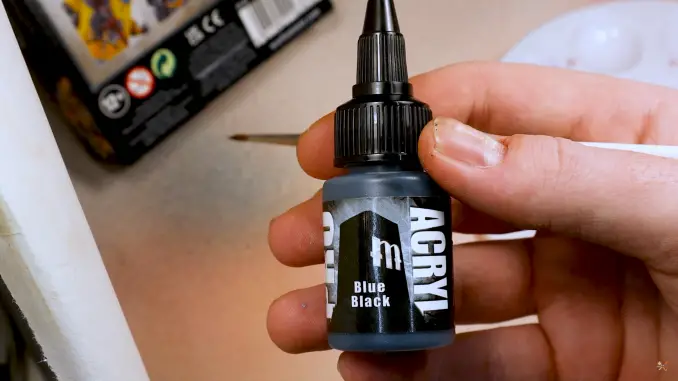
Here, we’re looking for any Imperial Fist icons, as well as some cloth and areas, as well as some of the ribbed material that can be seen between armour panels around the backs of knees and the insides of elbows.
You may want to use a smaller brush if you have one available in order to ensure you don’t get black paint anywhere you shouldn’t.
How to Paint Imperial Fists Step 17 – Edge Highlighting, Part 5
Now. we’re going to finish off those darker areas. Once again, take some Bright Warm Grey from Pro Acryl and your drybrush of choice.
Work the paint into your drybrush thoroughly. Again, you don’t want this to catch too many other areas if you can help it.
Aim for those areas you just painted black, using slow backward and forwards movement, or by “smooshhing” the brush onto the area. “gently rotating, or rolling it between your fingers”.
Don’t worry so much if you catch the silver areas when brushing, the grey won’t show up. Do be mindful of any yellow edges, though.
How to Paint Imperial Fists Step 18 – Painting Hair
If you’re painting a Fafnir Rann model of your own, we’ll paint the hair now. If you’re just painting standard helmeted Imperial Fists, skip this step.
For this, you’ll need some Snakebite Leather and some Contrast Medium
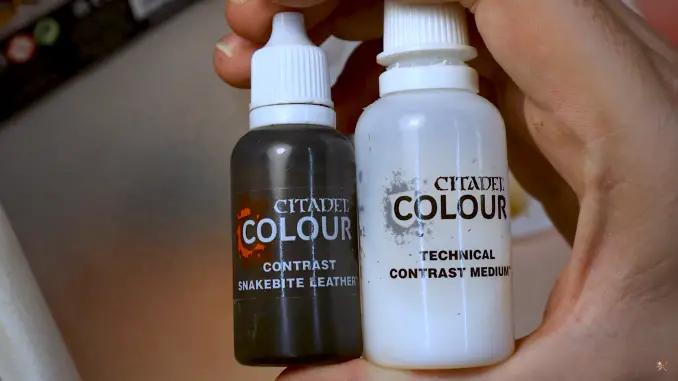
You’ll need to thin the Snakebite Leather with Contrast Medium rather than water or else the paint may end up looking a little bit blotchy.

Focus the contrast paint into those recesses on Fafnir Rann’s hair to build up a good shade.
How to Paint Imperial Fists Step 19 – Gloss Varnish
Once all the paint on the miniature has fully dried, apply some gloss varnish to the entire model.
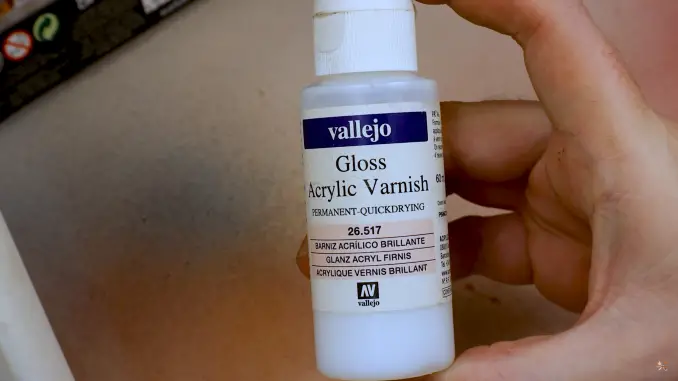
Do this carefully. If you apply too much varnish, it’ll pool and create a goopy, PVA glue-like build-up on your model. Give it a good few hours to dry before the next step. I’d recommend leaving it overnight. Or if you painted your model with Gloss varnish in the morning (before noon). give it until late-late evening at the earliest.
How to Paint Imperial Fists Step 20 – Oil Paints
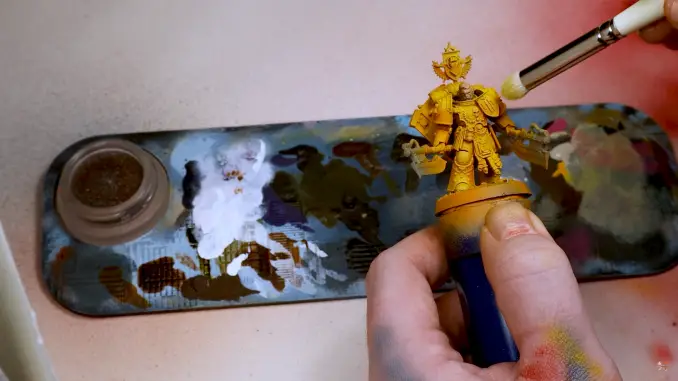
Now we arrive at the crucial “grime up” step that’s so necessary for creating that grimdarky finish on the miniature. This stage takes all the effort out of washing and/or shading your models. and yes, it will look much worse here before it looks better.
For this stage, we’ll need oil paints:
- Abteilung 502 Black Oil (Abteilung)
- Abteilung 502 Burnt Umber(Abteilung)
- Abteilung 502 Red Oil (Abteilung)
- Abteilung 502 Midnight Blue (Abteilung)
You’ll also need something to mix them on, as well as some mineral spirits to thin them.
First, take the red and the blue to mix a deep purple. You may want to add some brown and a tiny amount of black to this in order to darken it up. We’re going to use this on all the yellow areas of the armour, so the colour needs to be complimentary to that shade we’ve already created.
So imagine when you would normally shade recesses with a black or brown? but to add more contrast we are making a colour which is as dark as something like Nuln Oil or Agrax Earthshade – but we are adding a purple hint which is directly complimentary (contrasting) to yellow.
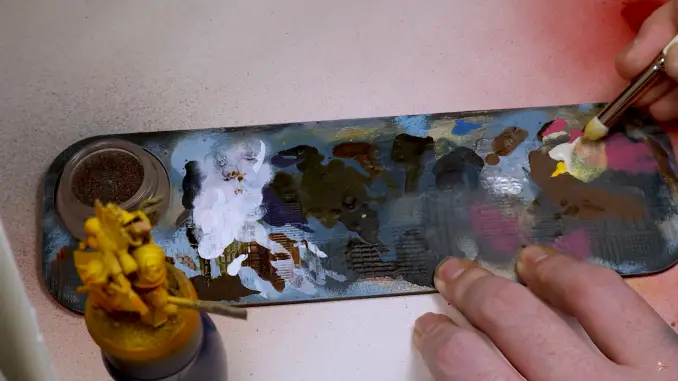
Next, add some Burnt Umber and some Black Oil to separate areas of your palette and thin these with spirits.
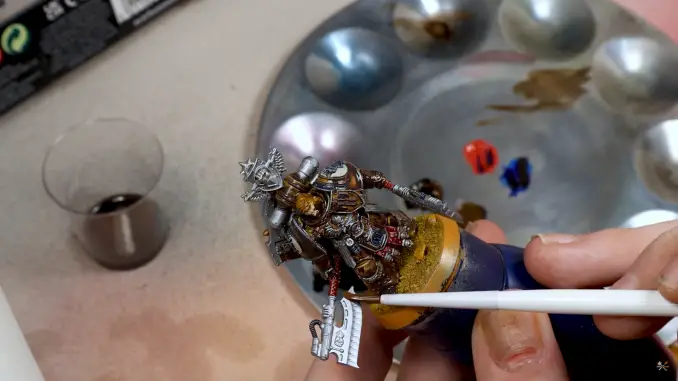
Now, carefully add the black to the red areas, the Burnt Umber to the metallic areas, and the purple mix to the yellow areas. You don’t need to be careful or accurate, just slosh it on until your miniature looks absolutely foul.
Leave it to one side to dry.
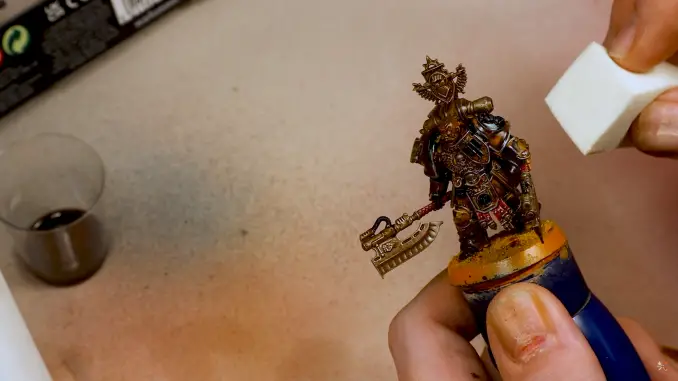
Once it is fully dry, use some mineral spirit and a make-up sponge (cotton buds also work, but you’re more likely to leave little bits of fluff on the miniature) to wipe the majority of the grime off, leaving that which has pooled around edges and in recesses.
You’ll be left with a fully shaded model at the end but unlike with acrylic washes, you’ll have all those bright armour areas super bright and vibrant again.
How to Paint Imperial Fists Step 21 – Matte Varnish
Finally, apply a matte varnish to the entire model.
Again, take care not to put this on too thickly, in fact, with matte varnish shake it as best you can and apply it super thin, as you don’t want this to pool and create gloopy areas.
How to Paint Imperial Fists Space Marines for Warhammer 40,000 – Complete
If you’ve followed every step in this guide, your finished miniature should look a little something like this…
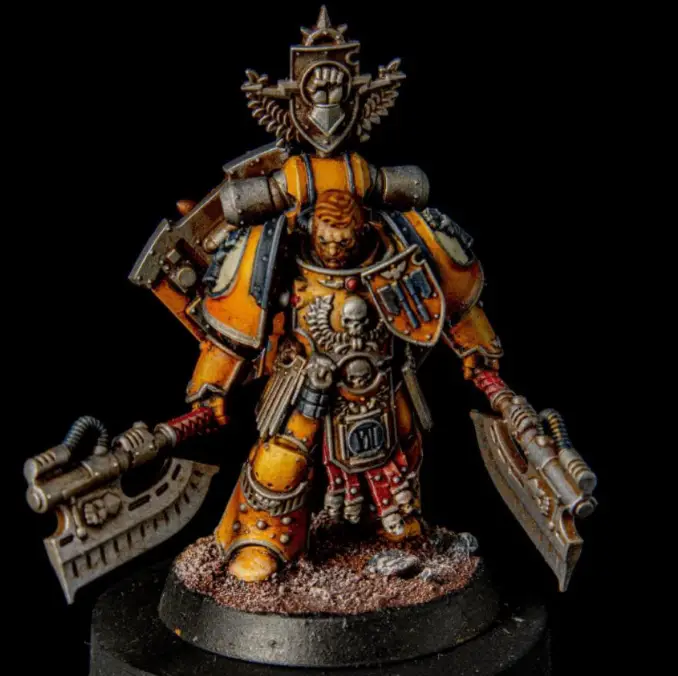
Use these techniques on any of your Imperial Fists models to create a whole army of gritty, grimy Imperial Fists – Space Marines – in no time at all.
Liked this guide and want to see more? Have questions about what products are used? Or maybe there’s a guide you’d like to see us make?
Let us know in the comments below!
Please Note: This site uses affiliate links. Our Affiliate Partners are shown below
(Affiliate links will result in compensation to the site on qualifying purchases)
Click this link & buy your hobby stuff from Element Games for the UK & Europe to support FauxHammer.com – Use Code “FAUX2768” at the checkout for double reward points.
Our Affiliates / Hobby Stores
- UK: Element Games, The Outpost, Wayland Games, Mighty Lancer, Goblin Gaming, Forbidden Planet, Model Scenery Supplies, eBay, Amazon
- US/Canada: MTechCave, GameKastle, eBay (US), eBay (CA), Amazon
- Germany: Taschengelddieb
- Europe: eBay (DE), eBay (FR), eBay (ES), eBay (IT), Amazon
- Australia: eBay, Amazon
- Global: RedGrass Games, Warcolours
- 3D Printers: Phrozen 3D, Elegoo, Anycubic
FauxHammer – Latest Video on YouTube
What did you think of this Tutorial? please let us know in the comments.
If you like what we’re doing here you could really help encourage more content with a share on any social media platform.
Click the share links at the bottom of this screen (or on the left for computers and tablets)
Want to keep updated with the blog? You can subscribe in the sidebar for RSS or by email below
(Sidebar is below the article on Mobile Devices)