
How to Make a Wet Palette for Painting Miniatures & Models
Last Updated on March 24, 2022 by FauxHammer
I’ve wanted to write a guide on how to make a wet Palette for a long while, but before I did I wanted to make sure it was the best guide possible. The process is relatively simple but there are a few what’s and why’s that are worth covering. See below how to follow this simple process to make up one of the most useful painting tools available.
Please Note: This site uses affiliate links. Our Affiliate Partners are shown below
(Affiliate links will result in compensation to the site on qualifying purchases)
Click this link & buy your hobby stuff from Element Games for the UK & Europe to support FauxHammer.com – Use Code “FAUX2768” at the checkout for double reward points.


Our Affiliates / Hobby Stores
- UK: Element Games, The Outpost, Wayland Games, Mighty Lancer, Goblin Gaming, Forbidden Planet, Model Scenery Supplies, eBay, Amazon
- US/Canada: MTechCave, GameKastle, eBay (US), eBay (CA), Amazon
- Germany: Taschengelddieb
- Europe: eBay (DE), eBay (FR), eBay (ES), eBay (IT), Amazon
- Australia: eBay, Amazon
- Global: RedGrass Games, Warcolours
- 3D Printers: Phrozen 3D, Elegoo, Anycubic
FauxHammer – Latest Video on YouTube
Do you use a wet palette? – If so put a comment below this Article with Yes, if not, put a comment below this article with No.
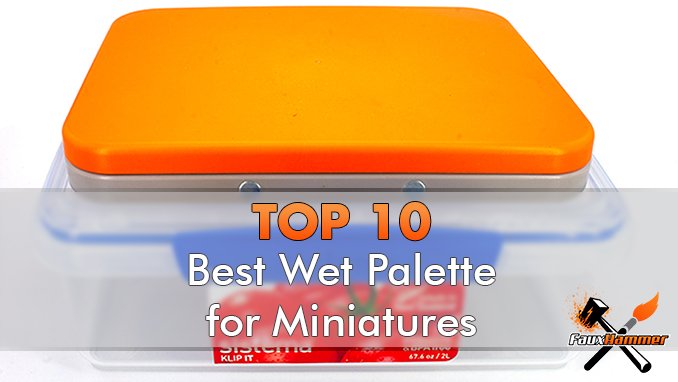
The Best Wet palette for Miniature painters
If you’d rather not muck about with hunting for the right paper and then cutting it up in order to make a wet palette – check out the best Wet Palettes available by reading our Best Wet Palette for Miniature Painters article here.
How to make the Best DIY Wet Palette Video
if you don’t fancy reading the article then you could also check out our video below which will walk you through the steps to create your own (and IMHO the best) Wet Palette for miniature painters.
As an amateur YouTuber, I am both inspired and fueled by Likes, Comments, Subscribers and people who hit the Notification Bell. You know, if I just saved you £20 with this video, can you help me out by clicking a couple of extra buttons?
Go on, you know you want to… I obviously want you to.
Why Create a Wet Palette?
You may or may not have heard of a Wet Palette. if you have great, you probably know most of the benefits. If not let me summarise;
The main function of a palette is that it keeps your paint wet for much longer, hours or days, even weeks if necessary. This immediately saves paint as it can go on your model instead of dry on your palette.
Beyond this, many people have noted that the use of a wet palette allows them to obtain a much better consistency. I can attest that the second I started using a DIY wet palette, my painting improved immediately and markedly.
It’s not the answer to every problem, however. Washes/Shades can end up absorbing too much moisture and become overdiluted. When edge highlighting (if that’s your thing), I like to stick to my dry palette so the paint remains tackier. You need to decide if you want your paint to flow or be sharp.
It’s also one of those cool items where you can hide the costs in your weekly shopping and not have to explain to anyone why you’re spending so much money on your hobby (this tip may be useful for some people reading).
What Makes a Good Wet Palette?
A wet palette is made of just 3 things. 1. A container, 2. A layer of water-absorbing material such as tissue or sponge and 3. (Technically Optional) a layer of semi-permeable paper.
The Water Absorbing material sits in the base of your container, it is loaded with water. You can put paint straight on this and the paint will stay wet by absorbing moisture, but it will bleed. If you use tissue for this, it will degrade and before long you’ll be picking up bits of tissue and putting them on your model. Sponge, like a dishwashing sponge. will last longer but it will still cause the paint to bleed into other colours.
The reason a semi-permeable layer is added is so the paint can absorb the water but the sponge/tissue won’t absorb the paint.
We’ll go into detail about this layer in the guide below and where you can find the right product anywhere in the world (It’s named differently in different places).


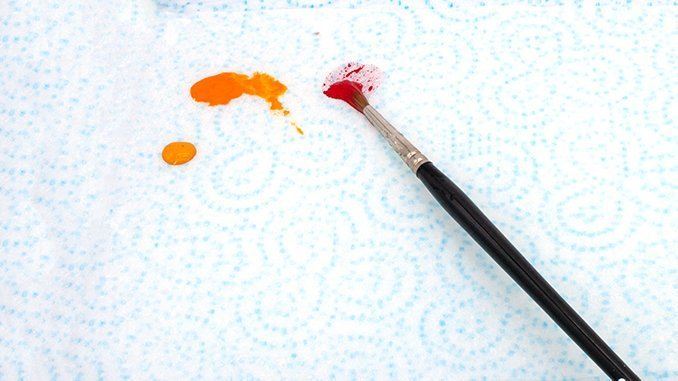
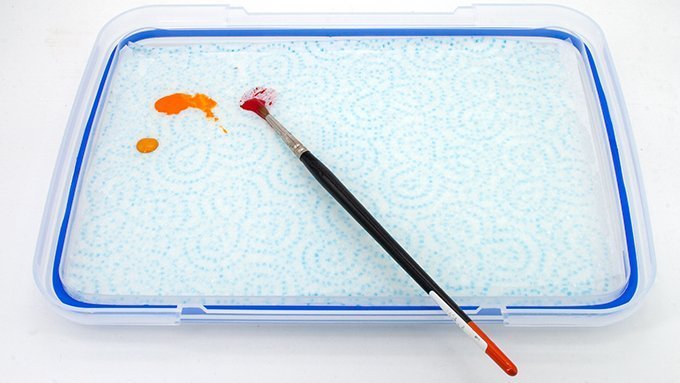
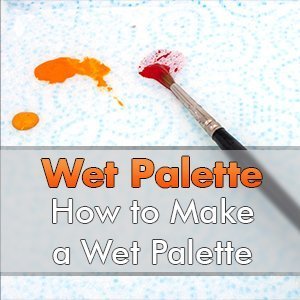
Finding good (or even the correct) paper is really important. If your paper is right, when you have built your palette, I’ve found that Citadel Paint will act as shown in the image above.
As you move the paint around with your brush it should remain fluid. when you lift the brush away, the paint will recess into a large bead with only spots of paint around it.
There are numerous retail options of acrylic wet palette available. Most notable is the Everlasting WetPalette from RedGrass Games. I have both the Painter and Studio Model. I really like these palettes but the paper you get doesn’t act like shown above and this is what I’m used to. It certainly has other benefits but with the little ah-ha moment I’ve shown below.
I’ve returned to my own DIY Palette (purely out of personal preference).
The Best Wet Palette Equipment
The first thing you want for a DIY wet Palette is a container. The most common type is sealable food containers such as Tupperware. But What Tupperware?
Well, Any really. But let’s have a look at what makes good Tupperware for a Wet Palette.
- Airtight Seal
- Clear Base
- Shallow as Possible
- Flat Lid
- Clips attached to the base, not the lid.
- Appropriate Size
The airtight seal is important when not in use you can close the unit and prevent excess evaporation. this is how you get your wet palette to last for days. If you still it in the fridge too, it will last weeks. Just be aware that water has bacteria in which will eventually grow spores. don’t use it if it smells funky or you can see mould forming.
The clear base will let you see inside. This is a benefit over the Everlasting Wet Palette. As the water naturally starts to evaporate it will cling to the lid. being able to see this before you open the palette is helpful. The first time I opened my Everlasting Wet Palette after a few days in the fridge, I sent water everywhere. including into my paint which caused colour mixes I didn’t want
having a shallow Tupperware container is really just for the convenience of storage. I know if I wanted to stick a large container in the fridge, I’d need formal approval. But fridge real estate in my house is obtained at a premium.
When it Comes to appropriate size. it really needs to be as big as you need. With Tupperware. the larger containers tend to be deeper which simply takes up more vertical space. below I’ve taken a look at several options and compared them to the well-know Everlasting Wet Palette.
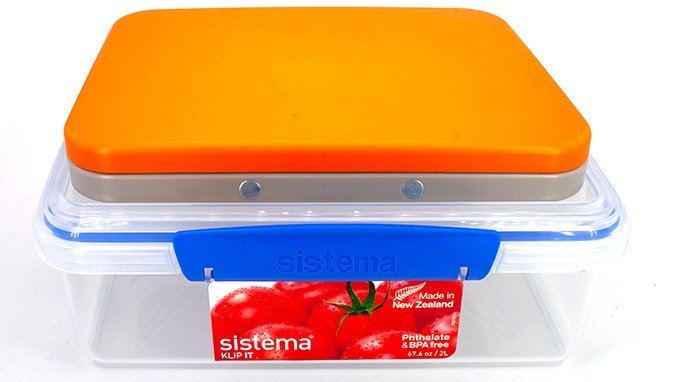
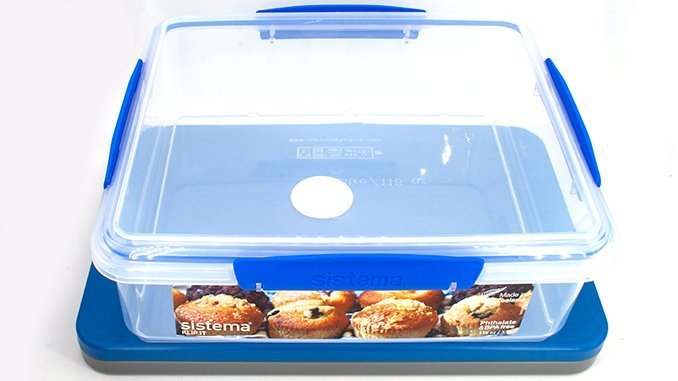
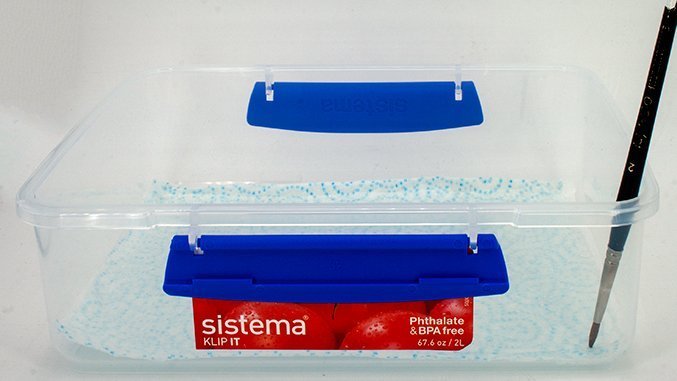
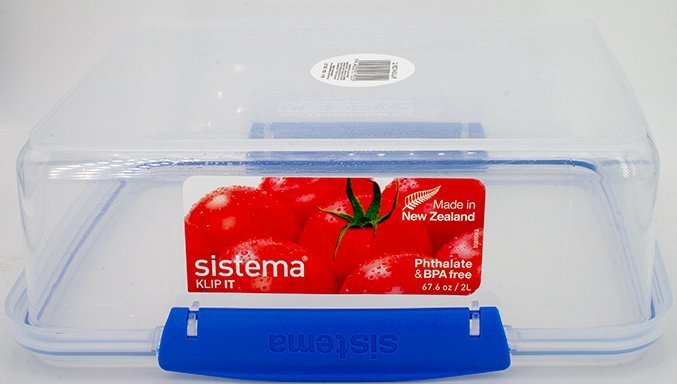
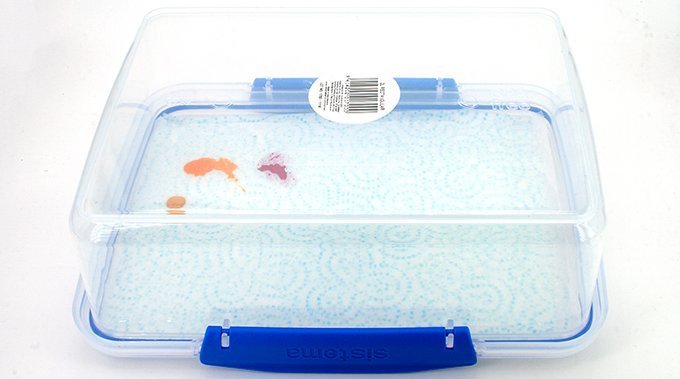
Tupperware – Sistema Klip It
I’ve selected the Sistema Klip it storage boxes becasue they meet all the requirements above and becasue they are available globally. I ordered a few various sizes to compare them.
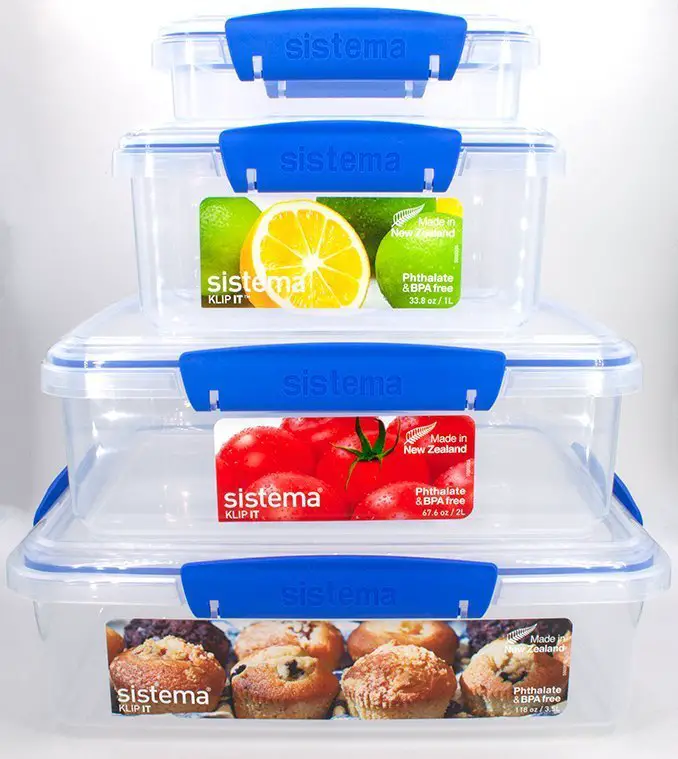
Above you can see (from top to bottom);
- 450ml Sandwich Box
- 1 Litre Food Storage Container
- 2 Litre Food Storage Container
- 3.5 Litre Bakery Box
Below we compare these to the Everlasting Wet Palette
Wet Palette Size
The Sistema 2L Food Storage Container is virtually identical in surface area to the Everlasting Wet Palette Painter model. The back of the Everlasting Wet Palette is flush with the inner edge of the lid.
Below I’ve compared the Sistema 3.5L Bakery Box is sat on top of the Everlasting Wet Palette Studio. the front of the storage container is flush with the edge of the Everlasting Wet Palette. However the back actually overhangs a bit. but it’s not as wide (we’ll look at this in detail below).
To make things easier I have measured the usable area on all containers. I hope the below pictogram is ok, I’m not the best at making these so if anyone wants a go at making a better one, please do so.
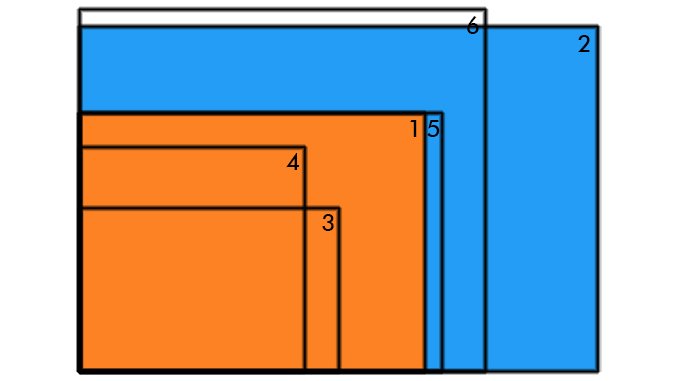
Sizes for each model;
- Everlasting Wet Palette – Painter (Orange)
- 15cm x 20cm (5,9″ x 7,9″)
- 300cm²
- Everlasting Wet Palette – Studio (Blue)
- 20cm x 30cm (7,9″ x 11,8″)
- 600cm²
- 1 Litre Food Storage Container
- 9.5cm x 15cm (3,7″ x 5,9″)
- 142.5cm²
- 450ml Sandwich Box
- 13cm x 13cm (5,1″ x 5,1″)
- 169cm²
- 2 Litre Food Storage Container
- 15cm x 21cm (5,9″ x 8,3″)
- 315cm²
- 3.5 Litre Bakery Box
- 23.5cm x 21cm (9,2″ x 8,3″)
- 493.5cm²
Essentially, what we’re saying is the 2L Food Storage Container is slightly larger than the Everlasting Wet Palette – Painter and the 3.5 Litre Bakery Box is 1/6 Smaller than the Everlasting Wet Palette – Studio.
The two Smaller containers are useful little alternatives if you are low on desk area. But this comparison above should give you an idea of how much space your container will take up when compared to retail options. You can always sketch these out on a sheet of paper before buying to test the area you have available.
As the 2 Litre, Food Storage container is almost directly comparable to the most commonly bought Everlasting Wet Palette, we will be using this container for the rest of the guide.
Absorbent Layer
This is relatively easy, just grab some paper towels (Kitchen-Roll in the UK) for the most accessible approach. Loo roll is a bit soft and nor normally large enough to cover teh area in the palette which will cause folds. you want a palette with a smooth and flat surface.
You want something relatively think and very absorbent. in the UK I use Blitz. it’s a bit more a slightly more expensive paper towel. This prevents creasing and it soaks up water really well, keeping itself wet.
An alternate option is a cleaning sponge cut to size. I don’t mean a car washing sponge or Scouring pad. I mean a Cellulose sponge cloth. they are about 4mm-5mm thick.
Using large sponges is actually counter-intuitive as the weight of the water will cause it to soak away from the semi-permeable layer and pool in the bottom of your container. Some of the retail wet palettes will tell you that the sponge is mould resistant, but in my experience is no better than a cellulose sponge in doing this.
To keep mould away there are a few tricks. You can use distilled water which will last longer. If your window cleaner is one who just cleans with a long rod instead of climbing a ladder to your window. Ask them to give you some of their water I’ve had 5 gallons of this sat under my desk for about 2 years. You can use tap water, keeping it in the fridge will help. Add a drop of dish soap or some people suggested putting old pennies under your foam, the copper will kill the bacteria.
The best thing to do is just wash it out thoroughly every week or so
Baking Paper/ Parchment Paper
Oh, this stuff.
When I followed my first guise on making a wet palette I followed a guide based in the UK (I’m in the UK) and ordered some baking paper to go in it. I was all happy and joyful that I’d finally made my wet palette and dropped a couple of spots of paint on it. I mixed in some water and got the consistency shown above. but I didn’t see much of a difference in my painting. 5 minutes later the paint on the palette was dry!
What I had done is bought the UK version of baking paper. it is commonly referred to in the UK as “Greaseproof” Baling Paper. Numerous cooking sites online even suggest that the US baking paper is exactly the UK’s greaseproof paper. This isn’t true!
The correct UK alternative is actually called Baking Parchment or Parchment Paper. I used to buy Bacofoil (brand) non-stick parchment from my local cookware store but for some reason, Bacofoil changed this from White to Brown (I blame Brexit). The brown paper made it slightly harder to see the true colours I was mixing as you can see it through the paint.
Here is what it is normally called in different countries
- Baking Paper (US, CA, AU)
- Parchment Paper / Baking Parchment (UK, IE, NZ)
Still not clear? You want the stuff that doesn’t stick to your cake or flapjacks when you put it in the oven. The paper is normally coated in Silicone, not Wax. Oh, and get it in white.
I’ve done a search for you below, so all of the options shown should be valid no matter where you are from.
How to Make a Wet Palette
In this guide, I’m first going to show you how to make a Wet Palette from a Tupperware container the wrong way. Don’t worry, the steps are correct, I’m not misleading you. I’m just taking you through the way I used to build my wet palette, an annoyance I had with it.
Then I just want to deliver it in a way that gives a taste of the (face-palm) Ah-Ha moment. One which really made me realise that going back to a DIY wet-palette over the retail options is the way forward for me. It probably will be for many other people too.
Just go with me, you’ll understand as we go through (and probably exclaim, “Well yeah! That’s obvious”).
Step 1 – Add Tissue Paper or Sponge
Really simple, get some Tissue or Sponge. (What Tissue or Sponge? See above)
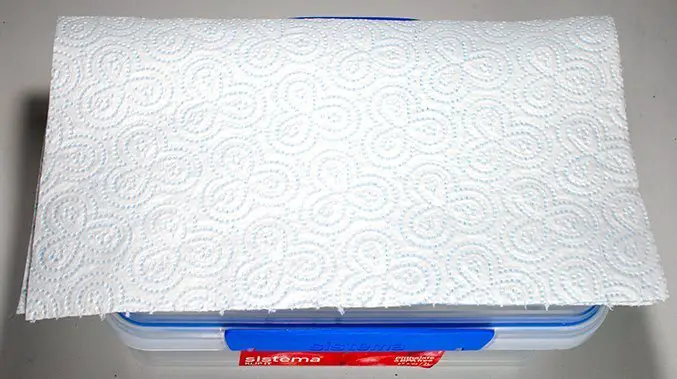
Cut it to size, this needs to sit flat within the surface of your content without any risk of creases or folds.
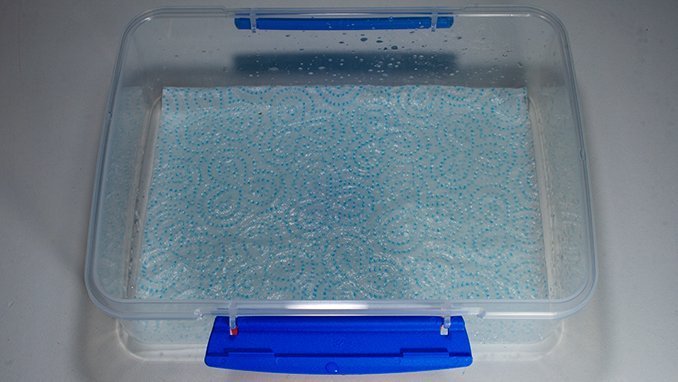
Step 2 – Add Water
Just pour some water in. The aim is to dampen the base layer not soak it.
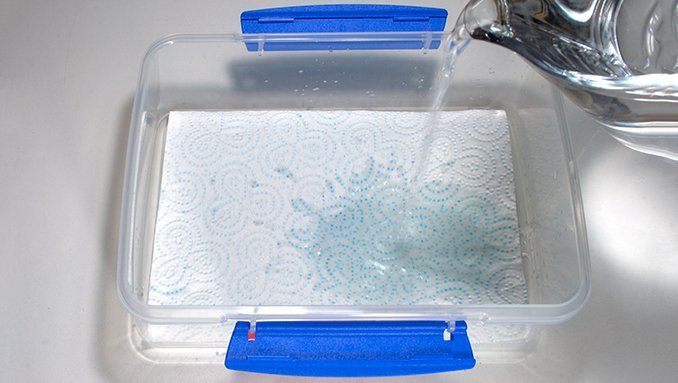
If you want to know how much is too much. Just soak it completely on your first pass. then tip the container onto a corner for a few seconds. any water that builds up here is too much water, pour this away,
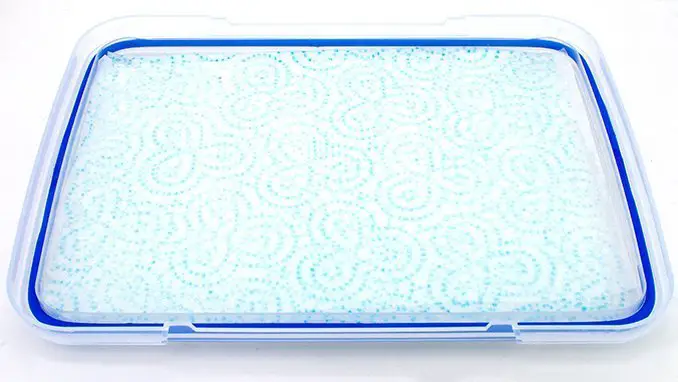
Step 3 – Add Baking Parchment / Paper
Cut your Baking Paper /Parchment Paper to size. this should be slightly smaller than your we base layer.
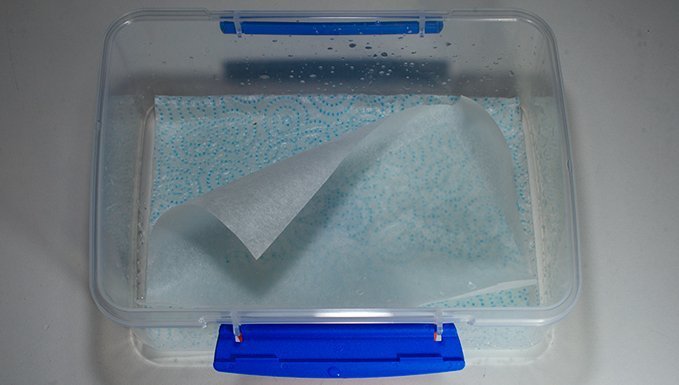
This is so that when you need to add more water (as it will still evaporate) you can just soak the edges and let it absorb into that base layer.
I cut mine a little too large here. could do with another cm or so off each side.
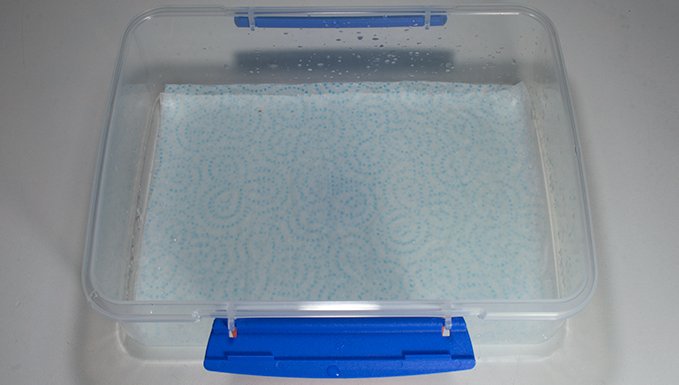
And there you have it, your wet palette is complete. However, there is one annoying thing I found with these DIY wet palettes which I did not have with the retail options.
How to Make a Wet Palette – Problem
These containers are quite deep
It is annoying and the larger the palette you want the deeper the container normally is too. it just puts your hand at an odd angle for mixing paints a lot of the time and I can’t count the number of occasions where I’ve knocked the lip and pushes the palette across my desk or once, even onto the floor.
I’m lucky enough to have a rather generous hobby area. Yet as we all know in this hobby, if there is a flat surface anywhere, it will eventually be filled with models. So dragging a palette unintentionally across a desk can be anything from minor irritation to absolute carnage.
I know I’m not alone in this, I’ve actually seen people try to fix this problem by filling the base with resin and / or large sponges to close the gap between the base and the rim.
There’s a much simpler way. It reminds me of the old (made-up) adage where the American Space Programme spent millions developing a pen to write in space when the Russians took pencils.
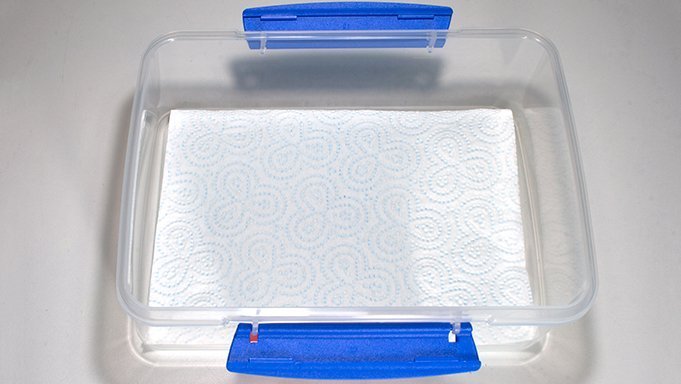
How to Make a Wet Palette – Solution
What if I was to take this?

And do this?
You may be thinking, well duh. You may be thinking this is obvious. You may already do this. But I promise that this knowledge is not common enough, as I still see people now filling the base with materials to close the gap. I was creating wet palettes the other way round for over 2 years before I saw a load of people doing this on a recent painting course I was on. It wasn’t just me that had the ah-ha moment in the class either!
If you still don’t understand what I’m getting at, see below.
How to Make a Wet Palette – Complete
So the point is, you make your wet palette in the lid of the container, not the base. This is why I said at the top you want a container with a flat lid and handles on the base. The flat lid means you have a flat palette and the handles being on the base means they don’t get in the way when the lid (as the palette) on your desk.
Once done, just add some paint. it should act like I described above and bead on the paper when you add water, rather than spread out.
You now have a low profile wet-palette comparable to the retail models. the only drawback is that you need to cut the sheets of paper yourself. Or you could just make your own palette and buy RedGrassGames sheets of paper. I’m just not a fan of that paper personally becasue it doesn’t act the way I was pre-conditioned to expect.
How to Make a Wet Palette – Final Thoughts
There you go, it’s a simple process with one minor (yes probably obvious) tweak you have a great wet palette that will last years.
If I’ve not said it enough, make sure you clean it to avoid mould. Put it in the fridge, select the water type or put some additives in it to keep it clean.
Now your paint will remain workable for days, even weeks
Please Note: This site uses affiliate links. Our Affiliate Partners are shown below
(Affiliate links will result in compensation to the site on qualifying purchases)
Click this link & buy your hobby stuff from Element Games for the UK & Europe to support FauxHammer.com – Use Code “FAUX2768” at the checkout for double reward points.
Our Affiliates / Hobby Stores
- UK: Element Games, The Outpost, Wayland Games, Mighty Lancer, Goblin Gaming, Forbidden Planet, Model Scenery Supplies, eBay, Amazon
- US/Canada: MTechCave, GameKastle, eBay (US), eBay (CA), Amazon
- Germany: Taschengelddieb
- Europe: eBay (DE), eBay (FR), eBay (ES), eBay (IT), Amazon
- Australia: eBay, Amazon
- Global: RedGrass Games, Warcolours
- 3D Printers: Phrozen 3D, Elegoo, Anycubic
FauxHammer – Latest Video on YouTube
What did you think of this Tutorial? please let us know in the comments.
If you like what we’re doing here you could really help encourage more content with a share on any social media platform.
Click the share links at the bottom of this screen (or on the left for computers and tablets)
Want to keep updated with the blog? You can subscribe in the sidebar for RSS or by email below
(Sidebar is below the article on Mobile Devices)
Author


Great article bud, explains things well, especially the baking parchment/paper, which I still know of people using the wrong stuff even now.
Thanks, really wanted to cover everything if I could as many guides I saw when i was getting into it were tailored to a specific country
Thanks for another great guide! Just to clarify, would you still water down your paints similar to a dry palette, or do you rely on the wet palette to get the right consistency? Also does the paint stay the same consistency on the wet palette over time?
Hey, Thank you. Yes you do still need to water your paint to meet the consistency you like to work with. The benefit of a wet palette is generally that it stays at this consistency longer.
Thanks for another great article! Just one clarification, do you still need to water down your paints as you would on a dry palette or rely on the wet palette to water the paint down to the right consistency?
Thank you so much for the very clear explanation on the differences between parchment papers between countries. I’ve seen plenty of helpful tutorials on wet palettes but you guys are the first to address the issues of supply and branding across different countries. Love it, will be coming back for more help in the future.
Thank you so much. if you really did find this useful, please share it and tell your friend what you think.
This is a great article as I am just learning about painting for miniatures and models. I do have one questions, however, regarding the water used to keep the paint moist. Would the paints last longer or be affected in some way if you used distilled water rather than regular water?
Thank you again for the guide
Thanks very much – distilled water is preferred by most as it contains fewer impurities and bacteria – it should stop your palette from going mouldy as quickly but it won’t last any longer, it will evaporate at the same rate as regular water.
Excellent, thanks!
I use a Ferrero rocher container (the 24pack one)
“Vinegar is a mild acid that’s effective for killing mold and can actually help prevent future mold growth.”
You think a drop or two would help with mold? Any problems with it getting into the paint?
I’m still struggling to find paper that works. In HK (despite being a former British territory) we’ll have paper sold under both names, and they’re almost always ‘silicone based’ too, which I think is what’s making it useless for use for wet pallettes.
I suppose fir the price, why nit just buy a pack of paper from Redgrass games?
Well bacofoil has now changed the baking parchment to baking paper I think they don’t do the baking parchment anymore like they used to now
Die deutsche Übersetzung benötigt dringend mal einen deutschsprachigen Korrekurleser! Die ist nämlich nicht gut.