Review in Progress – Painting Cloaks, Coats & Robes – ‘Eavy Medal masterclass – White Dwarf 3 September 2016
Last Updated on May 12, 2022 by FauxHammer
So, since ‘Eavy metal masterclass is back i decide to jump in feet first.
Since I still have my Dark Vengeance chaos cultist to paint, I had just the model to try this out on using one of the cultist leaders.
This guy;
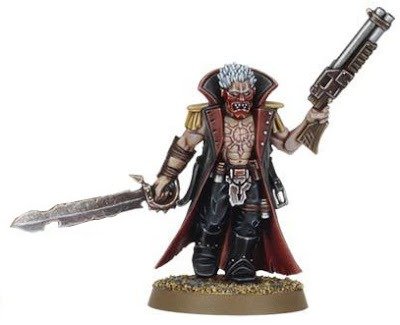
not my painting, just for reference
Anyway, this month’s article is all about painting coats and cloaks, something I definitely need to improve on. So using this guy (not tying to copy this paint scheme above, but using him as a practice model for this technique) in we go.
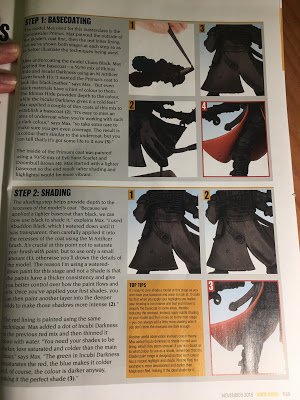
Page 1 is about Basecoating and shading, what I found interesting is that instead of using Abaddon black as a base over the primer, the base coat is created with a 50/50 Mix of Rhinox Hide and Incubi Darkness. On the positive side of this, it give a great explanation why to do it and how the paints interact. First off, Black clothing is rarely a true black colour. (I remember learning something like this in Art class in school) Mixing the brown which gives colour depth with a dark blue which cools the brown makes for a great base for leather. So I mixed my paint and found my first problem, and I’m usually quite a stickler for measurements, if a cook book says use 100 grams of something I won’t go a miligram over or under. As I have learned more recently;
“The price of perfection is prohibitive” – A. P. J. Abdul Kalam
I’ve started just eyeballing stuff more, no matter how much brown or blue I added either way i could not make this colour pictured in the book. in the book it looks (brown y) black on black. So I just went with the colour I think worked better which we will call Seel Skin blue. I dropped a layer of my Seel Skin blue on and it covered nicely (as expected with both of these base paints as they normally do a good job on their own) I noticed I was loosing texture from the primer, looking in the mag you can almost still see the grain of the primer showing through after the main coat was applied, I’ve done 2 (3 in some places) coats and have quite a glossy sheen. Like the texture of a Seel’s Skin The same happened with the red mix of 50/50 Doombull Brown and Evil Sunz Scarlet, could not get a match, so crew it we now have, Browny Orange (GW should hire me to name paints, all theirs are named after what could be metal bands) I’m happy, keep painting. the shading went on well, this is my first time trying out thinned paints as washed/shades and it worked really well. as the guide said, thinned Abaddon Black gives you much better control than Nuln Oul and doesn’t dry with a different texture to the base coat. the same by adding some Incubi darkness to my Browny Orange mix, cooled the colour and gave it a darker tone. this was lovely to apply and let me feather it on thinly has given a decent gradual shade. I added a touch more ID to make it darker still and did another layer of shades right in the deepest receses, this is my first successful attempt at custom shading, and even layering TBH.
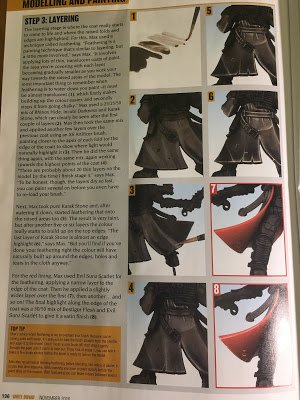
This is where I’m getting stuck, i’m still not a massive fan of GW’s tutorial here, there simply is’t enough detail and the images are not printed in colours true to life. I followed the guide and thinned my mix of 25/25/50 Rhinox Hide/IncubiDarkness/Karak Stone (first time I’ve opened my Karak stone pot) until it was transparent. I used flow aid to thin (maybe this is my problem). and painted 1 thin layer on all the raised areas. It was going ok at first with some slight pooling, and a couple of errors due to my not so steady hand (easily corrected with tissue as the paint was still wet). But as it dried it went patchy.,as if the paint has separated from the flow aid into tiny specs. the flow aid has evaporated i the drying process leaving me with a speckled finish, not like the smooth consistency grey colour in the books. So, what do you think of my progress so far?
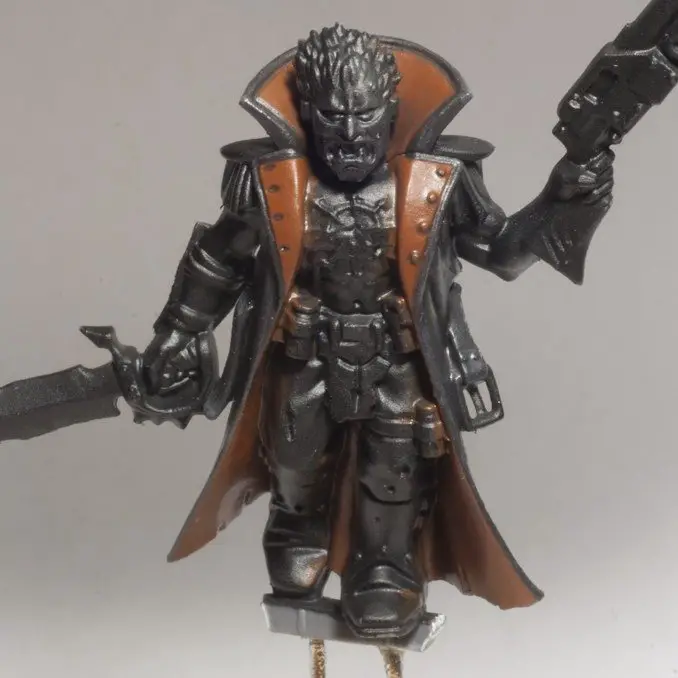
Ok, please forgive my photography, if I set the background to white then the model is overexposed and you can’ see the detail. The red has worked well, as best demonstrated on the collar behind the head, probably went a bit too deep in brown in the buttonholes on the left (your left on the models). but I’m also happy with the buttons themselves having a darker shade beneath them than above. On the right edge of the black jacket you can start to see the blotchiness I mean, unfortunately as this was lit from above with 1 light, you can’t see the bottom of the inside jacket too well, but I’m happy with how that has turned out. Also, can you see what I mean RE texture of the finish? are my paints still too thick? if I thinned them any more I’d have needed about 5 coats (not a pun).
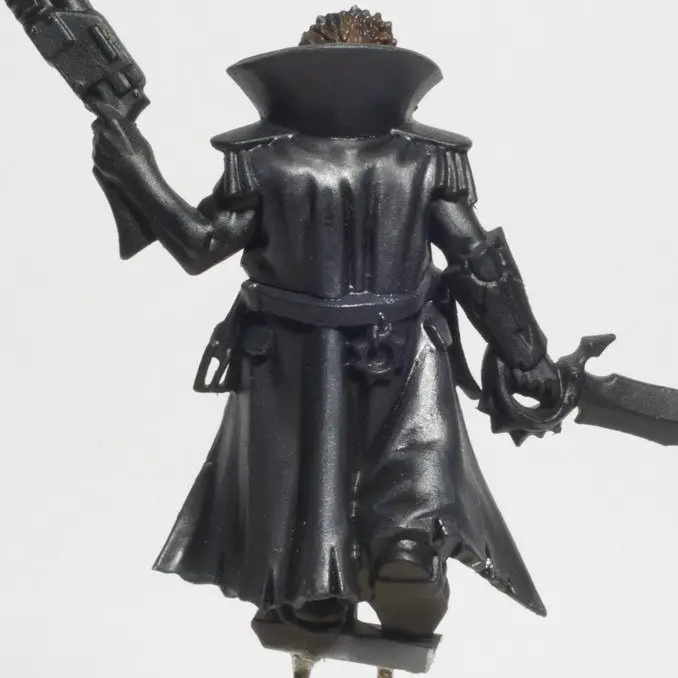
This is the back of the coat and the best blotchiness example was down that middle fold which the light has caught in the image so it’s not a great example, I also like how this has started looking more black in the pictures whereas the actual model base colour is more blue. Anyone who has experienced this blotchy effect when a (i’m guessing it’s called a glaze?) layer has dried, please tell me how you fixed this as I’ve had it now twice, on this and a Ravenwing bike (that one lead me to pretty much giving up on (what I call) glazing for a bit. should I now be using flow aid to thin my paints? So far I’m enjoying the guide and I have learned a few things, but the images are not the best, in some of the side by side images, the description says something has been done (specifically on the black shading) but you cant actually see a difference in the before and after. perhaps some on image annotation would help. Let me know what you think in the comments.