
How to Make Scenic Bases with Green Stuff World Rollers
Last Updated on February 9, 2021 by FauxHammer
Howdy, so as we said, we are going deep into tutorial territory this year and the first one out is this guide on How to Make scenic bases, and with this method, we’ll also show you how to use Green Stuff World Rollers in great detail.
Please Note: This site uses affiliate links. Our Affiliate Partners are shown below
(Affiliate links will result in compensation to the site on qualifying purchases)
Click this link & buy your hobby stuff from Element Games for the UK & Europe to support FauxHammer.com – Use Code “FAUX2768” at the checkout for double reward points.


Our Affiliates / Hobby Stores
- UK: Element Games, The Outpost, Wayland Games, Mighty Lancer, Goblin Gaming, Forbidden Planet, Model Scenery Supplies, eBay, Amazon
- US/Canada: MTechCave, GameKastle, eBay (US), eBay (CA), Amazon
- Germany: Taschengelddieb
- Europe: eBay (DE), eBay (FR), eBay (ES), eBay (IT), Amazon
- Australia: eBay, Amazon
- Global: RedGrass Games, Warcolours
- 3D Printers: Phrozen 3D, Elegoo, Anycubic
FauxHammer – Latest Video on YouTube
Green Stuff World Rollers – Introduction
Green Stuff World is a fantastic company who make a myriad of cool little extras to enhance the customisation of your miniatures. The Rollers are just one pillar of what they have on offer. Everything from Scenery and basing Materials to Paints and Brushes. You can easily get lost on their website for hours just overwhelmed by things that inspire you to try something new.
Here we are specifically looking at the rollers, But there’s so much more to cover in the future.
Green Stuff World Textured Rolling Pins – Milennial Version
Gah, the written word is so 1980s right! If you want the quickest way to absorb this content then check out the video below, but also, do that subscribey thing too!
Bear in mind though, the written version here will be packed with loads of extra nuanced detail that it is hard to fit into a video. Remember the following saying kids;
“Words are cool, so stay in School” – Fauxhammer 2020!
Green Stuff World Textured Roling Pins
Green Stuff World have a selection of nearly 50 textured Rolling Pins at the time of writing along with a few XL variants. Several can be bought in sets and you can even get a display case to store them in.
You can get everything from themed concrete, various cobblestones to vehicle tread textures and alien worlds. Your First challenge will be choosing which one (or how many) you want can afford).
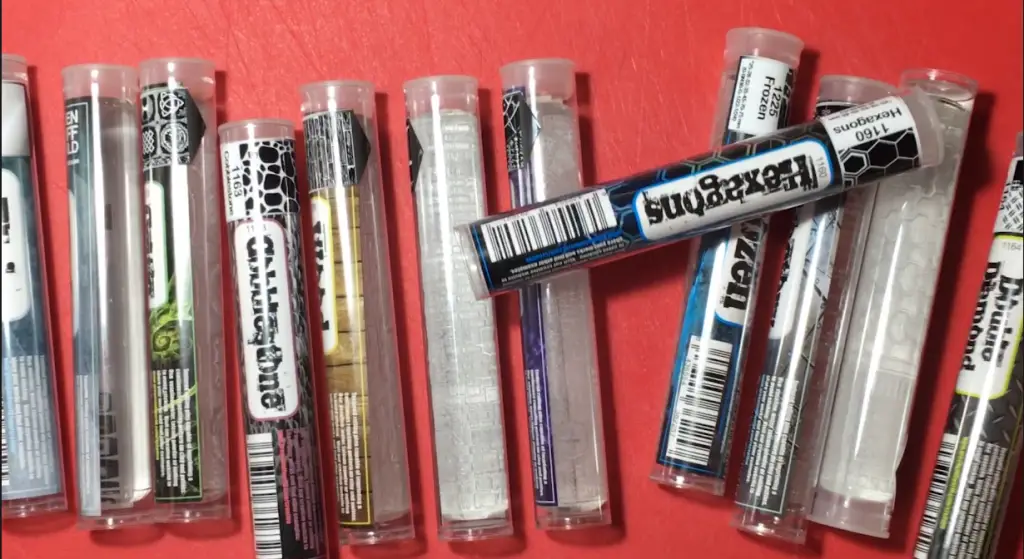
We have the first 2 sets from Green Stuff World to Go Over Today
Green Stuff World Textured Rolling Pin Pack 1.0 includes;
- Factory Ground
- Celtic
- Runic
- Wood Planks
- Frozen
- Plain – No Texture
Green Stuff World Textured Rolling Pin Pack 2.0 includes;
- Factory Ground
- Celtic
- Runic
- Wood Planks
- Frozen
- Plain – No Texture
Either of these would be a great starter set for most armies, but you can always just buy the 1 or two rollers you wnat individually.
The rollers themselves are made from acrylic rods with a pattern carved into the surface
The one thing to be aware of is that these are made by machining out from initial smooth surface material. It’s clear that whatever mechanism is used. The detail is cut out in a line across the surface, the rod is rotated then another line is cut. Due to this, you will find that in all the recesses in these rollers have lines going across them. and this makes a big impact when using them later.
How to make Scenic Bases with Green Stuff World Rollers – Sculpting Materials
The great thing about these rollers is that they can be used with a variery of sculpting material. Obviously intended for things like Green-Stuff and Miliput. but you can also use clays like Sculpey, Fimo or Das.
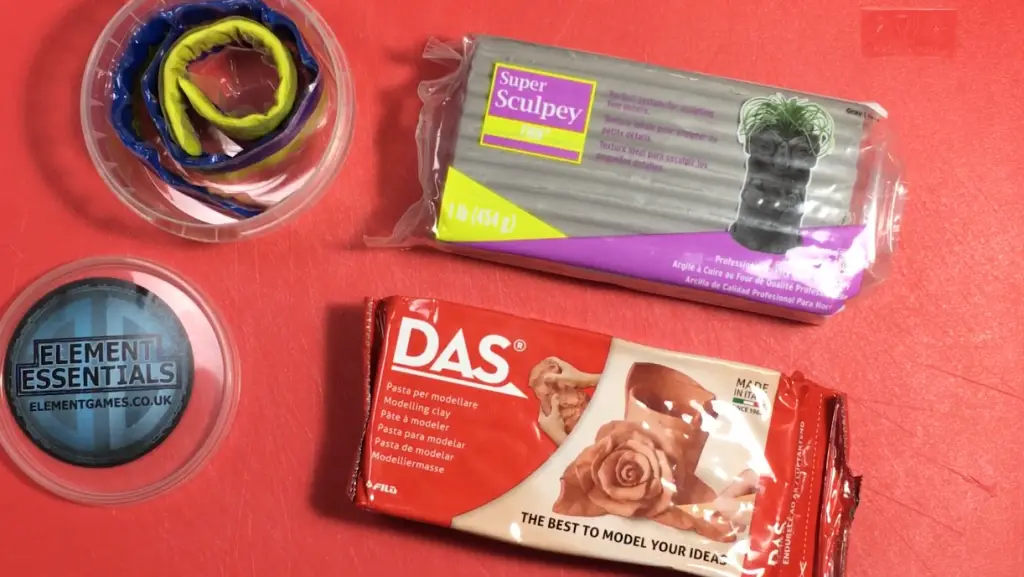
With this article i;m comparing Green Stuff, Sculpey and Das.
trying to work out the value of the different materials is tricky! Most places will sell green stuff in length measurements, not weight. But then again, weigh is arbitrary due to the differing mass between these products.
Ok. try this out and let’s just assume there’s not much in it when it comes to mass and go by weight alone. the following are approximations, but still.
- Green Stuff – 40g £5
- Sculpey Fine – 454g £18.50
- Das – 485g £4.00400
Ok so onthe surface it looks like Das is super cheap, Green Stuff is not much more and Sculpey is quite expensive. but looking at cost per gram, we have
- Green Stuff – £0.12p per gram
- Sculpey Fine – £0.04p per gram
- Das – £.0.0082p per gram
So, green stuff is only 3 times the cost of Sculpey. Sculpey is 5 times more expensive than Das. But this is why I was latking about mass
Whilst the block of Sculpey shown above is half the weight of the Das. You can see in the photo that it takes up roughly the same area, what you can’t see is that the block of Sculpey is deeper than the Das… So you actually get a little bit more Sculpey even though it weighs a bit less.
But let’s just go with these numbers, it’s close enough. Clearly that Das is super cheap in comparison and Green Stuff is kinda crazy expensive. let’s see how they perform below.
How to make Scenic Bases with Green Stuff World Rollers – Accessories
When I said before that the rollers are one pillar of Green Stuff Worlds Offering, that’s because there’s more on offer here than just the rollers themselves
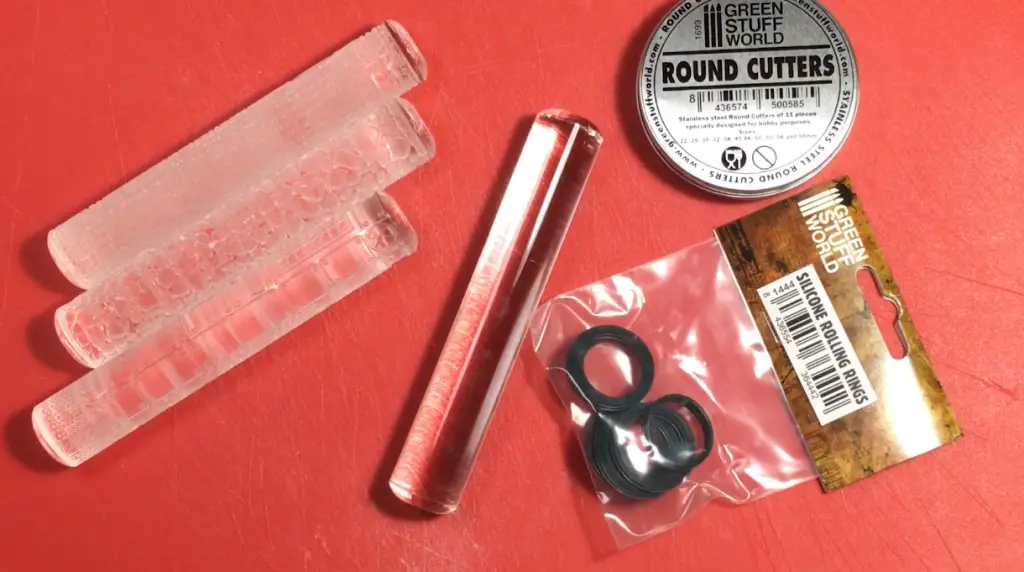
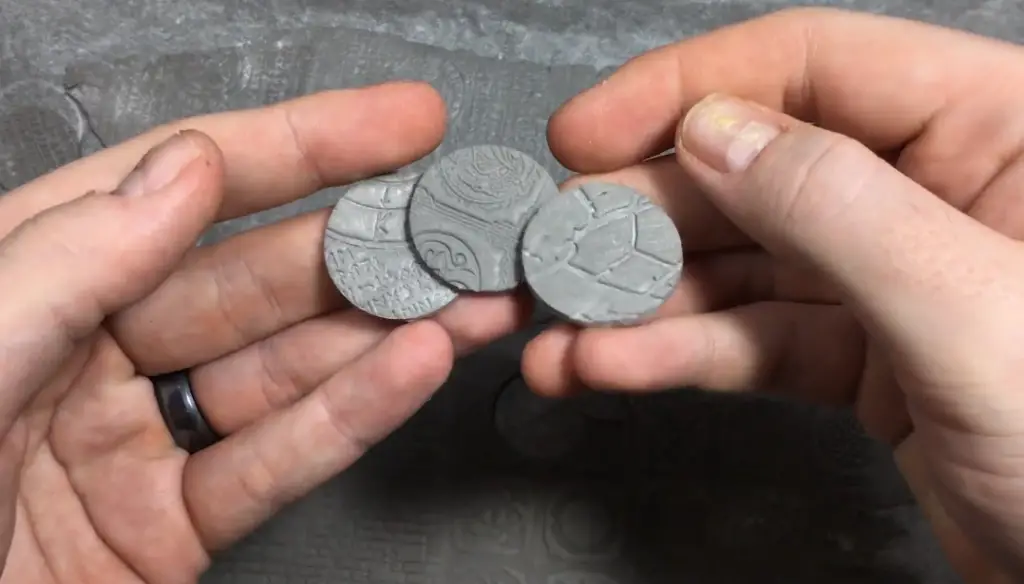
Shown above are 3 of the textured rollers, a plan roller for initially rolling the modeling material flat, some round cutters to easily cut out the textured material in perfect reltion to your bases. and Finally the silicon rings, uused to keeo the rollers off the surface to a set height.
They also sell sculpting vaseline which I didn;t pick up at the time and now regret. but there is an alternative.
How to make Scenic Bases with Green Stuff World Rollers – Preparation
As mentioned above the sculpers vaseline would be useful stuff becasue all of the materials get sticky in various ways.
In lieu of that, just get some water and pour in some talcum powder (baby powder).
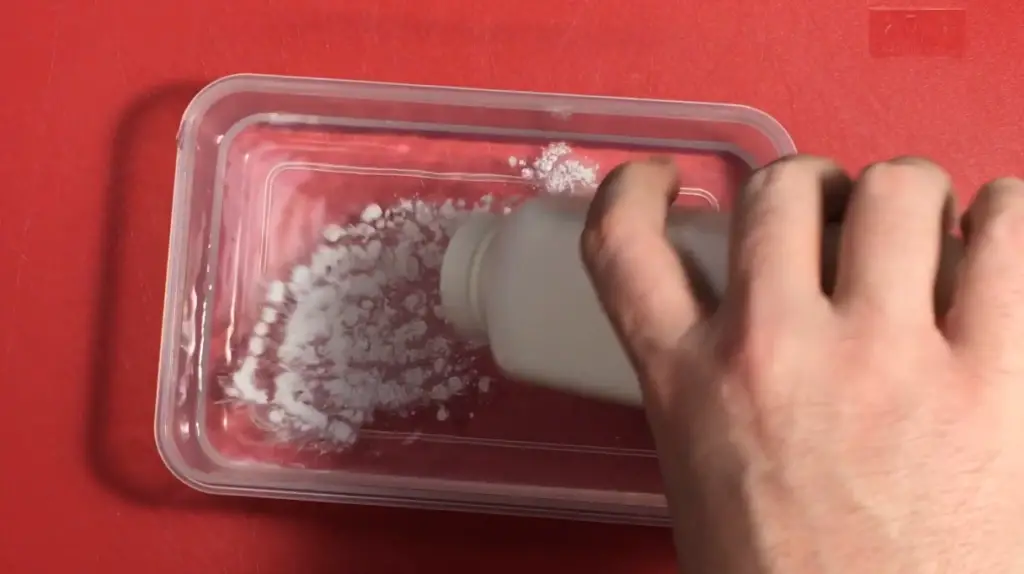
Mix it up until it is cloudy. this stuff on your hands & goves will resolve most (but ot all) of the sticking issues.
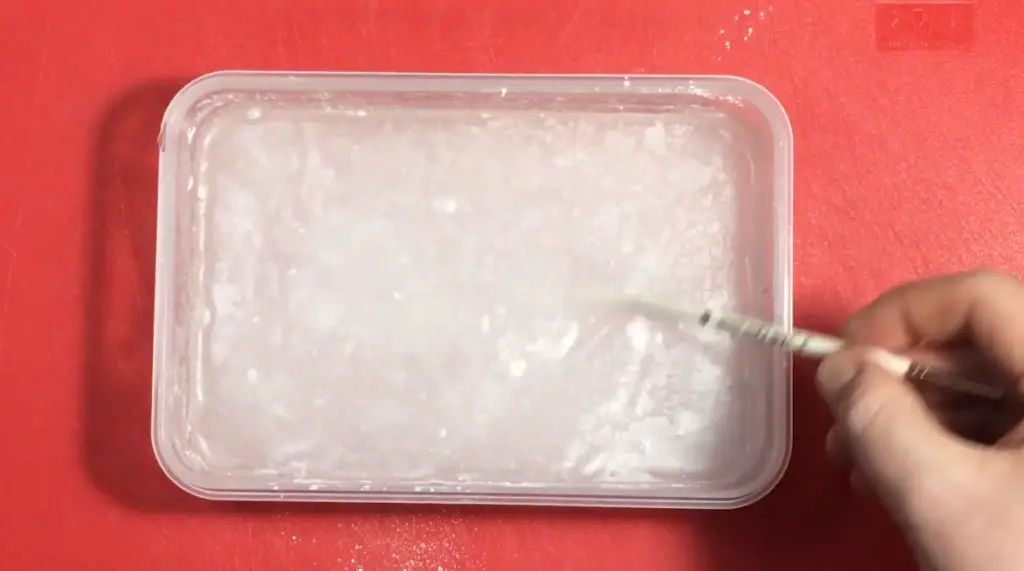
Remember to keep re-mixing throughout using it, otherwise the talk will settle on the bottom.
Making Scenic Bases with Green Stuff World Textured Rolling Pins – Guide
1. Prepare your Sculpting material
Mixing Green Stuff
With Green Stuff this is pretty straight Forwrad, just take equal parrts of the yellow side and blue side.
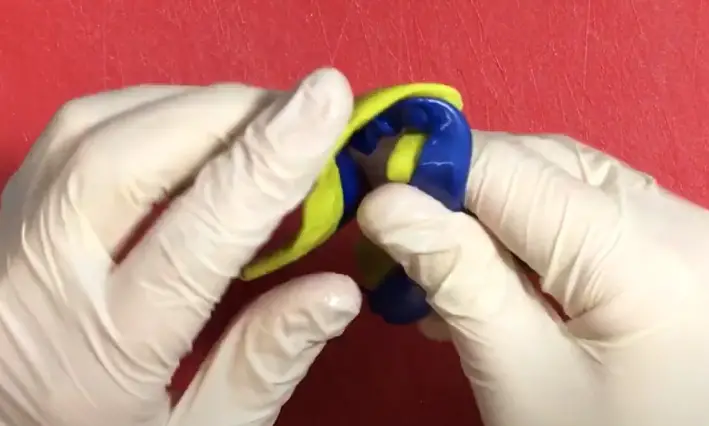
Keep your hands wet and knead it until it”s a consistent green
Mixing Sculpey
This one is odd as it never actually softens as you mix it, not in the 40 minutes I spent on it anyway. and this was probably a waste of time.
I bought the extra-fine sculpey as by reseasch suggested that this would provide the cleanest detail
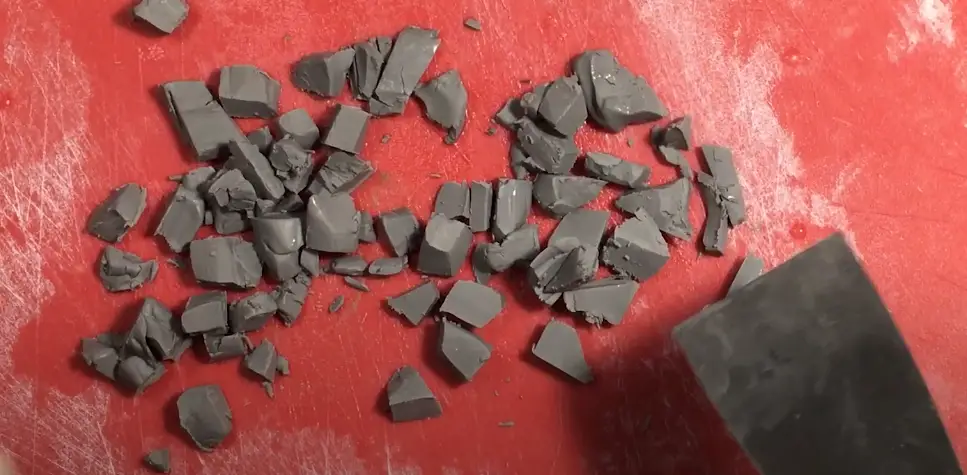
This stuff is hard and brittle, trrying to knead it is nigh-on impossible unless you have a vice-like grip. I resorted to choppong it up into small cubes then pushing it back together. Then rolling it out and folding it and rolling and folding. it cracks as it folds too showing just how brittle this is.
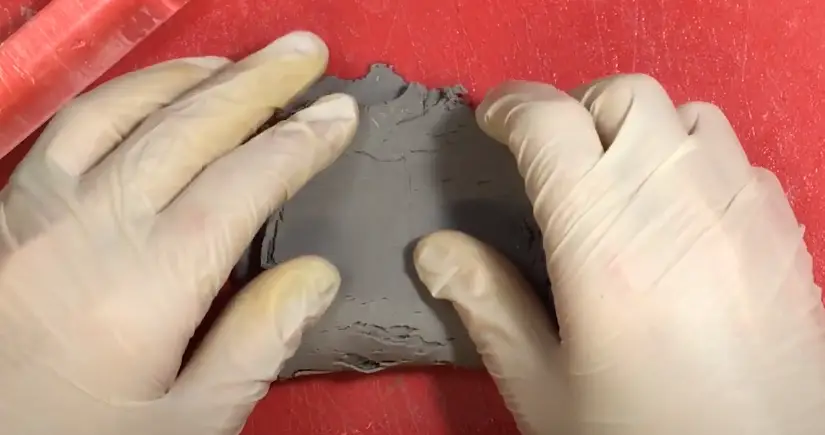
Which makes me wonder, why did I chop it up in the first place. Especially since the end consistency was no different to how it was straight out the pack.
With this stuff, just chop off a block, roll and fold for a but until it’s smooth, you need to bake it to cure it anyway.
Mixing Das
This is the messy one, As soon as you pop this stuff out of the pack it is really sticky, it’s waterbased and air-drying. You can easily knead this straight from the pack. but I’d definitely wear gloves. Unlike the other materials we’ve used here, it goes everywhere.
Also, I’ve seen numerous reports that this stuff will crack as it dries due to having terrible elasticity. So to improve that we need to mix in some PVA glue.
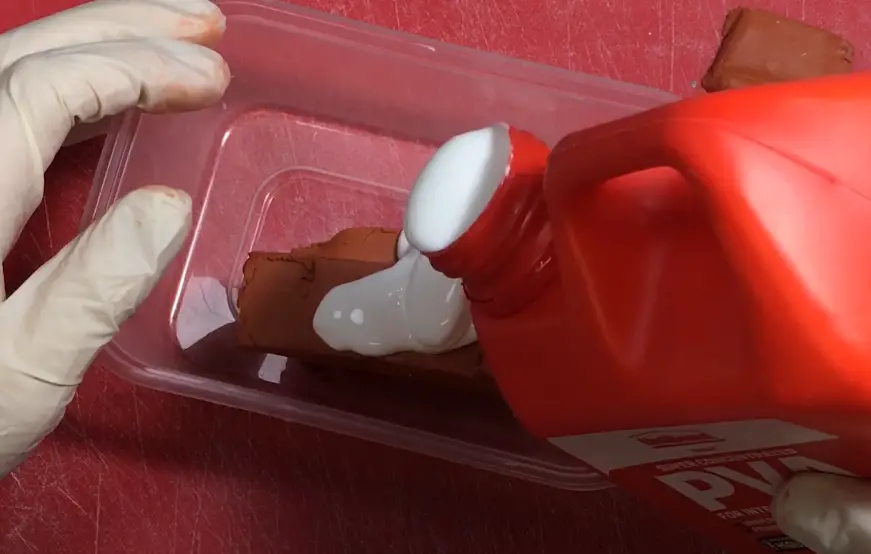
I’m yet to see a golden ratio for how much of each for the best results, and I’d be loath to ruining my kitchen equipment by measuring these materials out. So just add some, mix it in and just keep adding a bit more glue at a time until you have a big sticky lump.
The idea here is just to knead enough through so that there is some pva within it all, but not too much that it becomes runny.
2. Roll your material Flat.
You can buy the plain rollers or get them in the 1.0 or 2.0 sets as we did. or just use a kitchen roller. For how dense some of these maretials are a larger roller would have been helpful. Green Stuff World do sell an XL version of these.
Or you can just leave a textured roller in the packaging.
But this stops you from using the Silicone rings to roll your material to a set height.
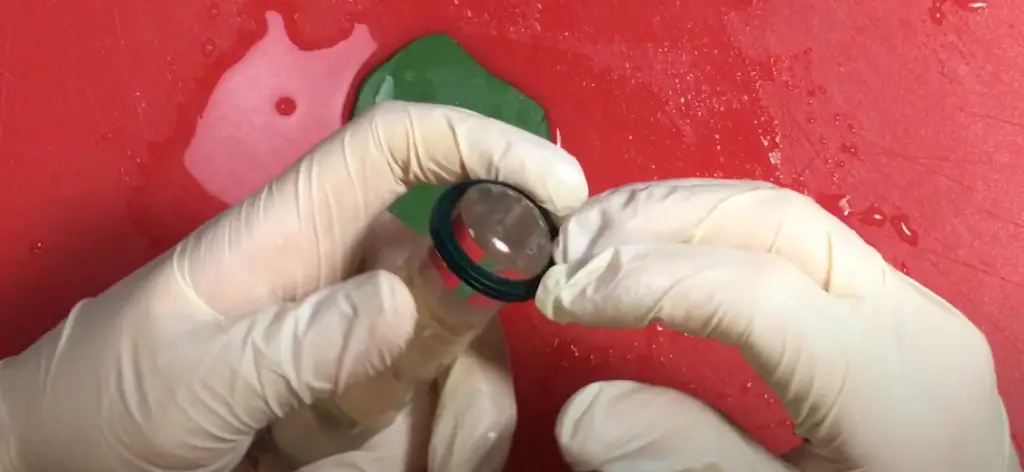
Green Stuff World – Silicone Rolling Rings
Just before we get into using your textured rollers, let’s talk about the Silicone Rings you can buy
The set comes with 3 pairs, 2mm, 4mm 5mm
The concept is good, my plan was to use the medium rings with the plain roller to get the material flat, then the small ring with a textured roller to lay in the pattern.
I expected that Green Stuff World had carefully calculated the difference in ring size based on the preferred depth that the roller should perfectly indent your sculpting material.
In reality that is not the case. Not only will small rings allow you to push the roller too deep from its medium ring depth and cause ridges (more on this in the results section), but the 4mm depth your material is left at when using the medium roller is excessive for a miniature base.
The only useful ring in this set for my application on Games Workshop Model bases was the small 2mm rings which allowed me to get my material down to a decent depth to start with.
But after that, there are no smaller rings to go down to. maybe a rubber band would be the next thickness you want?
Again, i love the idea of this, but we could do withGreen Stuff World making some improvements here if possible given the materials used.
The Small Rings are a Must have to get a consistent depth of your material. but for me at least the other two sizes are redundant.
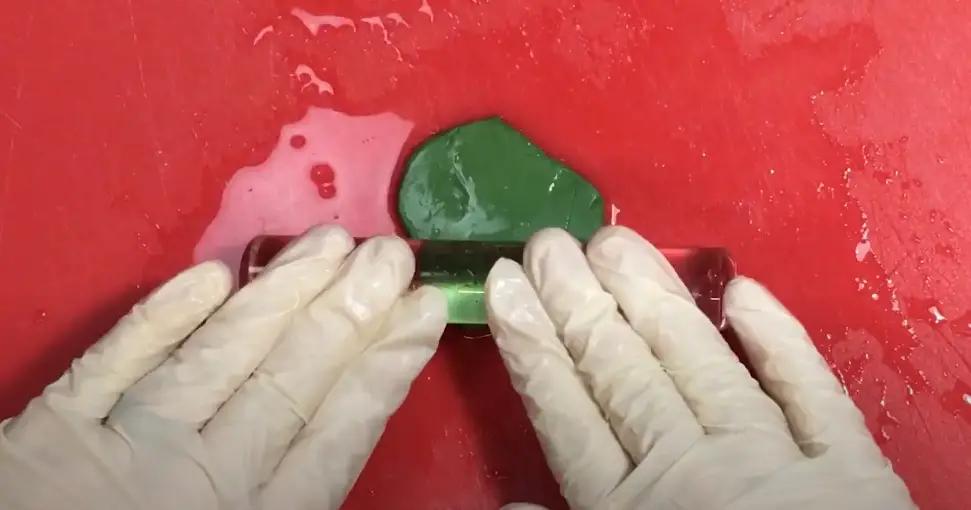
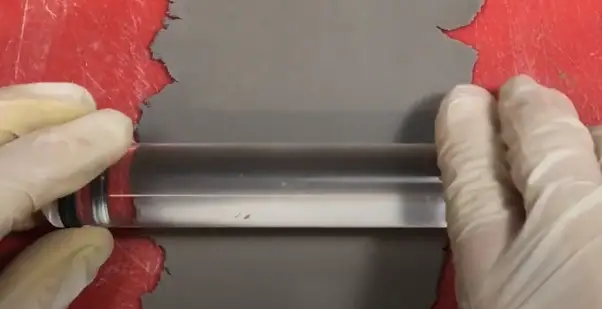
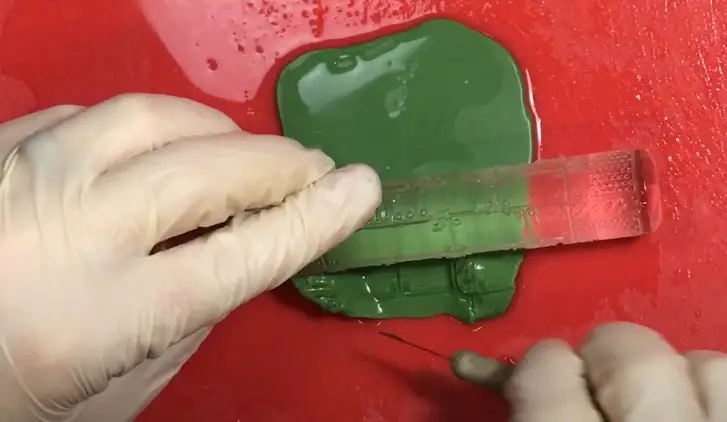
Rolling Green Stuff
Shown above in the example shots, Greenstuff is really easy to mix and pretty straight-forward to roll smooth
Just keep your plain roller wet becasue it will stick quite easily resulting in the green stuff lifting from whattever surface you are rolling it on and getting wrapped all the way around the roller
Rolling Sculpey
AS noted in the mixing section this stuff is really firrm, so it took some effort to roll out. The Plain Green stuff world roller did not help here as it was just too small to be effective.
I’d suggest a much larger heavy roller like Green Stuff World’s XL plain roller or any old plain Kitchen roller for that matter.
Rolling Das
This stuff is so messy
Initially when you try to roll this, it won;t roll, your roller will just spin like car tires in deep mud.
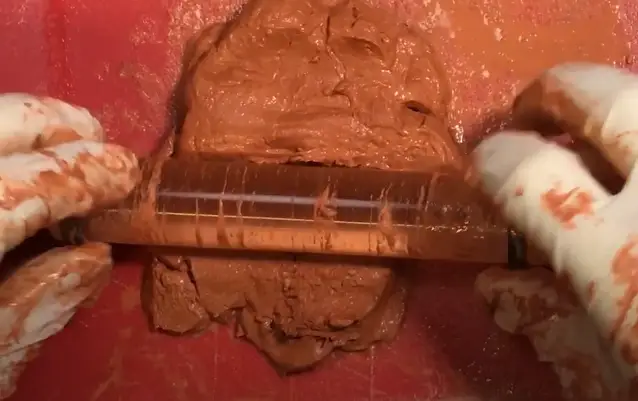
I found it best with this to initially just push it flat using my hands and the roller, once it is thin enough, you can use a plain roller for little more than smoothing it out
3. Roll with the textured rollers
As I said before it would have been great to have the silicone rings at specific heights so that one can be used to roll the material flat and another set of rings being a perfect increment smaller for the depth of the pattern in all the textured rolling pins.
Alas, this is not the case.
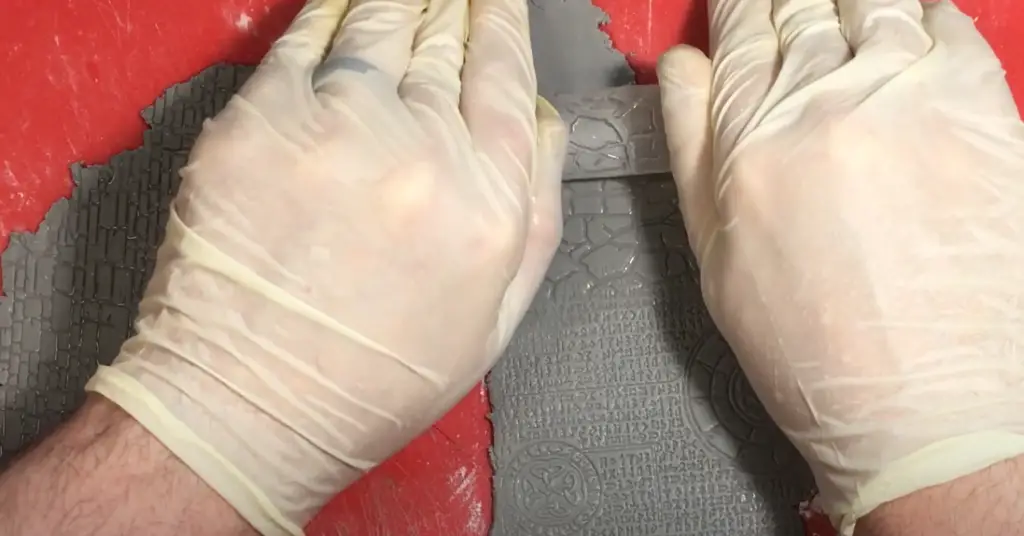
With all of these materials, it will just be a case of roling the textured rollig pin across and into your preprepared smooth surface.
To get the best results, there are two specific things to consider when rolling your texture.
- If you push the pin too deep, you will get lines in the final result.
In all of the indentations on these rollers have noticeable ridges across them, presumably from the manufacturing process as the pain acrylic rods are carved in rows and rotated,
2. you need to depress the roller firmly and evenly as you roll.
This is especially prevalent when rolling out the industrial style bases. Without even pressure, you’ll easily see peaks and troughs across the surface. It’s the opposite of what you when the texture you are rolling has a mechanical look. This is really tricky to pull off and is precisely why more evenly spaced silicone rings could have really helped.
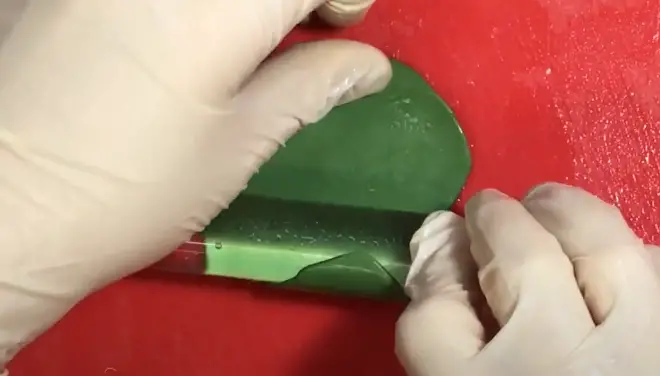
Rolling Green Stuff with Textured Rollers
Fiarly straightforwad with this stuff, keep your roller wet and get some talk on the surface and the roll should be fine.
Yhe only difficulty here is when you start, as you roll onto the greenstff, you;re likely to bring it up off the surfaceuntil you make it a decent way into the material. just use your hobby knife here to pry it way
don;t try to roll backwards, ythe likelihood that you will match upthe pattern is slim to none
Rolling Sculpey with Green Stuff World Textured Rollers
This was my preferred material to roll. It still grabbed when rolling in, but becasue of how firm it was, this was nowhere near as bad a green stuff. you can just pull it way with your finger and continue the roll.
Again, due to the firmness it was easier to get even pressure across the whole surface, just be mindful not to pish too deep so you can avoid the ridges,
Rolling Das Clay with Green Stuff World Textured Rollers
Das was my least favourite to work with here. Just getting it smooth with a roller was hard enough

Shown below you can see how even the plain roller leaves texture on the surface. the best way to get this smooth is just to rub water in with your fingertips.
But therein is the other problem, too much water on the surface will mix with the clay and it just becomes a watery clay like material.
As you roll out your texture, this will run into the pattern you;ve just made, reducing depth and detail once cured. We’ll get to that.
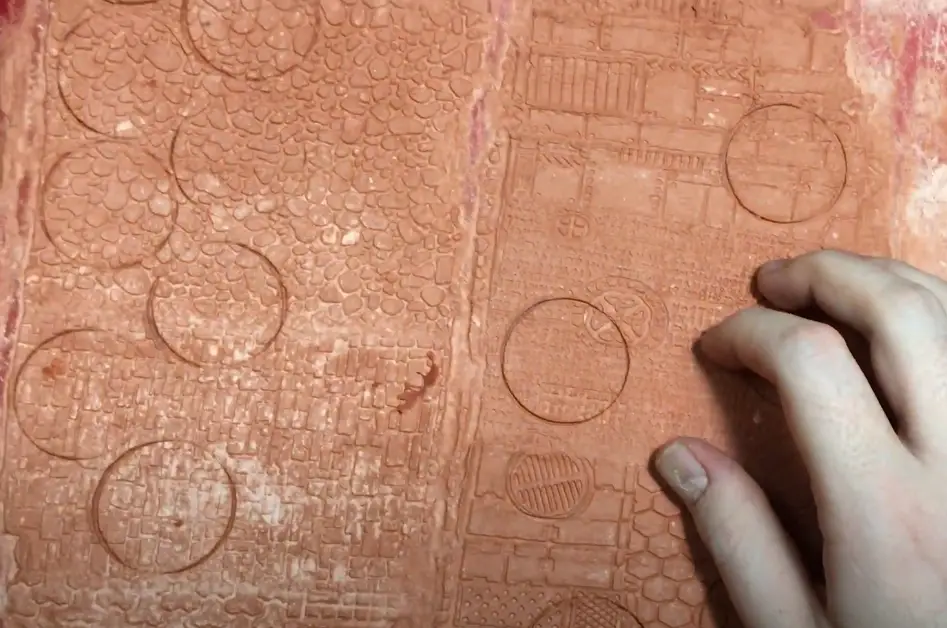
4. Green Stuff World Textured Rolling Pins – Round Cutters
On the other End of the Spectrum from the Silicone Rings, these are a must-have, especially for quick Warhammer Bases.
Once your texture is rolled out, just pick an area that looks cool, push these into the surface and twist a few times
The set comes with various sizes
22mm, 25mm, 30mm, 32mm, 38mm, 40mm, 48mm, 50mm, 55mm, 58mm & 60mm
I was worried when I took out the 32mm cutter for a 32mm games workshop model base only to find that 32mm was the complete base diameter. Obviously Games Workshop bases have a tapered edge, so the top of the base, the diameter you want to cut is actually narrower than the 32mm footprint. Thankfully Green Stuff World hAve you covered here.
To get the correct topper for these bases just subtract 2mm from the diameter of any standard round games workshop base and you’re golden, check the list above becasue this set provides those exact cutter sizes for all Games Workshop Bases from 25mm 9with a 25mm to 60mm.
Once you have cut your base toppers, quickly ball up and roll over any excess material and cut again. no need to waste it.
5. Green Stuff World Textured Rolling Pins – Curing
Really Simple this,
For the Green Stuff and Das, just leave it overnight to dry. I recomend when you roll out your material in the first place, do in on a hard surface. Like a large untextured (glossy) ceramic tile or a tempered glass panel.
Mostly so that the driued material can be easily removed from the surface.
I used an old thin plastic chopping board and as the Das Clay cured it pulled in on itself causing the board to fold and create a warp in the end result.
For the Sculpey, this needs to be baked at 130°C 275°F) for 15 minutes per 6mm thickness. Since these are only about 2mm thick. 15 minutes should suffice.
Just remember to but pre-heat the oven, if it’s like my knackered old thing it takes 15 minutes just to get to that temp!
6. Green Stuff World Textured Rolling Pins – Applying to Bases
If you have used the cutters then this should be as simple as applying some super glue to your base and upshing the newly created topper down until it dries.
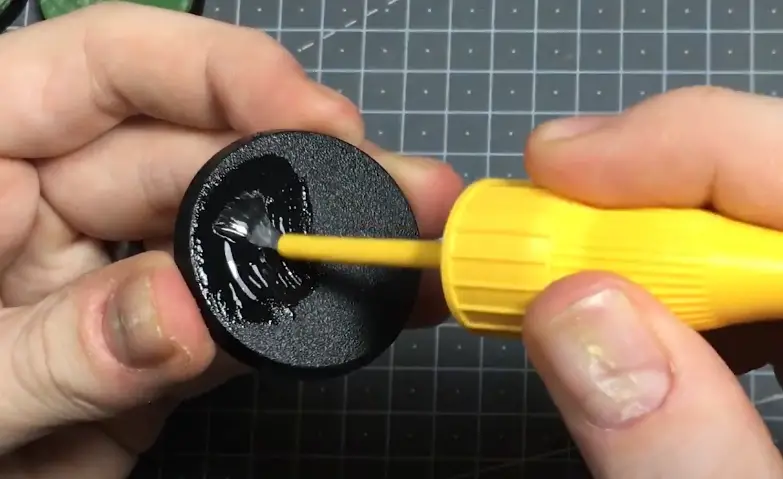
You can use any super glue, I just used this Gorilla Glue because I have always found Gorilla Glue to be one of the strongest and this version comes with a brush making application much easier.
Once the glueis on, just line up the pre cut topper ad push it into place
If any of the toppers have warped during curring, just put something heavy and flat on them as they dry. I used my big bottle of PVA
Making Scenic Bases
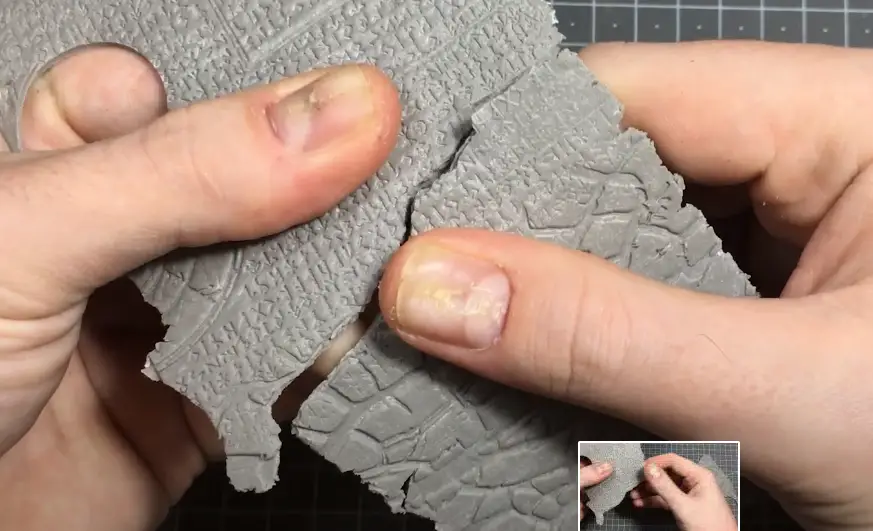
Another way to make bases is to add some moe features. and my preferred way of doing this is with the Sculpey. Instead of cutting out the base toppers, just bake it as is rolled out with texture.
Then just snap it, the fine edges in the cracks look remarkebly like weathered distress in poured concrete or layered stone.
For more dynamic bases, measure up the cracked parts to the base you wnat to cover, them glue that part to a thin cork board and tear around the edge to roughly match the shape of the snapped, textured sculpey.
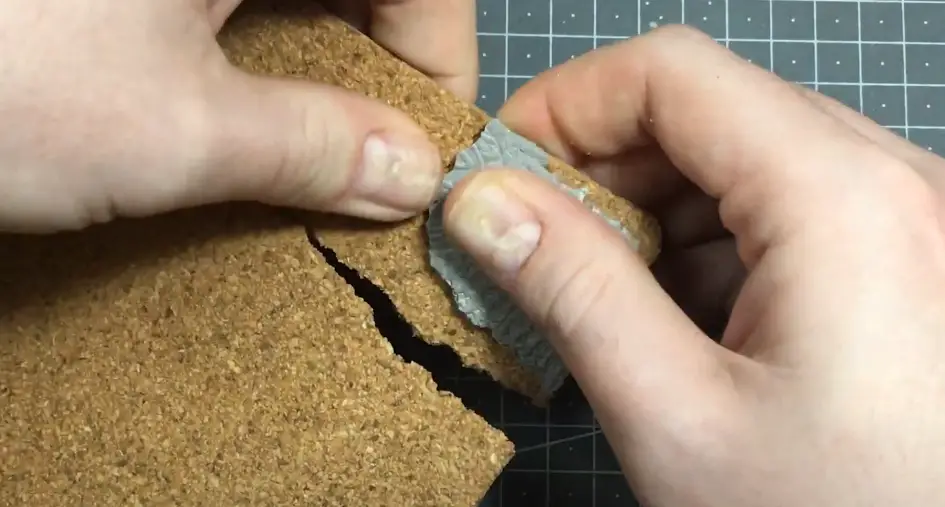
Stick these combined pieces to your base and voila.
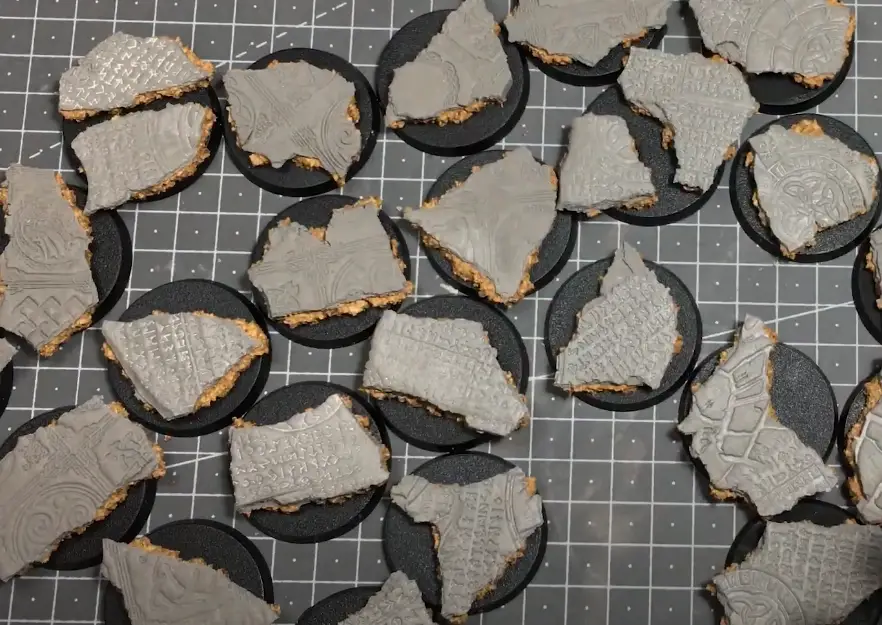
Once that’s done, just add some polyurethane glue (beacuse it;s more fluid to work with and stronger than PVA) in the gaps andpour in some sand
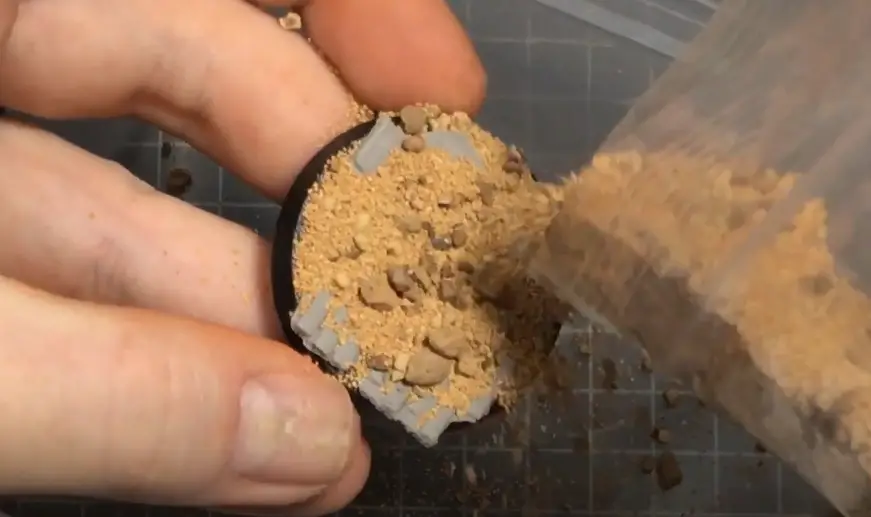
using these techniques I was able to knock out more than 30 scenic bases in the quuivelant of an afternoon. and if i wanted to make more, it’s just a case of rolling out more material in the first place,
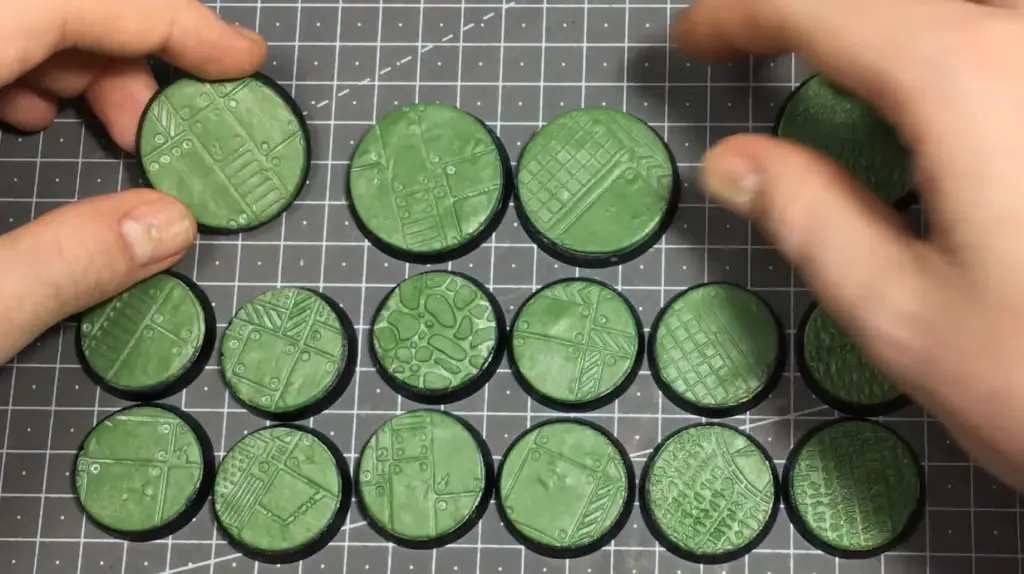
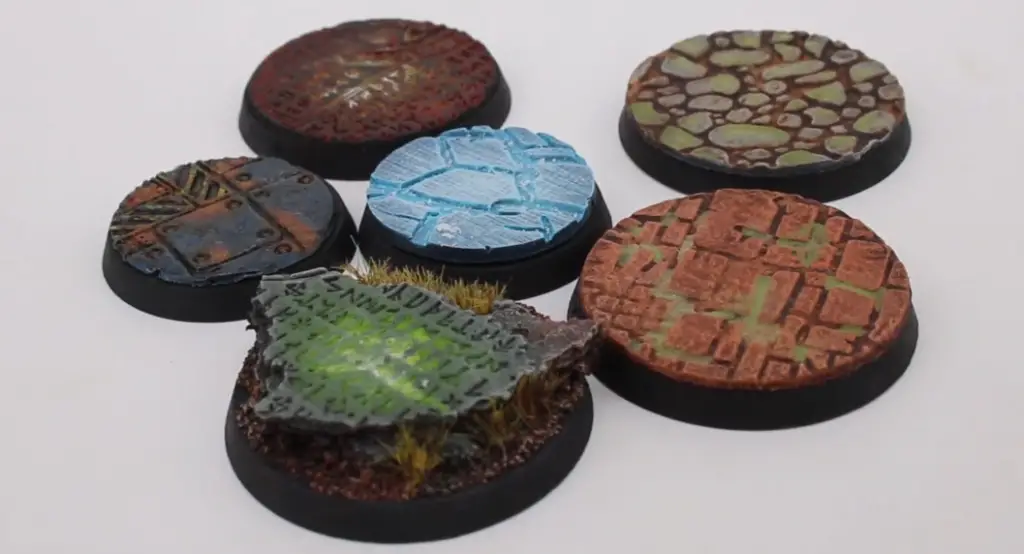
Green Stuff World Textured Rolling Pins – Results with specific materials
Below shows the results with the different material types used.
Green Stuff World Textured Rolling Pins – Green Stuff Results
Green Suff is the material that most people will use with these bases. The reslts were nice and sharp however as the roller stuck it caused some lumps and bumps
As I said at the top, this is not the best when you want to make industrial bases., but thankfully some rust effects can cover most of that
You really need to get the pressure quite deep and even if you want a crisp result. (Good King Wenceslas had a great way with words).
Overall the results are quite good, but persinally I prefer the below results using a cheaperr material.
Green Stuff World Textured Rolling Pins – Sculpey Results
The Sculpey came out reeally nice. The results were super crisp and a lot of that is from the resistence the sculpey has as you press into it.
This coupled with the nice texture it leave on the edge as you snap it amkes it my preferred opion as the Green stuff above just tears away if you try the same technique.
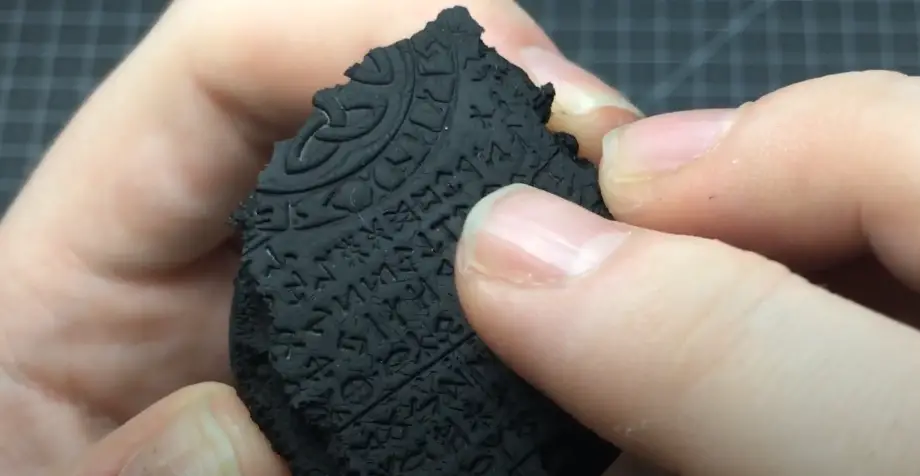
In the piece above you can even see the initial layer of texture rolled into the surface beore I decided I wasn;t happy and rolled it flat again. The Sculpey Fine, really is fine and give really sharp results.
Green Stuff World Textured Rolling Pins – Sculpey Results
The Das was also fairly decent but still quite obviously the weakest material. with practice and the right balance of PVA and water, you’d probably get better than this. But this isn’t bad.
You can see from the results above that even with the circular cutters, as the water has run into the gaps it has re-fused them to the larger body of the clay.
Thanksfully this easily tears away
Like with the Sculpey you can snap pieces of this away to make more scenic bases, but the edge it leaves is more like torn wet cardboard.
Never the less, for the price of it and how many bases you can make for very little money, it will more than do the job.
Green Stuff World Textured Rolling Pins – Painting
I love painting bases quickly, in the most part you can easily get away with some texture paint, a few drybrush effects and some static grass.
There’s no difference here really. so I’ve literally thrown paints at these to see how they look.
Painting Green Stuff Textured Bases
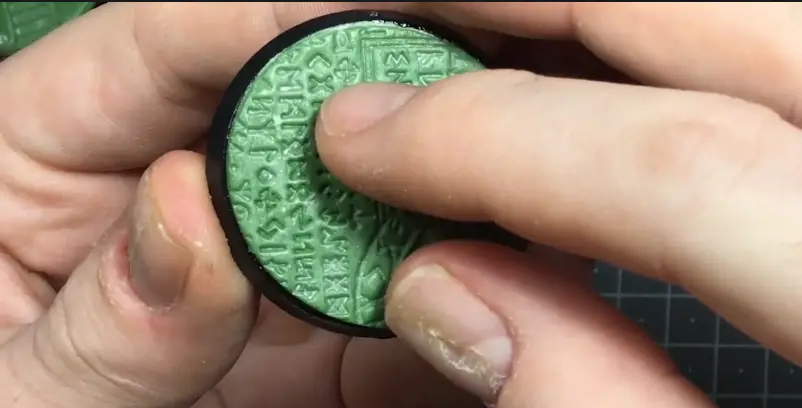
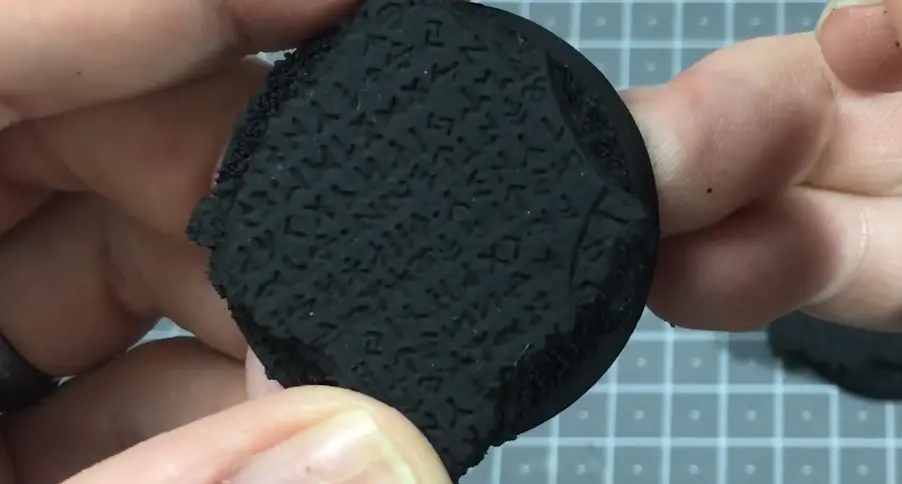
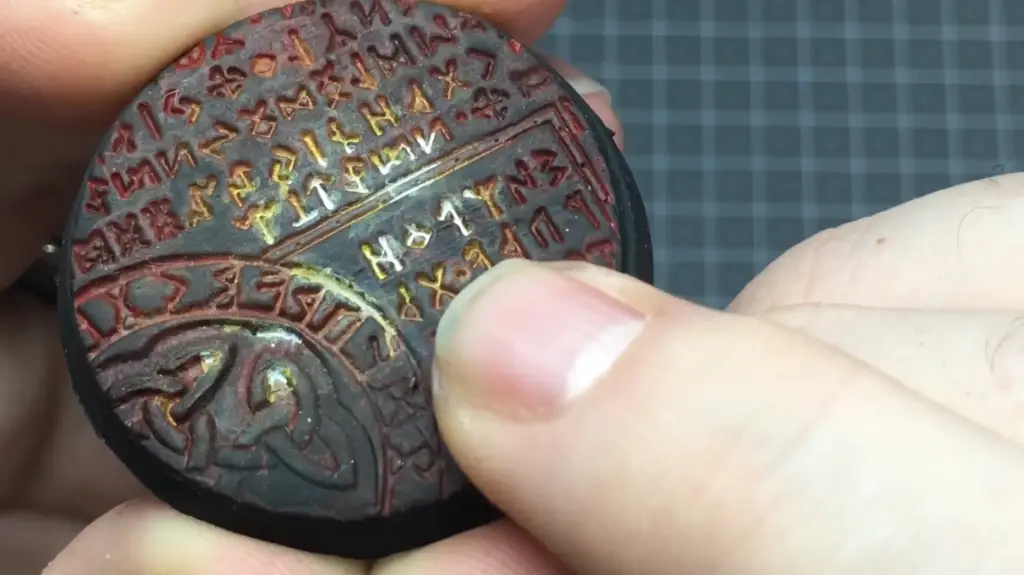
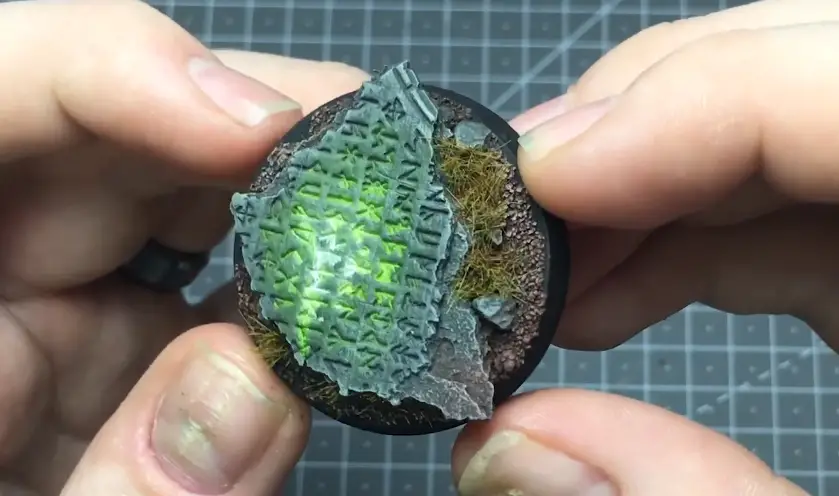
For the first base, i took the runic texture and just added some watered down paint into the recesses to simulate a heat glowing effect from below/very quick and lazy but this quickly enhances the base in a few minutes.
Shown above you can just about make out the ridges created from the depressions in the roller. Drybrushing would have really made this stand out making the base look fake.
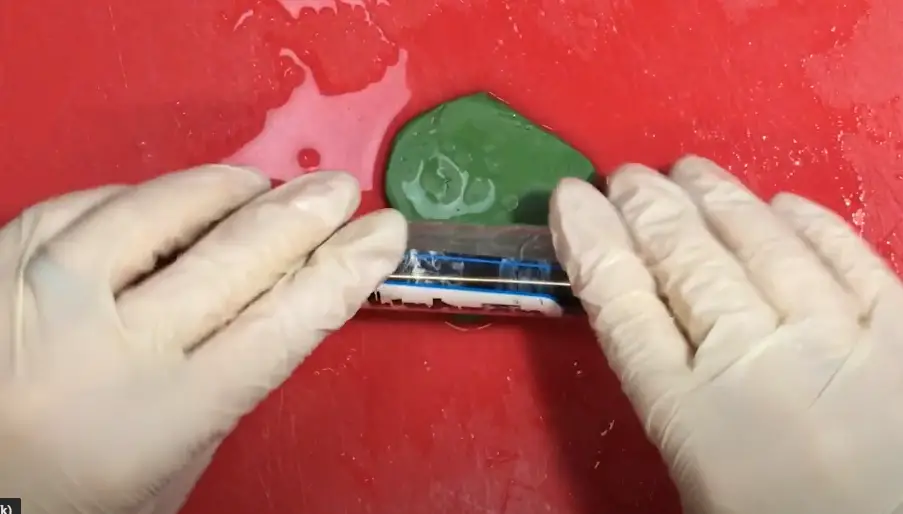
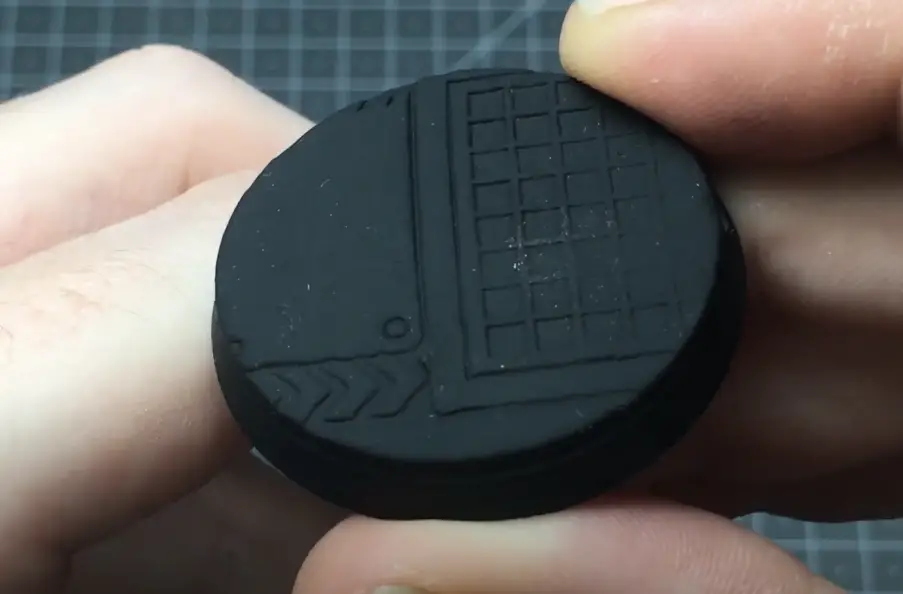
With the factory texture on Green Stuff, you can see just how imperfect the panels look.
I used a silver base then added some AK Worn Effects fluid before a dark blue base coat. then pulled away at the edges to re-reveal the metal below and add some raised paint texture.
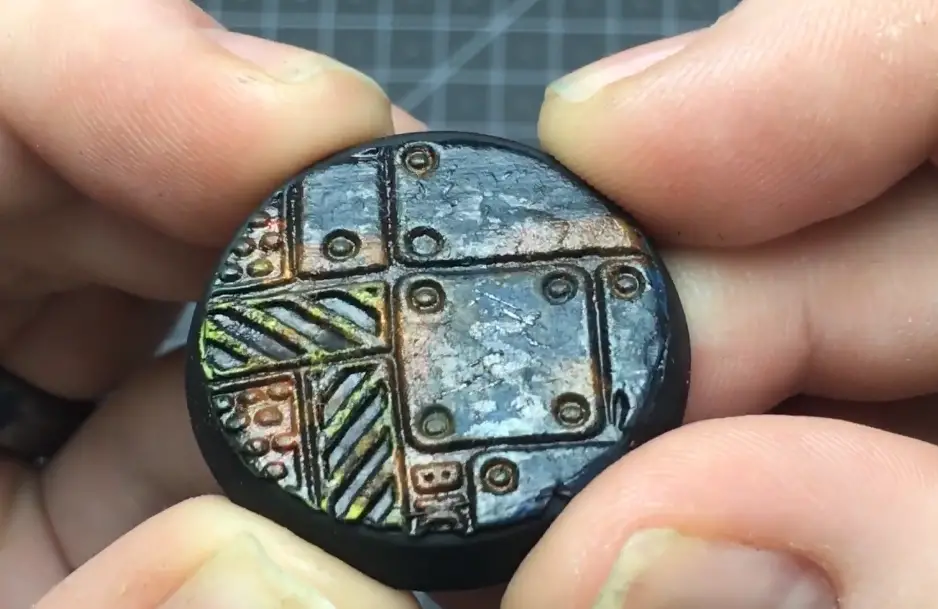
Again, not bad the details are sharp enough, they just aren’t precise enough for the panels and hazard lines to look truly realistic. so you need to be creative with your paint for these.
But again, fairly solid result.
Painting Sculpey Textured Bases
As noted above the Sculpey is more precise and sharp and the example below shows exactly what happens when you press too deep with the rollers, those lines are the ridges in the recesses of the rollers.
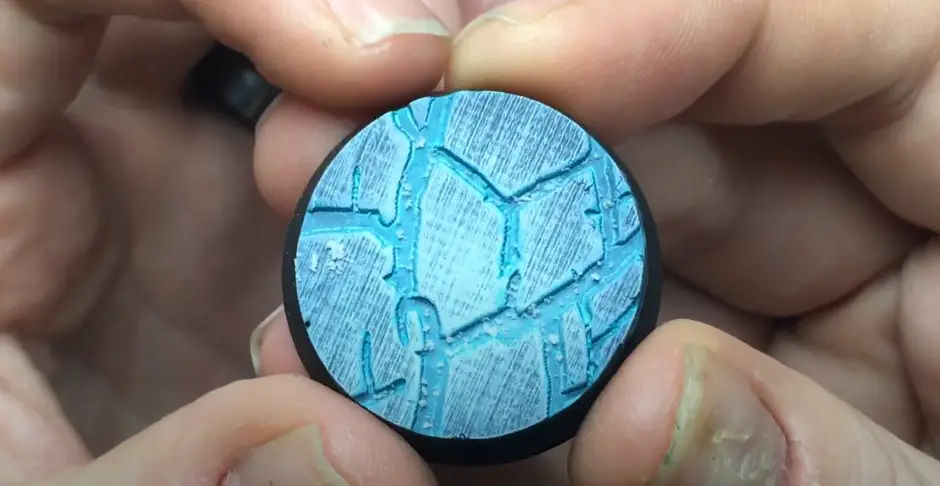
So just something to be aware of. if you want a flat surface on top, you need to achieve this initially with a flat roller.
You can be creative with this too. after flattening it, roll a rock over it to add some natural texture then press in the textured roller to apply the pattern
I know I;m sounding like a broken record here, but just don’t press to deep or you will get the results shown above.
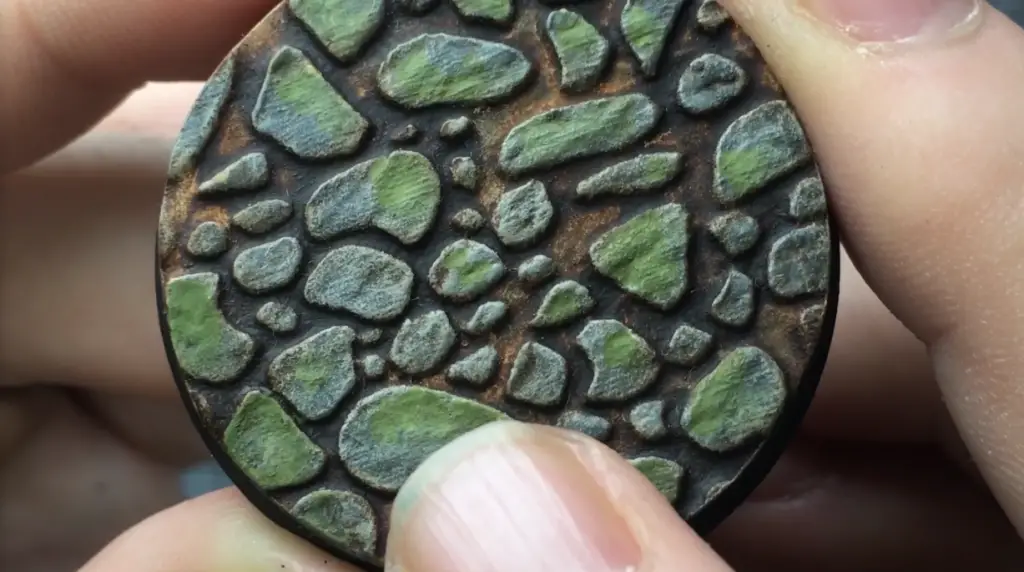
I really fell in love with the below process of adding the Sculpey to the cork base. In the below example, the part at the bottom right really shows what I meant in regard to the awesome texture. here I actually pulled away at the top level of Sculpey to show the texture below, there are several layers like this in the 2mm depth from the folding and kneading.
Here I drybrushed grey then applied thinned greens to white in the recesses, the drybrushed the earth in warmer browns.
Painting Green Stuff Textured Bases
With the Das the details were not as pronounced, but it was still a solid result.
In the examples below I once again just drybrushed it and added some AK enamel washes across the surface

Shown below you can once again see the lines across the surface (which are almost imperceivable at a distance. One upside to the Das which was an earlier drawback is that the watery clay removes detail, so here it reduces the visibility of these lines. yay
You know if you just want some bases that stand out from the majority and aren’t too fussed about detail, for the price this is a massive win.
Painting Green Stuff World Textured Rolling Pins – Final Thoughts
These rollers are fantastic and are just the ting that Green Stuff World excel at – those slightly out of the box products which add some really interesting quirks to your models.
genuinely, I’d avoid using Green Stuff with these, it’s fine and if it’s what you have when it works. so for the odd model here and there do it.
But if you are doing anything en-masse like and army’s worth. invest in a clay.
the Sculpey was by far my favourite. Whilst it was the hardest to knead this would have been made much easier with a bigger heavier roller than the little ones I had. After that, the win is that it’s not as sticky, or messy, it’s firmer and provides the sharpest results.
But the Das is a fair option, especially on a budget. You can easily base a decent-sized army with just one block and one roller. but it’s messy and you won’t get as much detail.
So there you go, thee options and my thoughts on each. there are more materials out there that you can use. But this should get you off to a solid start!
Please Note: This site uses affiliate links. Our Affiliate Partners are shown below
(Affiliate links will result in compensation to the site on qualifying purchases)
Click this link & buy your hobby stuff from Element Games for the UK & Europe to support FauxHammer.com – Use Code “FAUX2768” at the checkout for double reward points.
Our Affiliates / Hobby Stores
- UK: Element Games, The Outpost, Wayland Games, Mighty Lancer, Goblin Gaming, Forbidden Planet, Model Scenery Supplies, eBay, Amazon
- US/Canada: MTechCave, GameKastle, eBay (US), eBay (CA), Amazon
- Germany: Taschengelddieb
- Europe: eBay (DE), eBay (FR), eBay (ES), eBay (IT), Amazon
- Australia: eBay, Amazon
- Global: RedGrass Games, Warcolours
- 3D Printers: Phrozen 3D, Elegoo, Anycubic
FauxHammer – Latest Video on YouTube
What did you think of this Tutorial? please let us know in the comments.
If you like what we’re doing here you could really help encourage more content with a share on any social media platform.
Click the share links at the bottom of this screen (or on the left for computers and tablets)
Want to keep updated with the blog? You can subscribe in the sidebar for RSS or by email below
(Sidebar is below the article on Mobile Devices)

Great article! I purchased a few at Christmas and found them easy to work with and get a great result. Personally I have been using a mix of 2/3 standard milliput and 1/3 plasticine. Air dries and east to work with 👍🏼
oooh I had not heard of that method of mixing, would the plasticine not crack as it dries though?
Where you say ‘mass’, eg ‘weigh (sic) is arbitrary due to the differing mass between these products’; I think you mean ‘density’.
you are correct, I was trying to bve clever but used terms I did not fully understand… I’ll change it