
Anycubic Photon S Review for Miniatures
Last Updated on April 23, 2021 by FauxHammer
I know a lot of people are wondering “Can I build a wargame army using a 3D printer?” Well, today we’ll take a look at that as part of our Anycubic Photon S review for Miniatures & Wargames Models
Please Note: This site uses affiliate links. Our Affiliate Partners are shown below
(Affiliate links will result in compensation to the site on qualifying purchases)
Click this link & buy your hobby stuff from Element Games for the UK & Europe to support FauxHammer.com – Use Code “FAUX2768” at the checkout for double reward points.


Our Affiliates / Hobby Stores
- UK: Element Games, The Outpost, Wayland Games, Mighty Lancer, Goblin Gaming, Forbidden Planet, Model Scenery Supplies, eBay, Amazon
- US/Canada: MTechCave, GameKastle, eBay (US), eBay (CA), Amazon
- Germany: Taschengelddieb
- Europe: eBay (DE), eBay (FR), eBay (ES), eBay (IT), Amazon
- Australia: eBay, Amazon
- Global: RedGrass Games, Warcolours
- 3D Printers: Phrozen 3D, Elegoo, Anycubic
FauxHammer – Latest Video on YouTube
The Best 3D Printers for Miniatures
This article is part of our Best 3D Printers for Miniatures Article.
To see the full list of 3D printers check out that article.
Anycubic Photon Review for Miniatures – Summary
If you want to print highly detailed miniatures, this is one of the few options available which will allow you to do that. But no, you won’t print the quality you get from extruded plastic or cast resin. Detail wise the results are somewhat close to what you would have seen in 1990’s plastic models. Even at the lowest printable settings, you will get some show of layer lines
That being said, you can make quite suitable proxies and accessories for an existing army. You can get the parts you print to a suitable quality, this takes either thought upfront, to print at an orientation which hides the layer lines, or work after the print to sand them smooth. Sometimes (often) both.
Regardless of all of that. Having a 3D printer has lead to some of the most fun I have had since getting back into this hobby.
Why a Resin Printer?
Put simply, resin offers higher quality than FDM (the one where a spool of plastic is melted and pushed through a nozzle). Resin printers work in two ways. In both cases, the resin is poured into a vat. The resin is then cured using UV light. For the highest quality, the UV light is a laser (SLA), which like FDM printers traces the outline of each laser. The more affordable option, the light is shone through an LCD screen (DLP). The latter is what this is.
Put simply, if you want to print big get an FDM printer if you want to print at the highest quality get a Resin printer.
Anycubic Photon Review for Miniatures – Unboxing
Normally with my reviews, I like to do an unboxing segment. However, with this, I was so excited when the printer arrived, I just wanted to get to printing as fast as I could. The unboxing and initial setup is so easy I managed to get this arranged and printing during my lunch break.
Thankfully I’d watched some youtube videos beforehand. But essentially this was just plug in, level the bed and pour in some resin.
Getting the 3D file ready for printing was a bit trickier. 3D models come in the form of .STL files. To get them ready for printing you use a program called a Slicer. This program will turn the 3d model into a series of images, each breaking the model down to individual layers. The LCD screen of your printer projects these images to cure the resin. It also lets you create supports for areas of the structure which would otherwise print suspended in mid-air.
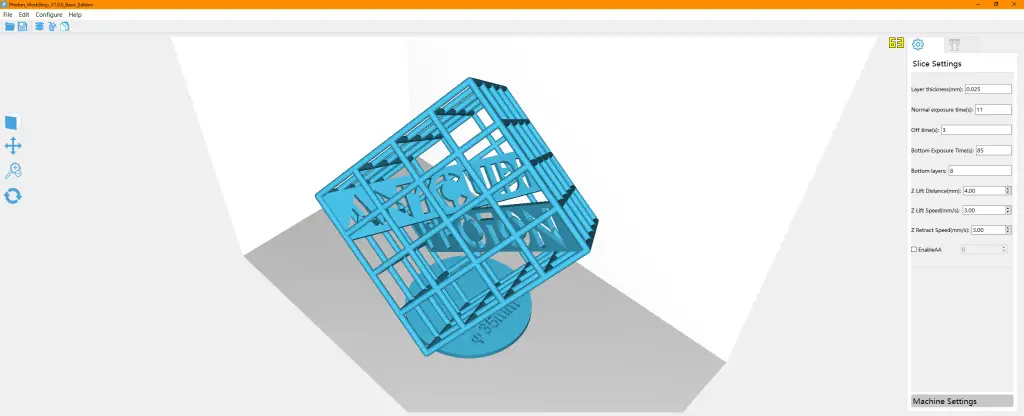
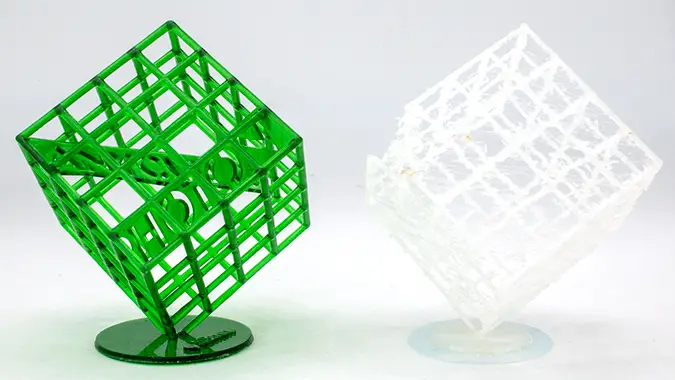
Before you make your first print, you need to run the test model (the cube above) through a slicer (you get one on the USB drive which comes with the printer). A tip I’d picked up before getting this printer was to take the files from the USB drive and save them on your PC ASAP. then take That USB drive, throw it in the bin and replace it with a decent brand one. Apparently many of the issues which cause print failures are due to this cheap USB drive intermittently cutting out. I’ve not tested this USB drive as I did exactly what the instructions said.
Run the STL file through the slicer and you create a .photons file. Put this file onto the (replaced) USB drive and stick it in the printer. It will then be in the print menu you can access from the printer’s own LCD.
Anycubic Photon Review for Miniatures – Post-processing
One thing to be aware of with resin printers is that post-processing is a big requirement. With FDM printing, once the print is complete just pull it off the print bed. for the more complex prints, you will have some support removal to do. With resin, you need to clean it and fully cure it before you even start any support clean up. (although some say it’s easier to clean the supports before a full cure – play about, see what works for you).
First off, you need to clear off any loose resin, for this, you need IPA or Methylated spirits. I use 2 baths, One to get off the majority of the resin. (after two models, this was opaque), then a second bath to clean off any diluted resin after the first bath.
You can use anything airtight for this, however, some users have reported better results by brushing the models with a toothbrush or using an ultrasonic cleaner.
Next is the cure, You need to use Ultraviolet light to finish curing the outside of a model. You can use sunlight if you have it, I’m in the UK and it’s currently winter. even if we do get a clear day it’s probably raining. So after killing my wife’s nail polish curing station, I built my own.
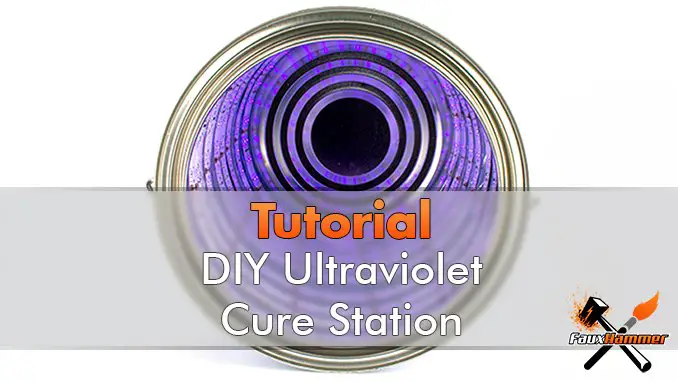
To “properly” cure models, you need to consider the light intensity and temperature, features which the retail options offer. But they are really expensive. For a few models to play around with, this is fine.
Once this is done, there’s often some further clean up to do, removing support pillars and smoothing surfaces. This is much easier with files initially (just like Forgeworld or other resin miniatures), once you have taken the stubs off left by the print support you can then sand it smooth with finer grades of sandpaper.
The with the prints above, I can leave them rough as these sides will not be seen when they are completed. If you’re printing miniatures you need to be very careful where you place your supports or you will have a nightmare trying to get these smooth. More on this in a bit.
Anycubic Photon Review for Miniatures – Printing with Resin
Whilst the test model printed, I spent some time on Thingiverse (a site for free 3D model files) looking for other models I could print. I’ll warn you now you can get lost on this site for hours, and I have. This get’s work if you go on a site like Yeggi which is a site showing models from various other free and paid sources including Thingiverse.
So after lots of hours of hunting, I’d found a ton of stuff and sorted them into folders ready to print. Using the Slicer which came with the printer I laid out several of these files (specifically for wargames miniatures) and changed the slicer layer height to 0.01mm (the lowest setting) and set it to print.
I woke up the next morning to find out that I’d printed…
Trash!
And he’s where the complexities of resin printing come in. You can’t just set a layer height and click go. There are also settings like exposure time to consider.
Too short an exposure and the resin won’t fully cure leading to warping (shown above). Too long and the horizontal detail will be lost. Light doesn’t cast in perfectly straight lines upward from the LCD surface, it shines outward and refracts off the resin itself. Overexposure turns a detailed patterned surface into a blur. Resin Type, opacity and room temperature all come into account too.
So It’s very much a balancing act.
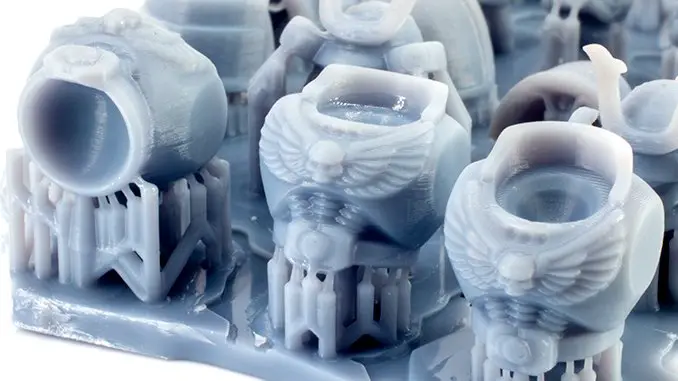
Thankfully these printers have a really strong community behind them some of my favourite communities are the Facebook groups AnyCubic Photon Owners, 3D Printed Warhammer & 3D Printing Miniatures & Terrain. One of these linked me to this table, which is a community-generated a list of successful settings per resin type and layer height.
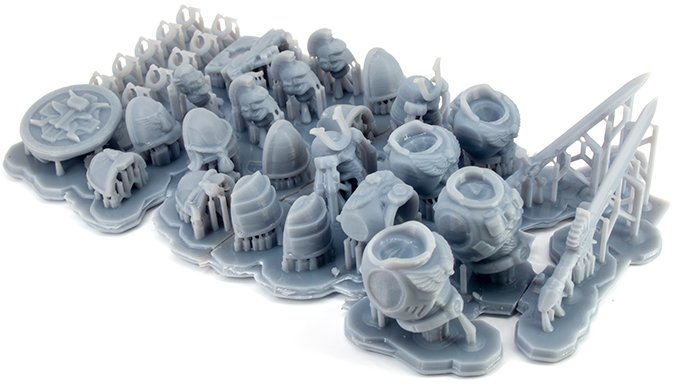
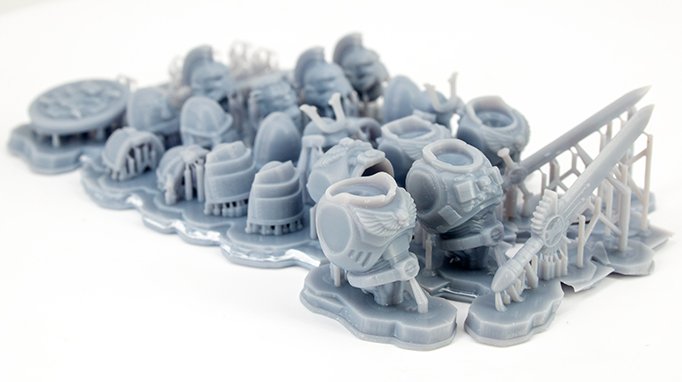
This immediately resulted in a much better print
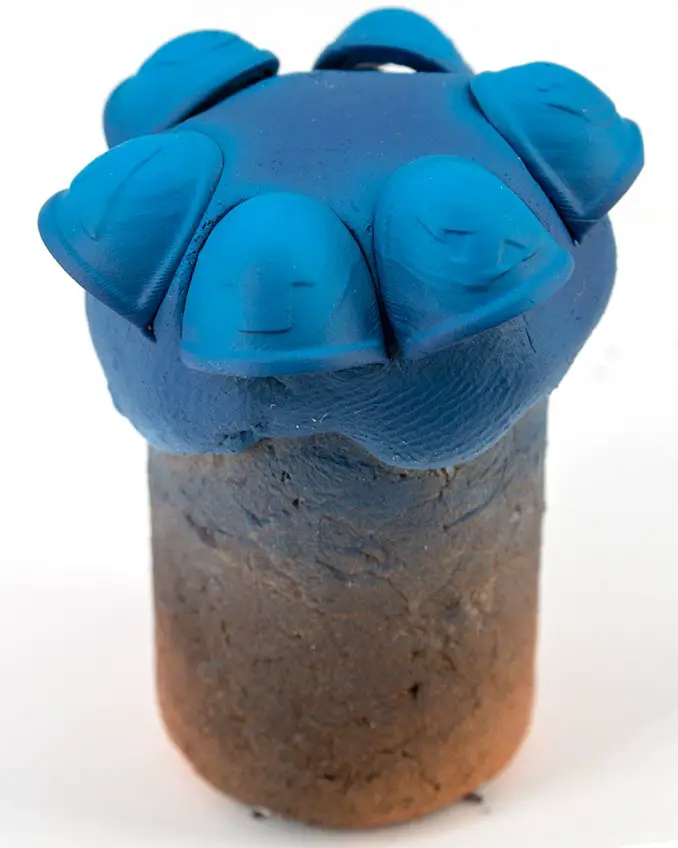
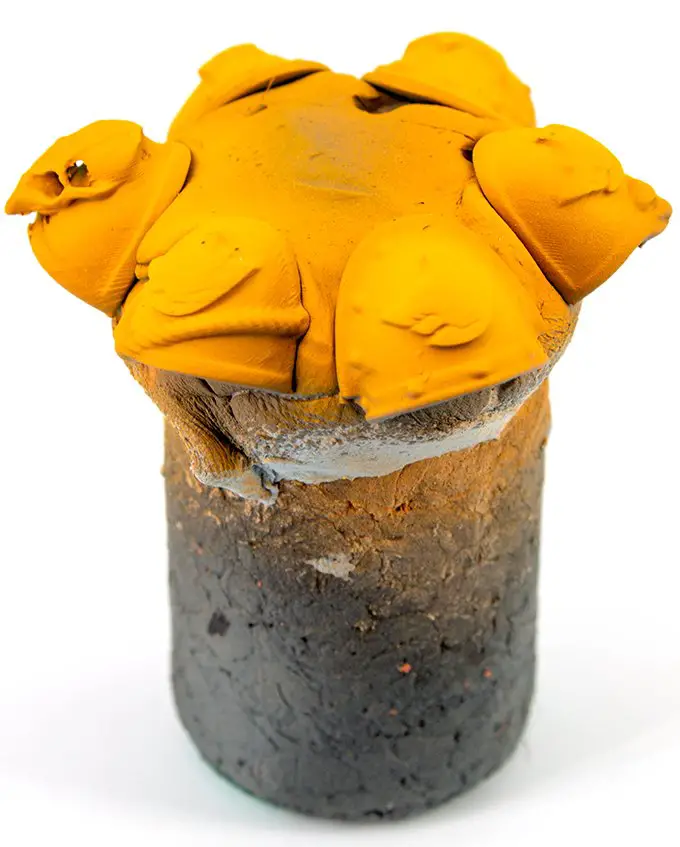
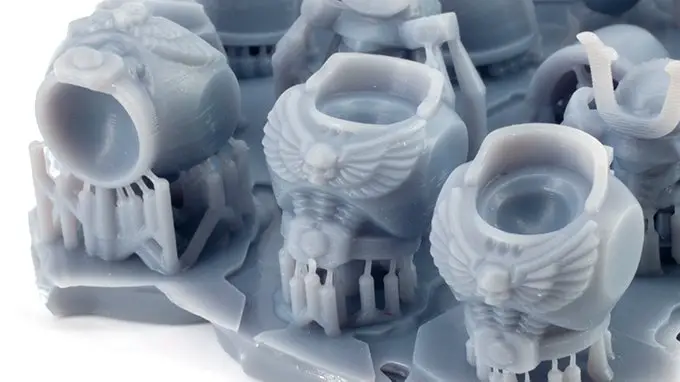
As you can see from the image above, there’s no warping of the models. This took about 6 hours to print. It was a bit hard to show in the original image so I’ve added a close-up below. This display base has cast correctly. however, this is at 0.02mm layer height as nowhere seems to recommend 0.01mm for successful prints.
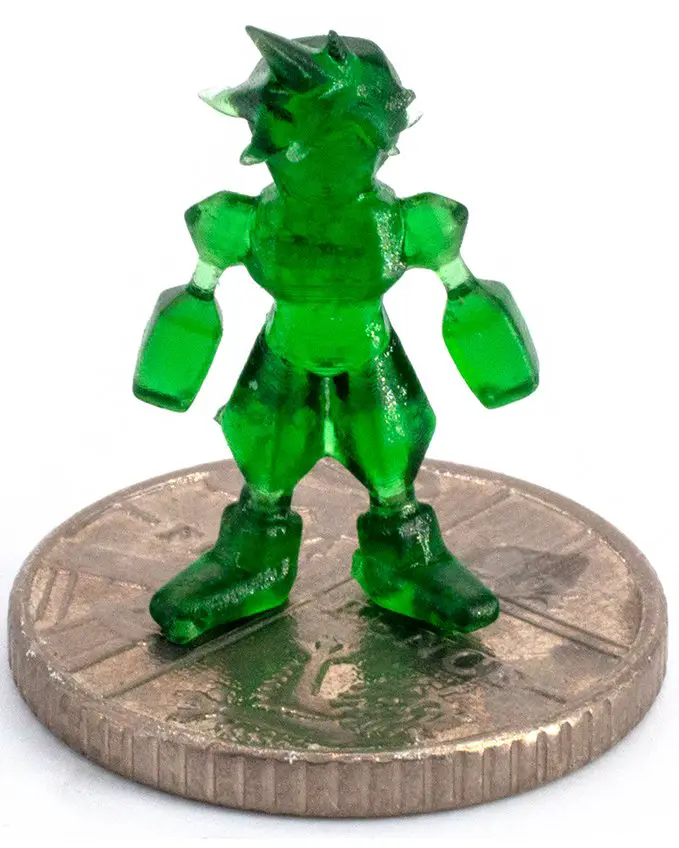
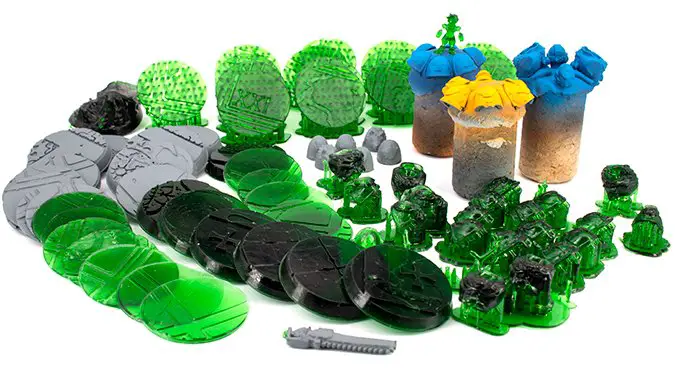
To give an idea of how small you can print, I added a tiny little polygon version of Cloud Strife amongst the test prints above, here he is stood on top of a UK 5 pence coin.
All in all, the prints turned out ok from the initial tests and I wanted to try some more stuff.
Anycubic Photon Review for Miniatures – Printing Models
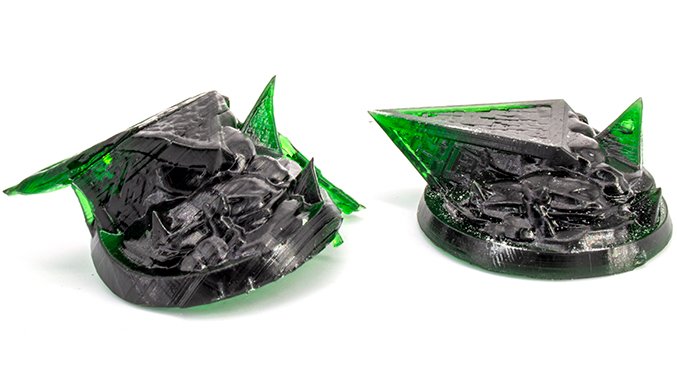
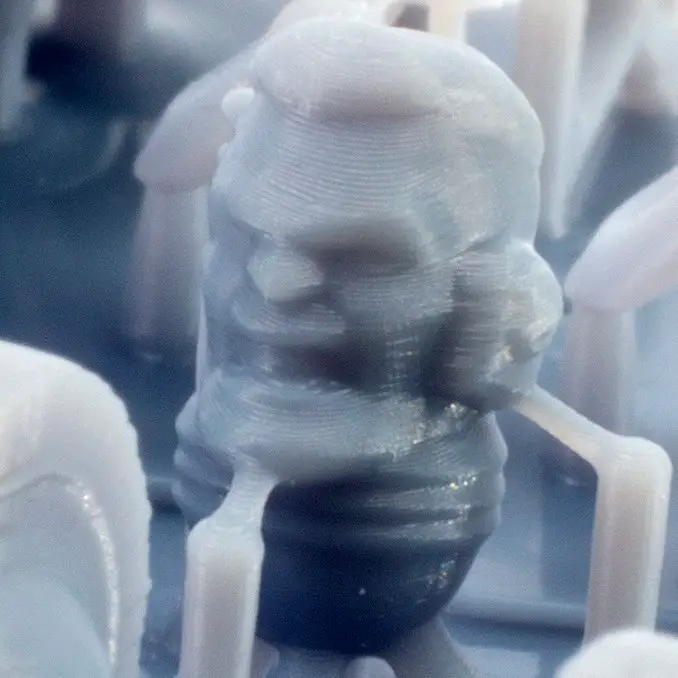
This time going big, sticking with a Final Fantasy VII theme, I loaded up 1 of the 5 components which make this amazing Tifa model in a combat stance by PrintedObsession. This took 28 hours to print, it’s approximately 9.5cm tall and is a solid block of resin.
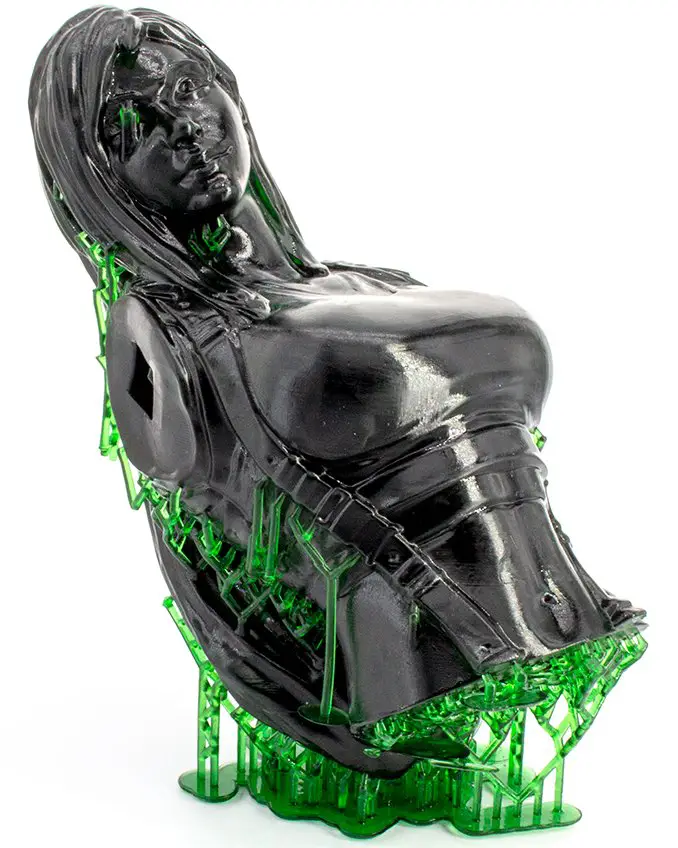
The last thing you want on any resin print is a failure and whilst 90% of this model came out fine. yet there are still some issues which make it unusable. Please note that I was still mostly using guided settings without much understanding of them. Firstly, I wasn’t aware how much the number of base layers of base layer curing time affected the print.
This is really important, without enough base layers and equally, without enough curing time, the resin won’t properly adhere to the build plate in the first place (shown below) the model above didn’t quite have enough curing time. Due to this a lot of the outer supports actually collapsed under the weight of the components printed on top of them. You can see this where the support in the middle of the model the disc for the base of the support has actually collapsed and adhered near the waist.
The other issue is that I was still using Auto-Supports. this is where the slicing application estimates where the overhangs will be, to ensure those areas don’t fail, it will create support which that overhang (or island as it’s referred to in the print layer) adheres to until it properly joins up with the rest of the model. In this case, it estimated that the right eyebrow needed to be supported which has resulted in a pillar right across the eye. The other thing to note is that due to the balance of exposure time, you will often find that layers of the horizontal axes are overexposed making components wider than they appear in the slicer program. So supports quite often fuse with the model or each other if they are too close.
You can trim these off after the print is done and fully cured. If they are too large or there are too many it leaves a lot of clean-up. resin does not cut and trim like plastic miniatures, this stuff is really brittle and will crack or shatter if it is not cut well.
There was so much clean-up needed, in this case, I just sacrificed the model entirely. A bit of a pain as I’ve since realised that the resin used here cost approximately £7.39 as I didn’t hollow out the model before printing… More on that later.
Anycubic Photon Review for Miniatures – Basing
One of the things I really wanted to try out was creating scenic bases. By this point, I had learned a little bit more about the printer and from somewhere online I’d read that models should be tilted at 45° for the best quality results.
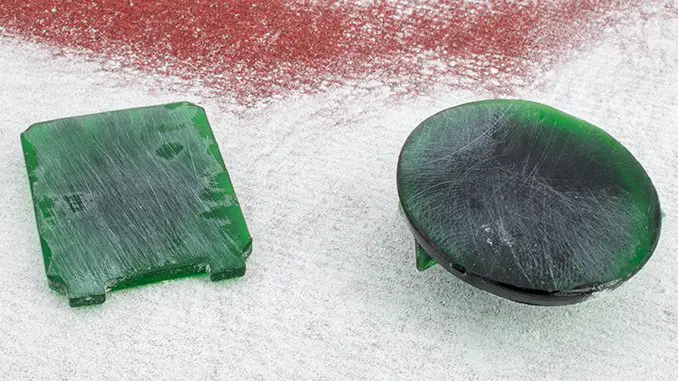
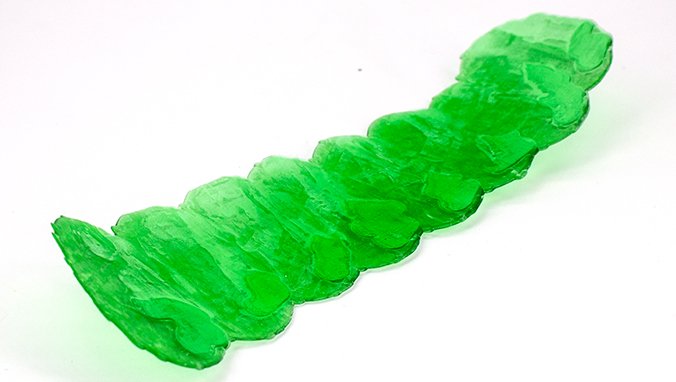
My first attempt at this failed, it has nothing to do with the angle, it as to do with the print not adhering to the print bed (as I mentioned above). Below is what you get if the LCD just cures the resin attached to the FEP film. When I came to this in the morning and realised there was no print. I had to empty the whole vat and carefully scrape this off the FEP.
If I had ignored this and tried another print straight away, The print bed could have pushed this cured resin into the LCD and cracked it.
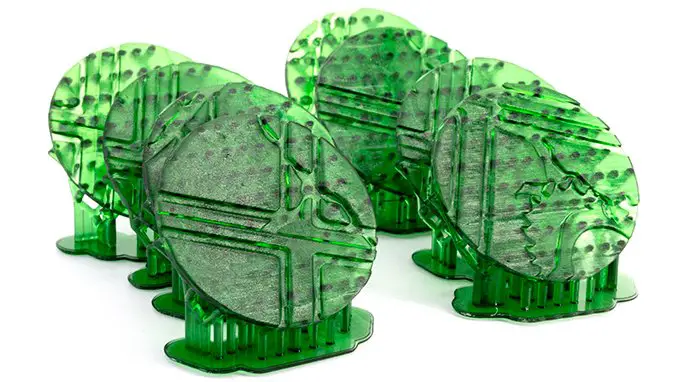
After increasing the base layer exposure time, I ran the print again and this time managed to make some base toppers, you can kind of make out from the above image how it has made this shape print without anything being lifted away from the print bed.
Once these were cured and stripped from the bases, I sanded down the bottoms to make them all smooth.
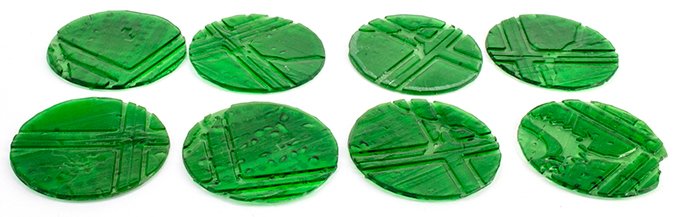
With the 45° These base toppers do still show the layer marks at 0.02mm intervals. With a heavy coat of paint, I could possibly get away with this, but if I were to drybrush or wash them (as I would want to) it would pick up every single ridge, accenting the issue.
The next step was to print them flat to the base plate.
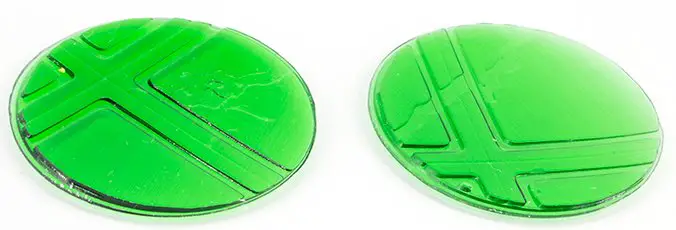
Whilst this has provided a glass smooth surface I’ve lost some detail on the vertical axis. As noted before, light doesn’t project upward from the LCD in a straight line. It projects slightly outward. Overexposure will make the shapes cure slightly wider than their source image. As the layers are built, some of the smaller detail gaps get closed.
It’s also worth noting that these toppers suffered from some curling which happened during the post-curing in my DIY Tin.
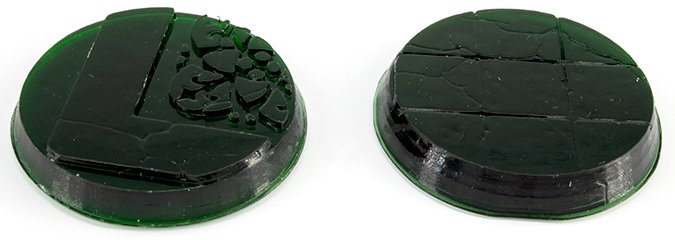
Shown above the surface cracks have pretty much disappeared. I have played around with this, reducing the exposure time between 7-13 seconds a layer to see what gave the best result.

After a primer coat, the surface details are all gone. the lip around the base of these prints is becasue they were printed flat to the surface of the print bed without supports. This means the heavily exposed base layers needed for good adherence are fused to the rest of the base. I thought this would mean less clean up, but instead, if I want to make these look like actual retail bases and fit with the rest of the army, there’s a heck of a lot of sanding to do. Next time I’ll use some supports but then I need to deal with cleaning those off still.
Now for some painting
After some stippling, I’m happy that I’m left with a rather decent looking and fairly original base. So far I’m the only person to have posted a make of this on Thingiverse. I really like that I’m adding some originality to my models, it should help them stand out just a little bit more amongst the waves of similar miniatures online.
Anycubic Photon Review for Miniatures – Details
When it comes to actually use these parts on your models, you really need to nail the balance of layer height, exposure time, print angle, room temperature and the type of resin you use.
The shoulder pads below clearly show the layer lines when viewed close-up.
The other thing to note is that the squad markings, which are the whole reason for making these custom pads have also warped and don’t have a crisp edge. They can, however, offer a decent guideline for getting the markings painted right and you could always sand down the ridges. Resin, unlike plastic, whilst brittle, is generally tough.
One approach to deal with layer lines is by having more details on the model. The below images show that the more curves and angles, like the skull, rope and iron trim, have actually disguised these lines. Whereas the flat areas will still show lines.
Anycubic Photon Review for Miniatures – Cost
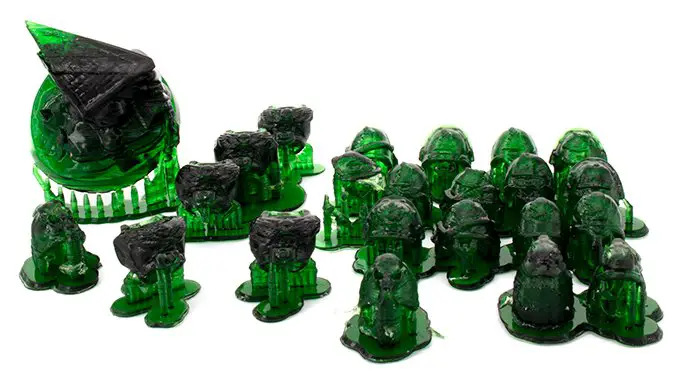
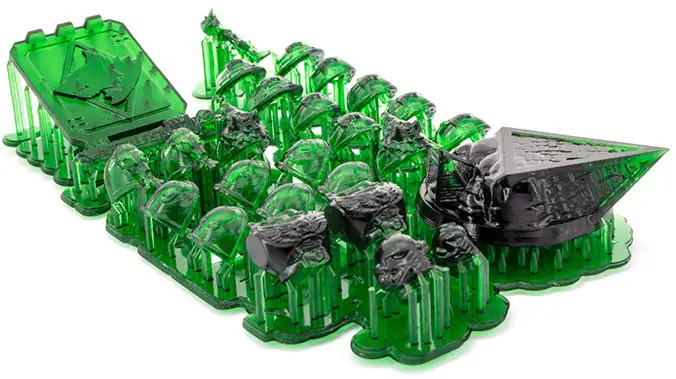
Bottles of resin come at various prices depending on brand/quality. With this printer, I received a 500ml bottle of Anycubic Green which would work out at roughly £20. And what you get from this, the large Tifa bust priced above, is pictured below.
Roughly 14 solid bases, 24 base toppers 24 shoulder pads, 20 or so badly moulded and damaged parts, 2 bodies, 2 heads. a teeny-tiny little Cloud Strife figure and the huge Tifa model posted above. This alone was almost half the resin from this bottle.
The largest cost for 3D printing is time. It’s something which people don’t consider enough. Time upfront to get your settings right, experimentation and waste. The time afterwards to clean up the prints. So if you’re thinking of printing your entire army. My advice… Don’t bother it’s just not worth the hassle.
Anycubic Photon Review for Miniatures – Fine-tuning
everything above was just testing and playing about with the initial 500ml of resin I got with the printer. Following on from this I also grabbed a full litre of Anycubic Grey resin. A very popular resin for this printer. I also spent some time looking at different slicer software.
Let me give you a big tip, just like the USB drive which you get with it and bin as soon as you can. Do the same with the software. Download ChiTuBox the guys who make this actually licenced an earlier version of this app to Anycubic. This is the software that comes with the Photon. ChiTuBox is a much more feature-rich version of the same application.
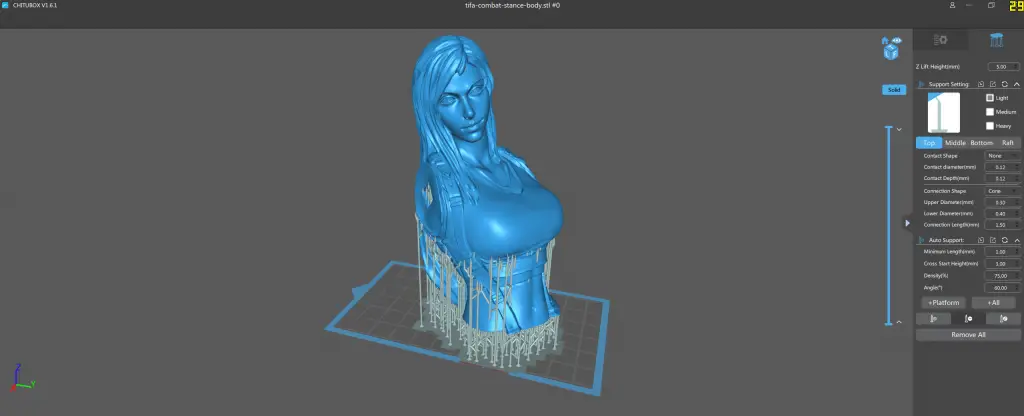
Thanks to this I was able to do things like hollow out large print, which reduced the cost of the Tifa Model to about £2.60.
I could also follow guides online as most experienced users will use this anyway. After spending some time online and doing some research I finally came across a channel by 3D Printing Pro which actually had videos tailored specifically to miniatures and maintaining as much quality as possible. I suggest you watch this series as it will explain pretty much everything you need to know. That, coupled with this spreadsheet will get you off to an incredible start. Check the results below.
Anycubic Photon Review for Miniatures – Layer Height
Once I was happy with my fine-tuning (and the Anycubic Grey seemed to provide better prints anyway) I decided to test the same print in both 0.05mm and 0.02mm layer heights just so you can see how this affects miniatures.
The image above is at 0.05mm and the image below is printed at 0.02mm. it’s hard to see any difference from this distance. All of these components are custom pieces which can be used to accessorise your existing army.
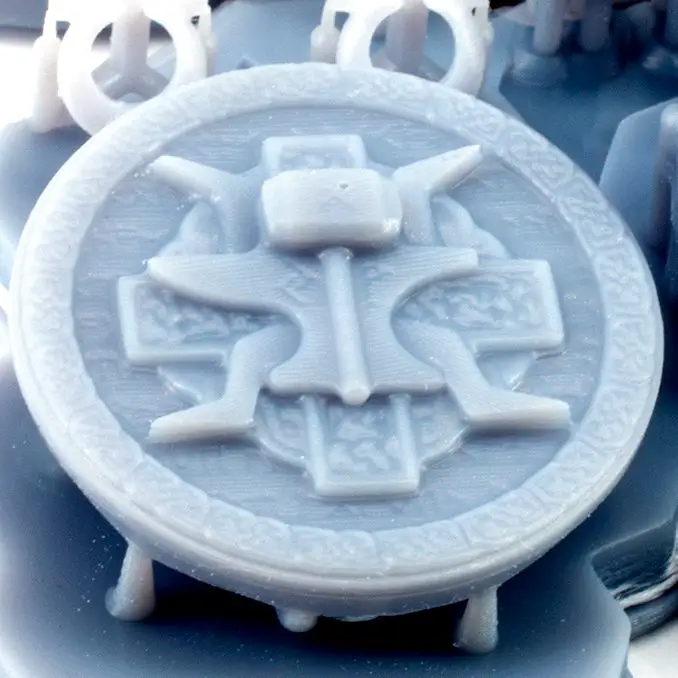
The image below printed at 0.05 mm has all the large features of a shield but the layer lines actually warped to the shape of the model at this angle. It does make it look like a woodgrain effect.
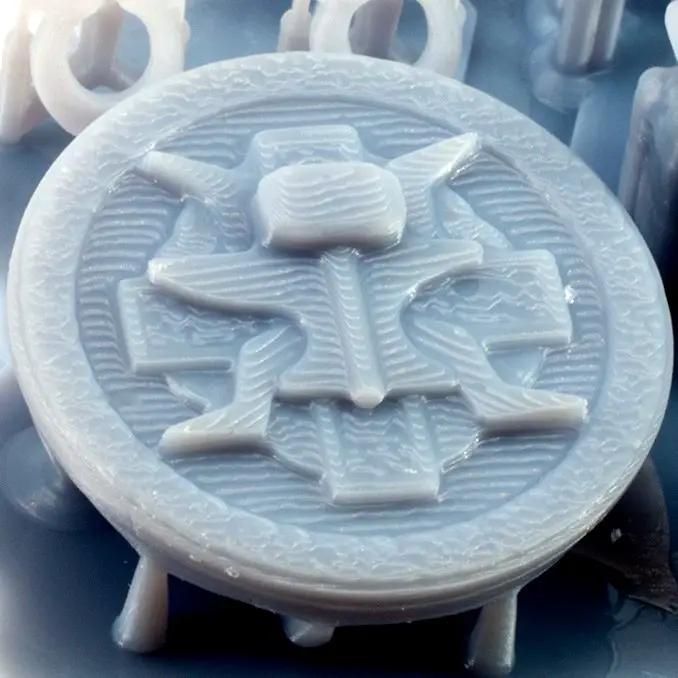
At 0.02mm however, whilst you can still see the layer lines, you can also make out the runic border. the rune markings on the anvil and if you look really close you can see the intended rune markings in the hammer and base of the shield.
The next test was to see how models come out when printed at different angles. the first image again is at 0.05mm and you can easily make out the layer lines.
At .02 mm, however, those layer lines are all but gone, even at this close angle. You can also see how the overexposure affects the horizontal axis, essentially everything on the horizontal plane is just that bit wider than the image. The skull between the wings on the leftmost body has closed eyes. Whereas on the right body the wings and skull are nicely pronounced. However, the collar has much softer edges than you would probably want.
If we look at a head printed at 0.05 mm we can see clearly the detail lost. I think if it weren’t already clear that these printers don’t hold a candle to the plastic you get in the shops – this image should drive that point home.
And it’s not like you could easily sand more details into this.
But when it comes to accessories, you can get away with a bit more, these custom swords printed at 0.02mm would fit quite well. The flat surface will lend itself well to a gentle sanding and give your force something unique to make it stand out.
But the body behind the sword once again nails the point that these things simply do not compare to retail options.
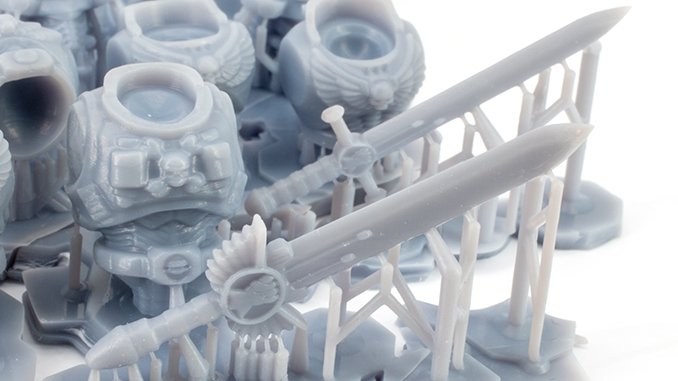
That said, taking an existing army and adding some detailed component flourishes is incredibly rewarding. When you add something like one sword to a normal retail body you can get away with it as it’s only one slight component amongst a highly detailed miniature.
Drybrushing and washes will really make those layer lines stand out, however the more detail you pack into a printed component the more this is hidden.
The thing I love printing more than anything though is small scale models & busts. Due to the larger scale of these, you can get away with the minor ridges which could be the ruin of a miniature on close inspection.
Will the Anycubic Photon S Improve My Hobby?
Without a doubt, this will open up a world of options for you to play with. If you have any Digital 3D Modelling skills or even just an interest in 3D Modelling, the world is your oyster. You can essentially create whatever you can think of. Even if you don’t have these skills you can still find a ton of stuff you can print and have fun with.
The drawback of 3D printing is that you need to be prepared for the work. There’s learning to do, It’s messy, there are a lot of consumables and there’s a lot of clean-up. It is a hobby in itself. Which is good and bad.
There’s the smell to consider too, some resins are worse than others, I had a headache the first few days this was running in my office. Some people can be more attuned to irritation from the fumes and vapours these give off. For me I was fine and once I’d got used to it I couldn’t even tell when it was running anymore (like being at a music festival for 3 days vs arriving on the third day).
If you can tolerate all that, you are going to have a lot of fun with one of these.
Anycubic Photon S – Final Thoughts
| Pros | Cons |
| High Detail Small Print your own Miniatures | Messy Smelly Lots to Learn |
Before you consider 3D printing an entire army of models using one of these, let me just say, you won’t.
Note: I’m not talking about the legality of this practise – I’m not a lawyer and I’m not here to share my thoughts on that topic (If you want to look into the legality side of things, check out this post from Tangible Day and maybe also check out this Intellectual Property Policy from Games Workshop).
When I say you won’t print an army, I just mean it’s not worth it. Sure the models would cost a small fraction of what you would pay retail, but the time you need to put in to make them tabletop ready outweighs it. Then you have the drawback of not being allowed to use them in many hobby locations.
When it comes to the miniatures hobby. My printer will be used solely for making Bases, base topper, terrain, or a few flourishes to make my rank & file models stand out from the crowd.
When it comes to owning a 3D printer, the biggest threat to the miniatures hobby is that I will get distracted from my miniatures by painting other things.
Please Note: This site uses affiliate links. Our Affiliate Partners are shown below
(Affiliate links will result in compensation to the site on qualifying purchases)
Click this link & buy your hobby stuff from Element Games for the UK & Europe to support FauxHammer.com – Use Code “FAUX2768” at the checkout for double reward points.
Our Affiliates / Hobby Stores
- UK: Element Games, The Outpost, Wayland Games, Mighty Lancer, Goblin Gaming, Forbidden Planet, Model Scenery Supplies, eBay, Amazon
- US/Canada: MTechCave, GameKastle, eBay (US), eBay (CA), Amazon
- Germany: Taschengelddieb
- Europe: eBay (DE), eBay (FR), eBay (ES), eBay (IT), Amazon
- Australia: eBay, Amazon
- Global: RedGrass Games, Warcolours
- 3D Printers: Phrozen 3D, Elegoo, Anycubic
FauxHammer – Latest Video on YouTube
What did you think of this Review? Please let us know in the comments.
If you like what we’re doing here you could really help encourage more content with a share on any social media platform.
Click the share links at the bottom of this screen (or on the left for computers and tablets)
Want to keep updated with the site? You can subscribe in the sidebar for RSS or by email below
(Sidebar is below the article on Mobile Devices)


If you haven’t already, try some different resins (start with something like siraya fast or esun/elegoo water washable)
You should be able to get significantly better results than here with some dialing in of print settings.
Really really interesting article! I’ve just bought one of these and was wondering if you would share your settings for archiving the final prints you were happiest with? Thanks for taking the time to write this can’t tell you how helpful it was.
Very nice review, I am now and more about to crack. Regarding terrain pieces, how big did you managed to print them before artifacts showed up?
Thank you very much
What is this garabage? I’ve printed several large armies without too much effort.
Please tell me your settings