HobbyZone OM10 - Recensione del modulo WIP della grande vetrina
Last Updated on Aprile 23, 2021 by FauxHammer
For my Third HobbyZone Review, I’m taking an in-depth look at the OM10 – Big Showcase WIP Module. Mentre inizialmente questo sembrava uno di quegli extra da buttare via che hanno poco scopo oltre a nutrire il mio ego. In realtà è diventato un pilastro del mio nuovo allestimento di officina. Uno che mi incoraggia a concentrarmi sull'attività a portata di mano prima di acquistare altri modelli.
Divulgazione completa: Non sono affiliato con HobbyZone e non sono stato pagato per questa recensione. L'ho acquistato con i miei soldi e sto condividendo le mie opinioni personali sull'articolo.
Avviso: questo articolo utilizza collegamenti di affiliazione
HobbyZone OM10 – Big Showcase WIP Module – Packaging & Unboxing
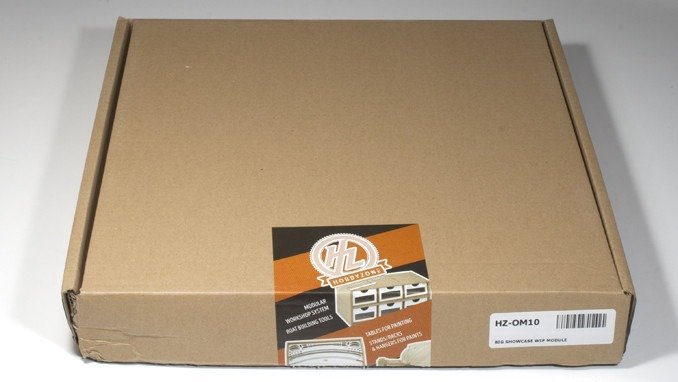
Come con le recensioni precedenti del OM05s – 26 mm Paints Module e il OM07a – Brushes & Tools Module. il Modulo vetrina OM10 Big WIP viene fornito in una scatola marrone standard con sigillo HobbyZone e un'etichetta identificativa.
Questa scatola è in realtà il doppio della lunghezza delle scatole precedenti. Qual è la dimensione della scatola più grande delle 3 che ho visto nei pacchetti HobbyZone Modular Workstation.
This particular box comes with a rather unique feature… The bottom left corner is smashed in…
I’ve noted this as it’s important to see how the packaging can protect the contents from damage. I received 31 Modular Workshop System Modules along with 2 extra HobbyZone products in this order. Between the 2 large boxes they arrived in, the whole set weighed over 46 kilos! When shifting these boxes around, it wouldn’t take much for the weight alone to have some impact on the cardboard packaging. When opening this module (and one of my reasons for choosing it as the next module to build) was to see if the internal components were damaged at all.
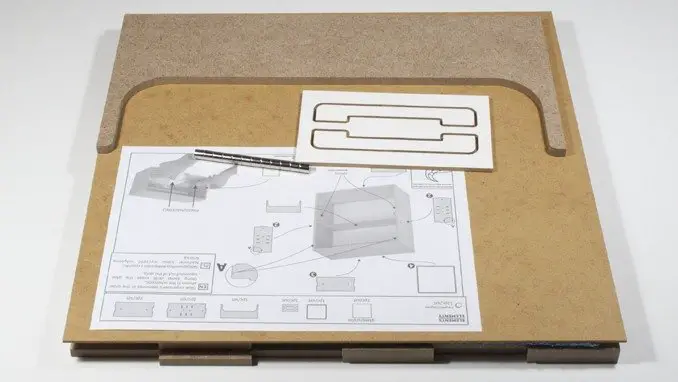
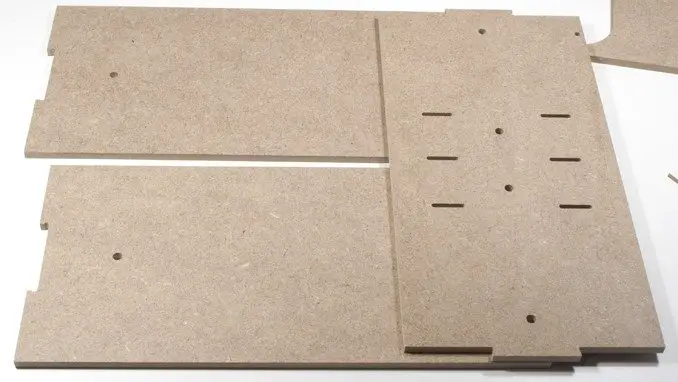
Come i moduli precedenti, i componenti sono avvolti in modo pulito nell'involucro a bolle con una precisione quasi lavorata.

Possiamo vedere che il lato della scatola che è stato colpito è stato adeguatamente protetto. È interessante notare che il lato destro non era affatto protetto da bolle d'aria. I componenti si sono chiaramente spostati a destra. Non è chiaro se questo sia stato solo un movimento durante il trasporto a causa della mancanza di bolle su questo bordo o dell'impatto.
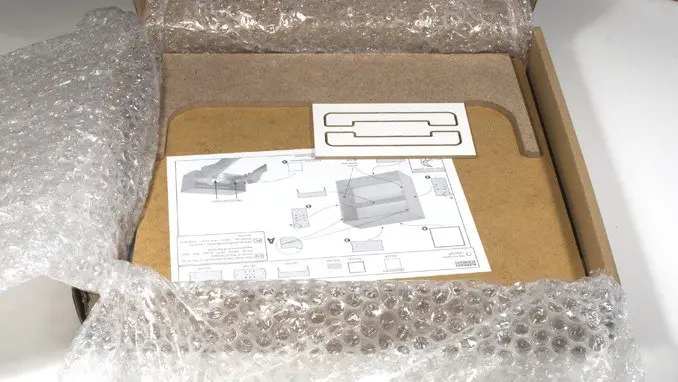
I componenti stessi, tuttavia, non hanno subito alcun danno, incluso il tabellone che è la parte più sottile e fragile in questa scatola (senza contare le istruzioni, che non hanno subito danni).
HobbyZone OM07a – OM10 – Big Showcase WIP Module – Instructions
In my previous reviews, I’ve kicked off a bit about the instructions being the let-down of the product. I can’t really make this judgement here as the build is so simple.
La parte anteriore come al solito indica i componenti necessari per costruire il set.
- Colla per legno
- Martello
- Nastro adesivo di carta
- Panno umido
Personally, I’d forego the paper tape and invest in some large G-Clamps to hold this together as it dries. Especially if you are doing a few of these modules. Because you are wiping away excess glue with the damp cloth, it stops the tape from sticking to the unit. Unless you wrap it all the way around and stick it to itself. It also leaves a rough texture on the wood in the few places where it has stuck.
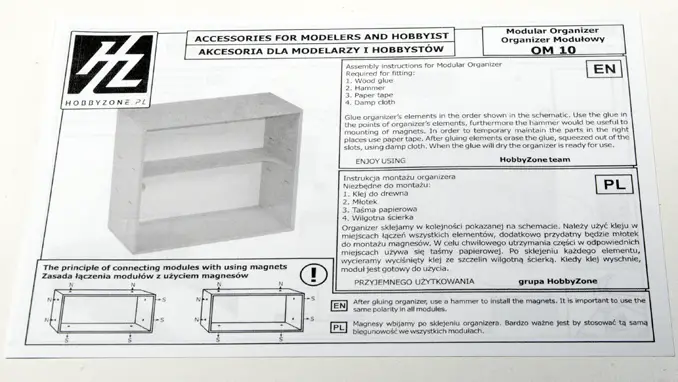
As I said, I can’t complain about the instructions here. Where the different modules require more steps, I like my instructions to look like Lego or IKEA sets. One step/component at a time showing exactly what goes where.
This is one picture with a load of arrows. But you can’t really get this too wrong. It’s a box. it has 4 sides and a back. it’s clear what goes where. The only thing you have to look out for is the 2 extra holes on the side panels, which are needed for the window. These need to go on the front at the top. The instructions make this clear with a big letter UN.
HobbyZone OM10 – Big Showcase WIP Module – Assembly
As I said above, assembly of this module is straightforward, you don’t really need the instructions. But they are worth a look, just to make sure you understand the correct orientation of your A-holes.
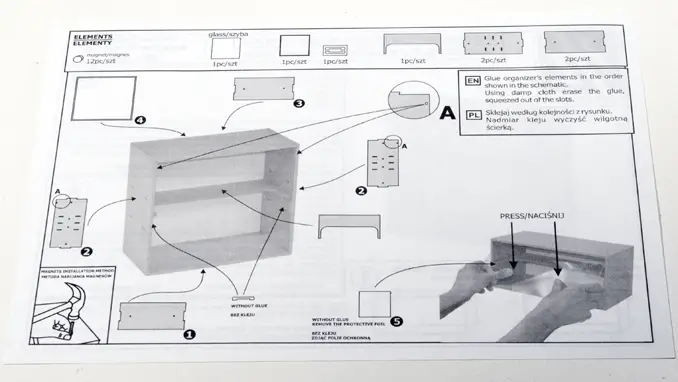
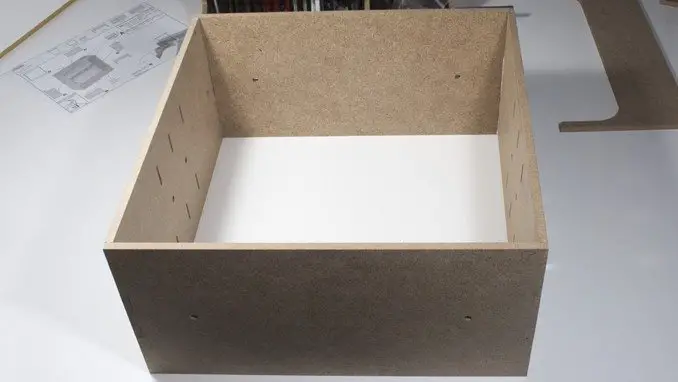
HobbyZone OM10 Assembly – Step 1
Step 1 (according to the instructions) is to lay the baseboard down. In the shot below I have 2 identical boards, either can be used as the baseboard. I also have a side panel. You can see the A-hole (yep, I’m gonna keep making that joke) at the top right of this panel. I now know which side and orientation it is, ready for Step 2
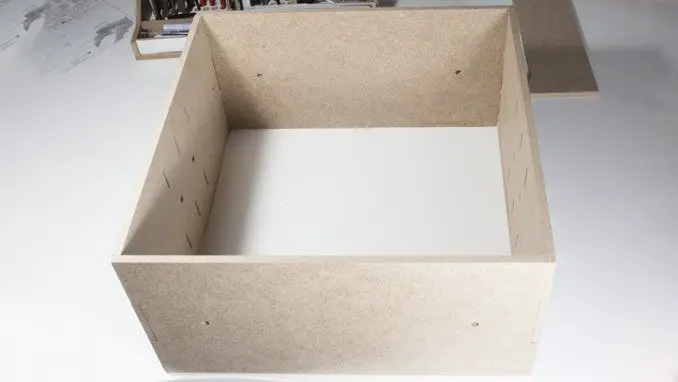
HobbyZone OM10 Assembly – Step 2
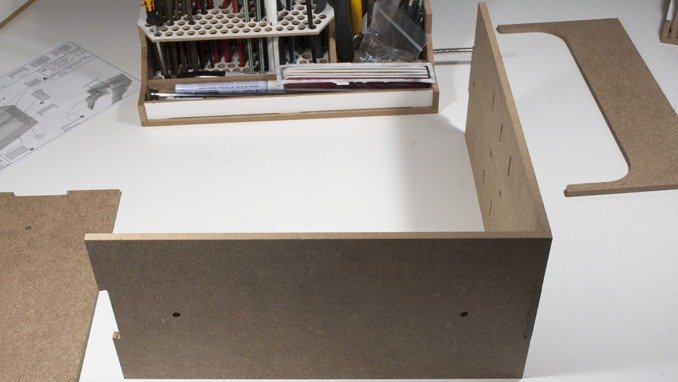
Just attach the sides, 1 at a time, a line of glue down all the connecting edges. Push them together and wipe away the excess with your damp cloth. I used a Micro-fibre towel, which is just a bit too thick for getting deep into the inside corners. But the glue dries clear, if you do leave any excess glue you’ll see a slightly darker wood stain at most.
HobbyZone OM10 Assembly – Step 3
Once the sides are on, it’s just a case of doing the same with the top. Make sure you are working quite quickly here. The back-plate is used to line everything up. You don’t want this unit drying at an odd angle before you reach the next step.
HobbyZone OM10 Assembly – Step 4
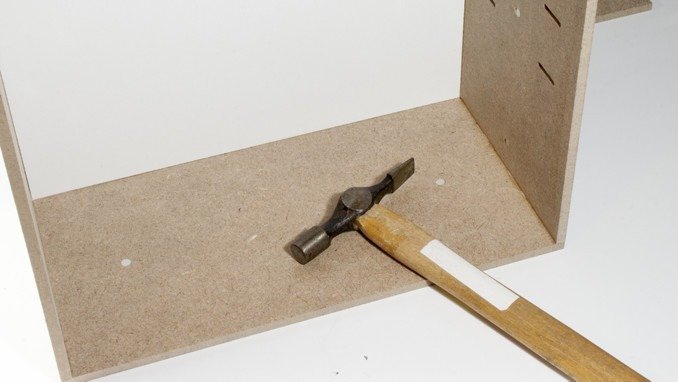
Prima che la colla si asciughi nei passaggi precedenti, procurati della colla lungo i bordi della piastra posteriore e strofinala con un dito.

Utilizzare la piastra posteriore per allineare il riquadro quadrato. Ora, con il peso della scatola che spinge sulla piastra posteriore, spingi tutto insieme. Rimuovere l'eventuale colla in eccesso e lasciarla così per lasciarla asciugare.
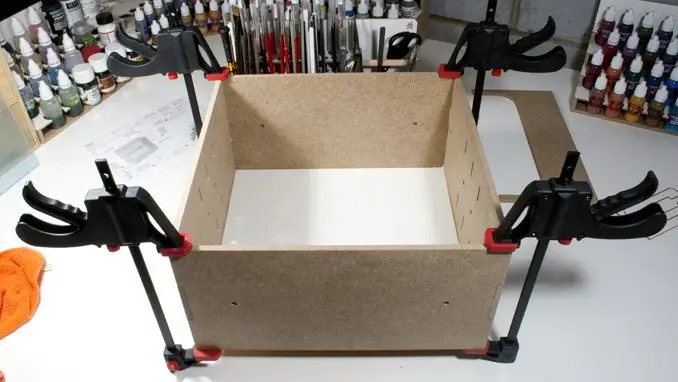
Taking things to a somewhat unnecessary degree, I used g-clamps to hold all the pieces to the back plate. This is to ensure that the module stays in it’s best position until the glue is dry. The fit of the wood is pretty tight anyway, but just this extra step make sure this is on the money.
Avrei potuto fare con le più grandi lampade g. Per tenere i lati ai pannelli superiore e inferiore. Queste sono le parti che potrebbero fare con l'essere costretti insieme. La piastra posteriore si prende cura di se stessa per il peso della scatola appoggiata su di essa. Questo è il più grande modulo attualmente offerto da HobbyZone nella gamma Modular Workshop System. Tutti gli altri moduli sono alti solo 15 cm, il che sarebbe stato perfetto per i miei morsetti da 15 cm. poiché questo si estende su 2 livelli, i miei morsetti non sono stati in grado di tenere insieme questi bordi.
È possibile utilizzare il nastro per questo passaggio. ma ricorda, devi avvolgere completamente l'unità in modo che il nastro possa aderire a se stesso. Rimuovere la colla in eccesso con un panno umido impedirà al nastro di carta di attaccarsi, dove il nastro si attacca all'unità, toglierà la finitura quando viene rimosso lasciandolo ruvido.
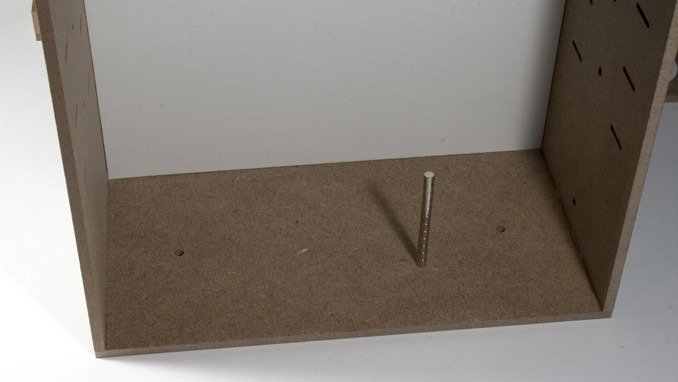
HobbyZone OM10 Assembly – Magnets
È qui che è iniziato il mio apprendimento dai moduli precedenti. Una volta completata la shell, è il momento migliore per inserire i tuoi magneti. Se lo fai prima, potresti disallinearli spostando le parti e bussare tornano indietro. Fallo in seguito e rischi di martellare o sconvolgere la colla su altri componenti più fragili.
Vedi i miei appunti sul OM06s – 26mm Small Paints Module review for details about magnet alignment. Assuming this is not your first module, just make sure that you use those modules as a template for which way round the magnets go (maybe mark them once you know). Then just line up a tower of magnets with the hole and gently tap one in so it’s just about gripped by the hole. Don’t keep hammering, one tap should do, just to get it partially in the hole. The magnets are fragile, repeated hammering could crack one, and you don’t get any spares. Once it’s in slightly move on to the next hole and so on. Then hammer them all flush.
The last couple are a bugger as you don’t have a tower of magnets to hit, you have 2 which aren’t even as tall as the fingers you’d hold them with. I tend to just generally line them up and give it one swift hit with the hammer. That works fine 3 quarters of the time.
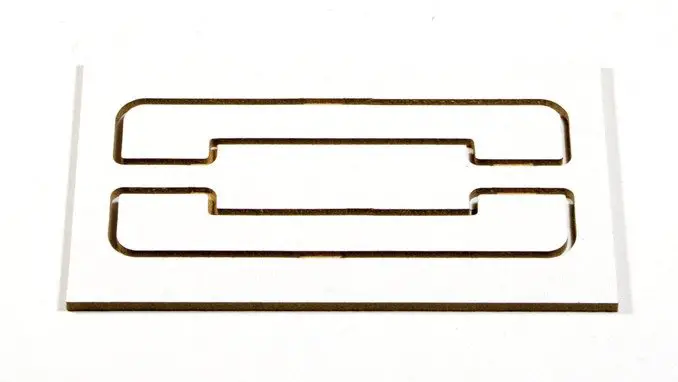
HobbyZone OM10 Assembly – Brackets & Shelf
This bit isn’t really on the instructions. Instead, you just have the image of one of these brackets, an arrow pointing to the 2 side panels and an annotation; “without glue”.
It’s still rather clear what to do.
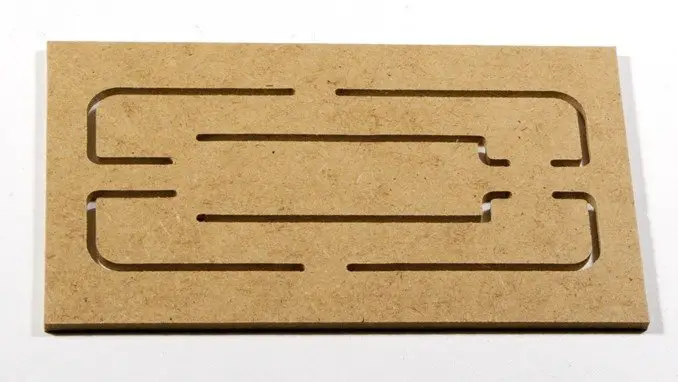
On the reverse, you can see that the brackets are only partially machined out, with only some points remaining connected to the board. It’s shipped like this so that these smaller and more fragile components are safe during transport.
Puoi staccarli solo, ma per evitare strappi o danni ho usato un coltello da hobby e poi ho limato il resto delle linguette per ottenere una finitura liscia
Fatto tutto, le parentesi sono lisce e ora sono pronte per essere inserite nel modulo display.
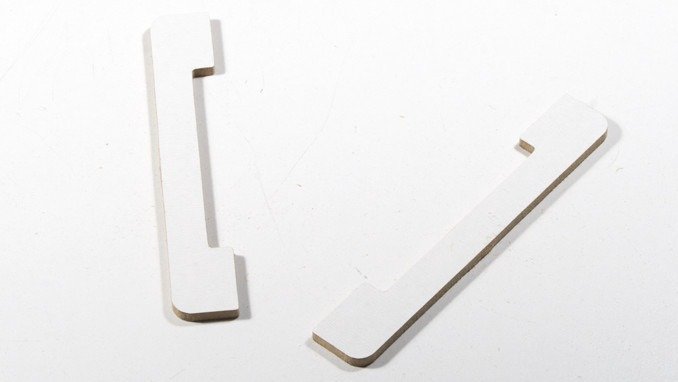
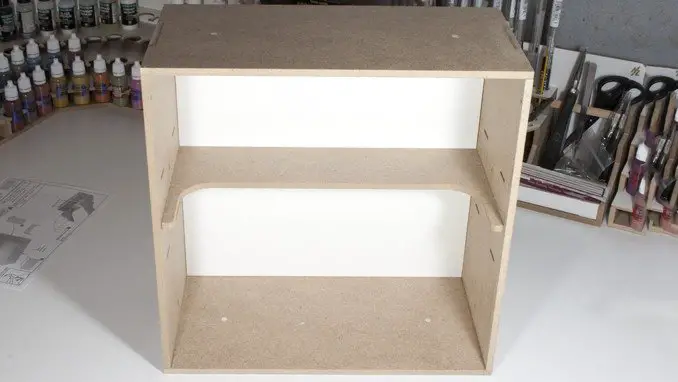
È possibile inserire le parentesi a una delle 3 altezze diverse a seconda delle dimensioni dei modelli visualizzati in essa.
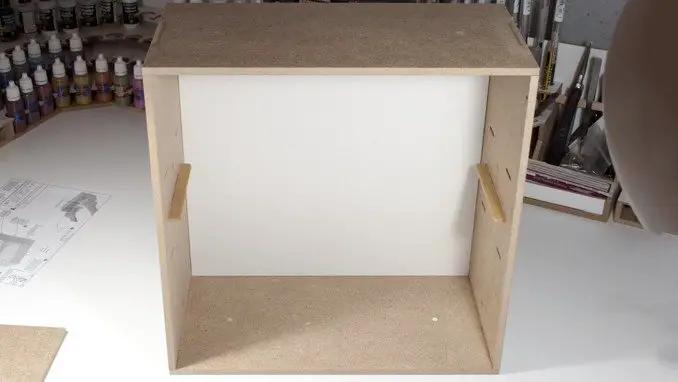
Lo scaffale si trova facilmente sopra le staffe, poiché queste parti non sono incollate, è possibile regolarle secondo le necessità. La rientranza nello scaffale consente anche di riporre i modelli più alti verso la parte anteriore.
HobbyZone OM10 Assembly – Step 5
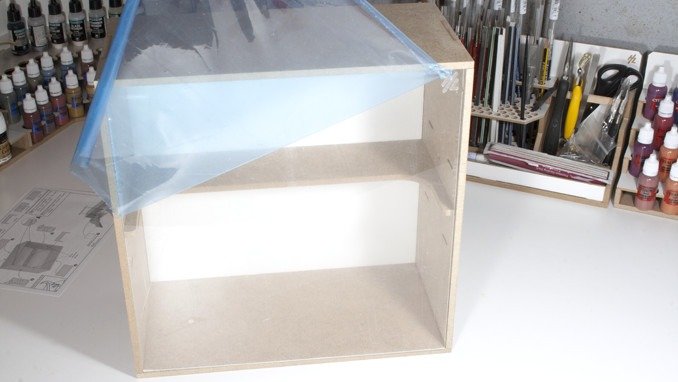
The final piece is the perspex window. This has a separate instruction to simply flex it as you fit it into the A-holes (told you I’d keep using it) on the upper sides of the unit.
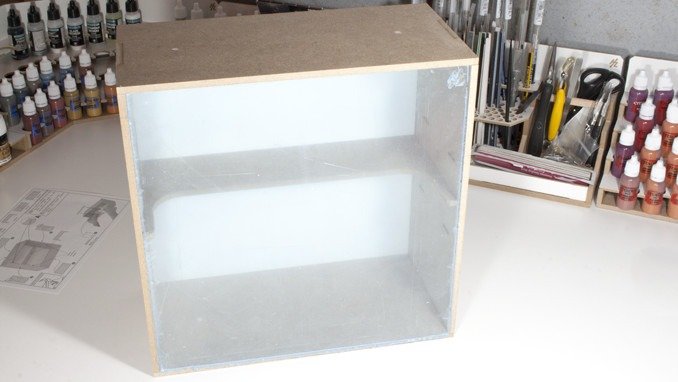
Couldn’t resist a shot of peeling the cellophane off. The window has this protection film on the front and rear to ensure it has no scratches during shipping.
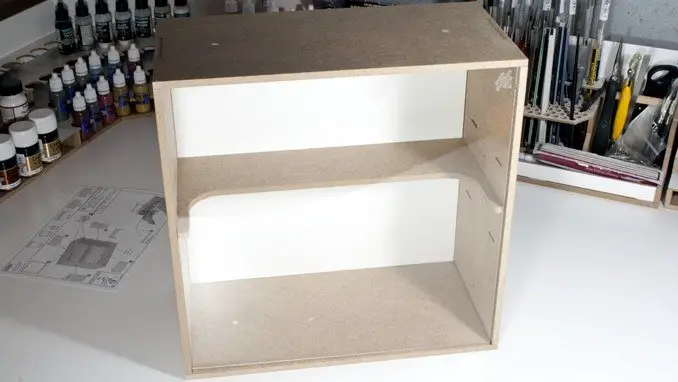
HobbyZone OM10 – Big Showcase WIP Module – Usage
At 30cm tall; this module stands at twice the height of all of the other modules in the range. On its own it is quite simply a box with a window in, the machined in HobbyZone HZ logo adds to the professional look of this set-up and matches all of the other modules in the range. It also serves as a point to press on in order to open the window. The module certainly fits its place as the centrepiece of your workstation set-up. At some point, I’d like to wire in some LED lights at the top and under the shelf to really help my mini’s stand out.
To get the negative out of the way: on its own, or if you only have the real-estate for a large workstation set-up; then this probably isn’t for you. It’s certainly no replacement for a display cabinet and you’d be better off taking up space with more tool or bitz storage.
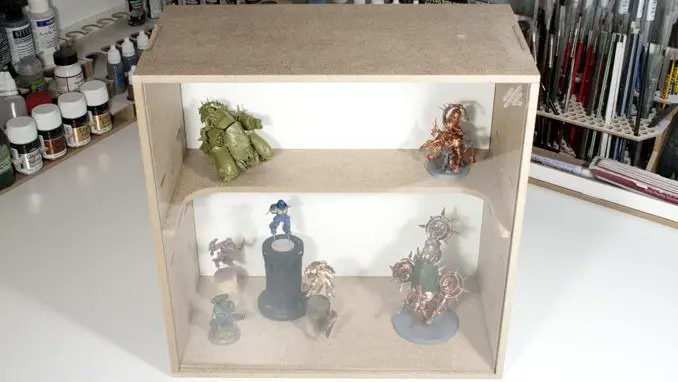
However if you do have a full workstation and have room for it, this is a great addition. As you can see there’s plenty of storage for in-progress mini’s. On the image below mine are spread out quite wide with various sizes of bases and, some are on corks or maniglie per pittura. Puoi facilmente montare un paio di 10 squadre navali spaziali umane sullo scaffale superiore e un paio di veicoli sottostanti
HobbyZone OM10 – Big Showcase WIP Module – Final Thoughts
Simple to build and easy to use. Although it’s one of the more expensive parts of the Modular Workshop System range, it does add value to your hobby workstation set-up (covered in the next section). It’s not something you want in place of tool storage if you need that. Your in-progress models can just as easily fit in a box somewhere.
The acrylic glass is a fingerprint magnet. I’ve found that If I push the HobbyZone logo, this is the best place to start opening the window then lift by the edges. Doing this means I only need to clean it occasionally. It is also nice to see the acrylic fit so close to the edges of the module as this limits the amount of dust that can get in – a problem I have with my old display cabinet.
| Professionisti | Contro |
| Attraente Parte di un sistema modulare Molto facile da costruire Molteplici opzioni di altezza del ripiano Robusto e costruito con precisione | Hai bisogno di spazio per questo Costoso per quello che è |
Does the HobbyZone OM10 – Big Showcase WIP Module improve my hobby?
Yes, it can but, and I can’t express this enough, not at the cost of additional tool or bitz storage. The point of a workstation is to have the things you need close at hand. So, if this is on your desk and your clippers, files, spare heads or bags of sand are tucked away – you may want to re-think your configuration.
But if you do have space, and you are building a full workstation, it’s a great addition that will improve your hobby by keeping you focused.
Per avere un'idea del valore, basta considerare il vecchio adagio “out of sight, out of mind”. This is why I’ve had my guitar on full display for 8 years even though I can only play a badly plucked version of Ode to Joy. When it comes to painting models, I’m just the same. I’m forever moving on to the next project because it seems more interesting and my in-progress work is tucked up in a box somewhere. These display modules serve to remind me that I have all of this stuff in progress, my brain now screams at me “don’t start anything new!” And especially, “do not ‘buy’ anything new”.
Ma lo sappiamo tutti ormai, giusto?
Cosa ne pensi di questa recensione? per favore fatemi sapere nei commenti.
If you like what I’m doing here you could really help encourage more content with a share on any social media platform.
Vuoi essere aggiornato con il blog? Puoi iscriverti nella barra laterale via email o RSS
(La barra laterale è sotto l'articolo sui dispositivi mobili)