HobbyZone OM10 - Revue du module WIP Big Showcase
Last Updated on avril 23, 2021 by FauxHammer
For my Third HobbyZone Review, I’m taking an in-depth look at the OM10 – Big Showcase WIP Module. Alors qu'au départ, cela semblait être l'un de ces extras jetables qui ne servent à rien au-delà de nourrir mon ego. En fait, cela s'est avéré être un pilier pour ma nouvelle configuration d'atelier. Celui qui m'encourage à me concentrer sur l'activité en cours avant d'acheter plus de modèles.
Divulgation complète: je ne suis pas affilié à HobbyZone et je n'ai pas été payé pour cet examen. J'ai acheté cela avec mon propre argent et je partage mes opinions personnelles sur l'article.
Remarque: cet article utilise des liens d'affiliation
HobbyZone OM10 – Big Showcase WIP Module – Packaging & Unboxing
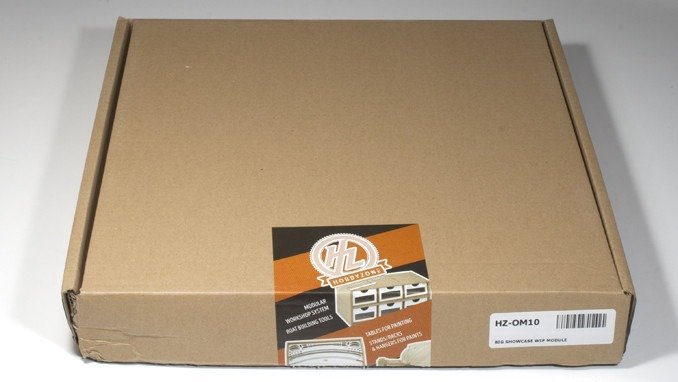
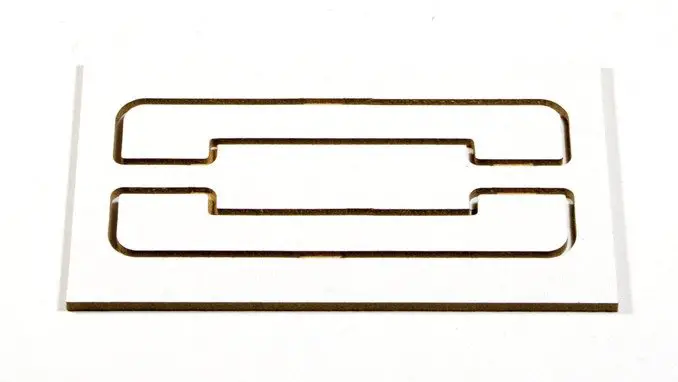
Comme lors des précédents examens du OM05s – 26 mm Paints Module et le OM07a – Brushes & Tools Module. le Module de présentation OM10 Big WIP est livré dans une boîte marron standard avec un sceau de marque HobbyZone et une étiquette d'identification.
Cette boîte est en fait le double de la longueur des boîtes précédentes. Quelle est la plus grande taille de boîte des 3 que j'ai vues dans les packages de station de travail modulaire HobbyZone.
This particular box comes with a rather unique feature… The bottom left corner is smashed in…
I’ve noted this as it’s important to see how the packaging can protect the contents from damage. I received 31 Modular Workshop System Modules along with 2 extra HobbyZone products in this order. Between the 2 large boxes they arrived in, the whole set weighed over 46 kilos! When shifting these boxes around, it wouldn’t take much for the weight alone to have some impact on the cardboard packaging. When opening this module (and one of my reasons for choosing it as the next module to build) was to see if the internal components were damaged at all.
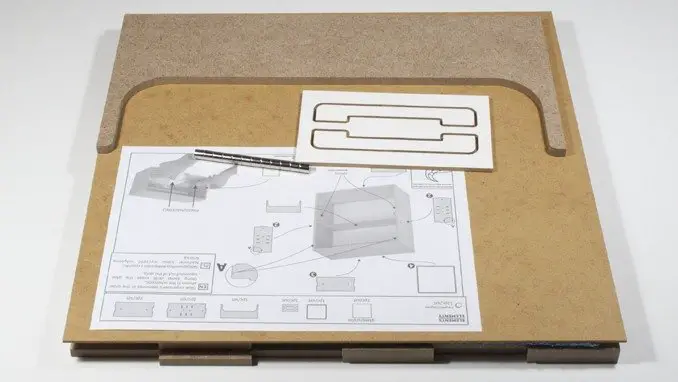
Comme les modules précédents, les composants sont emballés proprement dans du papier bulle avec une précision presque usinée.

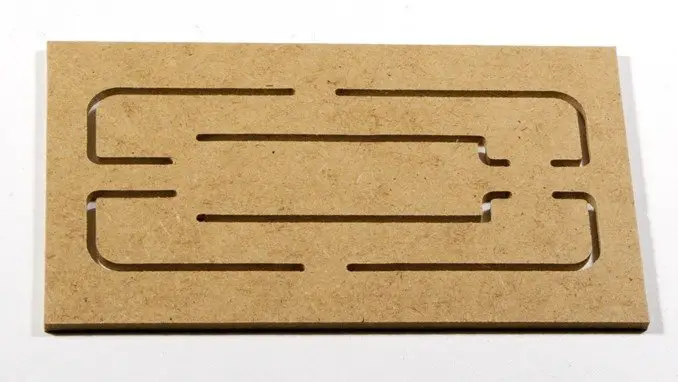
Nous pouvons voir que le côté de la boîte qui a été touché était correctement protégé. Fait intéressant, le côté droit n'était pas du tout protégé par du papier bulle. Les composants se sont clairement déplacés vers la droite. Que ce soit juste un mouvement pendant le transport en raison de l'absence de film à bulles à travers ce bord ou en raison de l'impact, ce n'est pas clair.
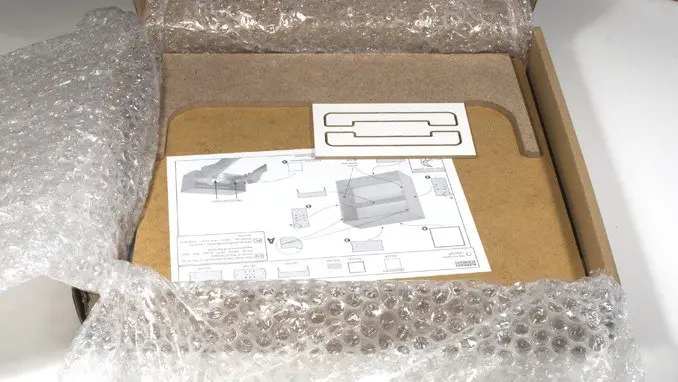
Cependant, les composants eux-mêmes n'ont subi aucun dommage, y compris le panneau arrière qui est la partie la plus mince et la plus fragile de cette boîte (sans compter les instructions, qui n'ont également subi aucun dommage).
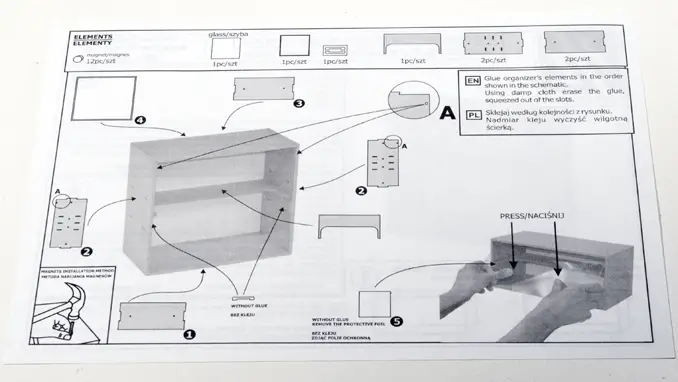
HobbyZone OM07a – OM10 – Big Showcase WIP Module – Instructions
In my previous reviews, I’ve kicked off a bit about the instructions being the let-down of the product. I can’t really make this judgement here as the build is so simple.
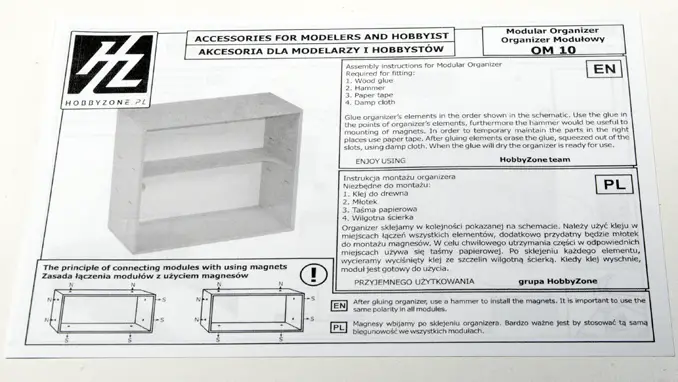
L'avant, comme d'habitude, indique les composants dont vous avez besoin pour construire l'ensemble.
- Colle à bois
- Marteau
- Bande de papier
- Chiffon humide
Personally, I’d forego the paper tape and invest in some large G-Clamps to hold this together as it dries. Especially if you are doing a few of these modules. Because you are wiping away excess glue with the damp cloth, it stops the tape from sticking to the unit. Unless you wrap it all the way around and stick it to itself. It also leaves a rough texture on the wood in the few places where it has stuck.
As I said, I can’t complain about the instructions here. Where the different modules require more steps, I like my instructions to look like Lego or IKEA sets. One step/component at a time showing exactly what goes where.
This is one picture with a load of arrows. But you can’t really get this too wrong. It’s a box. it has 4 sides and a back. it’s clear what goes where. The only thing you have to look out for is the 2 extra holes on the side panels, which are needed for the window. These need to go on the front at the top. The instructions make this clear with a big letter UNE.
HobbyZone OM10 – Big Showcase WIP Module – Assembly
As I said above, assembly of this module is straightforward, you don’t really need the instructions. But they are worth a look, just to make sure you understand the correct orientation of your A-holes.
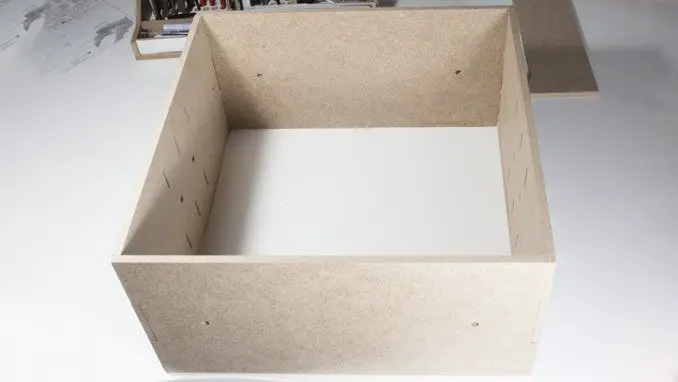
HobbyZone OM10 Assembly – Step 1
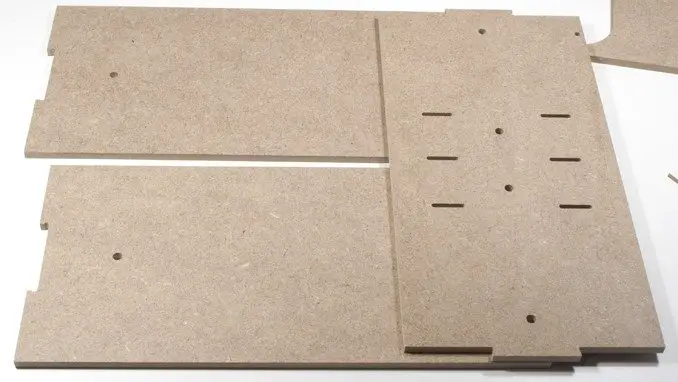
Step 1 (according to the instructions) is to lay the baseboard down. In the shot below I have 2 identical boards, either can be used as the baseboard. I also have a side panel. You can see the A-hole (yep, I’m gonna keep making that joke) at the top right of this panel. I now know which side and orientation it is, ready for Step 2
HobbyZone OM10 Assembly – Step 2
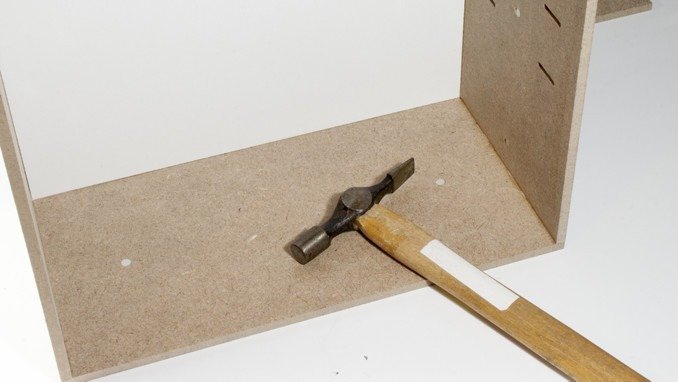
Just attach the sides, 1 at a time, a line of glue down all the connecting edges. Push them together and wipe away the excess with your damp cloth. I used a Micro-fibre towel, which is just a bit too thick for getting deep into the inside corners. But the glue dries clear, if you do leave any excess glue you’ll see a slightly darker wood stain at most.
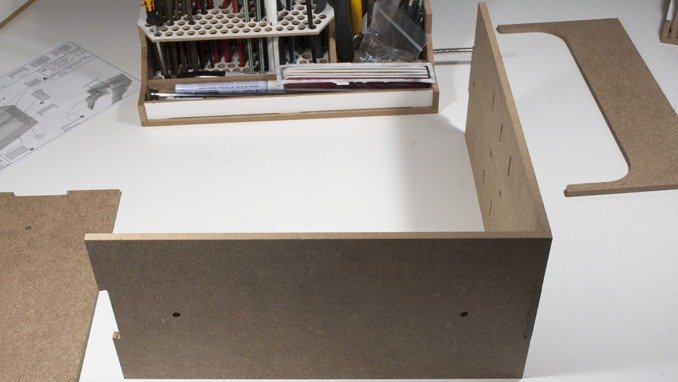
HobbyZone OM10 Assembly – Step 3
Once the sides are on, it’s just a case of doing the same with the top. Make sure you are working quite quickly here. The back-plate is used to line everything up. You don’t want this unit drying at an odd angle before you reach the next step.
HobbyZone OM10 Assembly – Step 4
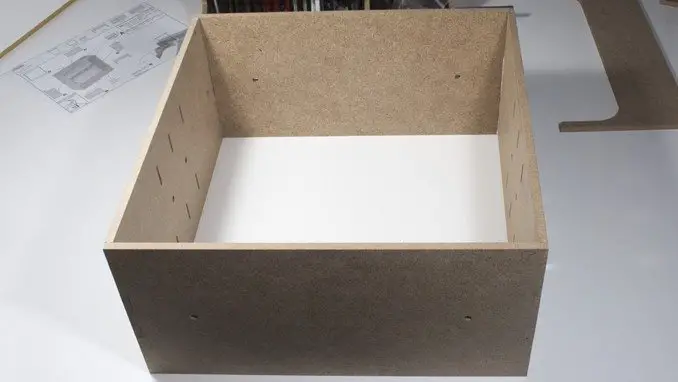
Avant que la colle ne sèche sur les étapes précédentes, retirez de la colle sur les bords de la plaque arrière et frottez-la avec votre doigt.

Utilisez la plaque arrière pour aligner le carré de la boîte. Maintenant, avec le poids de la boîte poussant sur la plaque arrière, poussez tout ensemble. Essuyez tout excès de colle et laissez-le comme ça pour le laisser sécher.
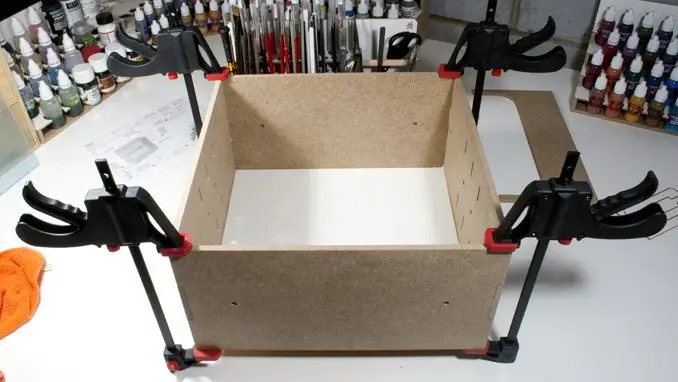
Taking things to a somewhat unnecessary degree, I used g-clamps to hold all the pieces to the back plate. This is to ensure that the module stays in it’s best position until the glue is dry. The fit of the wood is pretty tight anyway, but just this extra step make sure this is on the money.
J'aurais pu le faire avec des lampes G plus grandes. Pour maintenir les côtés sur les panneaux supérieur et inférieur. Ce sont les parties qui pourraient être liées au fait d'être forcées ensemble. La plaque arrière prend soin d'elle-même grâce au poids de la boîte qui y repose. Il s'agit du plus grand module actuellement proposé par HobbyZone dans la gamme Modular Workshop System. Tous les autres modules ne mesurent que 15 cm de haut, ce qui aurait été parfait pour mes pinces de 15 cm. comme celui-ci s'étend sur 2 niveaux, mes pinces n'ont pas pu maintenir ces bords ensemble.
Vous pouvez utiliser du ruban adhésif pour cette étape. mais rappelez-vous, vous devez envelopper complètement l'unité afin que la bande puisse coller à elle-même. Essuyer l'excès de colle avec un chiffon humide empêchera le ruban de papier de coller, là où le ruban adhère à l'appareil, il détachera la finition une fois retiré, le laissant rugueux.
HobbyZone OM10 Assembly – Magnets
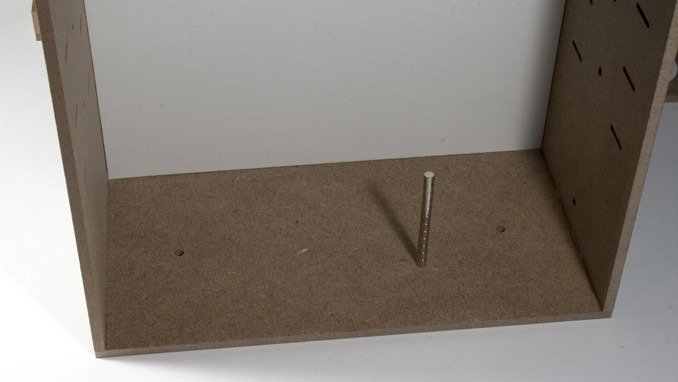
C'est là que mon apprentissage des modules précédents a commencé. Une fois la coque terminée, c'est alors le meilleur moment pour mettre vos aimants. Si vous le faites avant, vous pourriez les désaligner en déplaçant les pièces et devoir frapper les faire reculer. Faites-le plus tard et vous risquez de marteler ou de désinstaller la colle sur d'autres composants plus fragiles.
Voir mes notes sur le OM06s – 26mm Small Paints Module review for details about magnet alignment. Assuming this is not your first module, just make sure that you use those modules as a template for which way round the magnets go (maybe mark them once you know). Then just line up a tower of magnets with the hole and gently tap one in so it’s just about gripped by the hole. Don’t keep hammering, one tap should do, just to get it partially in the hole. The magnets are fragile, repeated hammering could crack one, and you don’t get any spares. Once it’s in slightly move on to the next hole and so on. Then hammer them all flush.
The last couple are a bugger as you don’t have a tower of magnets to hit, you have 2 which aren’t even as tall as the fingers you’d hold them with. I tend to just generally line them up and give it one swift hit with the hammer. That works fine 3 quarters of the time.
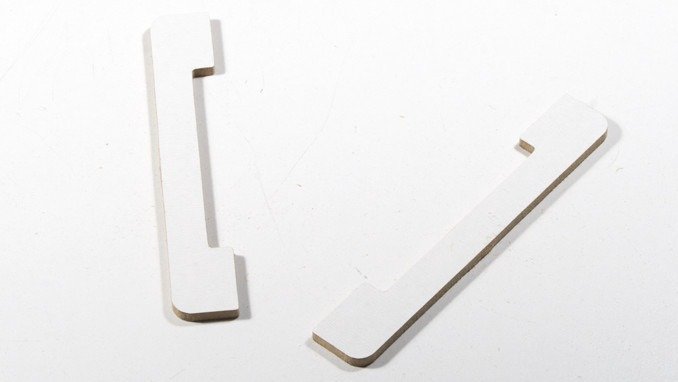
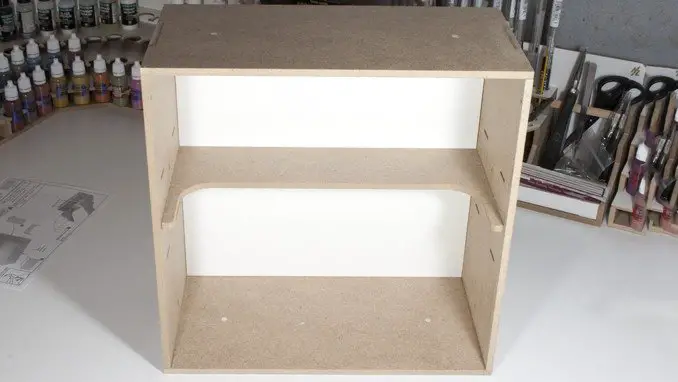
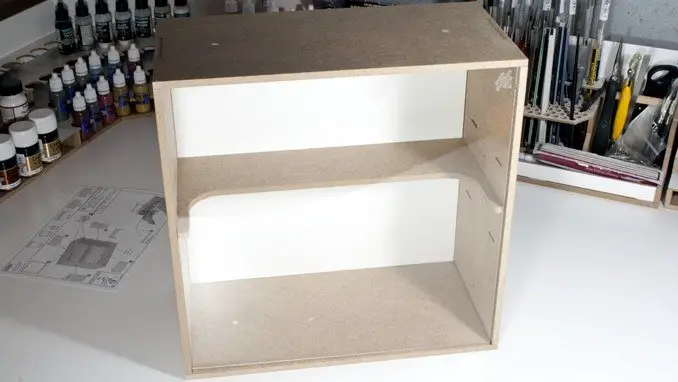
HobbyZone OM10 Assembly – Brackets & Shelf
This bit isn’t really on the instructions. Instead, you just have the image of one of these brackets, an arrow pointing to the 2 side panels and an annotation; “without glue”.
It’s still rather clear what to do.
On the reverse, you can see that the brackets are only partially machined out, with only some points remaining connected to the board. It’s shipped like this so that these smaller and more fragile components are safe during transport.
Vous pouvez simplement les casser, mais pour éviter toute déchirure ou tout dommage, j'ai utilisé un couteau de loisir, puis limé le reste des onglets pour obtenir une finition lisse
Tout est fait, les supports sont lisses et sont maintenant prêts à être insérés dans le module d'affichage.
Vous pouvez insérer les supports à l'une des 3 hauteurs différentes selon la taille des modèles que vous y affichez.
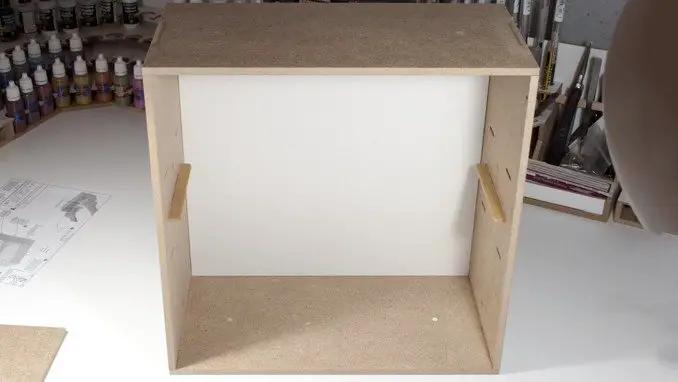
L'étagère se pose facilement sur les supports, car ces pièces ne sont pas collées, vous pouvez les ajuster selon vos besoins. L'évidement de la tablette vous permet également de ranger des modèles plus hauts vers l'avant.
HobbyZone OM10 Assembly – Step 5
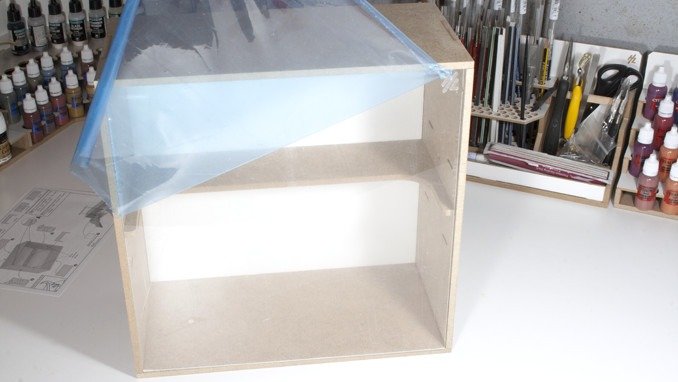
The final piece is the perspex window. This has a separate instruction to simply flex it as you fit it into the A-holes (told you I’d keep using it) on the upper sides of the unit.
Couldn’t resist a shot of peeling the cellophane off. The window has this protection film on the front and rear to ensure it has no scratches during shipping.
HobbyZone OM10 – Big Showcase WIP Module – Usage
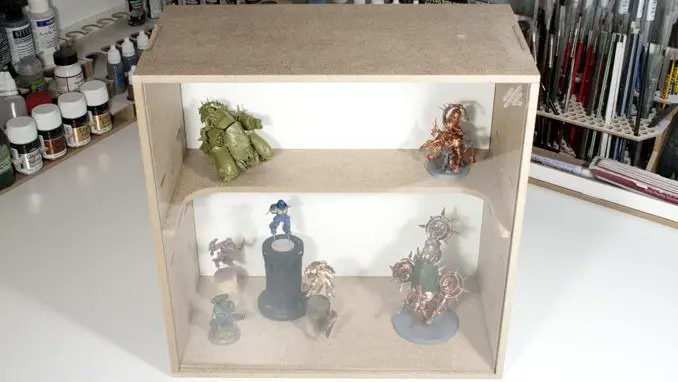
At 30cm tall; this module stands at twice the height of all of the other modules in the range. On its own it is quite simply a box with a window in, the machined in HobbyZone HZ logo adds to the professional look of this set-up and matches all of the other modules in the range. It also serves as a point to press on in order to open the window. The module certainly fits its place as the centrepiece of your workstation set-up. At some point, I’d like to wire in some LED lights at the top and under the shelf to really help my mini’s stand out.
To get the negative out of the way: on its own, or if you only have the real-estate for a large workstation set-up; then this probably isn’t for you. It’s certainly no replacement for a display cabinet and you’d be better off taking up space with more tool or bitz storage.
However if you do have a full workstation and have room for it, this is a great addition. As you can see there’s plenty of storage for in-progress mini’s. On the image below mine are spread out quite wide with various sizes of bases and, some are on corks or poignées de peinture. Vous pouvez facilement installer un couple de 10 escouades marines spatiales sur l'étagère supérieure et quelques véhicules ci-dessous
HobbyZone OM10 – Big Showcase WIP Module – Final Thoughts
Simple to build and easy to use. Although it’s one of the more expensive parts of the Modular Workshop System range, it does add value to your hobby workstation set-up (covered in the next section). It’s not something you want in place of tool storage if you need that. Your in-progress models can just as easily fit in a box somewhere.
The acrylic glass is a fingerprint magnet. I’ve found that If I push the HobbyZone logo, this is the best place to start opening the window then lift by the edges. Doing this means I only need to clean it occasionally. It is also nice to see the acrylic fit so close to the edges of the module as this limits the amount of dust that can get in – a problem I have with my old display cabinet.
| Pour | Contre |
| Attrayant Partie d'un système modulaire Très facile à construire Plusieurs options de hauteur d'étagère Robuste et construit avec précision | Vous avez besoin d'espace pour cela Cher pour ce que c'est |
Does the HobbyZone OM10 – Big Showcase WIP Module improve my hobby?
Yes, it can but, and I can’t express this enough, not at the cost of additional tool or bitz storage. The point of a workstation is to have the things you need close at hand. So, if this is on your desk and your clippers, files, spare heads or bags of sand are tucked away – you may want to re-think your configuration.
But if you do have space, and you are building a full workstation, it’s a great addition that will improve your hobby by keeping you focused.
Pour avoir une idée de la valeur, il suffit de considérer le vieil adage “out of sight, out of mind”. This is why I’ve had my guitar on full display for 8 years even though I can only play a badly plucked version of Ode to Joy. When it comes to painting models, I’m just the same. I’m forever moving on to the next project because it seems more interesting and my in-progress work is tucked up in a box somewhere. These display modules serve to remind me that I have all of this stuff in progress, my brain now screams at me “don’t start anything new!” And especially, “do not ‘buy’ anything new”.
Mais nous savons tous que maintenant, non?
Qu'avez-vous pensé de cette critique? veuillez me le faire savoir dans les commentaires.
If you like what I’m doing here you could really help encourage more content with a share on any social media platform.
Vous voulez rester à jour avec le blog ? Vous pouvez vous abonner dans la barre latérale par email ou RSS
(La barre latérale se trouve sous l'article sur les appareils mobiles)
Auteur