HobbyZone OM10 - Big Showcase WIP-Modulüberprüfung
Last Updated on April 23, 2021 by FauxHammer
For my Third HobbyZone Review, I’m taking an in-depth look at the OM10 – Big Showcase WIP Module. Während dies anfangs wie eine dieser wegwerfbaren Extras schien, die wenig Sinn haben, außer mein Ego zu ernähren. Es ist tatsächlich eine wichtige Stütze für meinen neuen Workshop-Aufbau geworden. Eine, die mich ermutigt, mich auf die jeweilige Aktivität zu konzentrieren, bevor ich weitere Modelle kaufe.
Vollständige Offenlegung: Ich bin nicht mit HobbyZone verbunden und wurde für diese Bewertung nicht bezahlt. Ich habe dies mit meinem eigenen Geld gekauft und teile meine persönlichen Meinungen zu dem Artikel.
Hinweis: Dieser Artikel verwendet Affiliate-Links
HobbyZone OM10 – Big Showcase WIP Module – Packaging & Unboxing
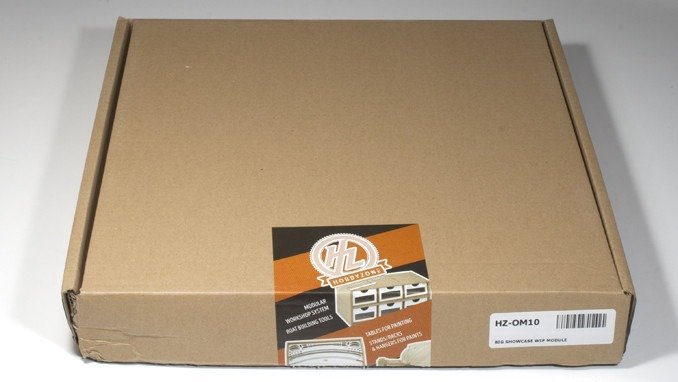
Wie bei den vorherigen Bewertungen der OM05s – 26 mm Paints Module und der OM07a – Brushes & Tools Module. das OM10 Big WIP Showcase-Modul wird in einer braunen Standardbox mit HobbyZone-Markensiegel und einem ID-Etikett geliefert.
Diese Box ist tatsächlich doppelt so lang wie die vorherigen Boxen. Welches ist die größte Boxgröße der 3, die ich in den HobbyZone Modular Workstation-Paketen gesehen habe.
This particular box comes with a rather unique feature… The bottom left corner is smashed in…
I’ve noted this as it’s important to see how the packaging can protect the contents from damage. I received 31 Modular Workshop System Modules along with 2 extra HobbyZone products in this order. Between the 2 large boxes they arrived in, the whole set weighed over 46 kilos! When shifting these boxes around, it wouldn’t take much for the weight alone to have some impact on the cardboard packaging. When opening this module (and one of my reasons for choosing it as the next module to build) was to see if the internal components were damaged at all.
Wie bei den vorherigen Modulen werden die Komponenten mit nahezu bearbeiteter Präzision sauber in Luftpolsterfolie eingewickelt.

Wir können sehen, dass die Seite der Box, die getroffen wurde, angemessen geschützt war. Interessanterweise war die rechte Seite überhaupt nicht mit Luftpolsterfolie geschützt. Die Komponenten haben sich deutlich nach rechts verschoben. Ob dies nur eine Bewegung während des Transports aufgrund des Fehlens einer Luftpolsterfolie über diese Kante oder aufgrund des Aufpralls war, ist nicht klar.
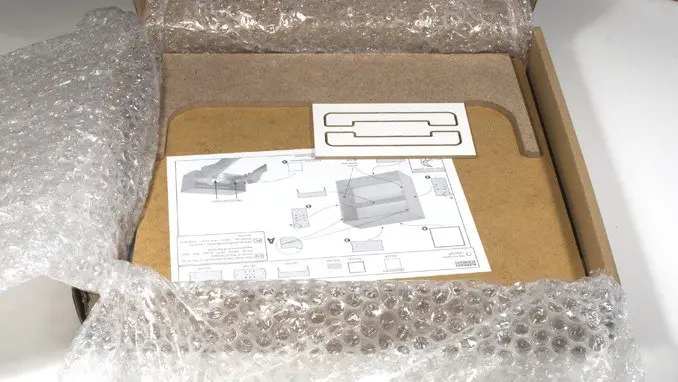
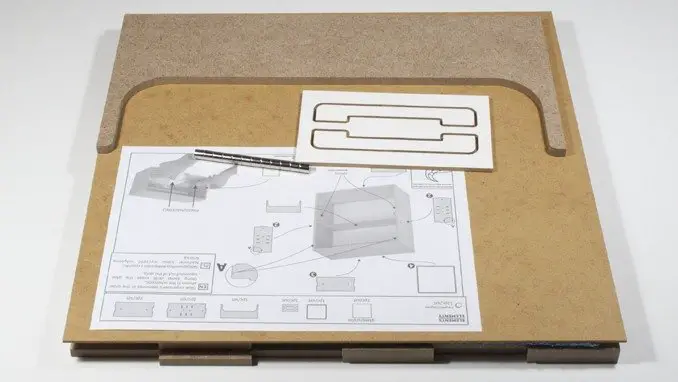
Die Komponenten selbst haben jedoch überhaupt keine Schäden erlitten, einschließlich der Rückwand, die das dünnste und zerbrechlichste Teil in dieser Box ist (ohne die Anweisungen, die ebenfalls keine Schäden erlitten haben).
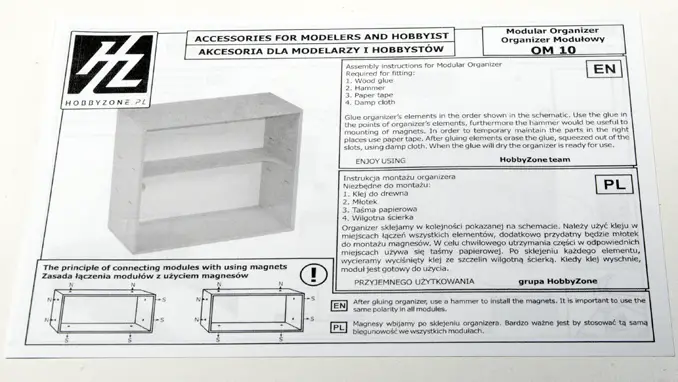
HobbyZone OM07a – OM10 – Big Showcase WIP Module – Instructions
In my previous reviews, I’ve kicked off a bit about the instructions being the let-down of the product. I can’t really make this judgement here as the build is so simple.
Die Vorderseite weist wie gewohnt auf die Komponenten hin, die Sie zum Aufbau des Sets benötigen.
- Holzkleber
- Hammer
- Papier Klebeband
- Feuchtes Tuch
Personally, I’d forego the paper tape and invest in some large G-Clamps to hold this together as it dries. Especially if you are doing a few of these modules. Because you are wiping away excess glue with the damp cloth, it stops the tape from sticking to the unit. Unless you wrap it all the way around and stick it to itself. It also leaves a rough texture on the wood in the few places where it has stuck.
As I said, I can’t complain about the instructions here. Where the different modules require more steps, I like my instructions to look like Lego or IKEA sets. One step/component at a time showing exactly what goes where.
This is one picture with a load of arrows. But you can’t really get this too wrong. It’s a box. it has 4 sides and a back. it’s clear what goes where. The only thing you have to look out for is the 2 extra holes on the side panels, which are needed for the window. These need to go on the front at the top. The instructions make this clear with a big letter EIN.
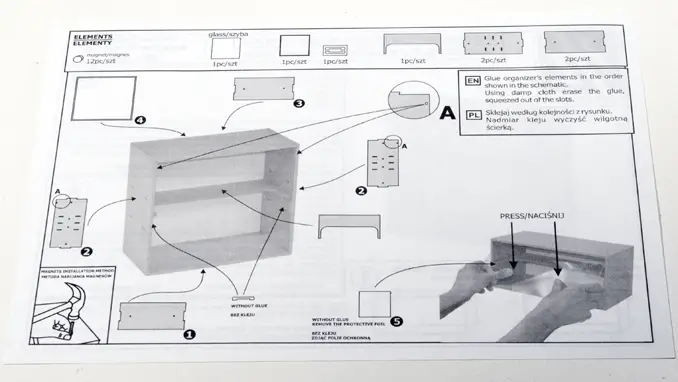
HobbyZone OM10 – Big Showcase WIP Module – Assembly
As I said above, assembly of this module is straightforward, you don’t really need the instructions. But they are worth a look, just to make sure you understand the correct orientation of your A-holes.
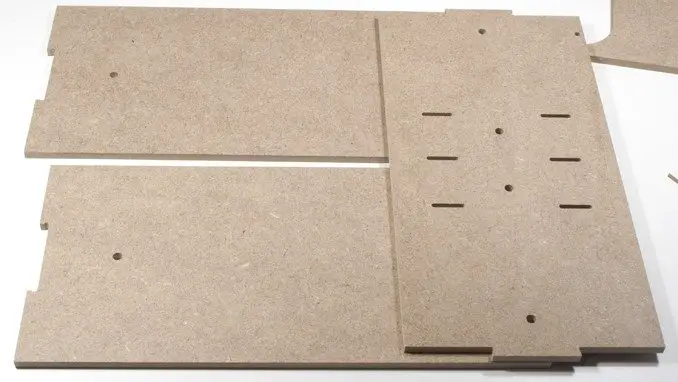
HobbyZone OM10 Assembly – Step 1
Step 1 (according to the instructions) is to lay the baseboard down. In the shot below I have 2 identical boards, either can be used as the baseboard. I also have a side panel. You can see the A-hole (yep, I’m gonna keep making that joke) at the top right of this panel. I now know which side and orientation it is, ready for Step 2
HobbyZone OM10 Assembly – Step 2
Just attach the sides, 1 at a time, a line of glue down all the connecting edges. Push them together and wipe away the excess with your damp cloth. I used a Micro-fibre towel, which is just a bit too thick for getting deep into the inside corners. But the glue dries clear, if you do leave any excess glue you’ll see a slightly darker wood stain at most.
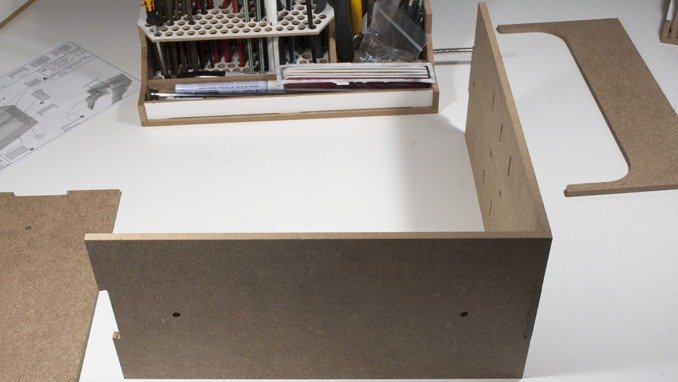
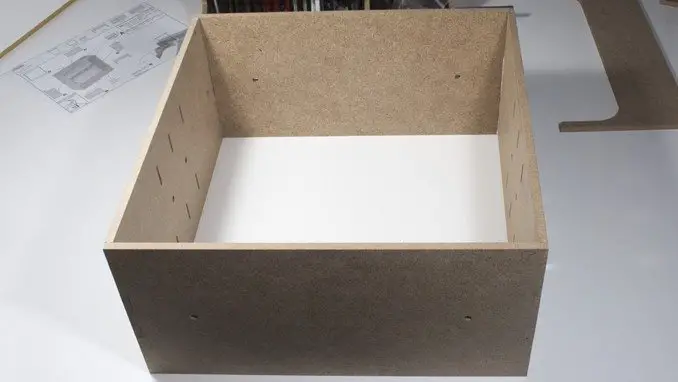
HobbyZone OM10 Assembly – Step 3
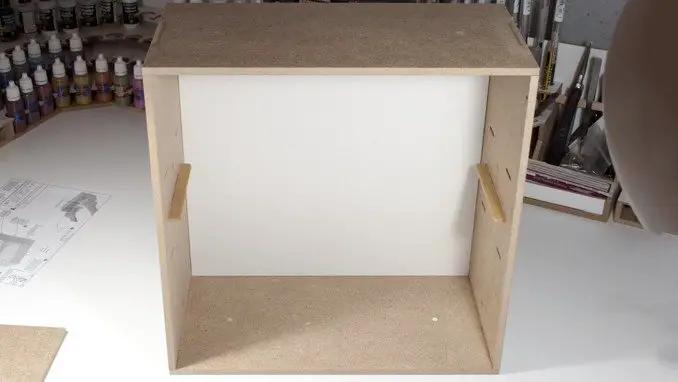
Once the sides are on, it’s just a case of doing the same with the top. Make sure you are working quite quickly here. The back-plate is used to line everything up. You don’t want this unit drying at an odd angle before you reach the next step.
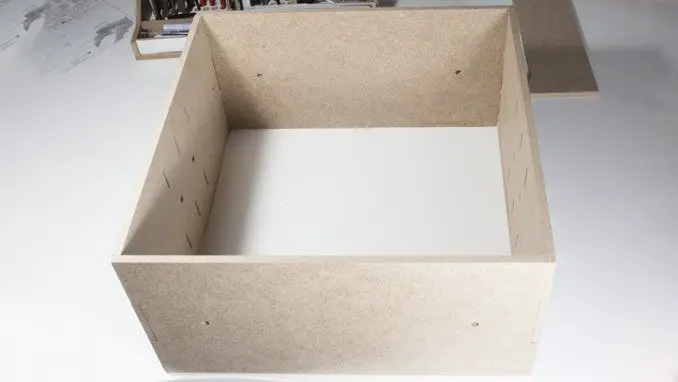
HobbyZone OM10 Assembly – Step 4
Bevor der Kleber in den vorherigen Schritten trocken ist, nehmen Sie etwas Kleber an den Rändern der Rückplatte und reiben Sie ihn mit Ihrem Finger ein.

Verwenden Sie die Rückplatte, um das Kastenquadrat auszurichten. Drücken Sie nun alles zusammen, während das Gewicht der Box auf die Rückplatte drückt. Wischen Sie überschüssigen Kleber ab und lassen Sie ihn so trocknen.
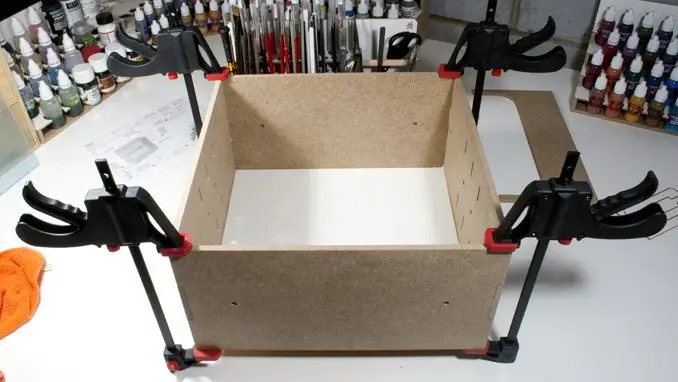
Taking things to a somewhat unnecessary degree, I used g-clamps to hold all the pieces to the back plate. This is to ensure that the module stays in it’s best position until the glue is dry. The fit of the wood is pretty tight anyway, but just this extra step make sure this is on the money.
Ich hätte mit größeren G-Lampen fertig werden können. Zum Halten der Seiten an der oberen und unteren Platte. Dies sind die Teile, die es vertragen könnten, zusammengedrängt zu werden. Die Rückplatte kümmert sich um sich selbst durch das Gewicht der darauf ruhenden Box. Dies ist das größte Modul, das HobbyZone derzeit im Bereich Modular Workshop System anbietet. Alle anderen Module sind nur 15 cm groß, was perfekt für meine 15 cm Klemmen gewesen wäre. Da sich diese über zwei Ebenen erstreckt, konnten meine Klammern diese Kanten nicht zusammenhalten.
Sie können für diesen Schritt Klebeband verwenden. Denken Sie jedoch daran, dass Sie das Gerät vollständig einwickeln müssen, damit das Klebeband an sich selbst haften kann. Wenn Sie den überschüssigen Kleber mit einem feuchten Tuch abwischen, bleibt das Papierband nicht mehr haften. Wenn das Klebeband am Gerät haftet, wird das Finish beim Entfernen weggezogen und bleibt rau.
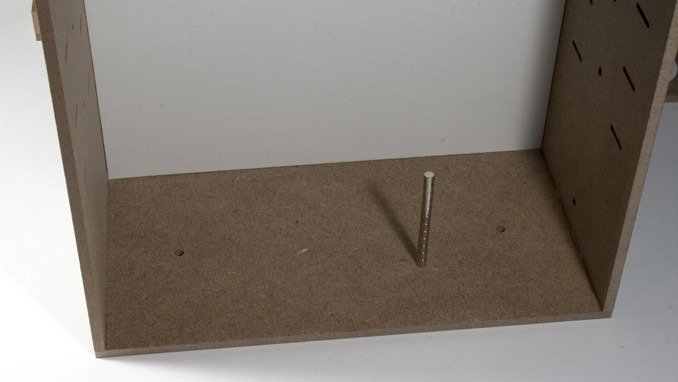
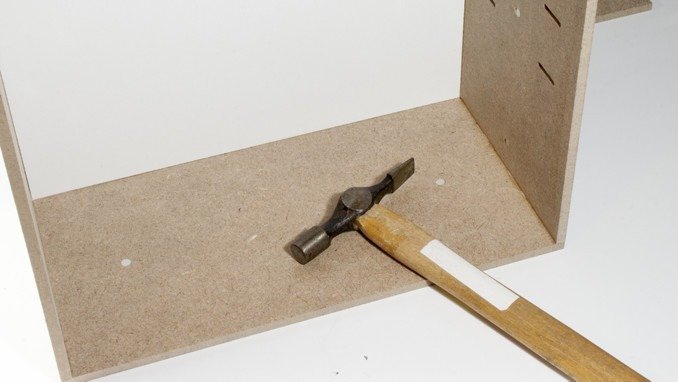
HobbyZone OM10 Assembly – Magnets
Hier hat mein Lernen aus den vorherigen Modulen begonnen. Sobald die Schale fertig ist, ist es der beste Zeitpunkt, Ihre Magnete einzusetzen. Wenn Sie dies zuvor tun, können Sie sie falsch ausrichten, indem Sie die Teile bewegen und klopfen müssen sie wieder raus. Wenn Sie dies später tun, besteht die Gefahr, dass Sie den Kleber auf andere, zerbrechlichere Komponenten hämmern oder verunsichern.
Siehe meine Notizen auf der OM06s – 26mm Small Paints Module review for details about magnet alignment. Assuming this is not your first module, just make sure that you use those modules as a template for which way round the magnets go (maybe mark them once you know). Then just line up a tower of magnets with the hole and gently tap one in so it’s just about gripped by the hole. Don’t keep hammering, one tap should do, just to get it partially in the hole. The magnets are fragile, repeated hammering could crack one, and you don’t get any spares. Once it’s in slightly move on to the next hole and so on. Then hammer them all flush.
The last couple are a bugger as you don’t have a tower of magnets to hit, you have 2 which aren’t even as tall as the fingers you’d hold them with. I tend to just generally line them up and give it one swift hit with the hammer. That works fine 3 quarters of the time.
HobbyZone OM10 Assembly – Brackets & Shelf
This bit isn’t really on the instructions. Instead, you just have the image of one of these brackets, an arrow pointing to the 2 side panels and an annotation; “without glue”.
It’s still rather clear what to do.
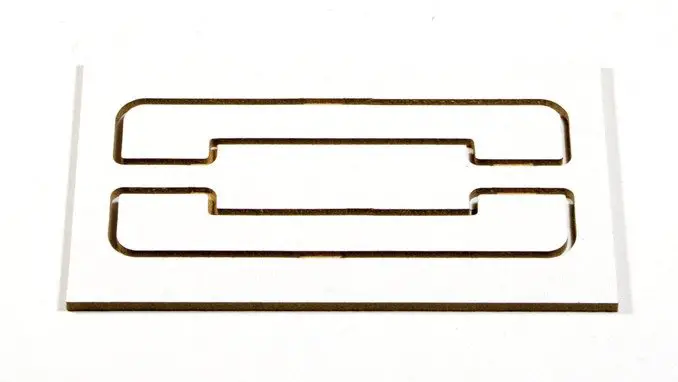
On the reverse, you can see that the brackets are only partially machined out, with only some points remaining connected to the board. It’s shipped like this so that these smaller and more fragile components are safe during transport.
Sie können sie einfach herausschnappen, aber um ein Reißen oder Beschädigen zu vermeiden, habe ich ein Hobbymesser verwendet und dann den Rest der Laschen abgelegt, um ein glattes Finish zu erhalten
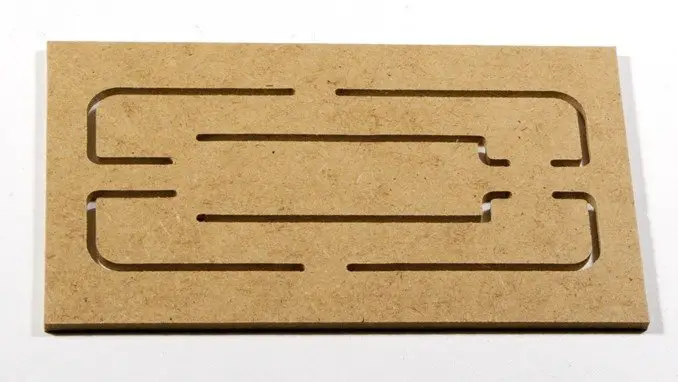
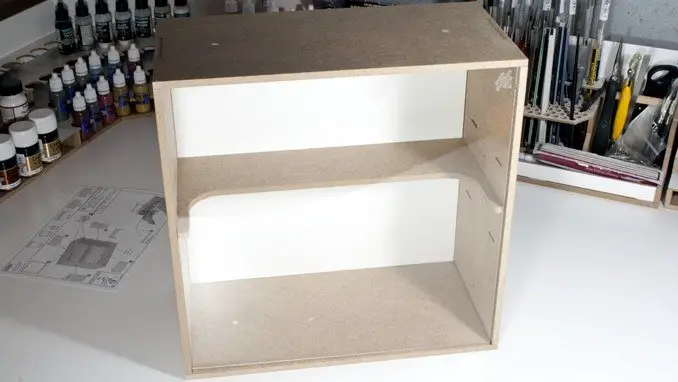
Alles erledigt, die Klammern sind glatt und können jetzt in das Anzeigemodul eingefügt werden.
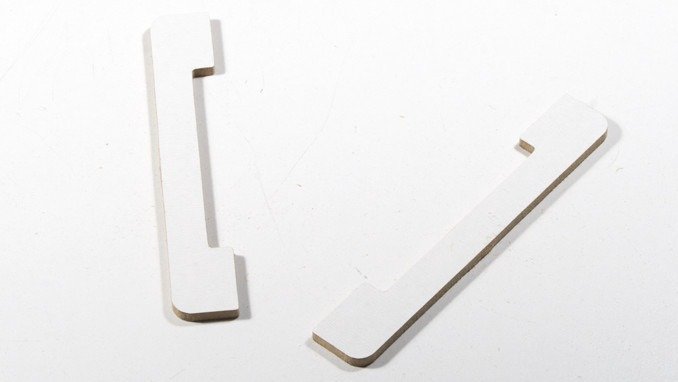
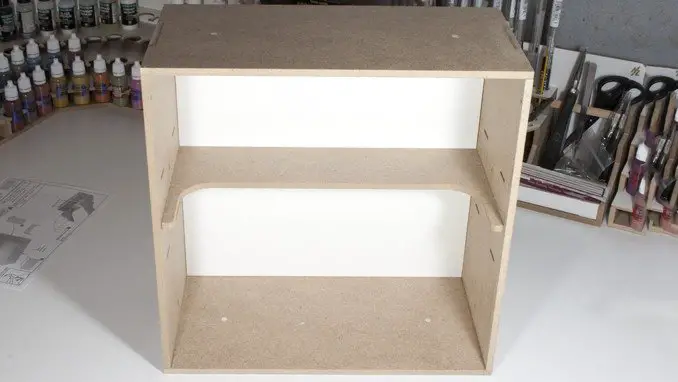
Sie können die Klammern in einer von drei verschiedenen Höhen einfügen, abhängig von der Größe der Modelle, die Sie darin anzeigen.
Das Regal sitzt leicht auf den Halterungen, da diese Teile nicht eingeklebt sind. Sie können sie nach Bedarf anpassen. In der Aussparung im Regal können Sie auch größere Modelle nach vorne verstauen.
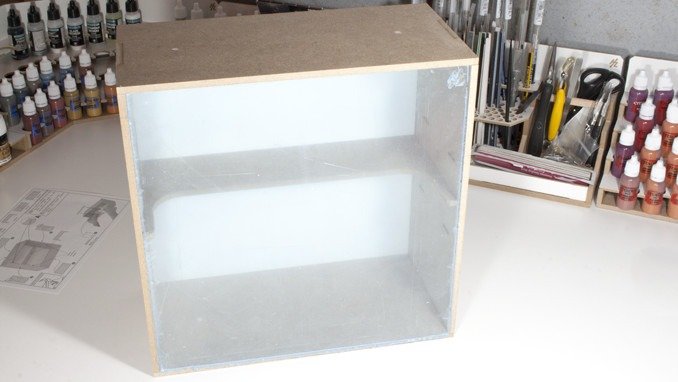
HobbyZone OM10 Assembly – Step 5
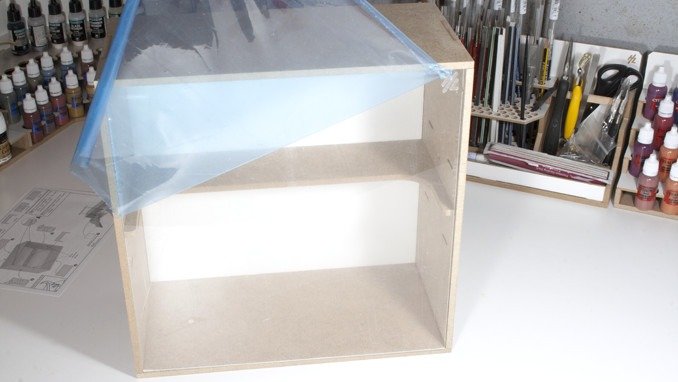
The final piece is the perspex window. This has a separate instruction to simply flex it as you fit it into the A-holes (told you I’d keep using it) on the upper sides of the unit.
Couldn’t resist a shot of peeling the cellophane off. The window has this protection film on the front and rear to ensure it has no scratches during shipping.
HobbyZone OM10 – Big Showcase WIP Module – Usage
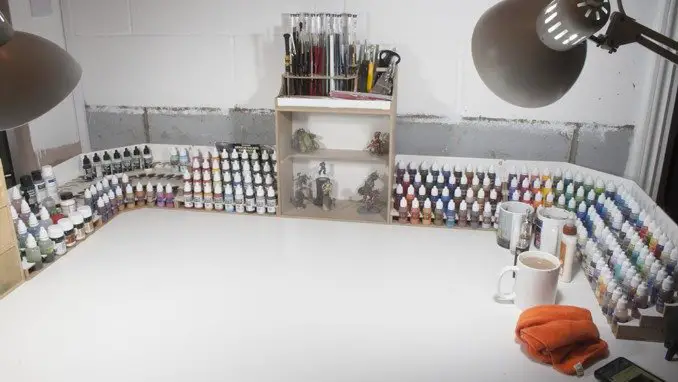
At 30cm tall; this module stands at twice the height of all of the other modules in the range. On its own it is quite simply a box with a window in, the machined in HobbyZone HZ logo adds to the professional look of this set-up and matches all of the other modules in the range. It also serves as a point to press on in order to open the window. The module certainly fits its place as the centrepiece of your workstation set-up. At some point, I’d like to wire in some LED lights at the top and under the shelf to really help my mini’s stand out.
To get the negative out of the way: on its own, or if you only have the real-estate for a large workstation set-up; then this probably isn’t for you. It’s certainly no replacement for a display cabinet and you’d be better off taking up space with more tool or bitz storage.
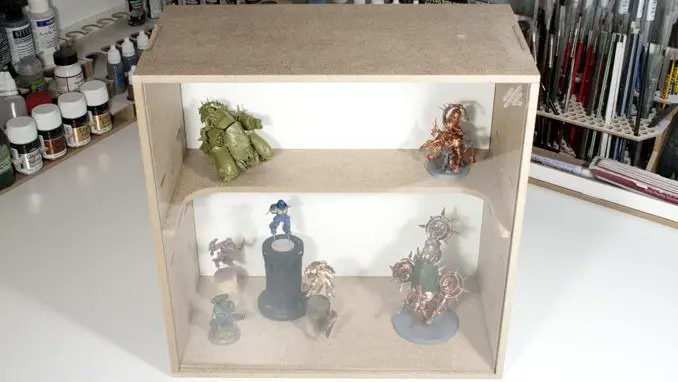
However if you do have a full workstation and have room for it, this is a great addition. As you can see there’s plenty of storage for in-progress mini’s. On the image below mine are spread out quite wide with various sizes of bases and, some are on corks or Malgriffe. Sie können problemlos ein paar 10-Mann-Space-Marine-Trupps auf das oberste Regal und ein paar Fahrzeuge darunter montieren
HobbyZone OM10 – Big Showcase WIP Module – Final Thoughts
Simple to build and easy to use. Although it’s one of the more expensive parts of the Modular Workshop System range, it does add value to your hobby workstation set-up (covered in the next section). It’s not something you want in place of tool storage if you need that. Your in-progress models can just as easily fit in a box somewhere.
The acrylic glass is a fingerprint magnet. I’ve found that If I push the HobbyZone logo, this is the best place to start opening the window then lift by the edges. Doing this means I only need to clean it occasionally. It is also nice to see the acrylic fit so close to the edges of the module as this limits the amount of dust that can get in – a problem I have with my old display cabinet.
| Vorteile | Nachteile |
| Attraktiv Teil eines modularen Systems Sehr einfach zu bauen Mehrere Regalhöhenoptionen Robust und präzise gebaut | Sie brauchen Platz dafür Teuer für das, was es ist |
Does the HobbyZone OM10 – Big Showcase WIP Module improve my hobby?
Yes, it can but, and I can’t express this enough, not at the cost of additional tool or bitz storage. The point of a workstation is to have the things you need close at hand. So, if this is on your desk and your clippers, files, spare heads or bags of sand are tucked away – you may want to re-think your configuration.
But if you do have space, and you are building a full workstation, it’s a great addition that will improve your hobby by keeping you focused.
Um eine Vorstellung vom Wert zu bekommen, betrachten Sie einfach das uralte Sprichwort “out of sight, out of mind”. This is why I’ve had my guitar on full display for 8 years even though I can only play a badly plucked version of Ode to Joy. When it comes to painting models, I’m just the same. I’m forever moving on to the next project because it seems more interesting and my in-progress work is tucked up in a box somewhere. These display modules serve to remind me that I have all of this stuff in progress, my brain now screams at me “don’t start anything new!” And especially, “do not ‘buy’ anything new”.
Aber das wissen wir alle inzwischen, oder?
Was denkst du über diese Bewertung? Bitte lassen Sie es mich in den Kommentaren wissen.
If you like what I’m doing here you could really help encourage more content with a share on any social media platform.
Möchten Sie mit dem Blog auf dem Laufenden bleiben? Sie können sich in der Seitenleiste per E-Mail oder RSS anmelden
(Auf mobilen Geräten befindet sich die Sidebar weiter unten.)