HobbyZone OM10 - Revisión del módulo WIP Big Showcase
Last Updated on abril 23, 2021 by FauxHammer
For my Third HobbyZone Review, I’m taking an in-depth look at the OM10 – Big Showcase WIP Module. Aunque inicialmente parecía uno de esos extras desechables que tienen poco propósito más allá de alimentar mi ego. En realidad, terminó siendo un pilar fundamental para la configuración de mi nuevo taller. Una que me anima a centrarme en la actividad en cuestión antes de comprar más modelos.
Divulgación completa: no estoy afiliado a HobbyZone y no me han pagado por esta revisión. Compré esto con mi propio dinero y estoy compartiendo mis opiniones personales sobre el artículo.
Aviso: este artículo utiliza enlaces de afiliados
HobbyZone OM10 – Big Showcase WIP Module – Packaging & Unboxing
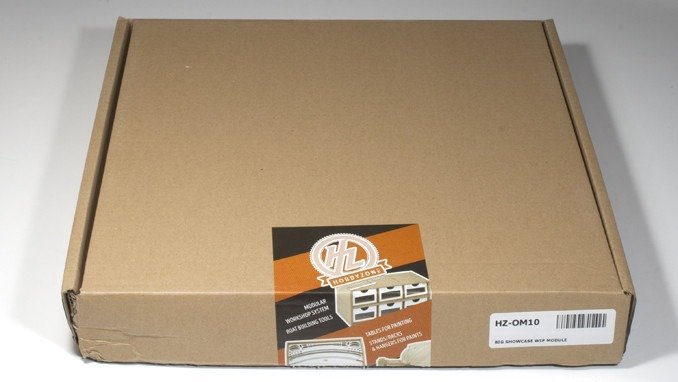
Al igual que con las revisiones anteriores de la OM05s – 26 mm Paints Module y el OM07a – Brushes & Tools Module. la OM10 Big WIP Showcase Module viene en una caja marrón estándar con sello de marca HobbyZone y una etiqueta de identificación.
Este cuadro es en realidad el doble de la longitud de los cuadros anteriores. Cuál es el tamaño de caja más grande de los 3 que he visto en los paquetes de la estación de trabajo modular HobbyZone.
This particular box comes with a rather unique feature… The bottom left corner is smashed in…
I’ve noted this as it’s important to see how the packaging can protect the contents from damage. I received 31 Modular Workshop System Modules along with 2 extra HobbyZone products in this order. Between the 2 large boxes they arrived in, the whole set weighed over 46 kilos! When shifting these boxes around, it wouldn’t take much for the weight alone to have some impact on the cardboard packaging. When opening this module (and one of my reasons for choosing it as the next module to build) was to see if the internal components were damaged at all.
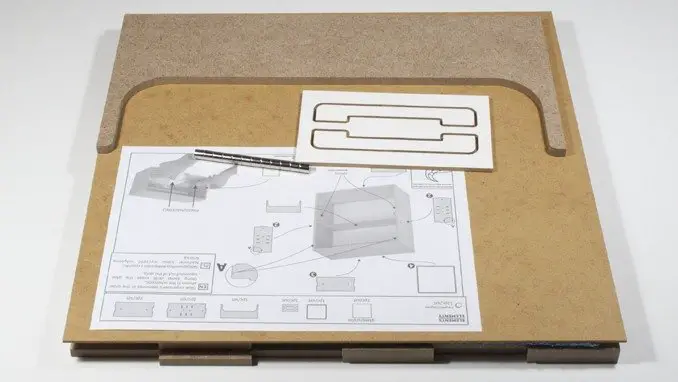
Al igual que los módulos anteriores, los componentes se envuelven limpiamente en plástico de burbujas con una precisión casi mecanizada.

Podemos ver que el lado de la caja que fue impactado estaba adecuadamente protegido. Curiosamente, el lado derecho no estaba protegido con plástico de burbujas. Los componentes se han desplazado claramente a la derecha. No está claro si esto fue solo movimiento durante el transporte debido a la falta de envoltura de burbujas a través de este borde o debido al impacto.
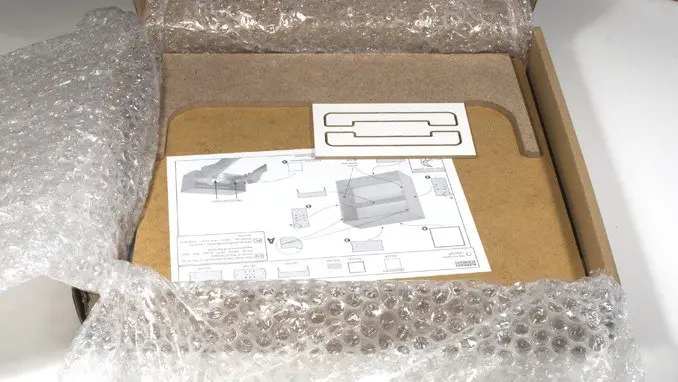
Sin embargo, los componentes en sí mismos no han sufrido ningún daño, incluido el tablero, que es la parte más delgada y frágil de esta caja (sin contar las instrucciones, que tampoco sufrieron daños).
HobbyZone OM07a – OM10 – Big Showcase WIP Module – Instructions
In my previous reviews, I’ve kicked off a bit about the instructions being the let-down of the product. I can’t really make this judgement here as the build is so simple.
El frente, como de costumbre, informa de los componentes que necesita para construir el conjunto.
- Pegamento de madera
- Martillo
- Cinta de papel
- Paño húmedo
Personally, I’d forego the paper tape and invest in some large G-Clamps to hold this together as it dries. Especially if you are doing a few of these modules. Because you are wiping away excess glue with the damp cloth, it stops the tape from sticking to the unit. Unless you wrap it all the way around and stick it to itself. It also leaves a rough texture on the wood in the few places where it has stuck.
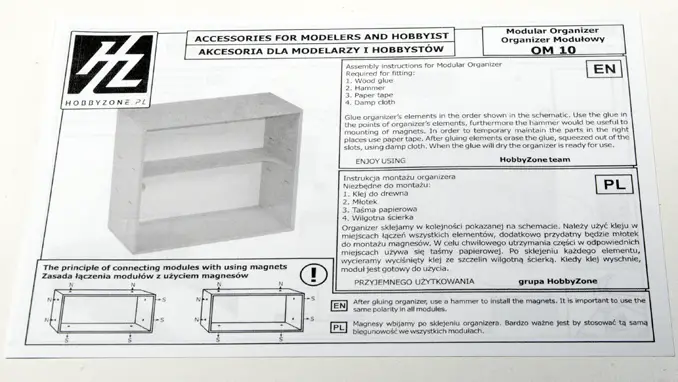
As I said, I can’t complain about the instructions here. Where the different modules require more steps, I like my instructions to look like Lego or IKEA sets. One step/component at a time showing exactly what goes where.
This is one picture with a load of arrows. But you can’t really get this too wrong. It’s a box. it has 4 sides and a back. it’s clear what goes where. The only thing you have to look out for is the 2 extra holes on the side panels, which are needed for the window. These need to go on the front at the top. The instructions make this clear with a big letter UNA.
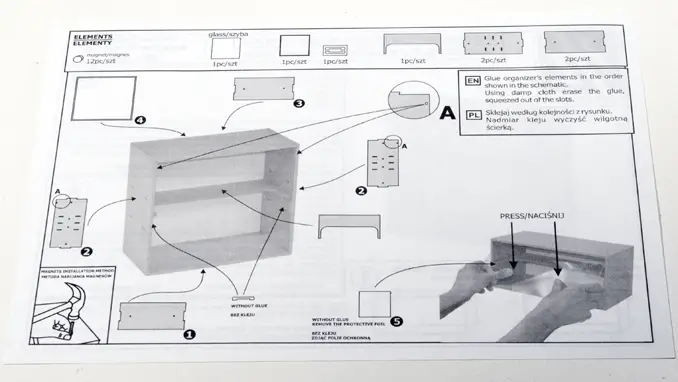
HobbyZone OM10 – Big Showcase WIP Module – Assembly
As I said above, assembly of this module is straightforward, you don’t really need the instructions. But they are worth a look, just to make sure you understand the correct orientation of your A-holes.
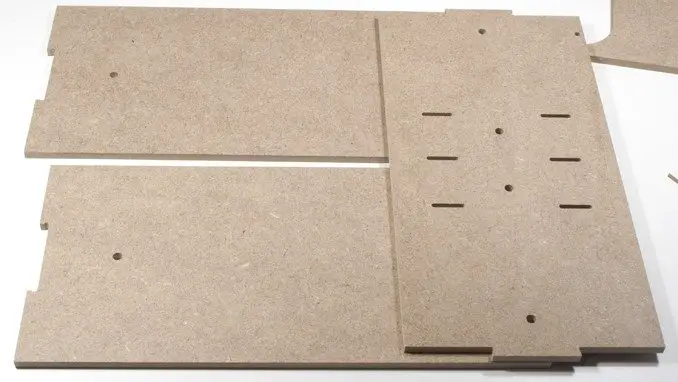
HobbyZone OM10 Assembly – Step 1
Step 1 (according to the instructions) is to lay the baseboard down. In the shot below I have 2 identical boards, either can be used as the baseboard. I also have a side panel. You can see the A-hole (yep, I’m gonna keep making that joke) at the top right of this panel. I now know which side and orientation it is, ready for Step 2
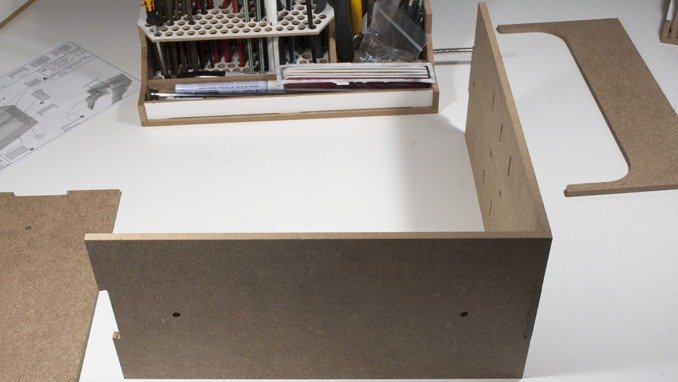
HobbyZone OM10 Assembly – Step 2
Just attach the sides, 1 at a time, a line of glue down all the connecting edges. Push them together and wipe away the excess with your damp cloth. I used a Micro-fibre towel, which is just a bit too thick for getting deep into the inside corners. But the glue dries clear, if you do leave any excess glue you’ll see a slightly darker wood stain at most.
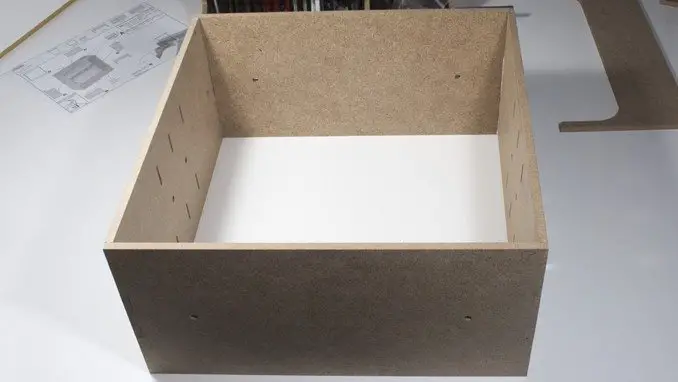
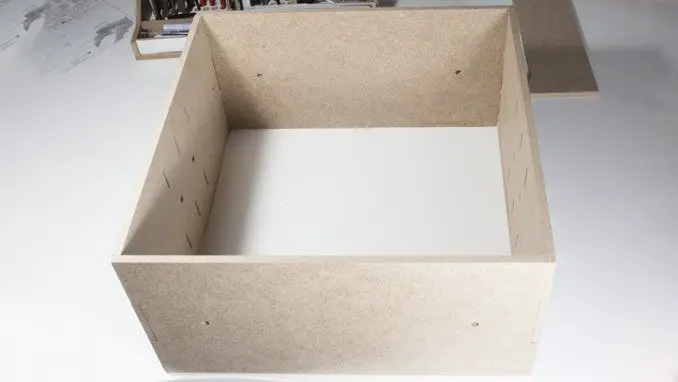
HobbyZone OM10 Assembly – Step 3
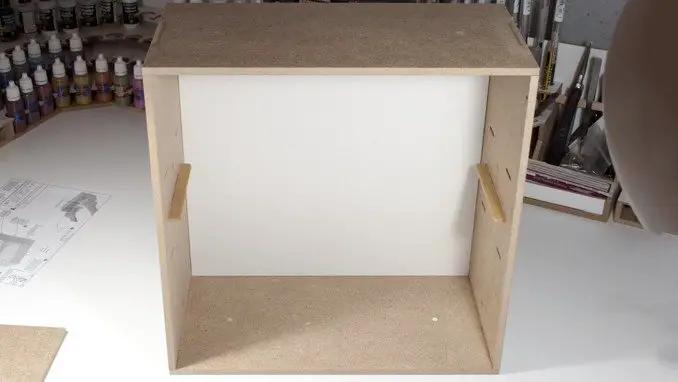
Once the sides are on, it’s just a case of doing the same with the top. Make sure you are working quite quickly here. The back-plate is used to line everything up. You don’t want this unit drying at an odd angle before you reach the next step.
HobbyZone OM10 Assembly – Step 4
Antes de que el pegamento se seque en los pasos anteriores, coloque un poco de pegamento en los bordes de la placa posterior y frótelo con el dedo.

Use la placa posterior para alinear el cuadrado de la caja. Ahora, con el peso de la caja presionando la placa posterior, junte todo. Limpie el exceso de pegamento y déjelo así para que se seque.
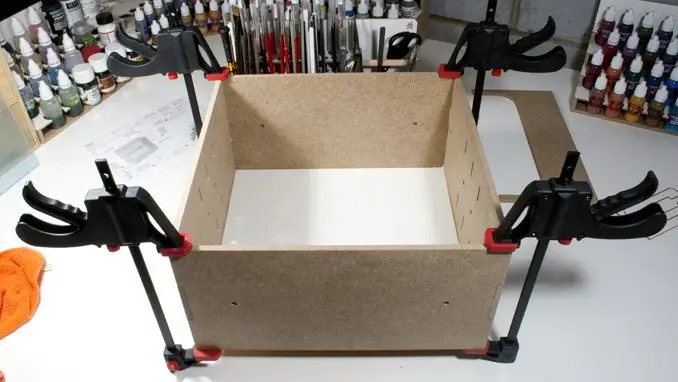
Taking things to a somewhat unnecessary degree, I used g-clamps to hold all the pieces to the back plate. This is to ensure that the module stays in it’s best position until the glue is dry. The fit of the wood is pretty tight anyway, but just this extra step make sure this is on the money.
Podría haberlo hecho con lámparas G más grandes. Para sujetar los lados a los paneles superior e inferior. Estas son las partes que podrían hacer con ser forzados juntos. La placa posterior se cuida por el peso de la caja que descansa sobre ella. Este es el módulo más grande que HobbyZone ofrece actualmente en la gama Modular Workshop System. Todos los demás módulos tienen solo 15 cm de altura, lo que hubiera sido perfecto para mis abrazaderas de 15 cm. Como este se extiende sobre 2 niveles, mis abrazaderas no pudieron mantener estos bordes juntos.
Puedes usar cinta para este paso. pero recuerde, debe envolver completamente la unidad para que la cinta pueda adherirse a sí misma. Limpiar el exceso de pegamento con un paño húmedo evitará que la cinta de papel se pegue, donde la cinta se adhiere a la unidad, separará el acabado cuando se retire, dejándolo áspero.
HobbyZone OM10 Assembly – Magnets
Aquí es donde comenzó mi aprendizaje de los módulos anteriores. Una vez que se completa el caparazón, entonces es el mejor momento para colocar sus imanes. Si lo hace antes, podría desalinearlos moviendo las partes y golpeando. ellos vuelven a salir. Hágalo más tarde y corre el riesgo de martillar o desestabilizar el pegamento en otros componentes más frágiles.
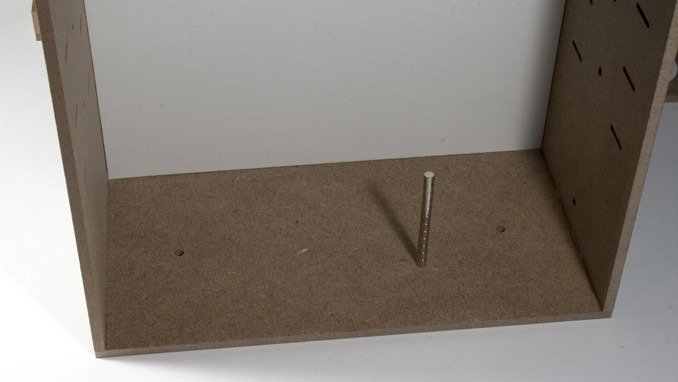
Ver mis notas en el OM06s – 26mm Small Paints Module review for details about magnet alignment. Assuming this is not your first module, just make sure that you use those modules as a template for which way round the magnets go (maybe mark them once you know). Then just line up a tower of magnets with the hole and gently tap one in so it’s just about gripped by the hole. Don’t keep hammering, one tap should do, just to get it partially in the hole. The magnets are fragile, repeated hammering could crack one, and you don’t get any spares. Once it’s in slightly move on to the next hole and so on. Then hammer them all flush.
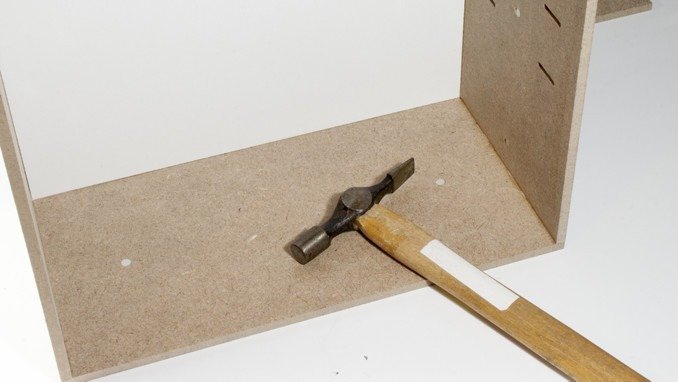
The last couple are a bugger as you don’t have a tower of magnets to hit, you have 2 which aren’t even as tall as the fingers you’d hold them with. I tend to just generally line them up and give it one swift hit with the hammer. That works fine 3 quarters of the time.
HobbyZone OM10 Assembly – Brackets & Shelf
This bit isn’t really on the instructions. Instead, you just have the image of one of these brackets, an arrow pointing to the 2 side panels and an annotation; “without glue”.
It’s still rather clear what to do.
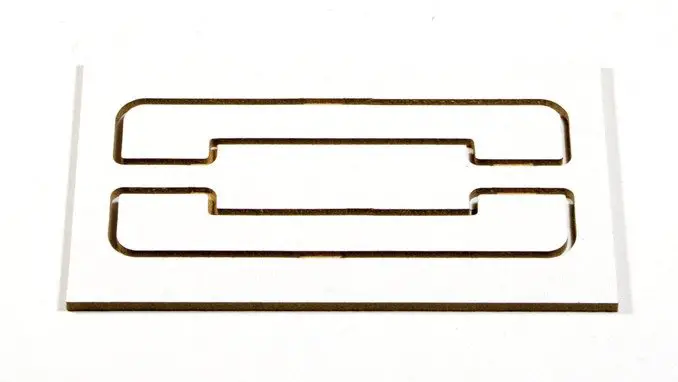
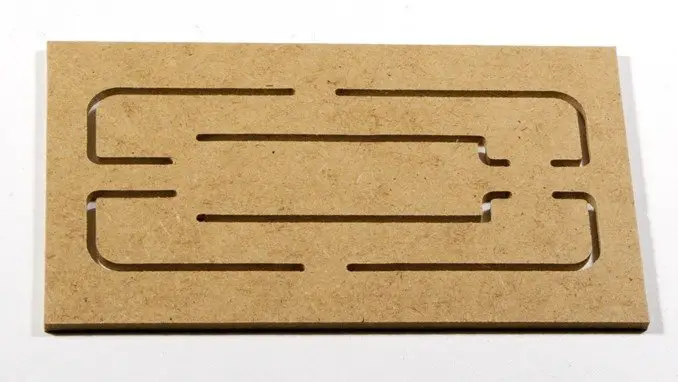
On the reverse, you can see that the brackets are only partially machined out, with only some points remaining connected to the board. It’s shipped like this so that these smaller and more fragile components are safe during transport.
Puede extraerlos, pero para evitar rasgaduras o daños, utilicé un cuchillo de hobby y luego limpié el resto de las pestañas para obtener un acabado suave
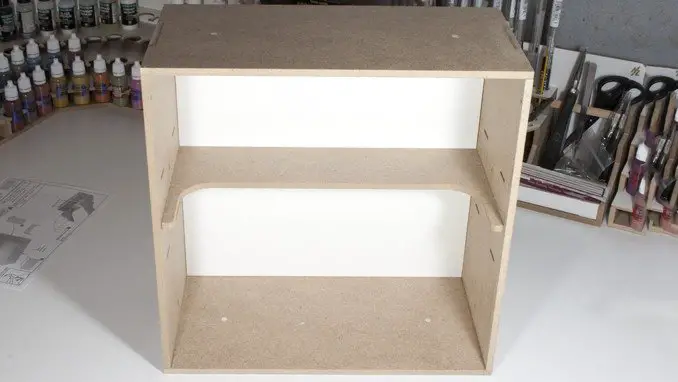
Todo listo, los soportes son suaves y ahora están listos para insertarse en el Módulo de pantalla.
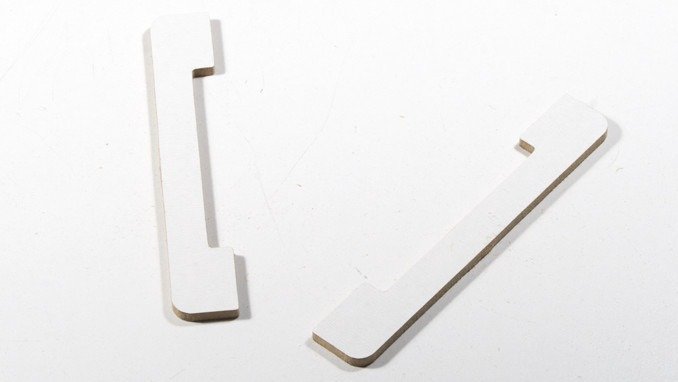
Puede insertar los soportes en una de las 3 alturas diferentes según el tamaño de los modelos que muestre en él.
El estante se coloca fácilmente sobre los soportes, ya que estas partes no están pegadas, puede ajustarlas según lo necesite. El hueco en el estante también le permite almacenar modelos más altos hacia el frente.
HobbyZone OM10 Assembly – Step 5
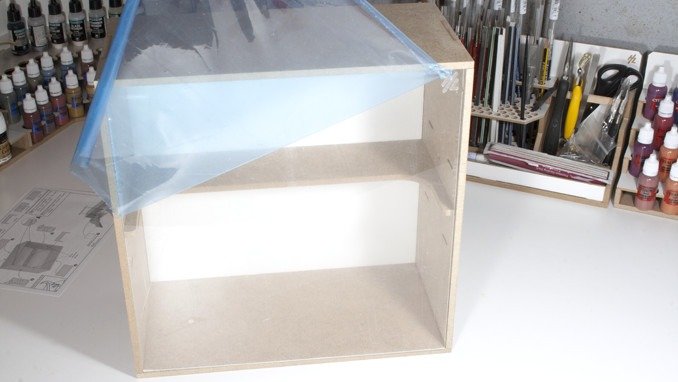
The final piece is the perspex window. This has a separate instruction to simply flex it as you fit it into the A-holes (told you I’d keep using it) on the upper sides of the unit.
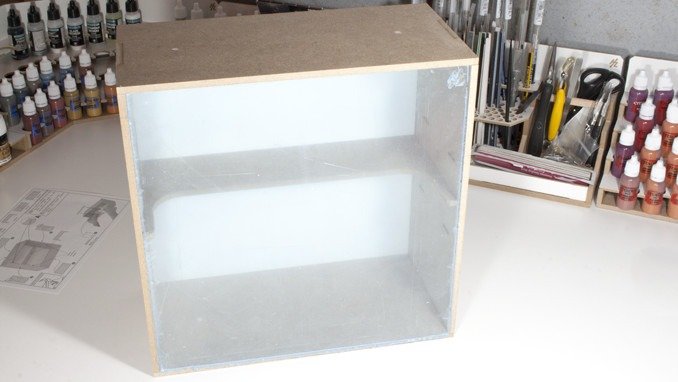
Couldn’t resist a shot of peeling the cellophane off. The window has this protection film on the front and rear to ensure it has no scratches during shipping.
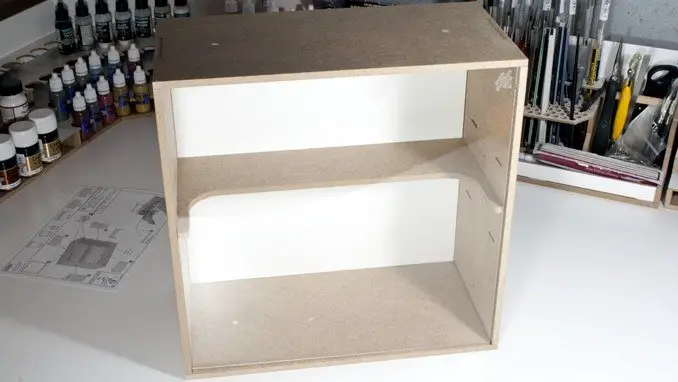
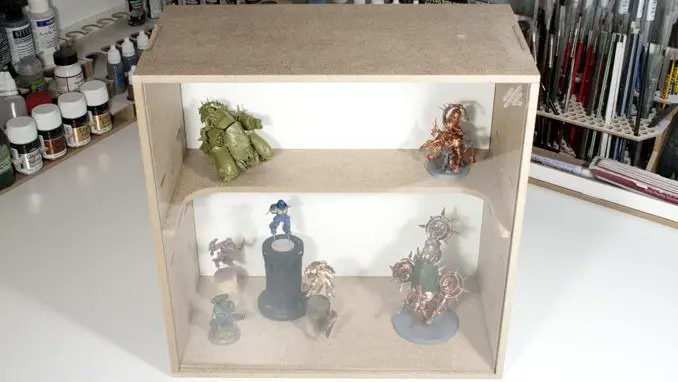
HobbyZone OM10 – Big Showcase WIP Module – Usage
At 30cm tall; this module stands at twice the height of all of the other modules in the range. On its own it is quite simply a box with a window in, the machined in HobbyZone HZ logo adds to the professional look of this set-up and matches all of the other modules in the range. It also serves as a point to press on in order to open the window. The module certainly fits its place as the centrepiece of your workstation set-up. At some point, I’d like to wire in some LED lights at the top and under the shelf to really help my mini’s stand out.
To get the negative out of the way: on its own, or if you only have the real-estate for a large workstation set-up; then this probably isn’t for you. It’s certainly no replacement for a display cabinet and you’d be better off taking up space with more tool or bitz storage.
However if you do have a full workstation and have room for it, this is a great addition. As you can see there’s plenty of storage for in-progress mini’s. On the image below mine are spread out quite wide with various sizes of bases and, some are on corks or mangos de pintura. Puedes colocar fácilmente un par de escuadrones marinos espaciales de 10 hombres en el estante superior y un par de vehículos debajo
HobbyZone OM10 – Big Showcase WIP Module – Final Thoughts
Simple to build and easy to use. Although it’s one of the more expensive parts of the Modular Workshop System range, it does add value to your hobby workstation set-up (covered in the next section). It’s not something you want in place of tool storage if you need that. Your in-progress models can just as easily fit in a box somewhere.
The acrylic glass is a fingerprint magnet. I’ve found that If I push the HobbyZone logo, this is the best place to start opening the window then lift by the edges. Doing this means I only need to clean it occasionally. It is also nice to see the acrylic fit so close to the edges of the module as this limits the amount of dust that can get in – a problem I have with my old display cabinet.
| Pros | Contras |
| Atractivo Parte de un sistema modular Muy fácil de construir Múltiples opciones de altura de estante Robusto y construido con precisión | Necesitas espacio para eso Caro por lo que es |
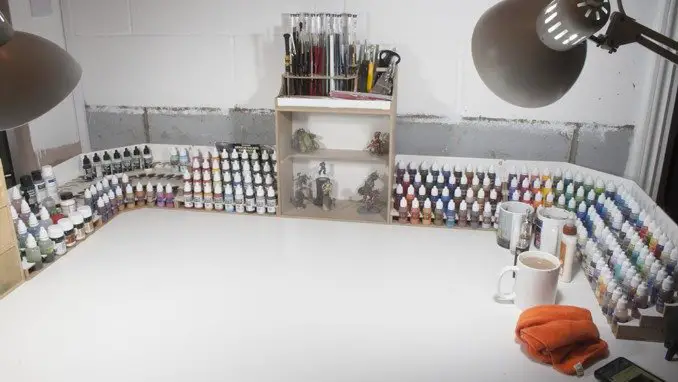
Does the HobbyZone OM10 – Big Showcase WIP Module improve my hobby?
Yes, it can but, and I can’t express this enough, not at the cost of additional tool or bitz storage. The point of a workstation is to have the things you need close at hand. So, if this is on your desk and your clippers, files, spare heads or bags of sand are tucked away – you may want to re-think your configuration.
But if you do have space, and you are building a full workstation, it’s a great addition that will improve your hobby by keeping you focused.
Para tener una idea del valor, solo considere el viejo adagio “out of sight, out of mind”. This is why I’ve had my guitar on full display for 8 years even though I can only play a badly plucked version of Ode to Joy. When it comes to painting models, I’m just the same. I’m forever moving on to the next project because it seems more interesting and my in-progress work is tucked up in a box somewhere. These display modules serve to remind me that I have all of this stuff in progress, my brain now screams at me “don’t start anything new!” And especially, “do not ‘buy’ anything new”.
Pero todos lo sabemos por ahora, ¿verdad?
¿Qué te pareció esta crítica? Por favor házmelo saber en los comentarios.
If you like what I’m doing here you could really help encourage more content with a share on any social media platform.
¿Quieres mantenerte actualizado con el blog? Puede suscribirse en la barra lateral por correo electrónico o RSS
(La barra lateral está debajo del artículo sobre dispositivos móviles)