
How to Paint Nighthaunt Chainrasps – Classic Ghost Scheme
Last Updated on August 12, 2020 by FauxHammer
Next to Space Marines and Stormcast Eternals, Nighthaunt are amongst the most ubiquitous of Games Workshop’s models. Since the second edition of Warhammer Age of Sigmar launched they’ve been the villainous poster-boys of the game and their models have featured in the various starter sets and even in the Mortal Realms partwork. Though the majority of the range is “push-fit” the models still feature an incredible amount of dynamism and momentum, making them fun to paint for hobbyists of various skill levels.
Please Note: This site uses affiliate links. Our Affiliate Partners are shown below
(Affiliate links will result in compensation to the site on qualifying purchases)
Click this link & buy your hobby stuff from Element Games for the UK & Europe to support FauxHammer.com – Use Code “FAUX2768” at the checkout for double reward points.


Our Affiliates / Hobby Stores
- UK: Element Games, The Outpost, Wayland Games, Mighty Lancer, Goblin Gaming, Forbidden Planet, Model Scenery Supplies, eBay, Amazon
- US/Canada: MTechCave, GameKastle, eBay (US), eBay (CA), Amazon
- Germany: Taschengelddieb
- Europe: eBay (DE), eBay (FR), eBay (ES), eBay (IT), Amazon
- Australia: eBay, Amazon
- Global: RedGrass Games, Warcolours
- 3D Printers: Phrozen 3D, Elegoo, Anycubic
FauxHammer – Latest Video on YouTube
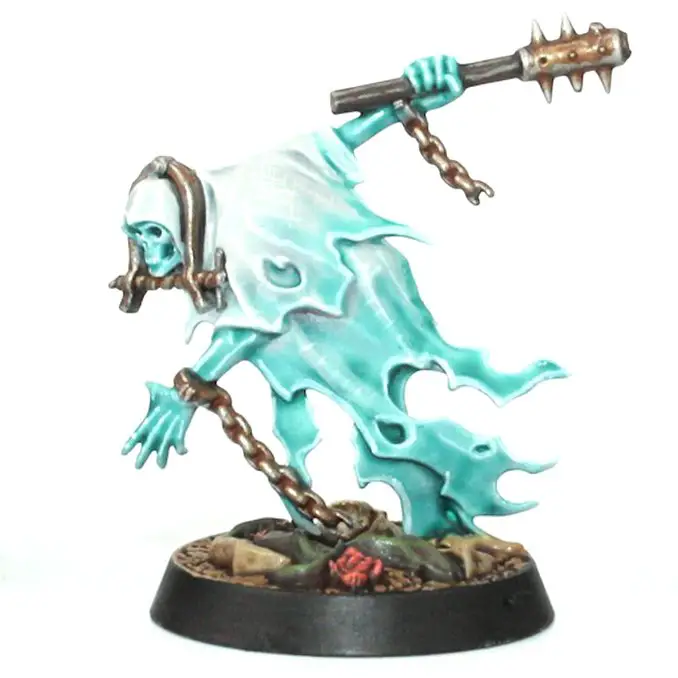
In this guide you’ll learn a Nighthaunt paint scheme that utilises Citadel Contrast – a method I use with my own models. I wanted my Nighthaunt to look more like traditional ghosts or wights and so opted for an off-white with tinges of ectoplasmic blue. I used paints from the Citadel Colour range to paint this model but you could very well use paints from other ranges and manufacturers. There is an app called MiniPaints that serves as an excellent conversion guide for matching colours from different paint ranges that you could try using if you wish to use paints that are not from the Citadel range.
How to paint Nighthaunt Chainrasps – Paints and Tools
Paints
- Grey Seer – Spraycan (Citadel Colour)
- Dryad Bark (Citadel Colour)
- Leadbelcher (Citadel Colour)
- Contrast Medium (Citadel Colour)
- Apothecary White (Citadel Colour)
- Aethermatic Blue (Citadel Colour)
- White Scar (Citadel Colour)
- Mournfang Brown (Citadel Colour)
- Nuln Oil (Citadel Colour)
- Agrax Earthshade (Citadel Colour)
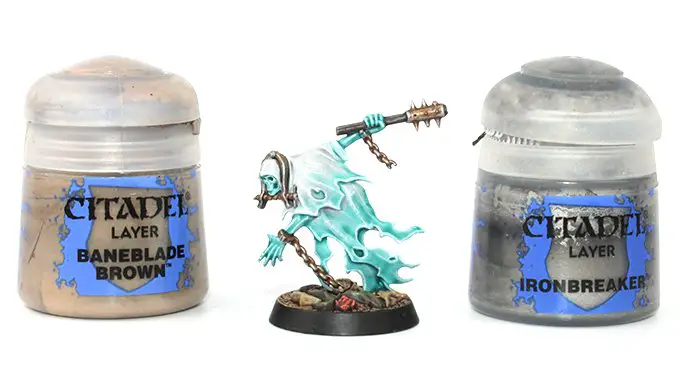
- Ironbreaker (Citadel Colour)
- Baneblade Brown (Citadel Colour)
Brushes
- Artmaster allmedia Series 10 5/10
- Artmaster allmedia Series 10 10/0
- Citadel Shade – Medium
How to paint Nighthaunt Chainrasps – Tutorial
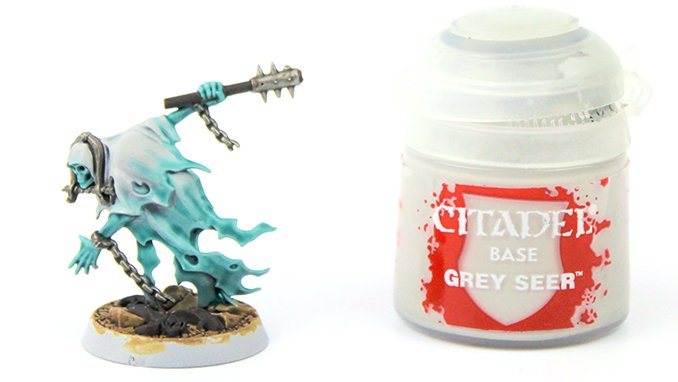
1. Priming
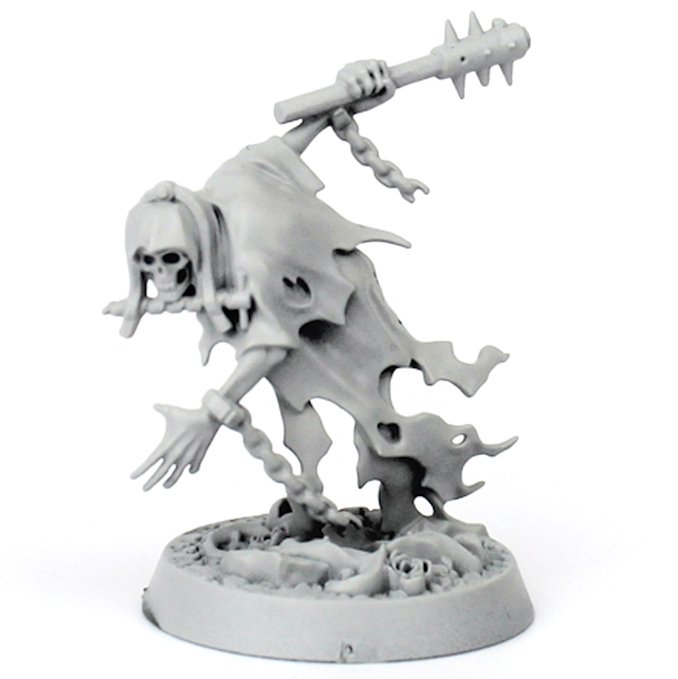
The model was primed using Grey Seer from a rattlecan. This is a paint designed by Games Workshop specifically to work with their contrast paints and is a bit more matte than other white primers. A full, even coat was applied to the entire model. When using rattlecan primers ensure that you give them a good shake before using to mix the propellant and the paint together and hold them straight and upright when applying to avoid the paint clogging or crystalising. It goes without saying, but make sure when using spray paints that you’re in a well-ventilated area. Manufacturer’s specifications and instructions might vary, but primers are usually touch dry within about 30 minutes.
2. Basecoating
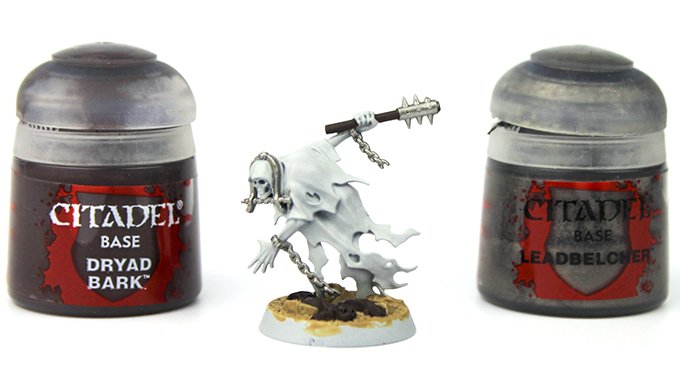
Because we’re working with white and we don’t want to be having to do a lot of touching up later on, I blocked in the base colours for the chains and the weapon at this stage. This poor fool also seems to be wearing some kind of head vice so that was also blocked in at this stage. Though some people may wish simply to use the ectoplasmic colour scheme over the entire model, painting the chains and weapons in different colours helps to give the model contrast and definition. I used Leadbelcher for the metal parts and Dryad Bark for the haft of the weapon.
If you do get any of the darker paints on the white during this stage simply touch up your mistakes using thin, watered down layers of Grey Seer, which is also available in a 12ml pot.
3. Shading
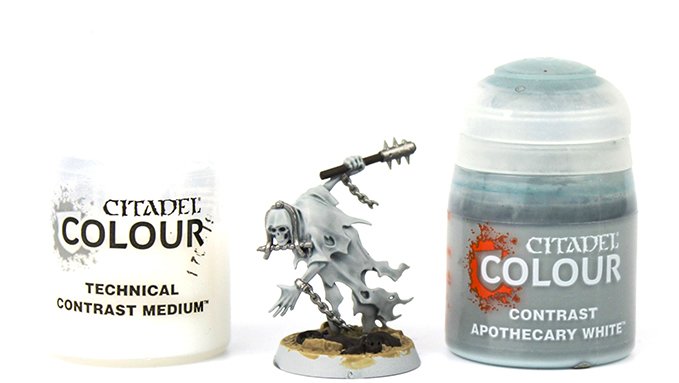
Once the basecoat was dry I applied a 50/50 mix of Apothecary White and Contrast Medium to the entire model. I almost always mix at least a little bit of medium in when using Contrast paints as I find it makes them easier to control and that I’m less likely to end up with tide marks on the model once it dries. This is a really quick and easy way of shading white and works very well. Whilst the paint was applied to the entire model, I ensured that the deeper recesses of the cloth got a more generous amount to really give the model some depth. If you’re not sure about how much paint to apply, it’s always better to apply lighter coats and build them up than to flood the model with paint and end up with pooling and tide marks.
4. Glazing
The first glaze used was a 4:1 mix of Contrast Medium and Aethermatic Blue. This layer was gossamer thin so as to graduate the blue throughout the model to create the impression of an ethereal, insubstantial being. The first glaze was applied to the face and limbs, 3/4s of the way up the lower tier of the robes and to the fringes of the upper tier on the robes.
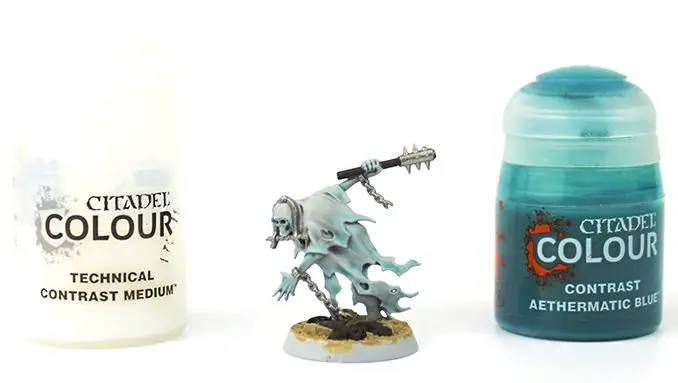
For the second glaze a little more Aethermatic Blue is introduced to the mix to give a ratio of approximately 2:1 Contrast Medium and Aethermatic Blue. This was applied to the face and limbs again, about half way up the lower tier of the model’s robes, and to the edges of the upper tier of the robes.
Finally, a 50/50 mix was applied to the limbs, face and the edges of the lower tier of the robes.
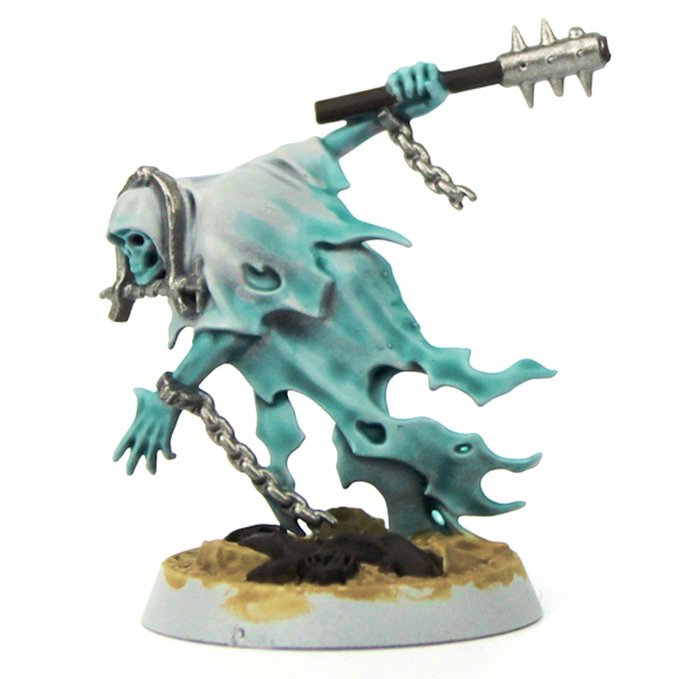
5. Highlighting
Once the glazes were dried I touched up some of the raised areas of the upper tier of the robes with a layer of Grey Seer.
Then I applied an edge highlight of White Scar which I had thinned down to a milky consistency. I also highlighted the raised areas of the face and the limbs to give the model a bit more definition, and painted in some hatched lines on the large, empty spaces on the robes to give them a fabric-like texture.
It’s important when using white to really thin it down if you want to prevent that chalky finish that is often seen with white. As mentioned previously, it’s better to apply many small layers than one thick layer that will often be harder to tidy up.
6. Accessories
The metal parts of the model were shaded with Nuln Oil, though the wooden haft of the cudgel was shaded with Agrax Earthshade.
Only use very small amounts of whatever wash you use when shading the weapons as you don’t want those dark washes getting onto the white of the model.
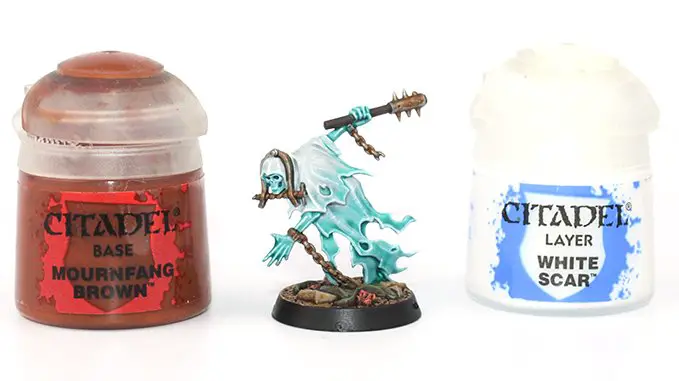
Once dry, I watered down some Mournfang Brown (roughly a 50/50 mix) and carefully dabbed it into the areas on the metal part of the model where I thought that moisture would gather. Remember that with weathering the rule of “less is more” very much applies. Start off small and build it up gradually as it’s easier to gauge how it will look that way.
Finally – as I wanted the metal to retain the appearance of dull iron – I applied a small highlight of Ironbreaker to the areas that I judged would have been abraded. The wooden haft of the cudgel was highlighted with a watered down layer of Gorthor Brown in line with the grain of the wood (9).
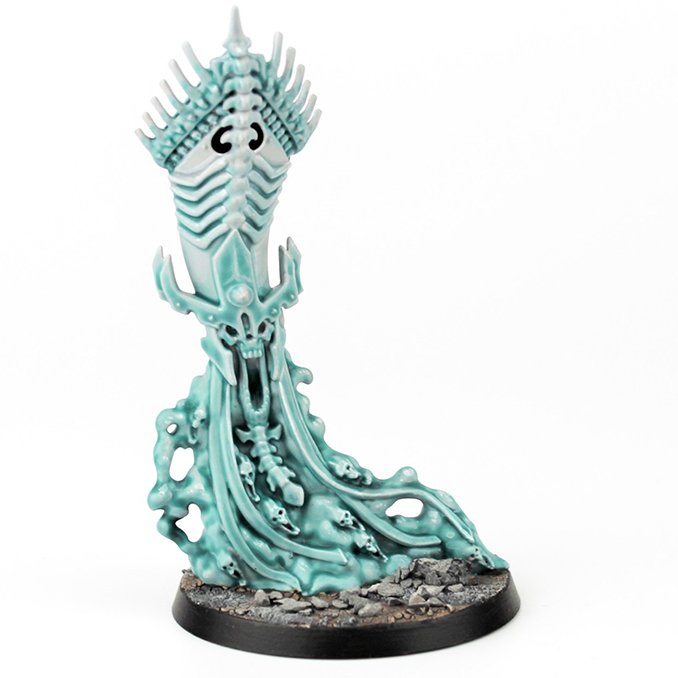
And there you have it – an alternate Nighthaunt paint scheme detailing how to paint Nighthaunt in a classic ghost style. The method used for painting the robes works well for painting ectoplasmic effects in general. I actually used it to paint one of my Endless Spells for Warhammer Age of Sigmar, and I imagine it would work well to create ethereal weapons, gems and energy effects on guns. Whatever you use it for, happy painting!
Please Note: This site uses affiliate links. Our Affiliate Partners are shown below
(Affiliate links will result in compensation to the site on qualifying purchases)
Click this link & buy your hobby stuff from Element Games for the UK & Europe to support FauxHammer.com – Use Code “FAUX2768” at the checkout for double reward points.
Our Affiliates / Hobby Stores
- UK: Element Games, The Outpost, Wayland Games, Mighty Lancer, Goblin Gaming, Forbidden Planet, Model Scenery Supplies, eBay, Amazon
- US/Canada: MTechCave, GameKastle, eBay (US), eBay (CA), Amazon
- Germany: Taschengelddieb
- Europe: eBay (DE), eBay (FR), eBay (ES), eBay (IT), Amazon
- Australia: eBay, Amazon
- Global: RedGrass Games, Warcolours
- 3D Printers: Phrozen 3D, Elegoo, Anycubic
FauxHammer – Latest Video on YouTube
What did you think of this Tutorial? please let us know in the comments.
If you like what we’re doing here you could really help encourage more content with a share on any social media platform.
Click the share links at the bottom of this screen (or on the left for computers and tablets)
Want to keep updated with the blog? You can subscribe in the sidebar for RSS or by email below
(Sidebar is below the article on Mobile Devices)

Great article!