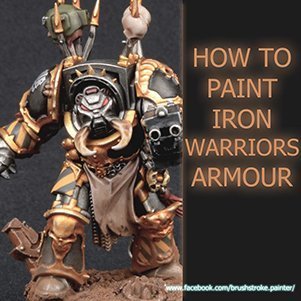
How to paint Iron Warriors Armour – 2019
This Brushstroke Guide shows you how to paint Iron Warriors. This guide is based on a Terminator, but you can apply this scheme to any Iron Warriors Model.
To See my latest Guides, Find me on Facebook & Instagram
How to paint Iron Warriors – Paints & Tools
Brushes
- Winsor & Newton Series 7 (not the Series 7 ‘Miniature’ Brushes)
Paints
- Eshin Grey
- Doombull Brown
- Zandri Dust
- Rakarth Flesh
- Averland Sunset
- Wazdakka Red
- Dawnstone
- Pallid Wych Flesh
- Mephiston Red
- Evil Sunz Scarlet
- Wild Rider Red
- Screaming Skull
How to paint Iron Warriors – Tutorial
Step 1 – Base Colours
Over a black primer paint the following base colours:
- Main armour -Iron warriors
- Armour trim – Retributor Armour
- Armour joints – Eshin Grey
- Tassels – Doombull Brown
- Skulls and Bones – Zandri Dust
- Loin cloth – Rakarth Flesh
- Silver details – Ironbreaker
- Hazard Stripe Panels – Averland Sunset
Step 2 – Shading
Shade the Retributor Armour with Seraphim Sepia
Shade the following colours with Nuln Oil:
- Iron Warriors
- Ironbreaker
- Eshin Grey
For the shoulder pads use 2 coats
Shade the following colours with Agrax Earthshade:
Step 3 – Hazard Stripes

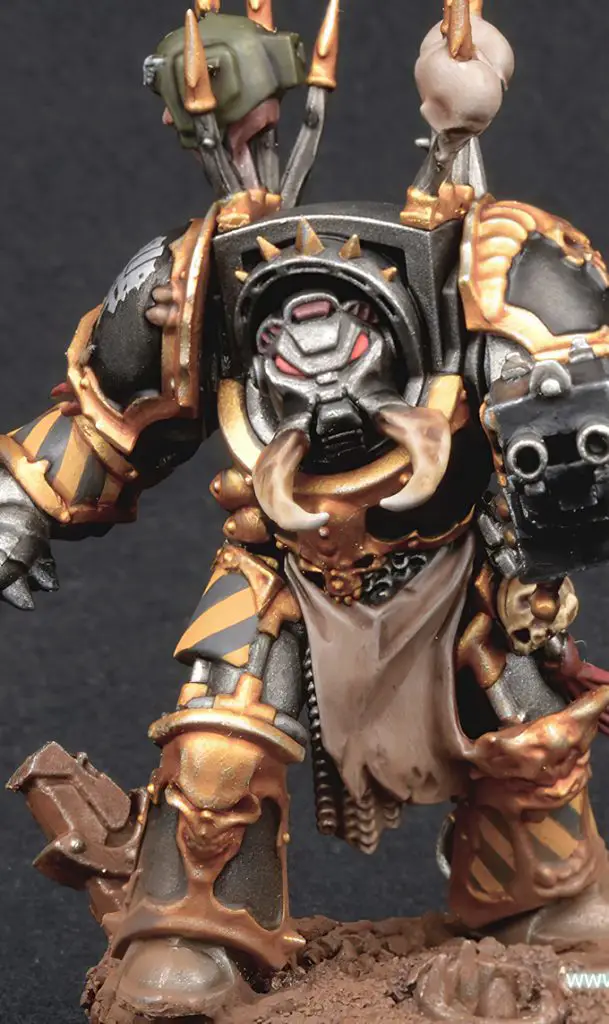
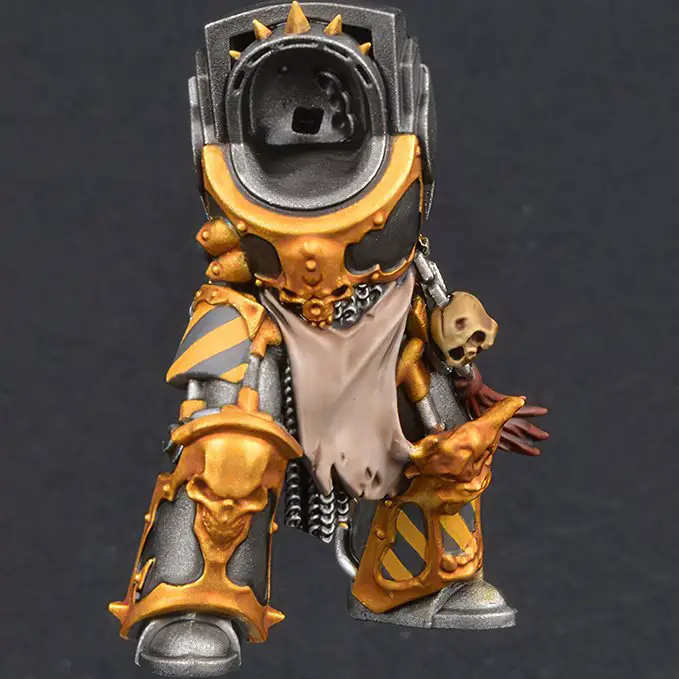
Iron Warriors’ most standout feature is their hazard striping, which really sets them apart from other legions.
For larger models, using masking tape to produce the striping is recommended. For smaller figures, however, I found freehanding them the quickest method.
Using thinned down Eshin Grey, mark in the edges of the dark stripes. Tidy up any mistakes with Averland Sunset. Once you’re happy, fill in stripes with Eshin Grey.
A tip to help paint neat lines is to hold the model so that you paint the lines vertically. As your fingers bend in that direction you’ll have far more control painting vertical lines from top to bottom.
Step 4 – Highlight
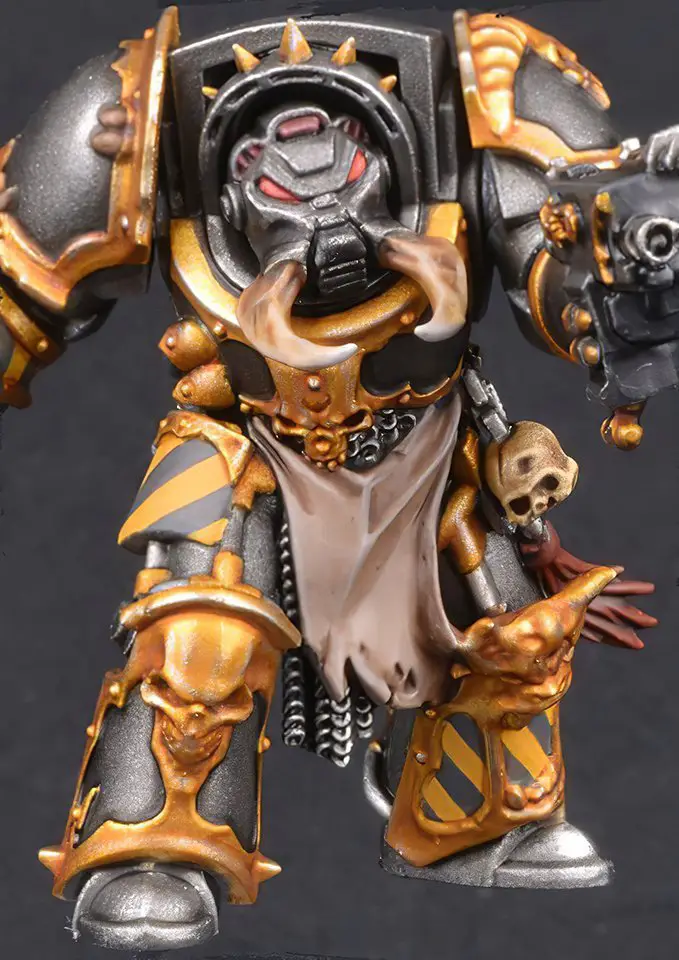
Edge highlight as follows:
- Armour with Iron Hands Steel and then Ironbreaker
- Silver with Ironbreaker. This just gives a highlight without being overpowering.
- Tassels with Doombull Brown and then Wazdakka Red
- Eshin grey with Dawnstone
- Gold trim with Retributor Armour and then Ironbreaker
- Rakarth Flesh with Pallid Wych Flesh
Step 5 – DETAILS
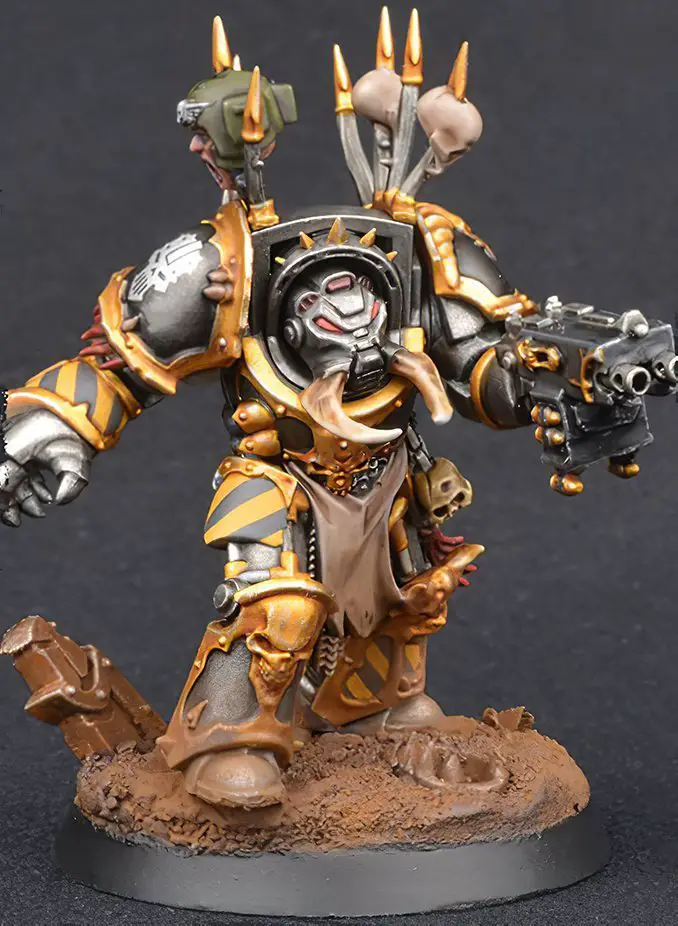
The last few details to finish off are:
The eyes I basecoated Mephiston Red, layered with Evil Sunz Scarlet and final layer of Wild Rider Red.
The skulls and bones I aged by doing a final wash of Seraphim Sepia.
The tusks I basecoated Rakarth Flesh, shaded the base with Agrax Earthshade, then painted stripes of Seraphim Sepia, Pallid Wych Flesh and Screaming Skull working towards the tip.
How to paint Iron Warriors – Complete
Thank You
I hope you find this guide useful.
If you do have any questions or suggestions on how to improve it for others, then please do let me know.
Don’t forget to LIKE and FOLLOW my Instagram & Facebook pages for more painting and basing guides
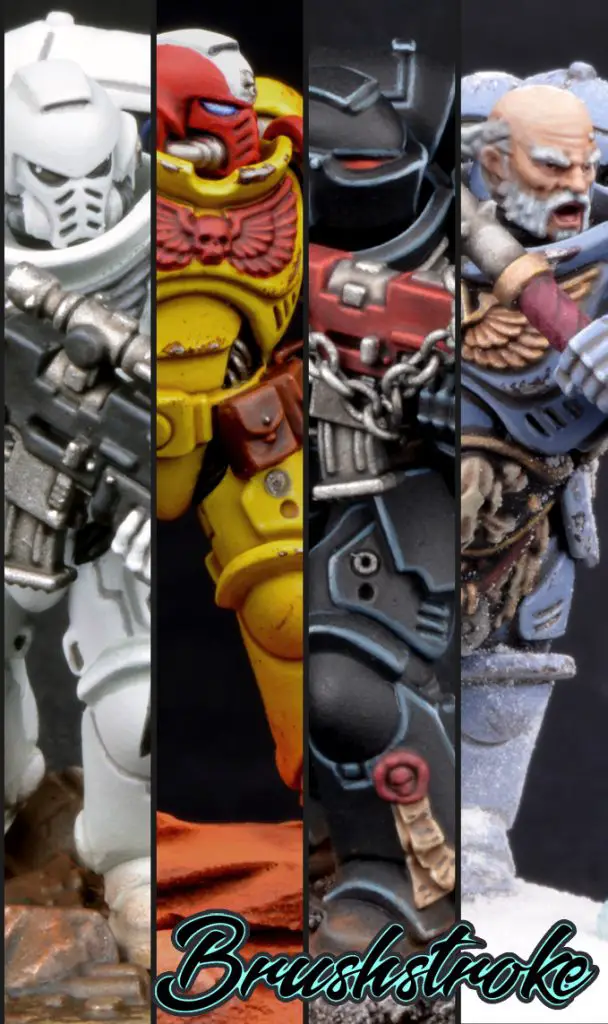
More Tutorials From Brushstroke
Got any questions? Want to see more tutorials like this, or what I’m working on next? Follow me on Instagram by clicking any of the images in this post.
I’m now on YouTube, Subscribe to my channel and see my video guides by clicking here.
See this full tutorial and more, directly on my Instagram & Facebook pages. Don’t forget to LIKE and FOLLOW for more tips and guides.
What did you think of this Tutorial? please let us know in the comments.
If you like what we’re doing here you could really help encourage more content with a share on any social media platform.
Click the share links at the bottom of this screen (or on the left for computers and tablets)
Want to keep updated with the blog? You can subscribe in the sidebar for RSS or by email below
(Sidebar is below the article on Mobile Devices)
Author