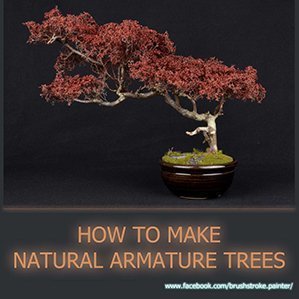
How to make Natural Armature Trees for Miniatures & Wargames Scenery – 2019
A few weeks ago I shared a post showing how to make your own Trees from scratch. In this week’s Brushstroke tutorial we’re going to take a look at making trees using natural armatures.
To See my latest Guides, Find me on Facebook & Instagram
How to make Natural Armature Trees – Paints & Tools
Tools
- Tree Branches
- Seafoam
- Cutters
- PVA glue
- Superglue
- Hairspray
- Leaf Flock / Model Tree Foliage
Paints
- Stormvermin Fur (optional)
How to make Natural Armature Trees – Tutorial
Step 1 – Find Branches
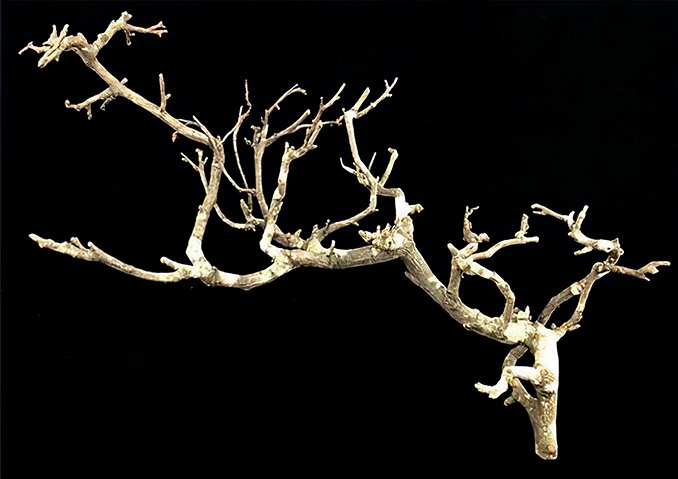
The main structure of the tree is formed from a piece of branch. In this case, I used a privet hedge branch from a hobby materials supplier. The main advantages of which is the convenience of them being pre-cleaned & processed and available all year round.
Select a piece which roughly suits the size and shape you’re looking for. Trim off the thinner twigs to leave the core shape. Bear in mind major branches can also be altered. Often a simple rotation of a branch makes all the difference in achieving the shape you want. To reposition a branch, cleanly cut it from the structure and pin it back in the desired position. Disguising the join can be achieved by filling any gap with superglue dusted with baking soda. Larger gaps may need a small piece of spare bark to be applied too.
All-natural products will always have imperfections but with a creative eye, you can use them to your advantage and achieve a more natural-looking finish.
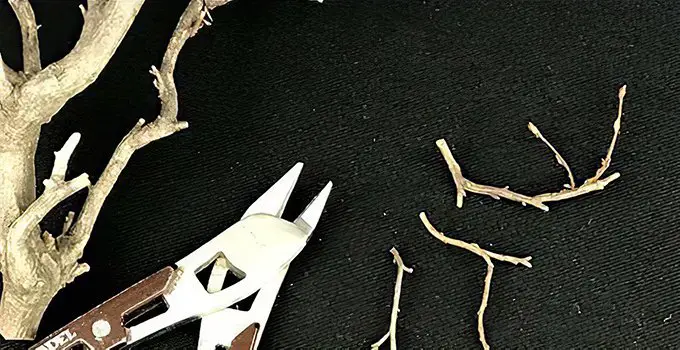
Step 2 – Create a Finer Structure
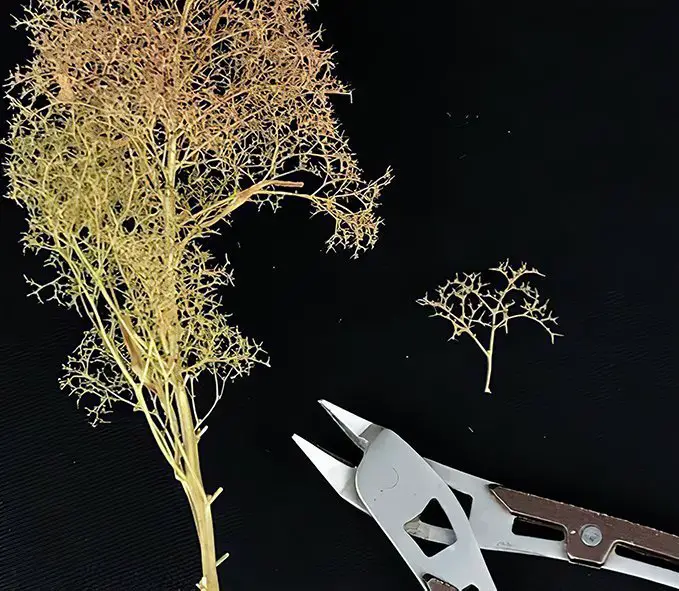
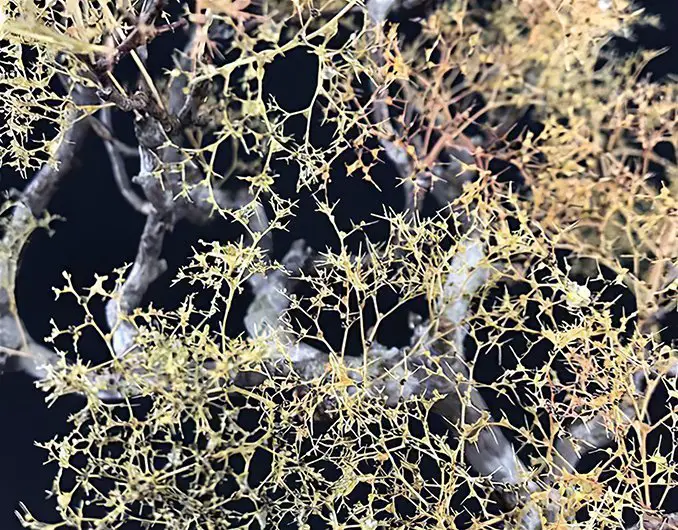
The smaller branches of the tree will be formed from seafoam. “Seafoam” is a plant whose seed/flower stalks grow very similar to the shape of actual deciduous trees. It can be bought as a dried product from modelling suppliers.
Whole dried stalks of seafoam can actually be used very effectively to model small trees on their own. However, in this case, cut small pieces off and superglue them individually to the ends of each branch of the privet branch structure.
Continue to build up the shape of the tree with seafoam pieces until the desired shape is achieved.
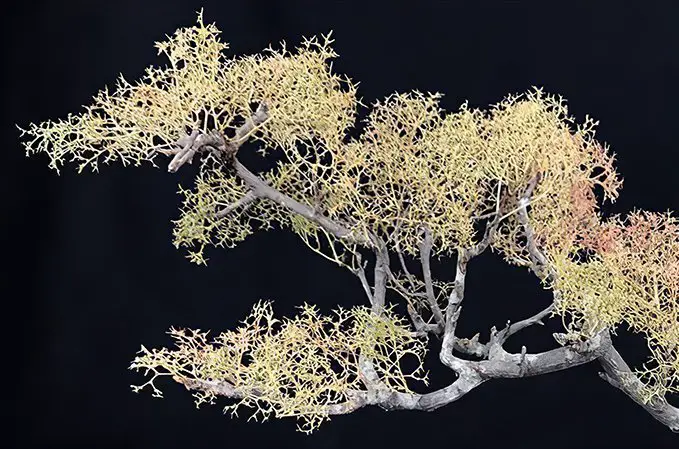
Step 3 – Strengthening
The drawback of using seafoam is just how fragile and brittle it is. There is, however, a brilliant solution which makes it far more resilient and robust.
Big thanks to Luke, from Luke’s APS, for this tip!
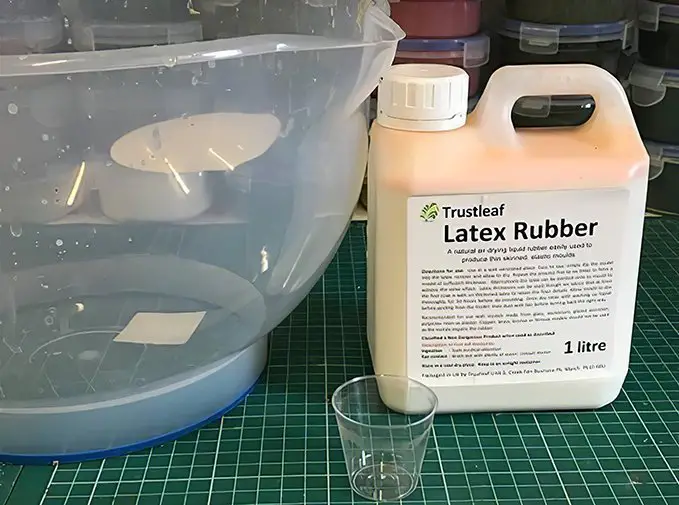
Once the tree is the required shape, you need to cover it with a layer of liquid latex rubber. This is brilliant because the seafoam is so dry it actually absorbs the latex into itself, as well as forming a coating around it. Once set, it makes the seafoam rubbery and far more resilient.
Pour the latex into a large bowl then either dunk the seafoam directly into it or use a small cup to pour it over more difficult to reach areas. I try and keep it off the main branches and trunk, as it dries as a horrible yellow-grey skin, which spoils the look of the tree. Bubble membranes will form over the gaps in the seafoam, so be sure to pop them before it sets. Thinning the latex with a little water helps reduce the number of bubbles formed.
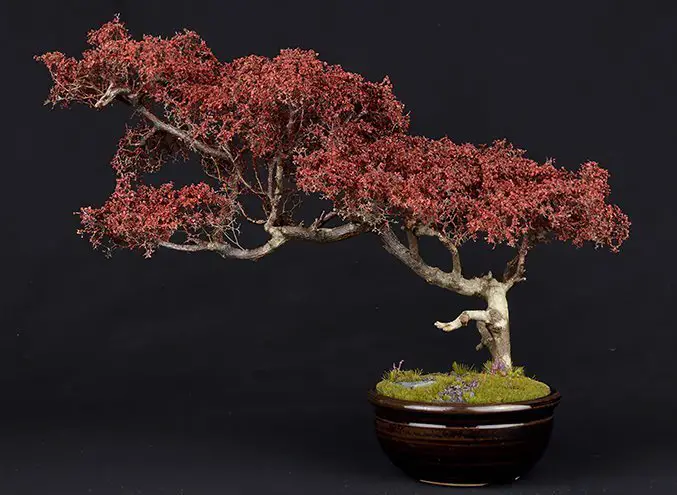
Step 4 – Colour Matching
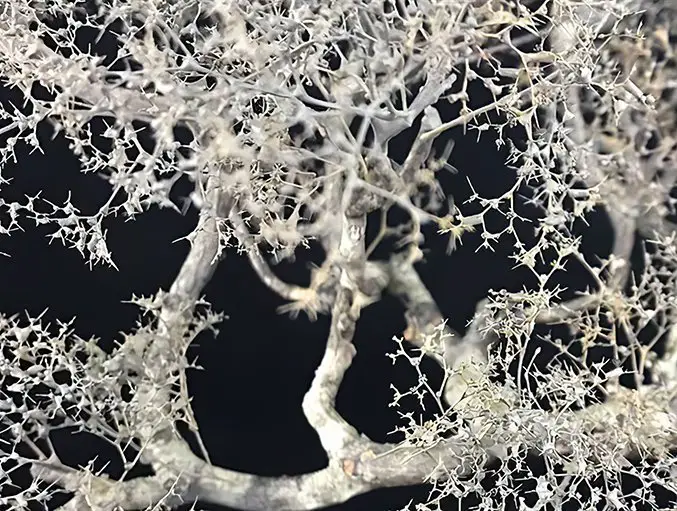
After the latex rubber is dry, peel / cut away any excess splashes on the branches and trunk.
I found the colour difference between the dry latex and the privet branch bark was quite ugly and distracting to the eye.
I decided it would look better to lightly paint the latex and blend it into the bark colour.
Mask off the main bark areas and either rattle can, airbrush or hand brush on a brown paint colour which closely matches the bark colour. In this case, I applied two thin coats of GW’s Stormvermin Fur.
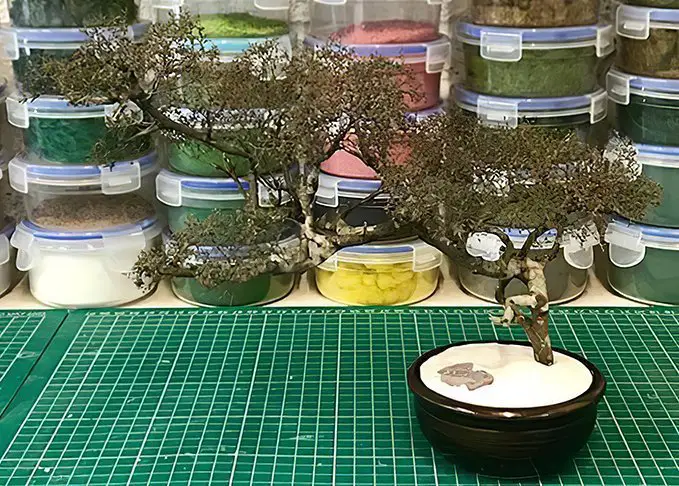
Step 5 – Flocking
Once the seafoam paint was dry it was time to add the leaf flock to the tree.
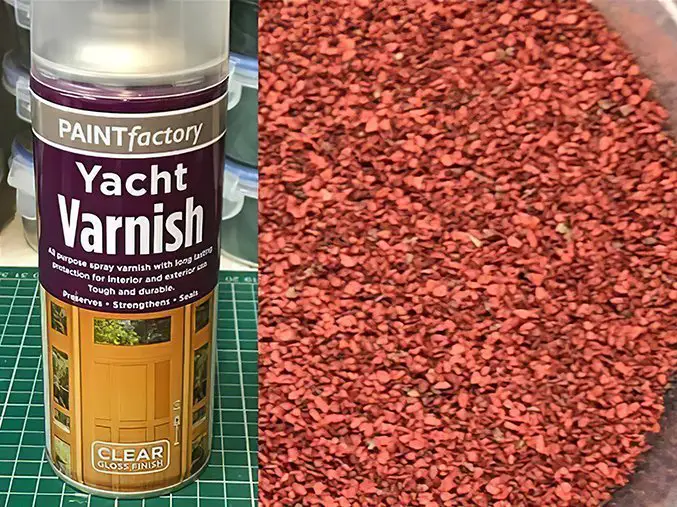
For this I used three shades of red fine scatter flock mixed together. I added a tiny sprinkle of green in there too, just for younger leaves.
Spray the branches with a clear varnish and sprinkle the flock lightly over. Repeat the process of spraying and sprinkling to build up the texture and coverage to a point you’re happy with.
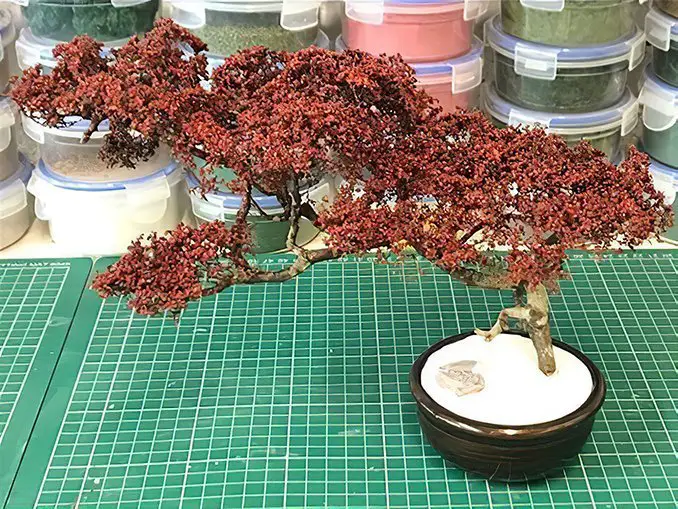
Leave the tree to fully dry before brushing away excess flock build up in unwanted areas. eg on main branches and trunk.
As a final sealant, I misted all the leaves with watered down PVA glue, using a plant misting spray bottle. Once dried it should prevent unwanted leaf drop.
Step 6 – Basing
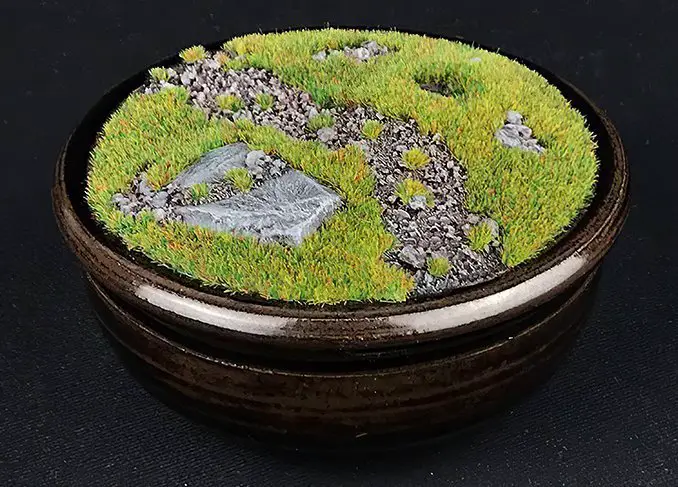
The choice of how you base your tree is as endless as the different trees you can make. I opted for a simple rocky grassland base and held the tree in place with a pin (section of a paperclip) drilled into the tree and base. I recommend Gorilla Glue as the fixing glue.
Details on how to make grassy bases like can be found in this guide.
How to make Natural Armature Trees – Complete
Thank You
I hope you find this guide useful.
If you do have any questions or suggestions on how to improve it for others, then please do let me know.
Credit:- Luke @ Lukes APS on YouTube for product advice
Don’t forget to LIKE and FOLLOW my Instagram & Facebook pages for more tips and guides
More Tutorials From Brushstroke
Got any questions? Want to see more tutorials like this, or what I’m working on next? Follow me on Instagram by clicking any of the images in this post.
I’m now on YouTube, Subscribe to my channel and see my video guides by clicking here.
See this full tutorial and more, directly on my Instagram & Facebook pages. Don’t forget to LIKE and FOLLOW for more tips and guides.
What did you think of this Tutorial? please let us know in the comments.
If you like what we’re doing here you could really help encourage more content with a share on any social media platform.
Click the share links at the bottom of this screen (or on the left for computers and tablets)
Want to keep updated with the blog? You can subscribe in the sidebar for RSS or by email below
(Sidebar is below the article on Mobile Devices)
Author