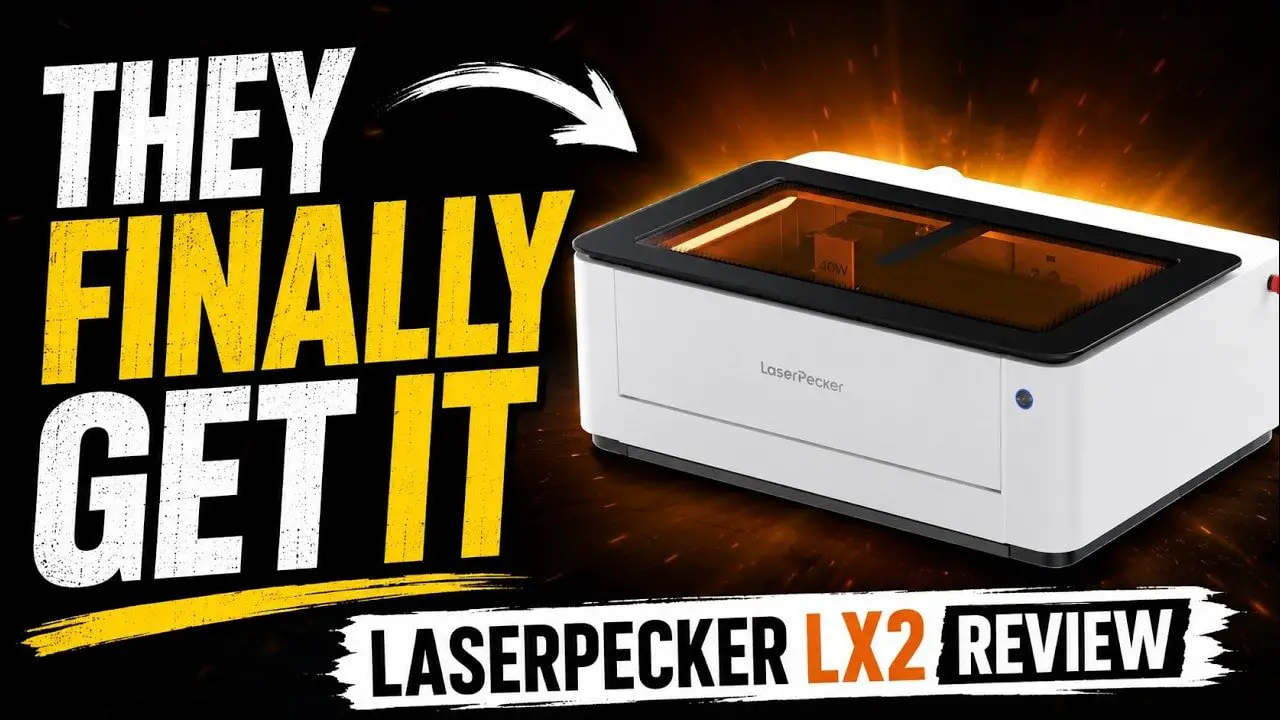
LaserPecker LX2 Review – Finally, a Laser That Feels Designed for Humans
Over the last year, I’ve looked at a lot of laser cutters and engravers that were technically capable, but awkward to live with. They could cut. They could engrave. They could tick the feature-list boxes. But actually using them often felt like wrestling with clunky software, odd workflows, and design decisions that made you wonder whether anyone involved had ever tried to use the thing in a normal home workshop.
los LaserPecker LX2 is one of the first machines in a while that genuinely feels like it understands usability.
That does not mean it is perfect. It absolutely isn’t. There are quirks in the hardware, the software still needs more refinement, and some of the accessory ecosystem feels better thought through than other parts. But the important thing is this: the LaserPecker LX2 gets a surprising amount right where many rivals still seem confused about what ordinary users actually want.
If you want a quick version, here it is. The LaserPecker LX2 is a modular enclosed diode laser with strong safety features, easy head swapping, genuinely useful camera-assisted alignment, simple height sensing, solid add-ons, and a software direction that looks modern rather than stuck in the past. It also has some frustrating omissions, like limited built-in material profiles, weak default exhaust airflow for bigger jobs, and a few workflow annoyances that should really be fixed in software.
Still, for the money, this feels like a serious contender.
If you are completely new to lasers, do yourself a favour and start with a proper laser safety guide before buying anything. A good machine helps, but laser safety is never optional.
Tenga en cuenta: This site uses affiliate links. Our Affiliate Partners are shown below
(Affiliate links will result in compensation to the site on qualifying purchases)
Haga clic en este enlace y compre sus cosas de hobby en Element Games para el Reino Unido y Europa para admitir FauxHammer.com - Use el código "FAUX2768"En la caja para obtener puntos de recompensa doble.


Nuestros afiliados / tiendas de hobby
- REINO UNIDO: Juegos de elementos, El puesto avanzado, Juegos Wayland, Lancer poderoso, Juego de duendes, Forbidden Planet, Suministros para escenarios de modelos, eBay, Amazonas
- EE. UU. / Canadá: MTechCave, GameKastle, eBay (EE. UU.), eBay (CA), Amazonas
- Alemania: Taschengelddieb
- Europa: eBay (DE), eBay (FR), eBay (ES), eBay (IT), Amazonas
- Australia: eBay, Amazonas
- Global: Juegos de RedGrass, Colores de guerra
- Impresoras 3D: Congelado 3D, Elegoo, Anycubic
FauxHammer - Último video en YouTube
LaserPecker LX2 – Summary
The easiest way to describe the LaserPecker LX2 is this: it feels like a machine designed around how people want to work now, not how power users worked ten years ago.
Put material in the machine, take a picture, let it measure height, choose a material preset, line up the design, run a preview, and hit go. That sounds obvious, but the home laser market has been bizarrely bad at making that workflow smooth.
los LaserPecker LX2 is not fully polished yet. In places it still feels like a very good platform waiting for a few software updates to unlock more of its potential. But even now, it is one of the better balanced packages around if you want an enclosed diode machine that is versatile, relatively approachable, and not offensively awkward.
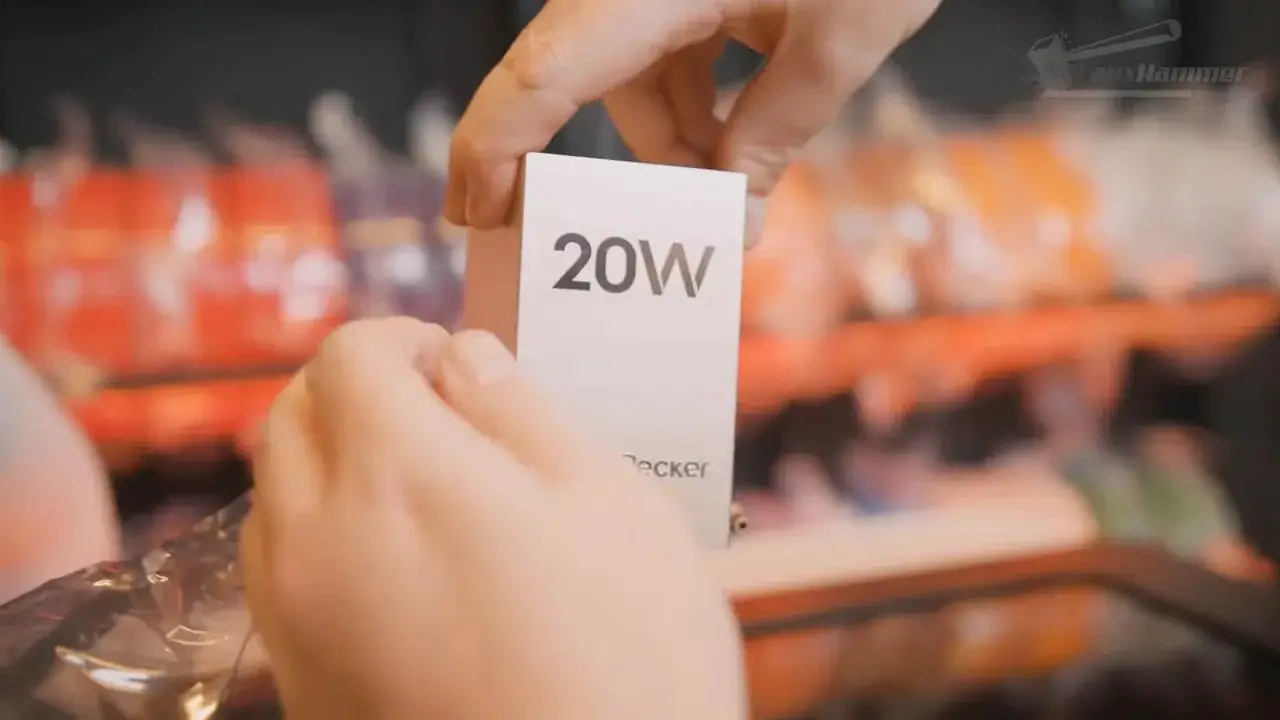
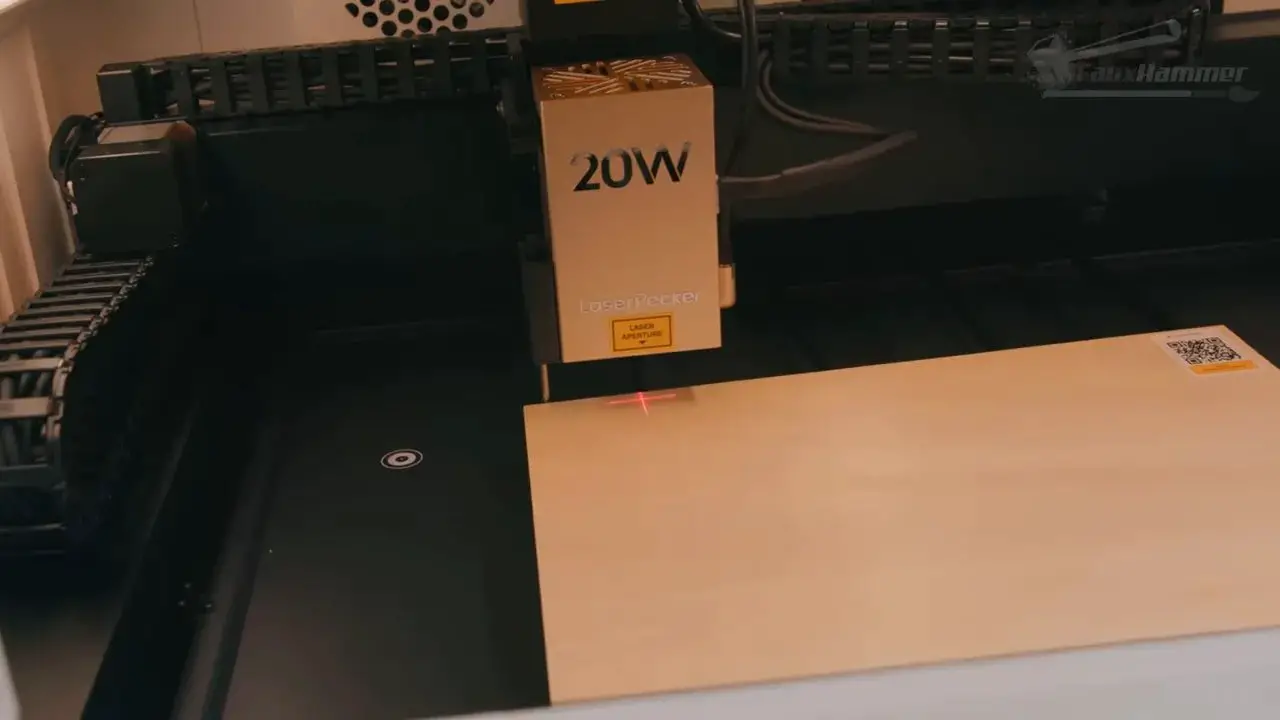
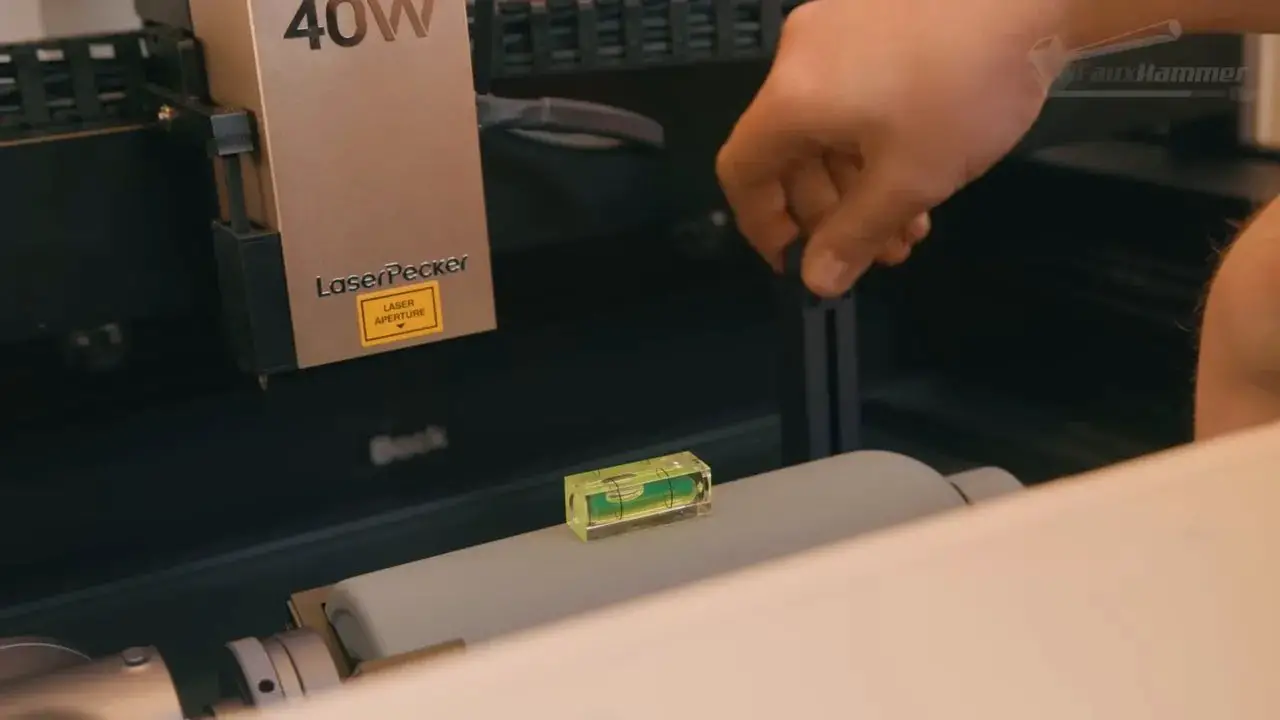
At the time tested, the machine supported multiple laser heads including 20W and 40W diode modules, with an upcoming 60W module. And a 2W IR head is also available now, or upcoming depending on region and bundle. The reviewed unit was used mainly with the 40W head, which is clearly the sweet spot for a lot of cutting and general workshop use.

Key strengths of the LaserPecker LX2 include:
- Good modular design
- Very easy laser head swapping
- Camera workflow that is actually useful
- Automatic height sensing
- Excellent rotary-tool setup
- Excellent safety-minded features
- Encouraging software direction
Main drawbacks include:
- Material library is still too limited
- Profile tuning needs work
- Time estimates are wildly off
- Default exhaust fan is not enough for larger jobs
- Only four slats included as standard
- No obvious way to save your own tested material profiles back into the software
That all adds up to a machine I enjoyed using a lot more than many technically similar, or in some cases “technically superior”, competitors.
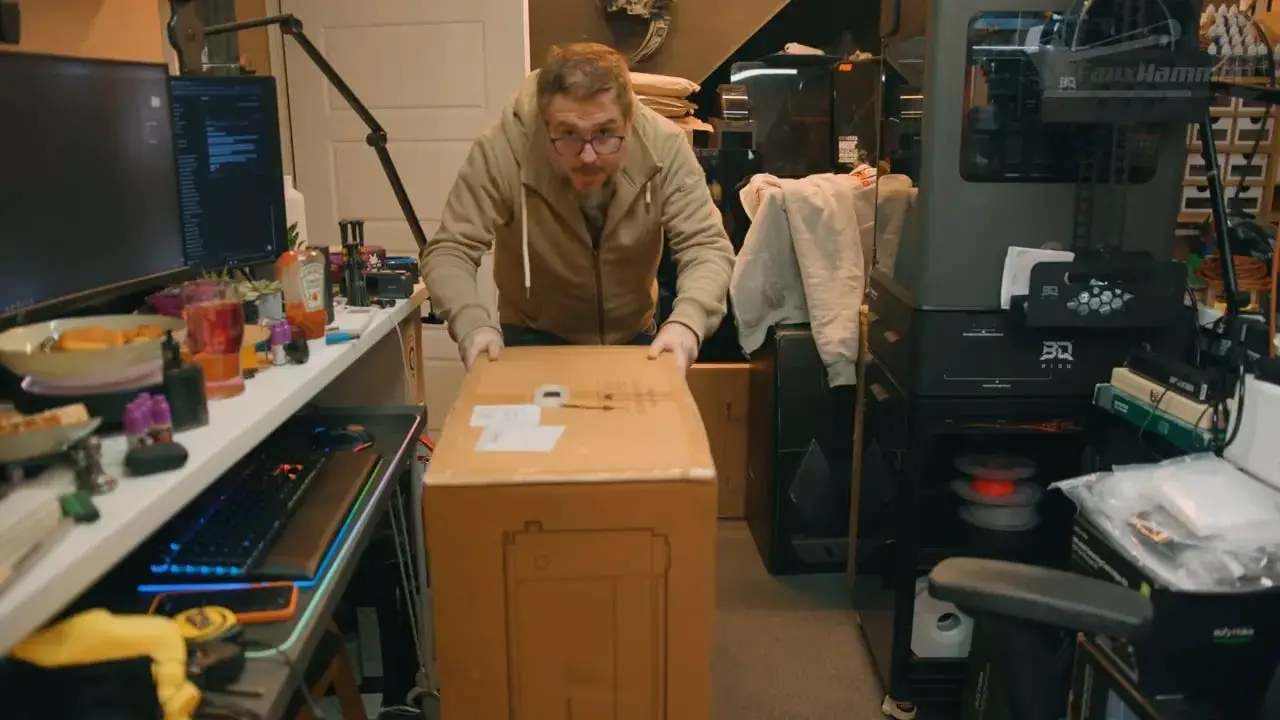
LaserPecker LX2 – Unboxing and First Impressions
los LaserPecker LX2 arrives as a fairly substantial machine. This is not one of those tiny desktop units you casually pick up with one hand and move around without thinking. It is more a “drag the box into place” kind of machine, and while one person can lift it, two people would make far more sense if you value your back and your floors.
Packaging is very well done. Everything is suspended in foam, accessories are tucked neatly inside, and the branded boxes and labelled parts immediately make the whole thing feel more premium. That may sound superficial, but first impressions do matter. When a product is meant to appeal to a broader home market, presentation is part of trust.
The machine itself looks good too. The white housing and large amber lid give it a much more consumer-friendly appearance than the exposed-frame lasers that still dominate parts of this category. It is not the most premium laser enclosure I’ve seen, but it is far from cheap-looking bodged-together nonsense.
There is also something reassuring about an enclosed machine that looks like it belongs in a workshop or hobby room without instantly screaming “industrial accident waiting to happen.”
LaserPecker LX2 – Setup and Laser Modules
Setup is refreshingly simple.
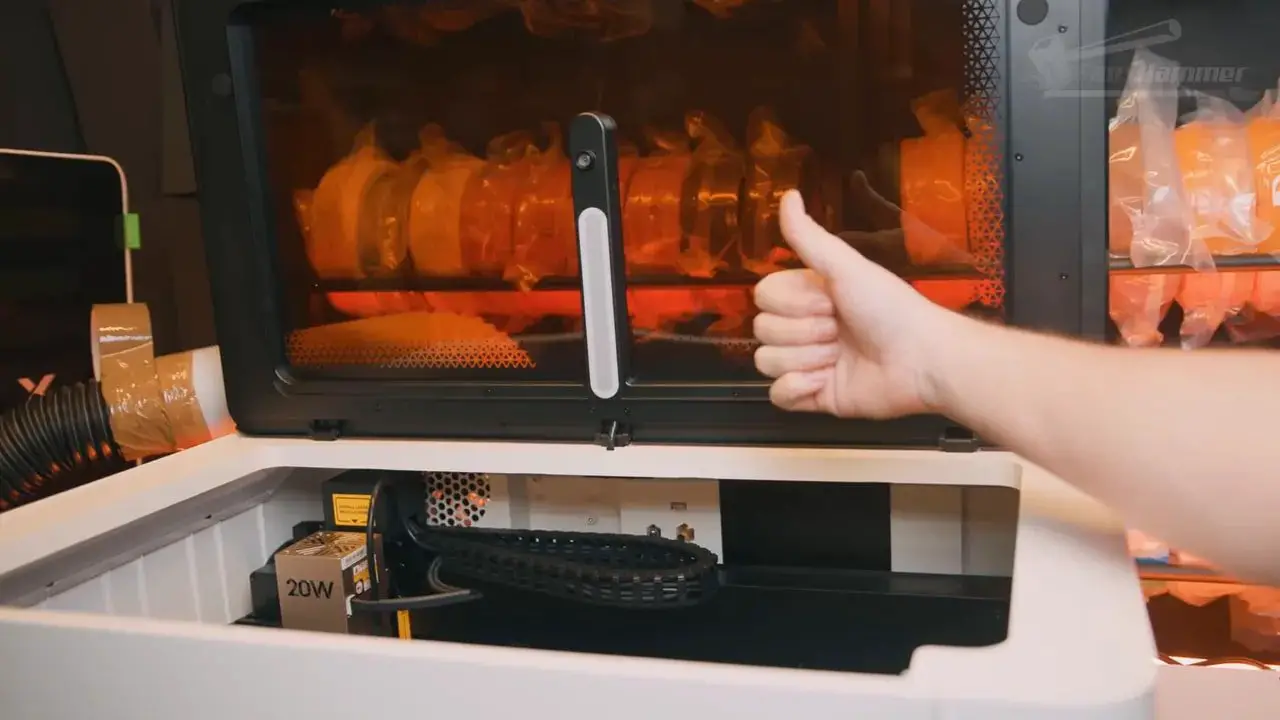
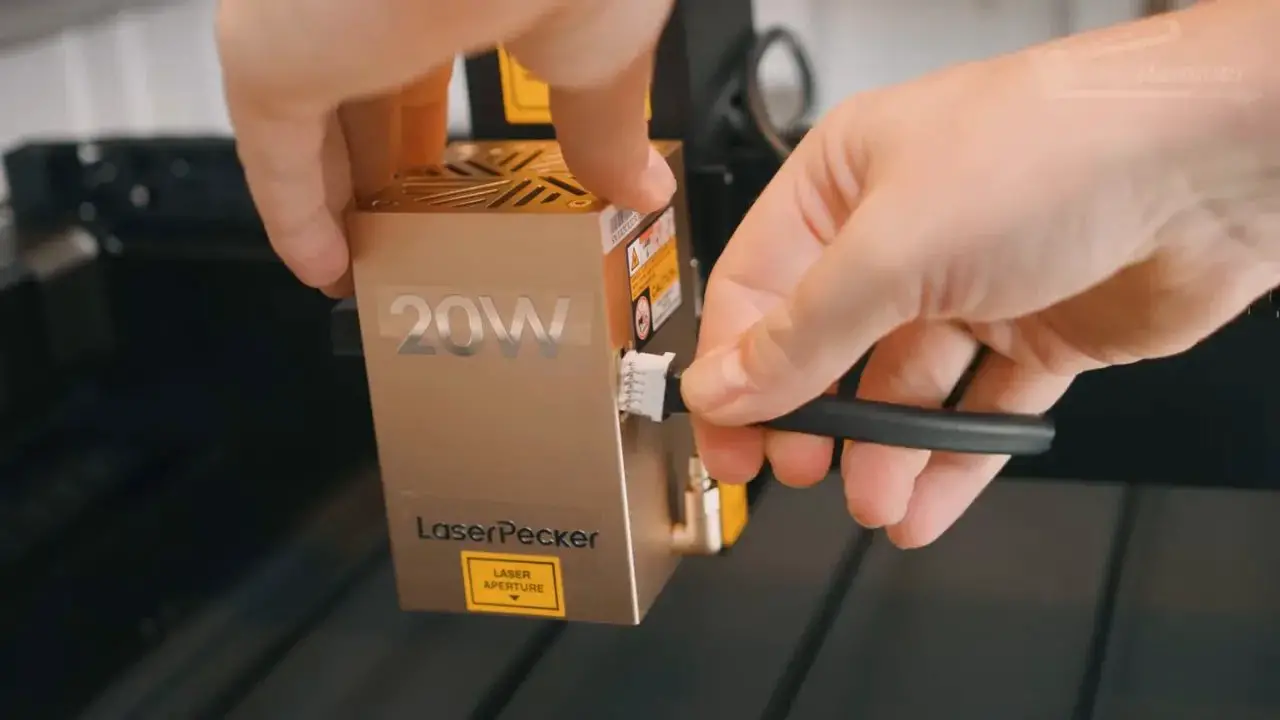
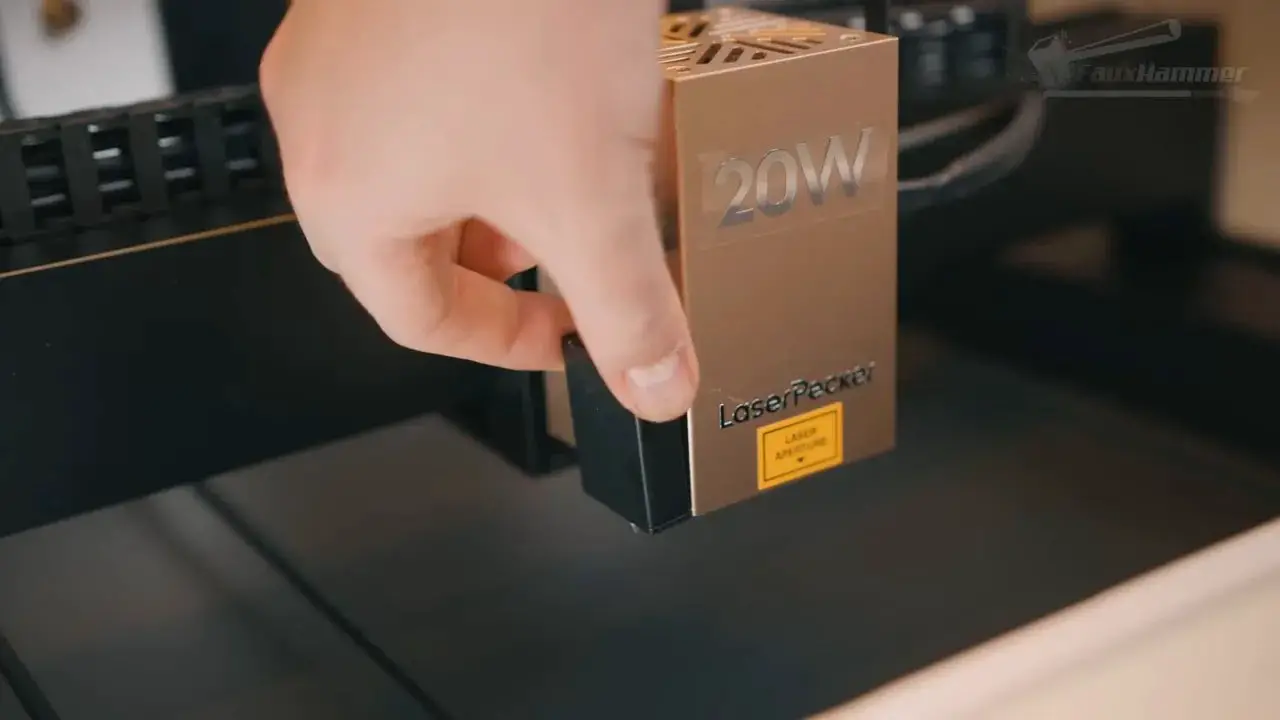
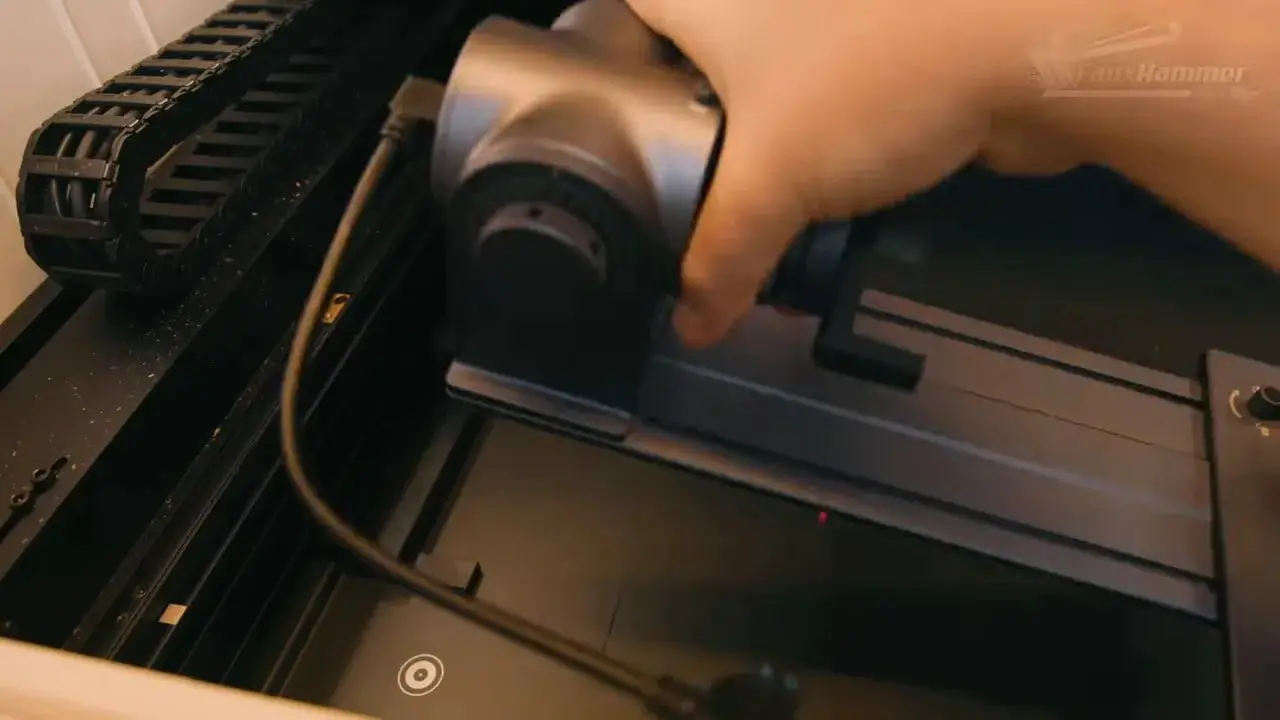
Once unpacked, you remove the internal foam, undo the cable ties securing the movement system, and install the laser head. The head mounting mechanism is especially good. Flick up the locking lever, slide the module in, connect the cable for power and data, attach the air assist hose, and lock it back down. Done.
That modularity is one of the biggest strengths of the LaserPecker LX2. Swapping laser heads is quick and painless, which matters a lot more than people think. Plenty of machines advertise modular ecosystems, but if the process is annoying, users just don’t bother. Here, it is simple enough that using multiple heads feels realistic.
There is also a magnetic add-on used for distance sensing (below) that magnetically clips to the side of the module. It is a small thing, but it fits the overall design language of the machine quite well: practical, simple, and less fiddly than it could have been.
In terms of capacity, the standard working area is 500 x 305 mm, with support for materials up to 45 mm tall by default. Add the optional riser base and that height goes up to 150 mm, which opens the door to much chunkier stock and rotary work.
That makes the LaserPecker LX2 feel more flexible than many enclosed diode machines at this size. It is clearly aimed at people who want one platform that can grow into more use cases over time.
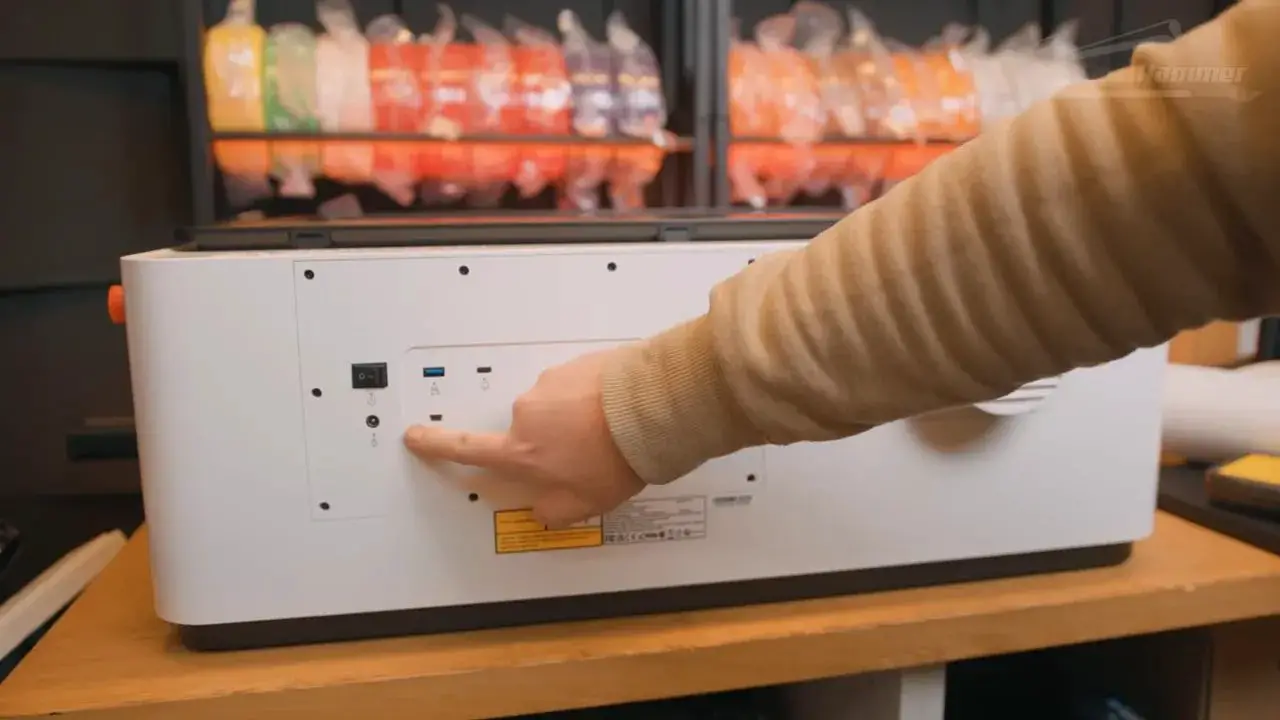
LaserPecker LX2 – Ports, Venting and Physical Design
Physically, the machine is mostly sensible, though not without a few irritating decisions.
Most of the ports are placed on the back. Some of that is fine. Power input, main switch, USB-C for computer connection, the security key, venting, and accessory inlets all make sense there. There is built-in Wi-Fi too, though you still need to connect by USB-C at least once to get Wi-Fi configured.
Once set up, wireless use is the much nicer option.
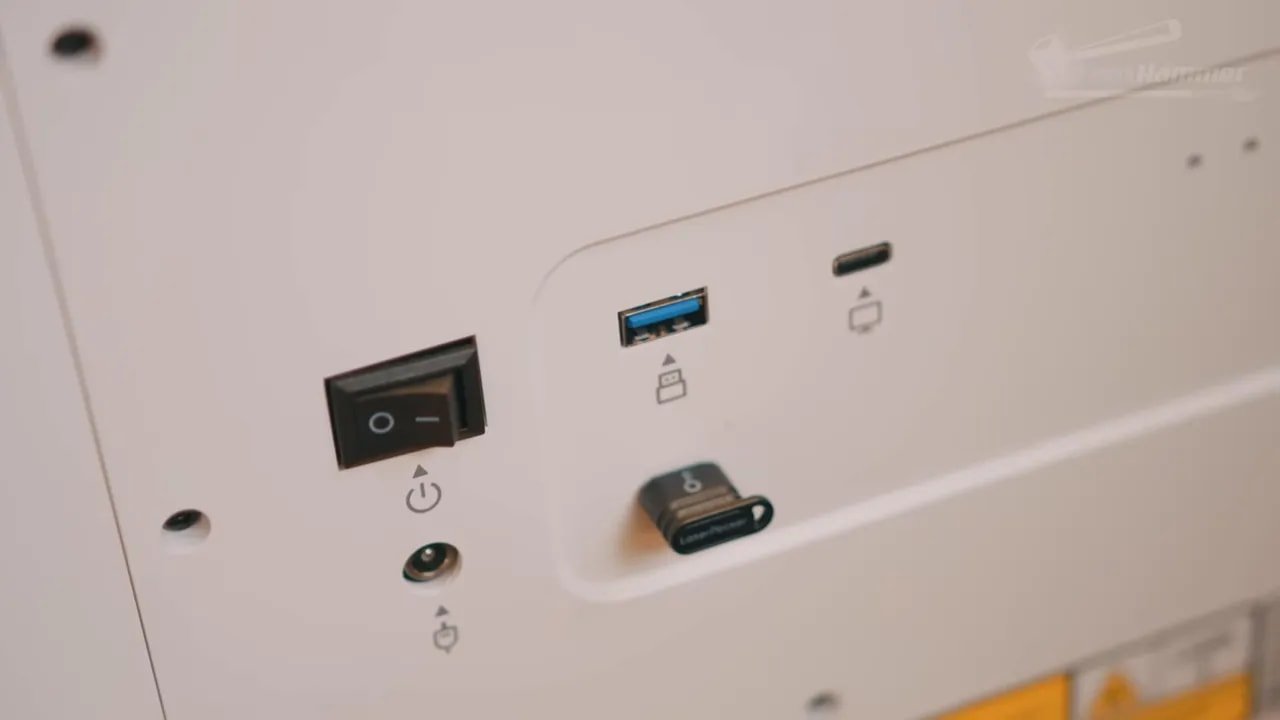
The awkward bit is the rear USB port if you want to run jobs from a USB stick. Yes, that works. No, it is not in a good place. If you regularly use removable media, having to reach around the back of the machine is clumsy.
One welcome bit of common sense is that the air assist hose and associated connection are positioned together properly. It should not be notable when brands do something obvious, but in this category it somehow still is.
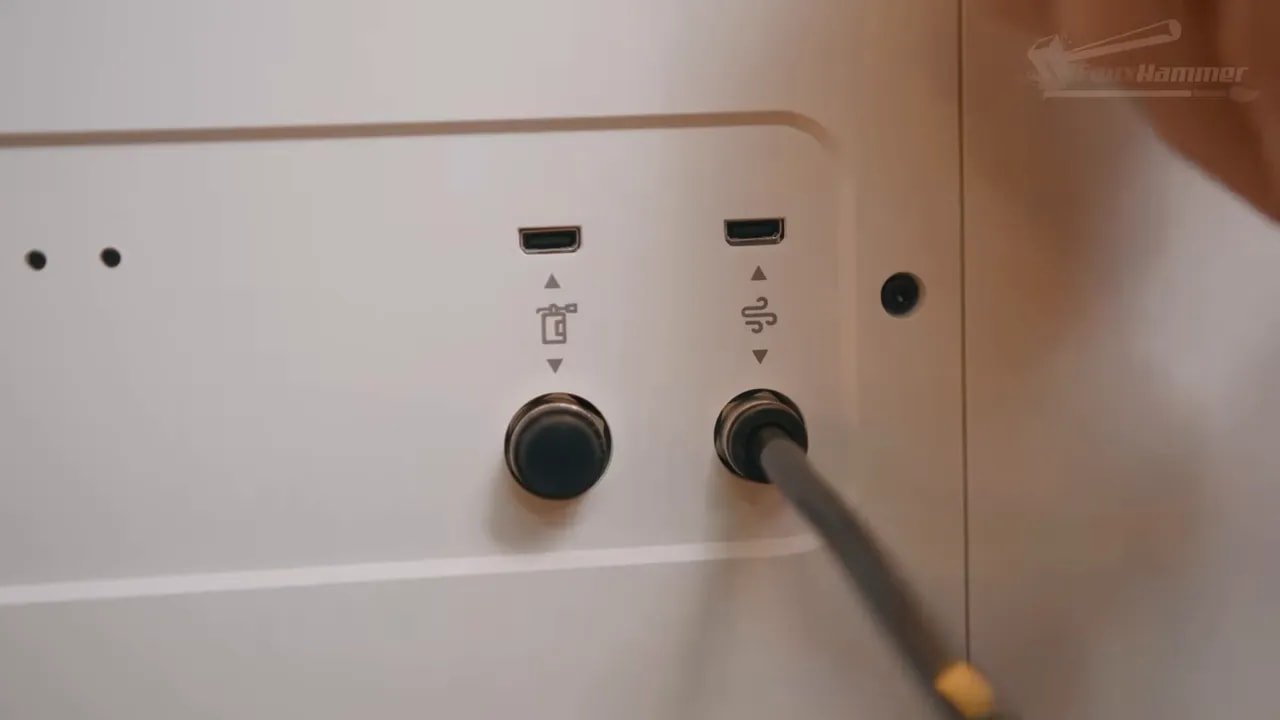
The included vent hose also works, although attaching it is more awkward than it needs to be because you have to remove a downward vent piece with screws and then reuse those screws for the hose fitting. A push-fit or twist-lock connector would have been better, especially for anyone who needs to move the machine or disconnect the hose regularly.
As for extraction, the built-in exhaust fan is acceptable for lighter work but underpowered for larger cutting sessions. For serious use, especially with longer jobs, you will want stronger extraction. That is not unique to the LaserPecker LX2; it is pretty typical for enclosed machines of this kind. But it is still worth stating clearly, because the stock fan is not enough to inspire confidence on heavier use.
LaserPecker’s optional smoke purifier is far more capable, and importantly it can be used either as an indoor filter or as a pre-filter while still venting outside. That flexibility is genuinely useful. It is not fully integrated in the slickest possible way, though, because it is controlled by its own front-panel buttons rather than synchronising fully with the machine’s job start and stop states.
That sums up quite a lot about the LaserPecker LX2: really good ideas, mostly executed well, but still a few places where you can see room for refinement.
LaserPecker LX2 – Safety Features
Safety is one of the strongest areas for the LaserPecker LX2, and frankly that matters more than another line on a spec sheet.
There is a physical security key, an emergency stop button, enclosed operation, flame sensors, lid-triggered stop behaviour, and a software setup flow that forces you through a laser safety video before you can actually use the system.
That last one deserves praise. A lot of people buy home lasers assuming they are just another desktop gadget. They are not. Anything that pushes users to take safety seriously is a good thing.

The emergency stop works immediately, cutting power as soon as it is pressed. The only criticism here is placement. It is on the right side towards the back rather than near the front, so you need to keep that side fully accessible. It is absolutely usable, just not as ideally positioned as it could be.
The flame sensors also proved they work. During a particularly over-ambitious attempt to cut 18 mm plywood in one pass, the material ignited and the air assist happily fed oxygen into the problem. Not the machine’s finest moment, but the flame detection did stop the job after a few seconds.
That does not mean the machine is now safe to leave unattended. No home laser should be left cooking away on wood while you wander off and make tea. Safety systems are assistants, not replacements for supervision.
LaserPecker LX2 – Software and User Experience
This is where the LaserPecker LX2 becomes genuinely interesting.
Yes, it works with LightBurn. If you are already committed to LightBurn, that option exists. For plenty of experienced laser users, that matters. But the more important story here is LaserPecker Design Space, especially the newer beta direction that shifts the workflow toward something much more modern and approachable.
Instead of expecting users to think first in terms of power percentages, line intervals, and focal quirks, the software increasingly works around outcomes.
The workflow goes roughly like this:
- Place your material in the machine
- Take a photo using the built-in camera
- Select a point for the distance sensor to measure height
- Take a second photo so the view is reframed based on the measured height
- Choose your material preset
- Select line, fill, or cut mode
- Position your design on the preview
- Run a framing preview
- Start the job
That is the sort of process many home users actually want. Not everyone wants to feel like they are configuring lab equipment every time they engrave a coaster.
Better still, the software can show the progress of the job on screen while it runs. It is one of those small quality-of-life features that should be much more common than it is.
If you’ve spent any time around machine reviews on Our featured hardware coverage, you’ll know this sort of user-first ecosystem design matters just as much as raw capability.
That said, Design Space still feels unfinished in places. It is clearly moving in the right direction, but not everything is fully dialled in yet.
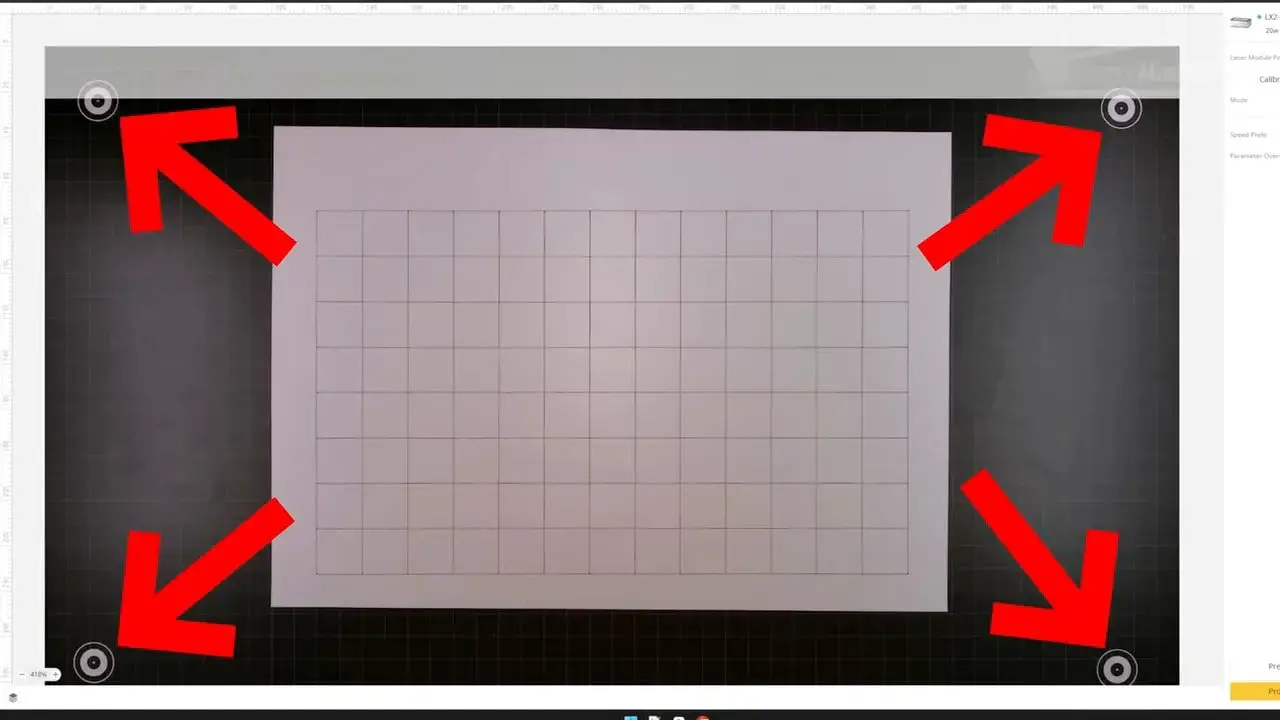
LaserPecker LX2 – Camera Alignment and Calibration
The camera system in the LaserPecker LX2 is one of its standout features.
Camera-based alignment in lasers often sounds better than it is. On many machines, the preview image is too inaccurate to trust for anything but rough placement. Here, it is one of the better implementations I’ve used.
The machine uses four alignment dots on the base plate, and these need to remain visible to the camera or the system throws an error. In return, the software can dynamically adjust framing with impressive accuracy. It still is not perfect to the millimetre every single time, and if you need exact placement you should absolutely use the framing preview, but for the vast majority of normal jobs it is extremely good.

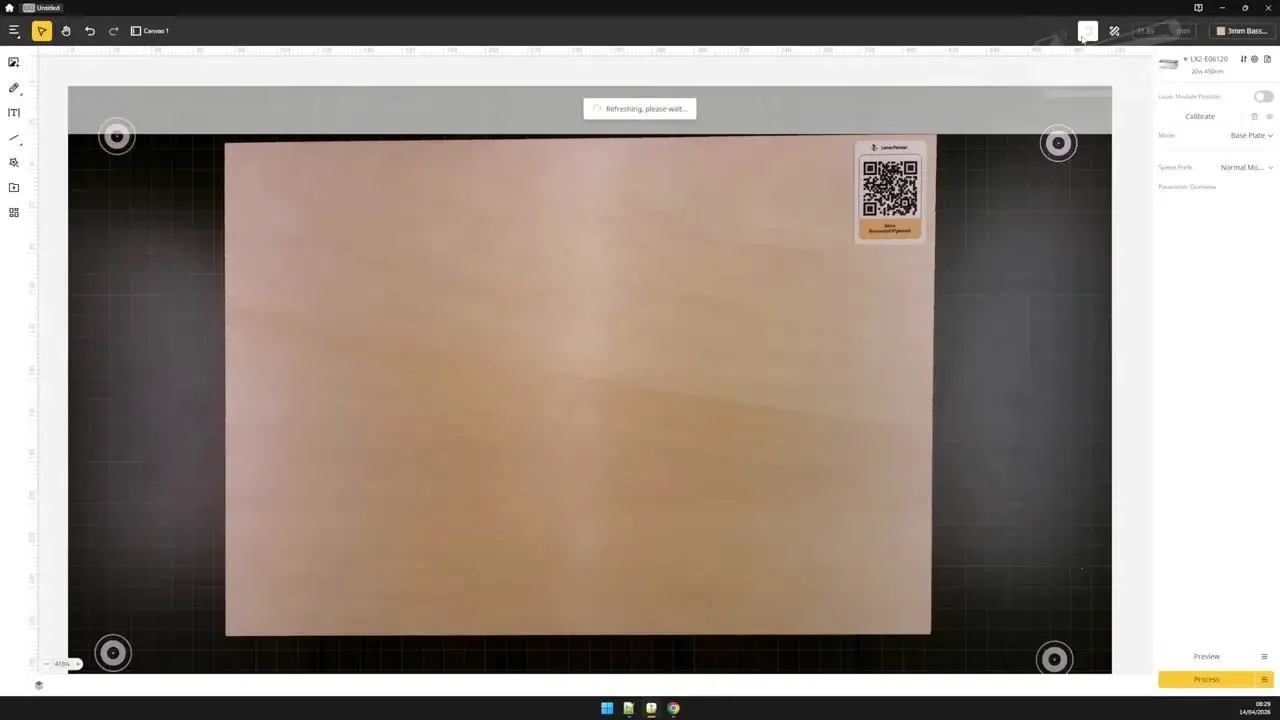
I;ve found that taking two-photos works best.
The two-photo process also makes sense once you understand it. The first image is used to locate the material generally so you can choose a spot for height probing. The second image then reframes the scene based on that measured height, co,mpensating for optical distortion at different material heights. It works well, though ideally the second camera refresh would happen automatically after probing rather than needing that extra step.
Calibration support is another area where LaserPecker has done better than many rivals. There is a library of setup videos to guide users through the process, which sounds basic but is a huge help. Too many brands still throw people a sparse manual and then act surprised when support inboxes fill up.
There is one naming issue in the software that deserves criticism: a feature labelled “calibrate” actually behaves more like manual framing or custom mapping. You jog the laser head to points around your stock and define a custom grid for very accurate placement. It is a useful feature, just badly named. As I tried to use it to calibrate my laser. When the actual calibration tools are aactually nested away in the settings menu.
Even with that gripe, this whole area of the LaserPecker LX2 is strong.
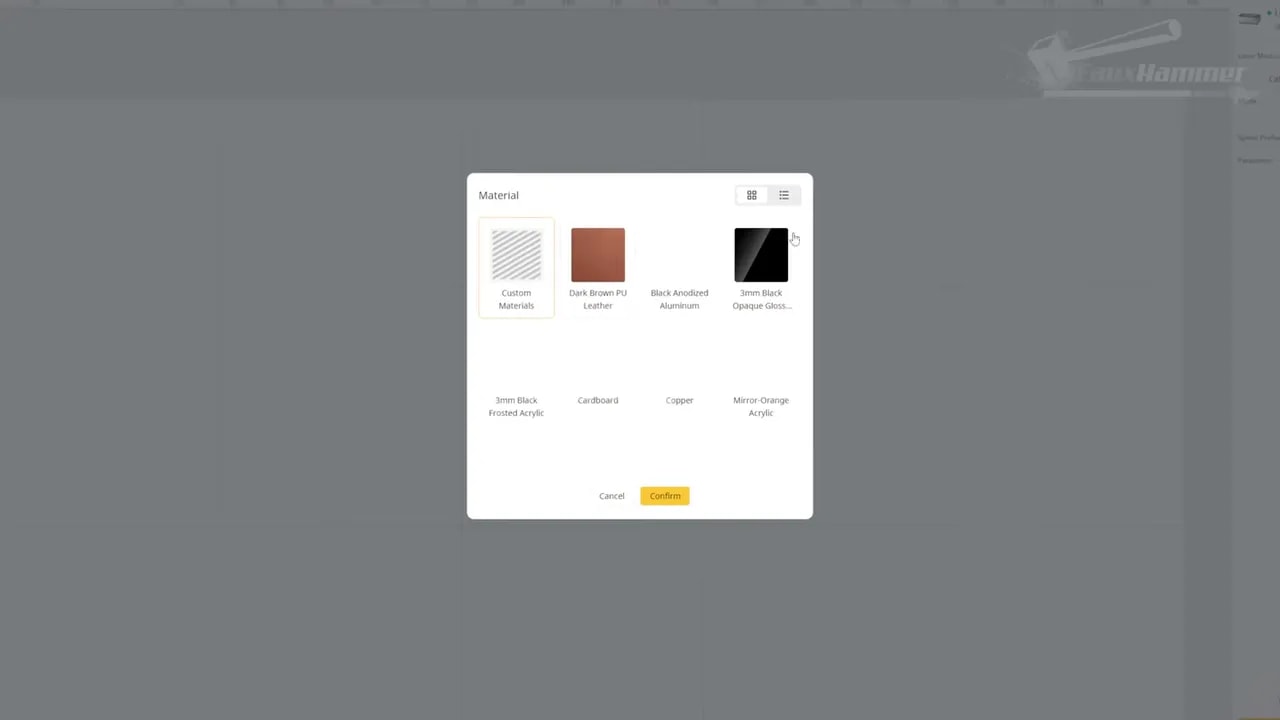
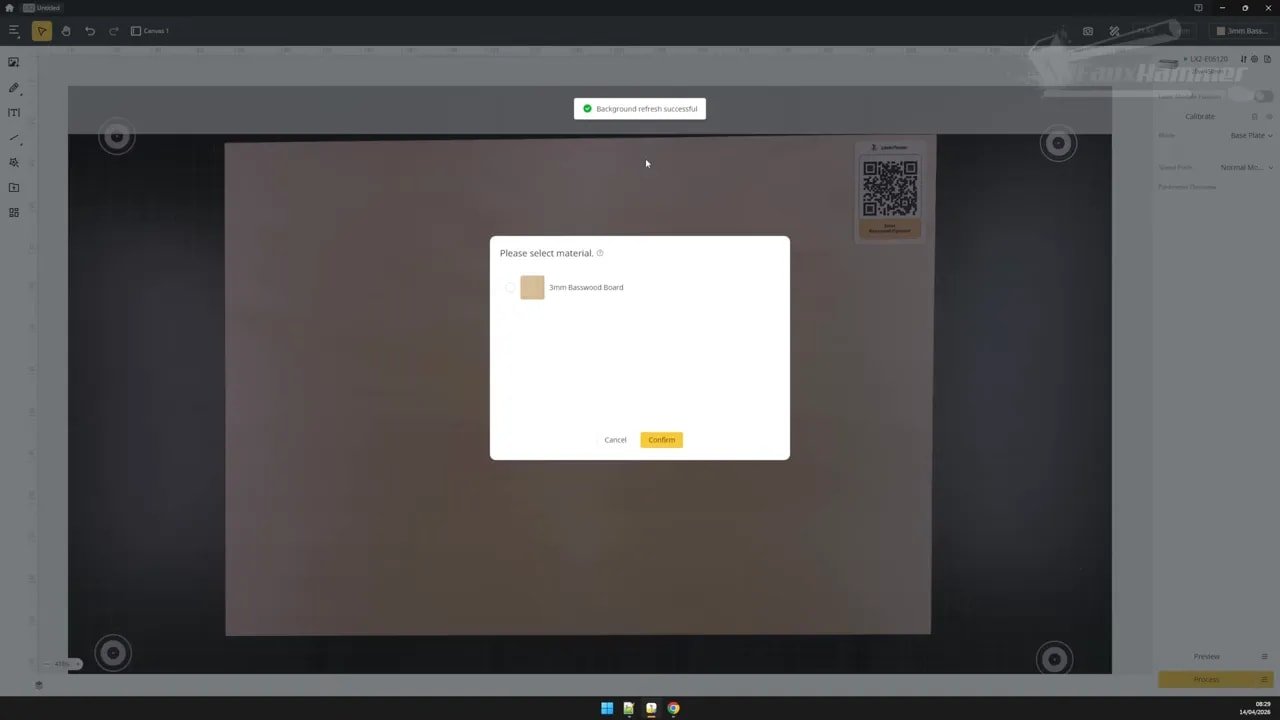
LaserPecker LX2 – Material Profiles, Presets and Workflow Issues
This is probably the weakest area of the user experience right now.
The promise is good. If you use LaserPecker’s own materials with QR-coded stickers, the software can detect the material and offer to load the matching settings automatically. That is exactly the kind of convenience consumer lasers should be chasing.

The problem is that the current materials library is too limited.
There are not enough material types, thickness options seem restricted to 3mm only, and many presets feel like they have not been tuned deeply enough. In several test cases, the available recommended settings occupied too narrow a range, even though the machine itself was clearly capable of producing a broader and more useful spread of results.
More frustratingly, if you do your own material testing and build a setting grid, there is no obvious way to save that result back into the software as a reusable custom profile. That feels like a major missed opportunity. The camera, the structured workflow, and the materials system all seem to be leading toward a really elegant “test, evaluate, save, reuse” ecosystem, but the last step is missing.
That means the LaserPecker LX2 currently sits in an awkward place where it is easy enough for beginners to get started, but slightly more annoying than it should be for anyone wanting to build a proper library of tested materials.
Time estimation is another weak point. Long jobs can be estimated wildly inaccurately, with jobs taking around 40 minutes showing as though they will take several hours. That is not catastrophic, but it chips away at confidence in the software.
Still, the key thing here is that these issues feel fixable. This doesn’t read like a fundamentally broken workflow. It reads like an evolving software platform that needs more time and effort.
LaserPecker LX2 – Cutting and Engraving Results
Hardware quality matters, but at some point you need the machine to actually produce good work. On that front, the LaserPecker LX2 is generally solid.
Line engraving on a Marvel calendar design showed one of the preset weaknesses straight away. Recommended settings charred the surface too aggressively, and even the lowest recommended option was still a bit harsh for the smaller version of the design. That again points back to profile tuning rather than raw laser capability.

On grayscale and gradient work, similar issues appeared. The machine could clearly go darker and produce more tonal range than the presets were delivering, but the default settings were not fully exploiting that range.
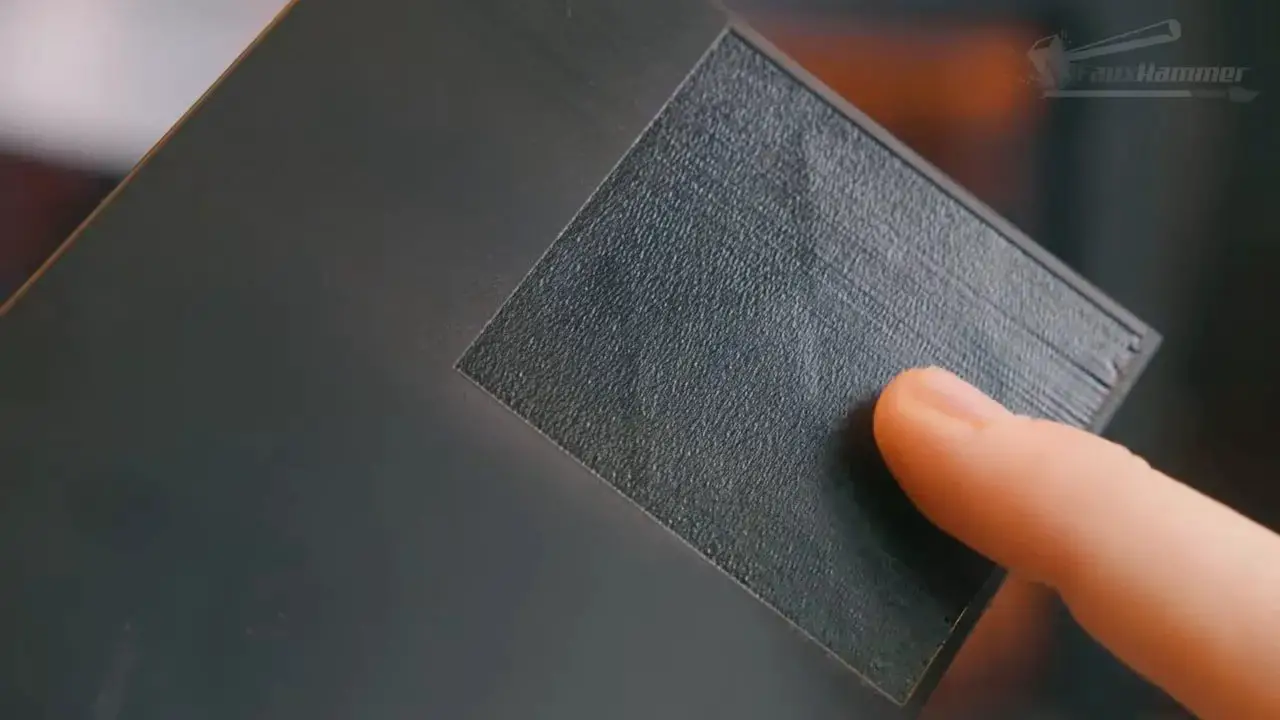
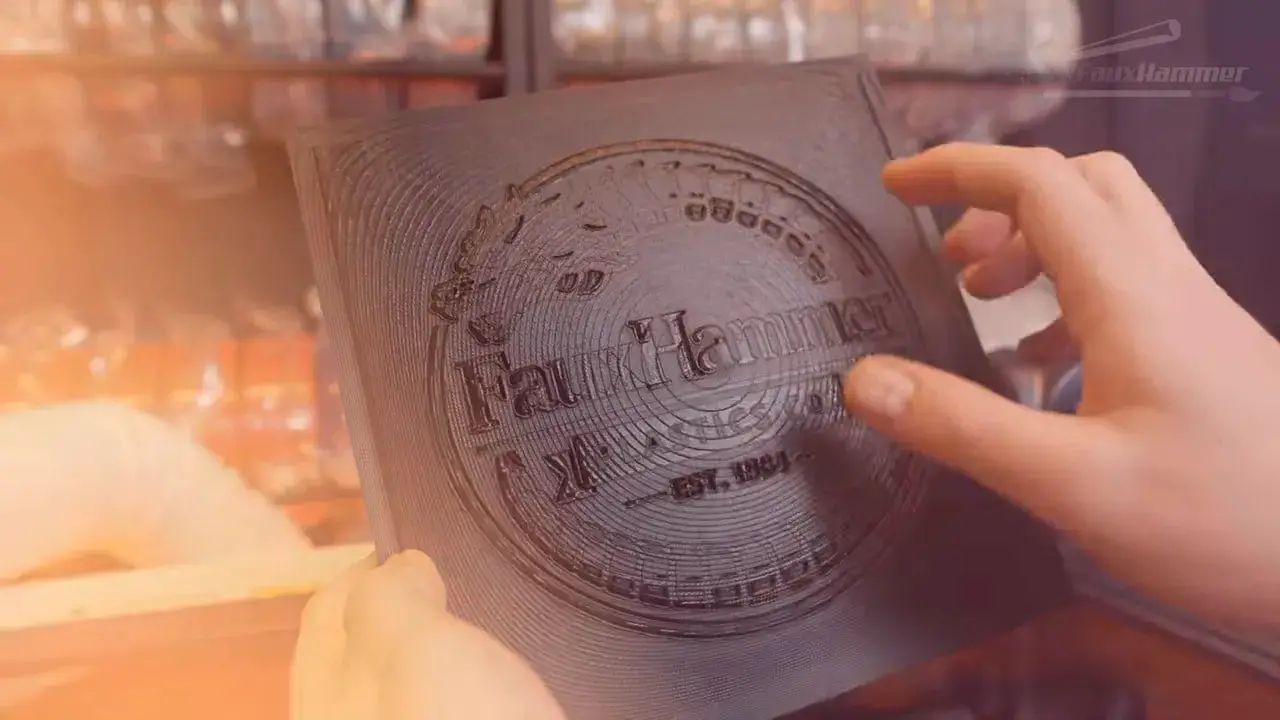
Standard vector engraving, though, came out well. A plaque project for coffee addicts (lower down the articel) looked clean, and general cutting performance was very good. Leather engraving also produced nice dark results, although there was some inconsistency on smaller vector elements that suggested pathing logic may be slowing too much in tight areas.
So how should you read that?
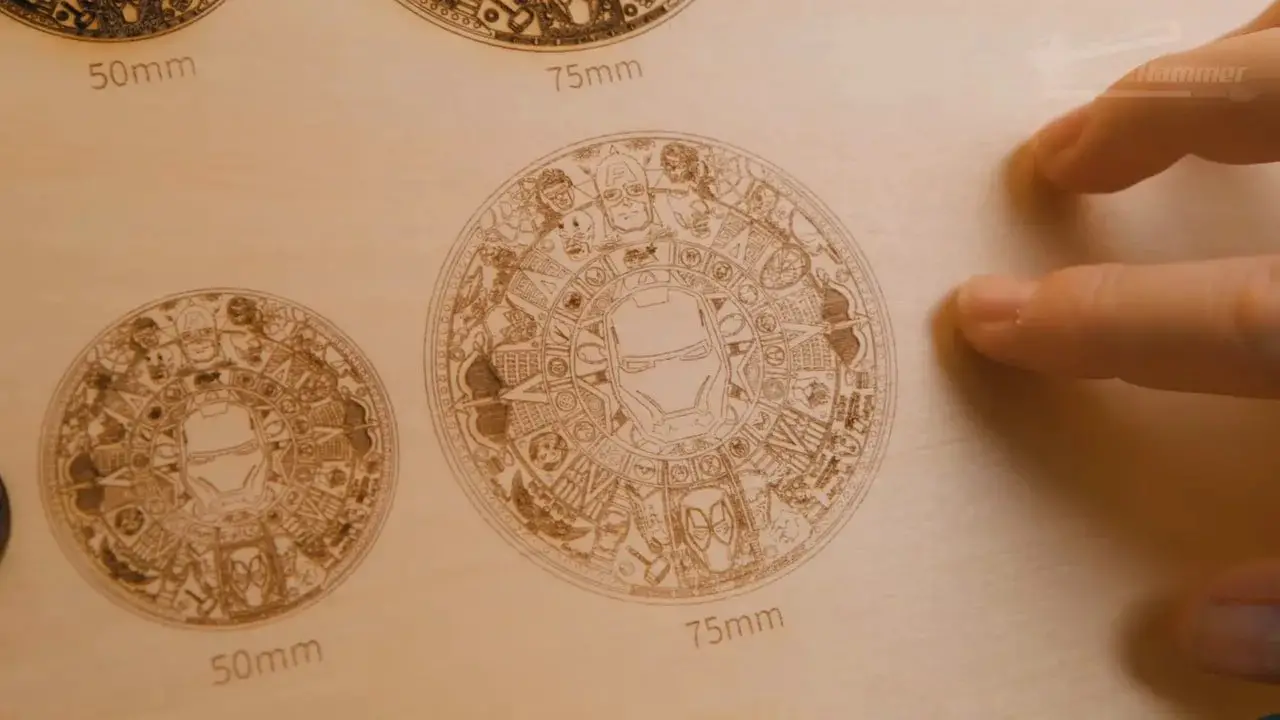
los LaserPecker LX2 hardware is capable. The machine can cut and engrave well. But to get the best results, the software presets need more refinement than they currently have. That is better than the reverse situation. A software problem can often be improved. Weak hardware cannot.
There was also one app performance issue worth noting. Large or more complex designs (such as the Mavel calendar design above) could make the app slow dramatically during positioning and path generation, which in all cases appears to hang for a long time before finally completing. Again, not ideal, and definitely something LaserPecker should improve.
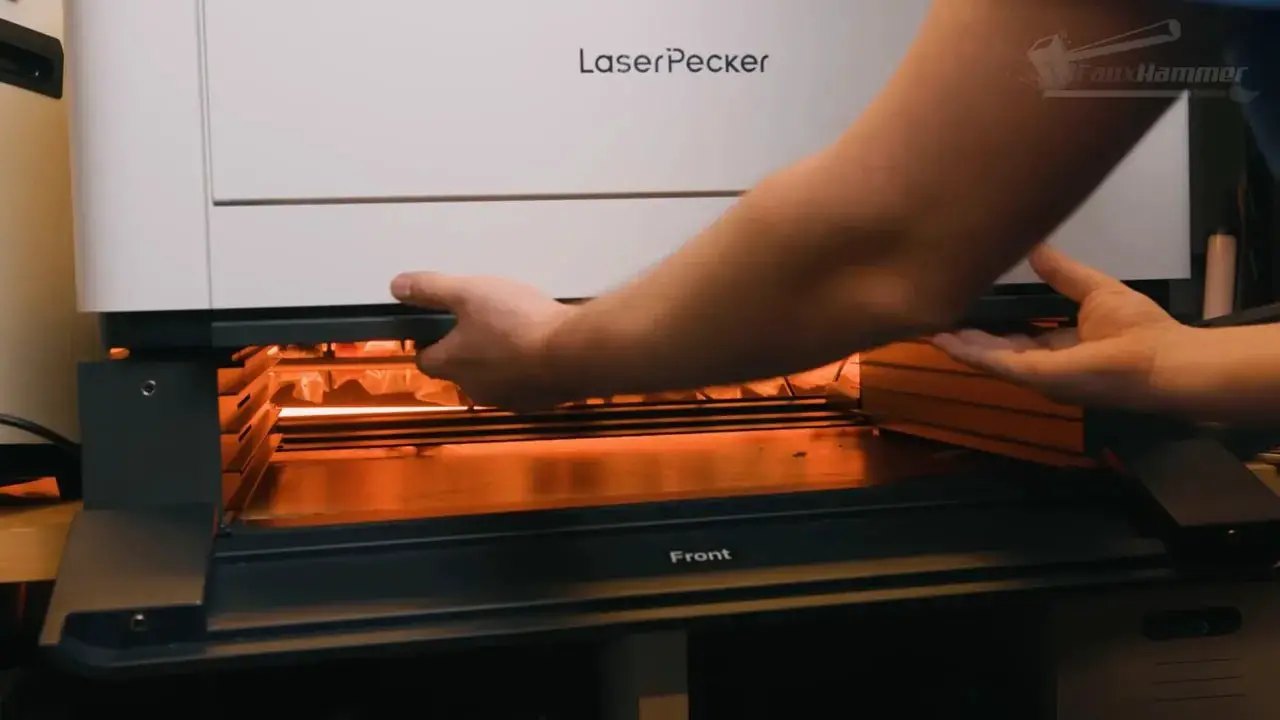
LaserPecker LX2 – Slats, Base Design and Day-to-Day Practicality
One of the stranger choices with the LaserPecker LX2 is that a machine so clearly suited to cutting ships with only four slats.
That just isn’t much.
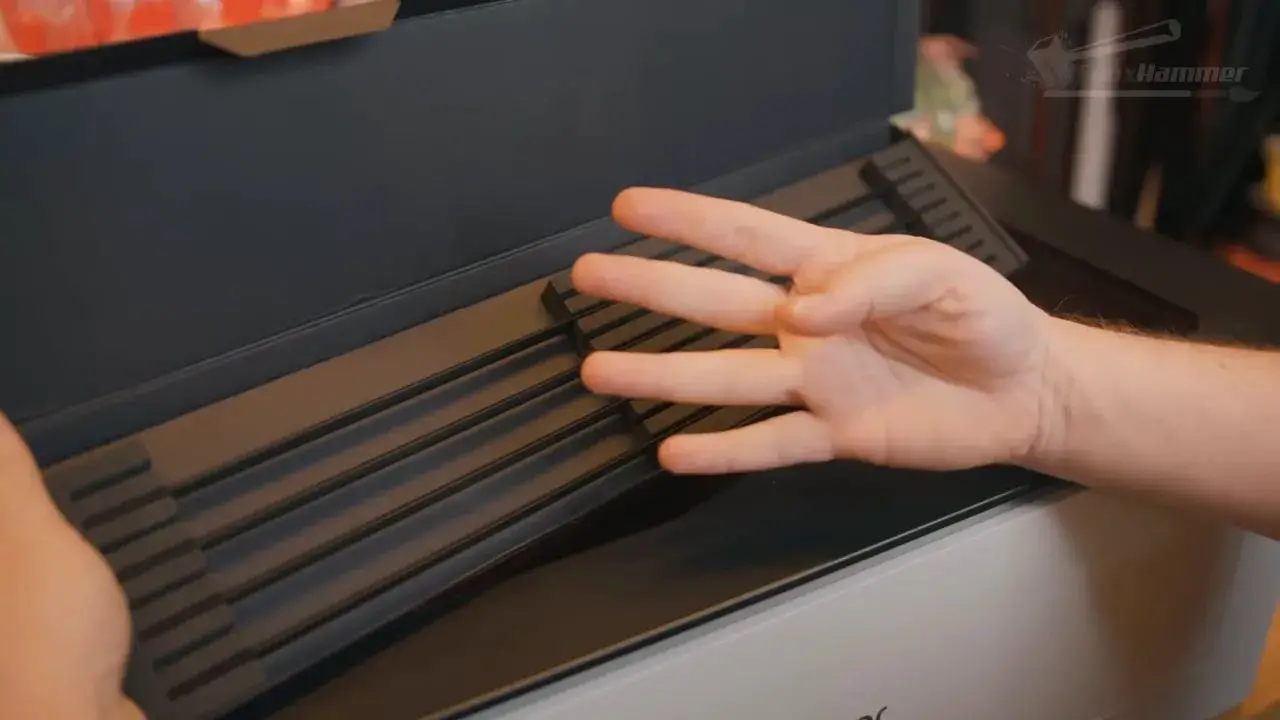
Many users may prefer a honeycomb bed anyway, but at the time tested there did not appear to be an official LaserPecker honeycomb option readily available for this machine. Additional slats could be purchased, but they were not especially cheap, and the included set rarely felt like enough.
There is also no real stock holding system. In fairness, the machine moves smoothly enough that vibration was not shifting materials around during testing, but it still feels less secure than it should. Being able to clamp or pin work more confidently would improve the day-to-day experience.
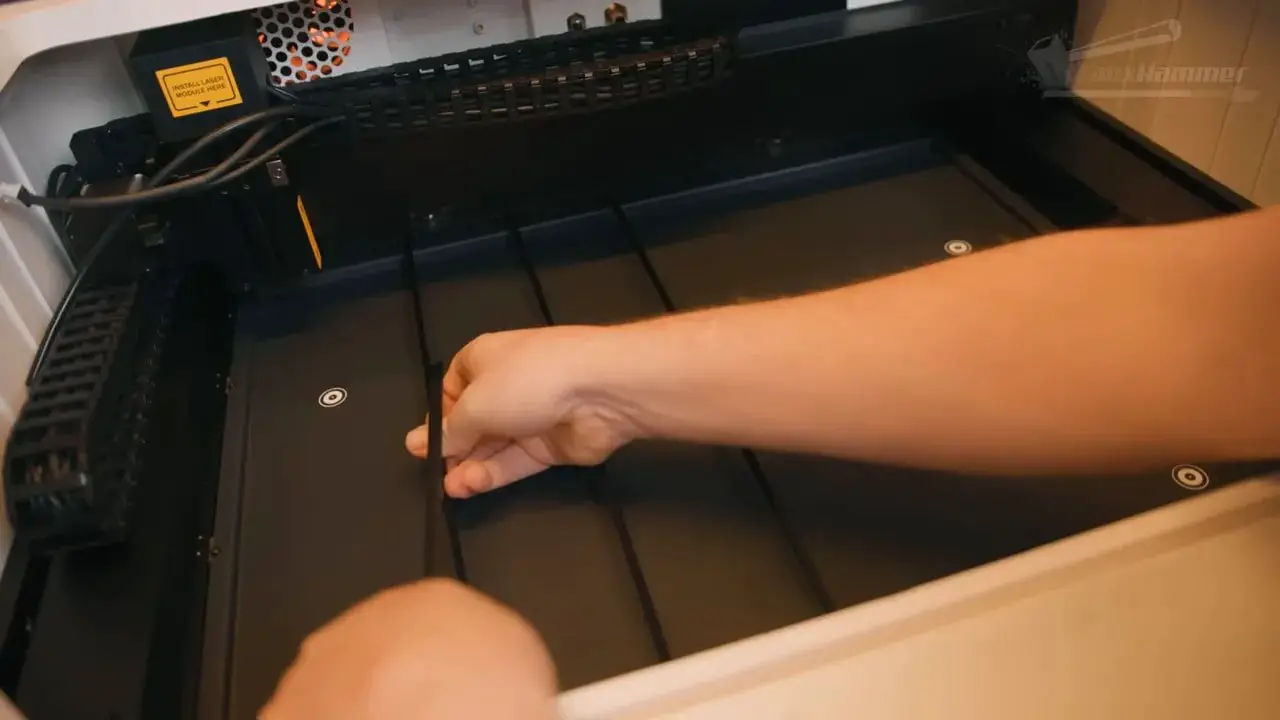
Maintenance is mostly straightforward, though the base plate needs to be unscrewed to remove and clear debris. That becomes more relevant if you are doing lots of cutting. It is not a dealbreaker, but it is another small friction point. And youc an always just leave it unscrewed
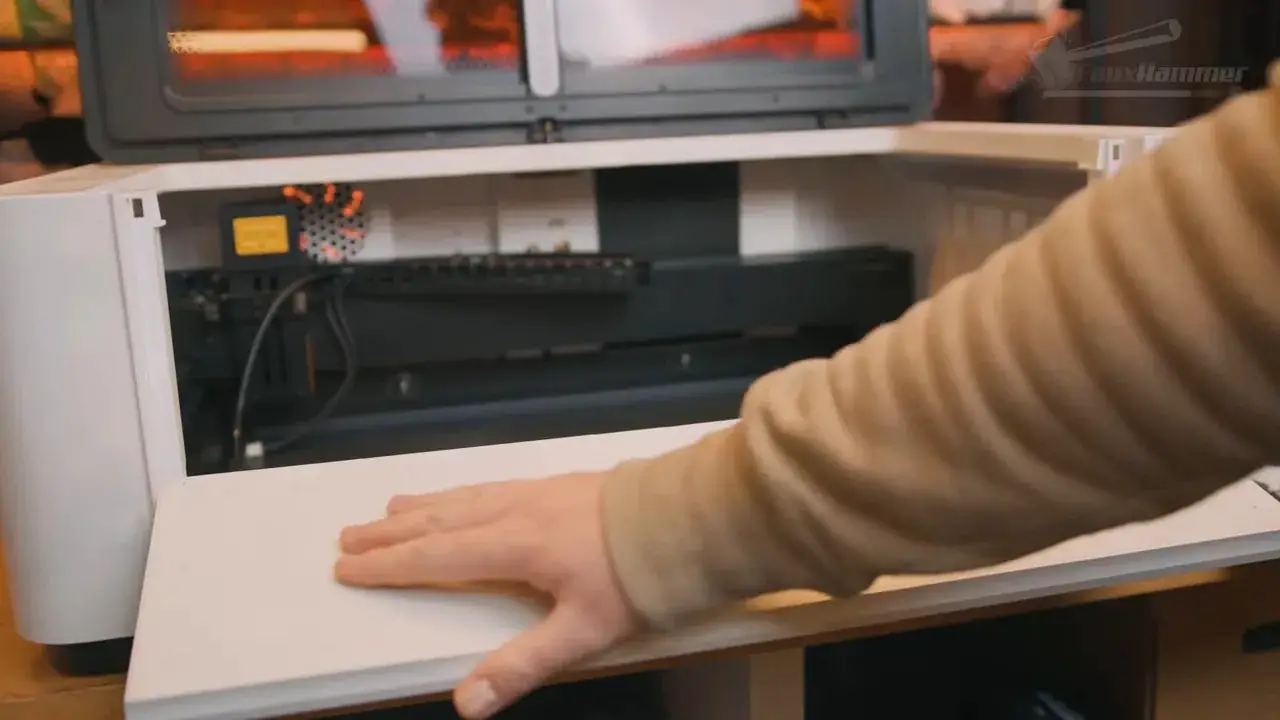
On the plus side, there is a front pull-down access door that turns out to be genuinely handy. Because the machine is relatively deep, that little door makes reaching inside far easier than lifting the main lid and stretching awkwardly over the front edge. It is exactly the kind of seemingly minor usability detail that ends up mattering more than expected.
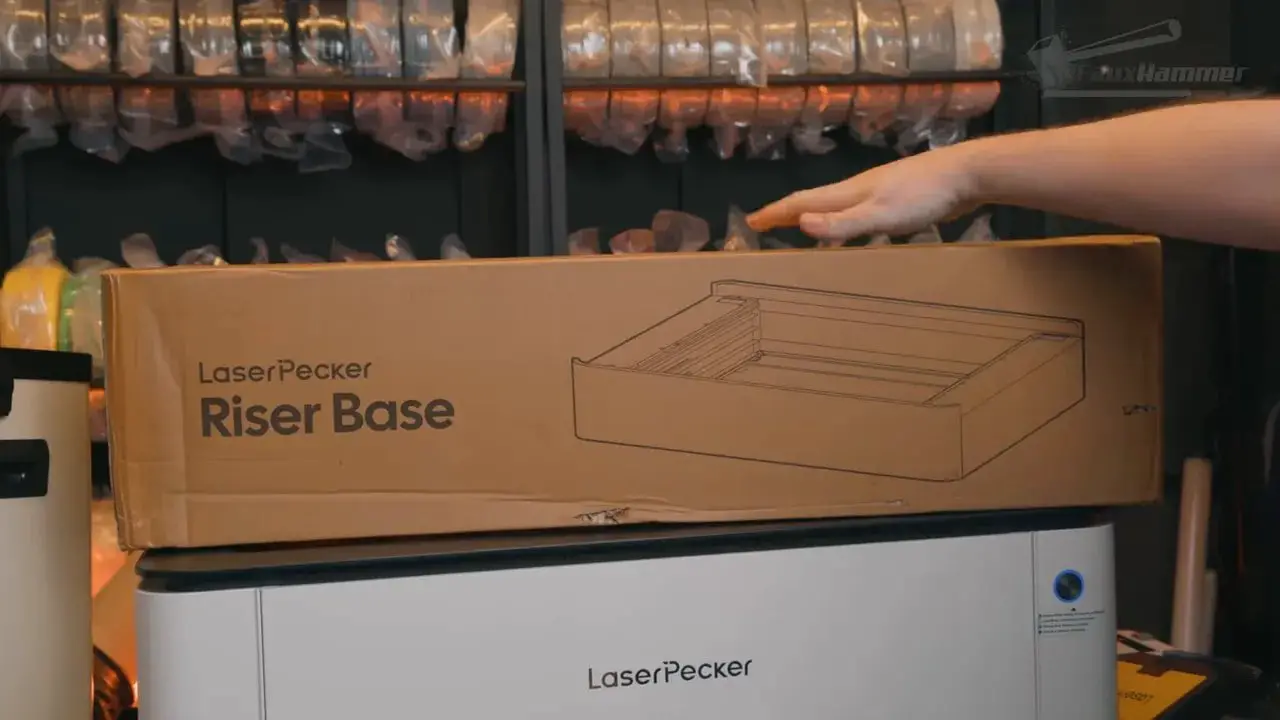
LaserPecker LX2 – Riser Base, Tall Objects and Curved Surface Engraving
The optional riser base is one of the better accessories available for the LaserPecker LX2.
It expands supported material height up to 150 mm and turns the base arrangement into something far more flexible for larger objects. Installation does require a bit of assembly and involves removing the base plate from the machine, but once fitted it feels like a meaningful upgrade rather than a token accessory.
The base remains integrated with the machine’s safety behaviour too, so opening the riser door during a job still stops the process. That is exactly how it should work.
The riser has doors on both front and back, which means larger materials can pass through if needed. That gives the LaserPecker LX2 more workshop utility than many enclosed competitors that become awkward the moment your material exceeds the internal footprint.
Curved surface engraving is another notable capability (up to a 15° degree curve). Using the probe, the machine can map the surface and adjust laser head height during the run to maintain focus over a curve. In testing, this worked reasonably well on a simpler curved PLA piece, though it struggled more with a more complex follow-up pattern.
That suggests the function is promising rather than magical. It can absolutely be useful, but it is not a free pass to engrave every weird shape flawlessly.
LaserPecker LX2 – Rotary Tool Performance
The rotary setup on the LaserPecker LX2 is excellent.
It requires the riser base, but once that is in place the rotary tool installation is very well thought out. A guide frame slots into place, magnets help hold things where they should be, the rotary drops in neatly, and it connects using the internal USB port. Better still, the software automatically aligns with the centre of the rotary tool.
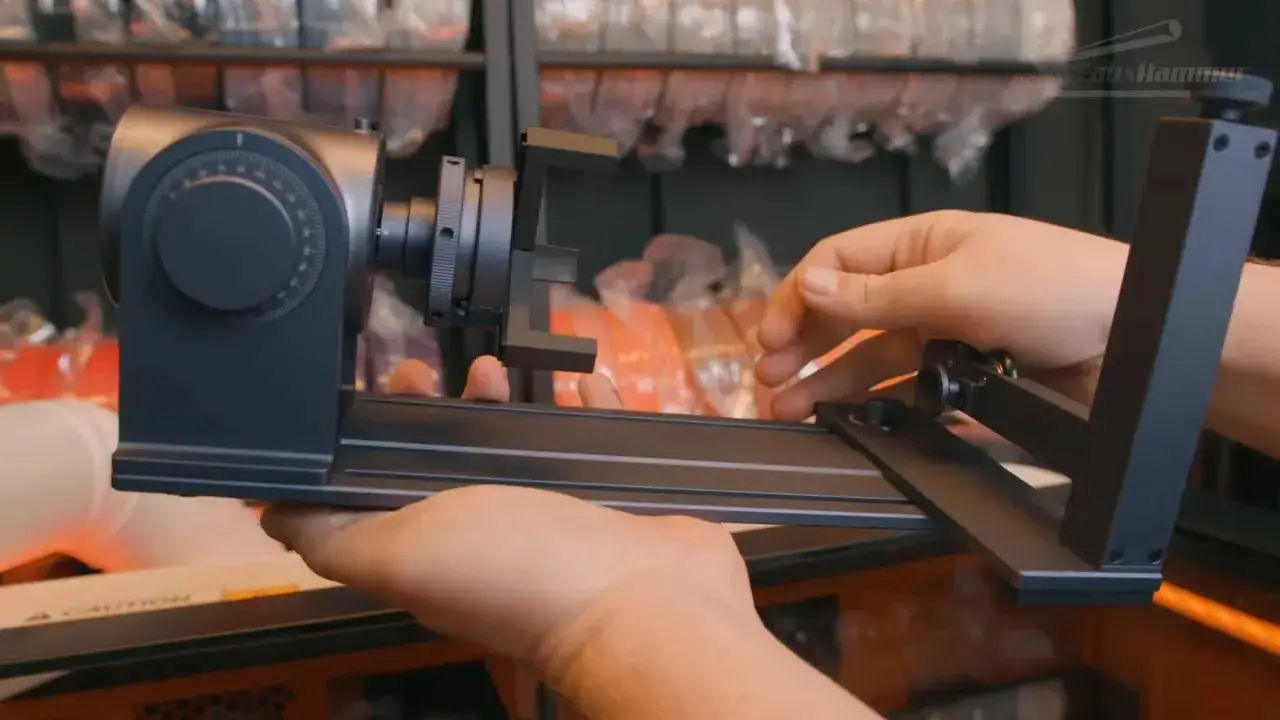
You do still need to measure the diameter of your object manually, but the machine handles focal height itself. That removes a lot of the usual faff from rotary jobs.
In practice, this has been one of the easiest rotary tools I’ve used so far, even outperforming some more established brands. That is significant because rotary support is often one of those features manufacturers boast about while delivering a setup process nobody wants to repeat.
Here, the accessory actually feels like part of the system.
LaserPecker LX2 – Who It’s For and Who Should Skip It
los LaserPecker LX2 is for people who want a capable enclosed diode laser that feels approachable, modular, and modern enough not to become immediately annoying.
It is especially attractive if you value:
- Camera-assisted placement
- Automatic height sensing
- Laser Power Modularity with Easy swapping between units
- A proper enclosed design
- Strong safety features
- Add-on flexibility such as rotary and riser support
It is also a good fit for buyers willing to tolerate software that is still maturing because the underlying hardware and workflow direction already show a lot of promise.

You may want to look elsewhere if you:
- Need highly polished software right now
- Rely heavily on an extensive built-in material library
- Want stronger extraction without extra investment
- Need a full workholding setup straight out of the box
There is also a mindset issue here. The LaserPecker LX2 is one of those machines that feels likely to improve over time through software updates. That can be a good thing if the brand follows through. If not, it becomes a frustrating “almost there” product. That uncertainty is part of the buying decision.
If you want to support more reviews like this, the site’s Afiliados y Soporte page explains the easiest ways to do that.
LaserPecker LX2 – Final Thoughts
los LaserPecker LX2 is one of the better laser cutters I’ve come across in this category because it feels like it was designed with real human use in mind.
That sounds like faint praise, but in the current market it really isn’t.
Too many lasers are still trapped between hobby enthusiast complexity and consumer-facing marketing. They promise simplicity, but what they actually deliver is a pile of settings to learn, weak software, and workflows that only make sense once you have already learned all the stuff the product was meant to simplify.

los LaserPecker LX2 avoids a lot of that. The hardware is strong, the safety features are genuinely useful, the camera system works, the modular design is practical, the riser and rotary accessories add real value, and the software is at least moving in the right direction.
It still needs more. More material profiles. Better tuning. More accurate time estimates. Better custom profile support. A little more polish in app responsiveness. Maybe a better extraction experience out of the box for heavier jobs too.

But importantly, those complaints mostly come from wanting the machine to do even more, not from it failing at the basics.
For the price, depending on the bundle and laser head you choose, the LaserPecker LX2 is a solid tool. More than that, it is a rare example of a laser that already feels good to use while still having obvious room to improve.
And honestly, that may be the most encouraging thing about it.
LaserPecker LX2 – FAQ
Is the LaserPecker LX2 good for beginners?
Yes, relatively speaking. The LaserPecker LX2 is one of the more approachable enclosed diode lasers thanks to its camera workflow, automatic height sensing, built-in safety features, and simple module installation. It is still a laser, so there is learning involved, but it is friendlier than many alternatives.
Does the LaserPecker LX2 work with LightBurn?
Yes. The machine supports LightBurn, which will matter to experienced laser users. It also has LaserPecker Design Space, which is the more consumer-friendly software environment and the one that best reflects the machine’s intended workflow.
What is the working area of the LaserPecker LX2?
The stated working area is 500 x 305 mm. Standard material height support is 45 mm, which can be expanded to 150 mm with the optional riser base.
Is the LaserPecker LX2 safe to use at home?
It includes strong safety features for a home machine, including enclosure-based protection, a security key, emergency stop, flame sensors, and software safety onboarding. That said, no laser is “set and forget.” Proper ventilation, correct material use, and active supervision are still essential.
How good is the camera on the LaserPecker LX2?
Very good by the standards of built-in laser cameras. It is not perfectly accurate for every precision job, but it is one of the better implementations available and is genuinely useful rather than gimmicky.
What are the biggest weaknesses of the LaserPecker LX2?
The biggest issues are software maturity rather than hardware quality. Material presets need more refinement, the materials library is too limited, job time estimates are poor, and there is no obvious built-in way to save custom tested profiles back into the software.
Is the LaserPecker LX2 worth buying?
If you want a modular enclosed diode laser with strong usability and you are happy to accept a software platform that is still evolving, then yes, the LaserPecker LX2 is absolutely worth considering. It is already a strong machine, and if LaserPecker continues improving the software, it could become an even better one.
Tenga en cuenta: This site uses affiliate links. Our Affiliate Partners are shown below
(Affiliate links will result in compensation to the site on qualifying purchases)
Haga clic en este enlace y compre sus cosas de hobby en Element Games para el Reino Unido y Europa para admitir FauxHammer.com - Use el código "FAUX2768"En la caja para obtener puntos de recompensa doble.
Nuestros afiliados / tiendas de hobby
- REINO UNIDO: Juegos de elementos, El puesto avanzado, Juegos Wayland, Lancer poderoso, Juego de duendes, Forbidden Planet, Suministros para escenarios de modelos, eBay, Amazonas
- EE. UU. / Canadá: MTechCave, GameKastle, eBay (EE. UU.), eBay (CA), Amazonas
- Alemania: Taschengelddieb
- Europa: eBay (DE), eBay (FR), eBay (ES), eBay (IT), Amazonas
- Australia: eBay, Amazonas
- Global: Juegos de RedGrass, Colores de guerra
- Impresoras 3D: Congelado 3D, Elegoo, Anycubic